Close


Page 1 of 3 123 LastLast
Results 1 to 25 of 51
  1. #1
    FEP Power Member Hemlock's Avatar
    Join Date
    Jan 2007
    Location
    Quartz Hill, California
    Posts
    2,230

    Talking Making a Factory looking Fox Body Headliner

    As promised this is a tutorial for Making your own Headliner. I just finished mine and I am pretty happy with the results. As stated in my previous post, I am not usually one to complain but when it comes to my hard earned money and a pretty basic product, I have a very low tolerance for what I consider to be a rip off! I checked several online Fox Body part's retailers and $200 for a non-factory headliner is a freaking JOKE! This product should be around $100 and even that is pushing it! It cost around $50 in supplies to make this headliner and I had enough left over to make another if needed. Which down the road I might do considering the circumstances.

    This tutorial is for making a headliner for a T-top style Fox Body but I am pretty sure it can be applied to making a headliner for any Mustang/Capri. The trickiest part of this project was finding a material that matched the factory headliner vinyl. It may be easier to find the cloth to make a headliner for a standard roof car.

    Things bought:

    1) Shower/Tub Backing board $19.95
    2) 2.5 yards Charcoal Vinyl $14
    3) 3M Super 77 spray Glue $8
    4) double sided duct tape $8

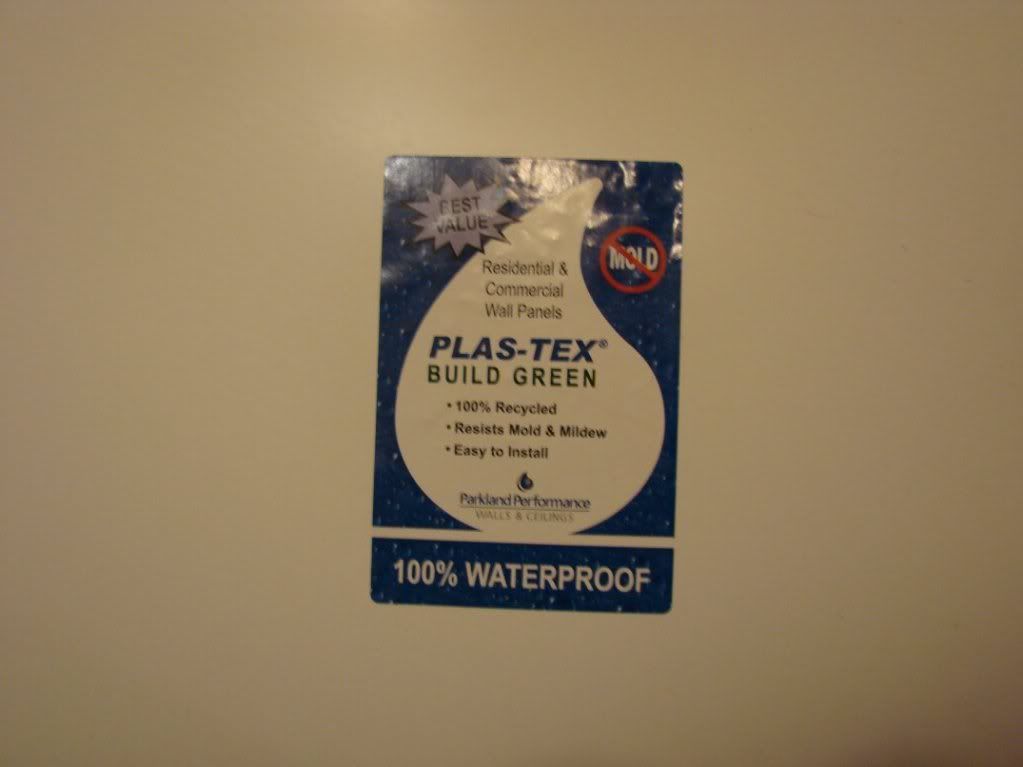
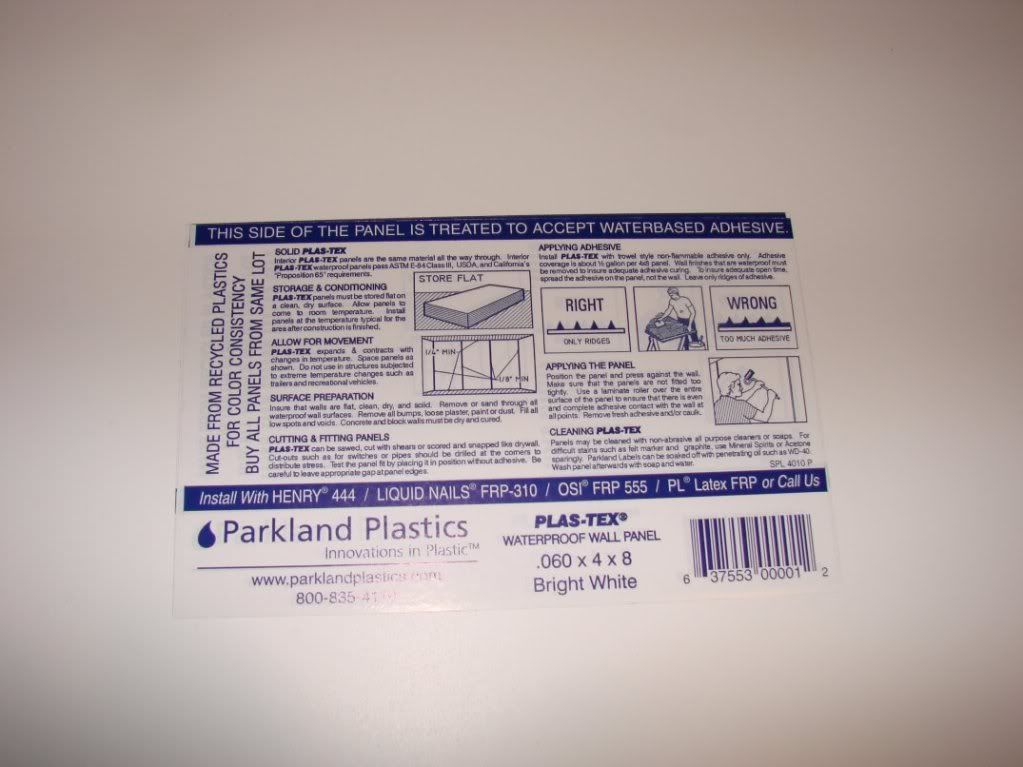
    The original headliner board was what seemed like a piece of compressed card board, which received a lot of water damage over the years from the normal T-top leakage. This is the reason I chose something water proof for the new headliner backing material. I shopped for quite a while and found a product that was both water proof and flexible. The stuff I bought is a tub enclosure backing board I found at Home Depot. The .20" thickness was slightly thinner then the original board coming in at .225" but if this board was any thicker I don't believe it would have been flexible enough. Here is a picture of the label of the product you are looking for. It cost $19.95 for a 4' x 8' piece and this is the only size it came in at the store I was at. There is enough product here to make 2 headliners.


    The second step of the build was to find a mid grade charcoal gray vinyl seat cover material to use to cover the backing board, seeing as I couldn't find a place that still sells the PVC style material that the car came factory with. I just took a small snip off my old headliner from under the interior plastic molding, that way I knew the color was not dirty from exposure to the elements. It took almost a week to locate a place that sold a similar vinyl to the original. I finally ended up going to the Garment District in down town Los Angeles to find a matcher. If your car has a color other then the dark charcoal, you are in luck and shouldn't have any problems finding a close match but I went through 20+ stores to find a dark charcoal vinyl! I guess it is not a popular color anymore. I am guessing you could also use leather instead of vinyl but it would have cost around $100+ just for the leather and that is if you could find a piece big enough to cover the entire headliner board.


    After buying the materials to make your new headliner you will need to strip out your old headliner. Remember! You need to make your new headliner board by tracing your old headliner board! Be very carefully not to damage it too bad when pulling it out.

    Some people might not need this next information but it may be something the T-Top car owners might want to consider while you have your headliner out.

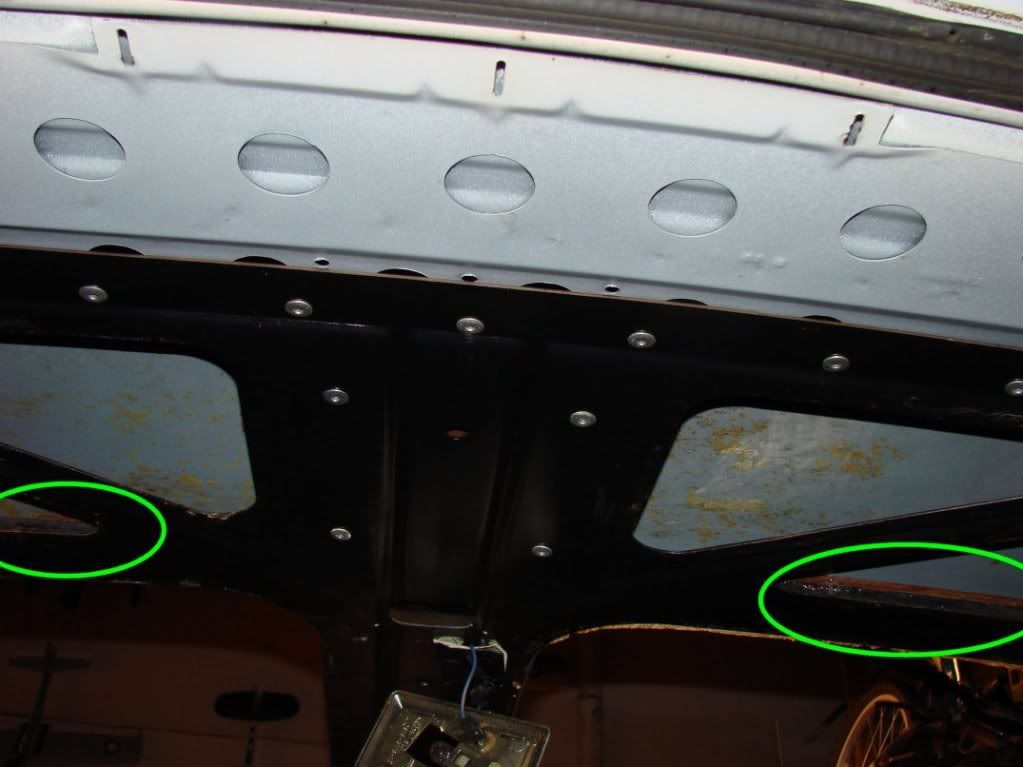
    The main reason for changing my headliner aside from the shrinkage issues around the dome lights and front window molding was, I had a metal on metal noise coming from the inside of my headliner while driving the car. The noise I discovered was a piece of riveted strip metal that had fallen off the rear interior T-top roof support and it was rattling around inside the headliner interior. The metal strip was providing support for the rear roof body panel and keeping the exterior body metal from collapsing behind the T-tops. The green circles in the picture shows where the strip was mounted inside. It went all the way across the roof line against the rear T-top support. You can see the small amount of rust where the thin metal strip was riveted.


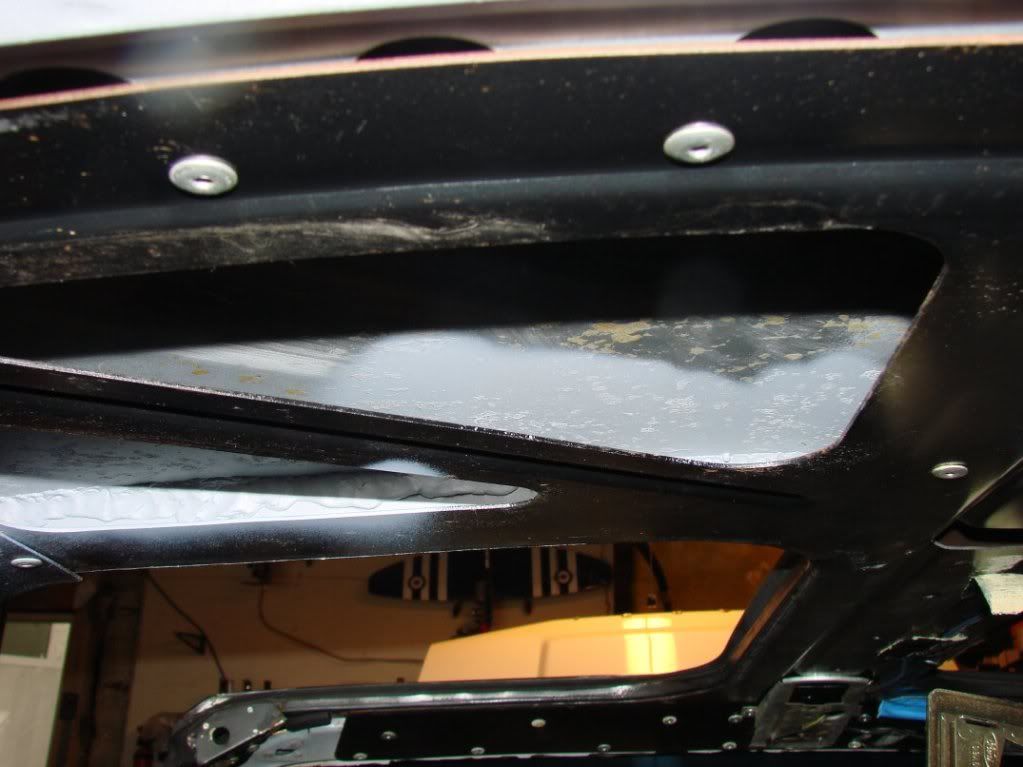
    To fix the metal strip problem I had a couple of choices. I could remove the entire T-top support cage by drilling out all the rivets, then re-rivet the support strip back in after cleaning the strip/interior area up and then re-rivet the cage back in. The problem with this was, it was gonna take a ton of extra work and there was also the chance that the cage doesn't go back in correctly or down the road the support strip just falls off again. To me it wasn't worth the risk. I instead left the cage in and when I was at Home Depot, I picked up a product called Qwik Steel. This product is basically a putty JB weld that works killer in areas you would like to weld but can't because of fire or heat damage risk. I have used it before on other projects and have been very pleased with the results. I broke out my trusty pen Dremel tool with a wire wheel style tip and cleaned all the rust from inside the cage. I then from the top pushed down on the roof panel and used silicone to seal the seam. I then used the Qwik Steel to create a weld where the strip use to be and then let it dry. After it dried I used a can of rust prohibiting primer to spray inside the T-top cage area.


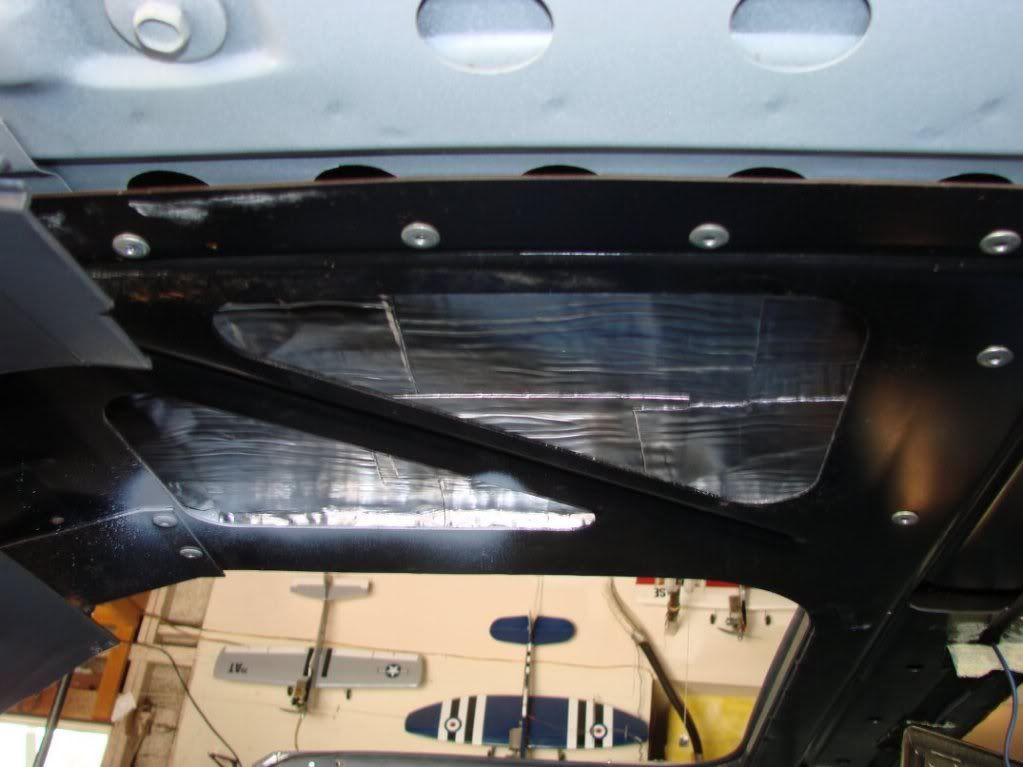
    (The next step is optional) After the primer dried, I took a roll of Peel and Seal I bought from the local Lowe's and used it to sound proof and kill the ring of the roof area behind the T-tops. You can use a better grade stuff if you have it but for what I was doing I wanted something cheaper and thinner then Dynamat. I used shears to cut it into small squares and installed it that way. Because of the cage layout it made it too tough to try to install in long strips.


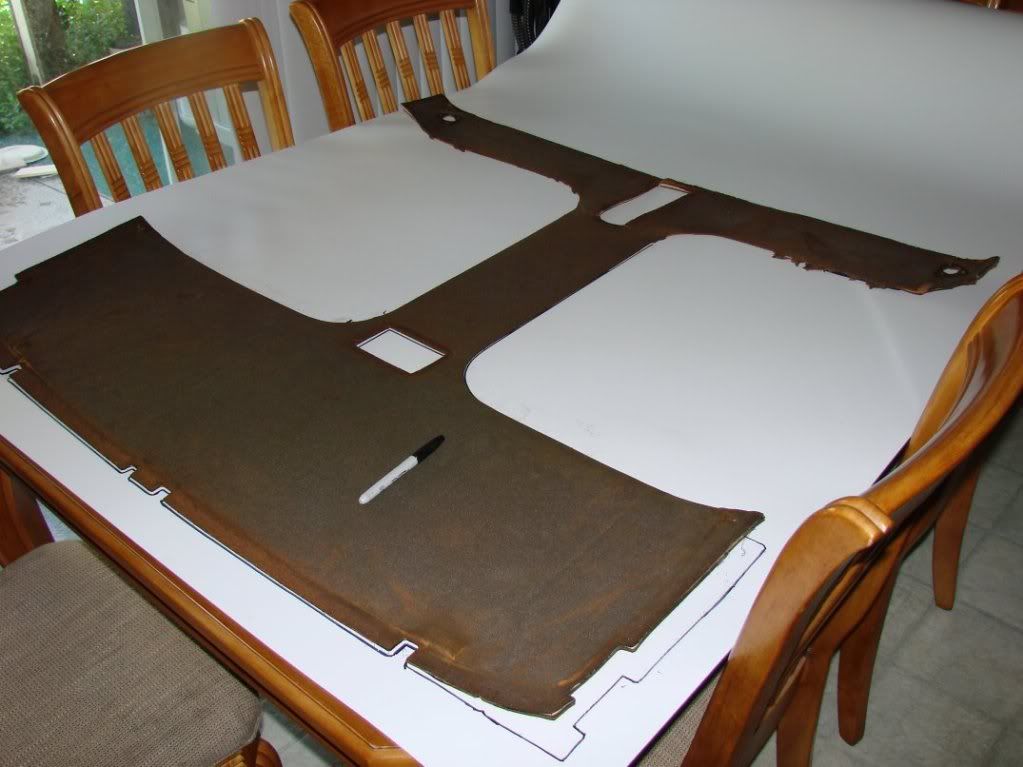
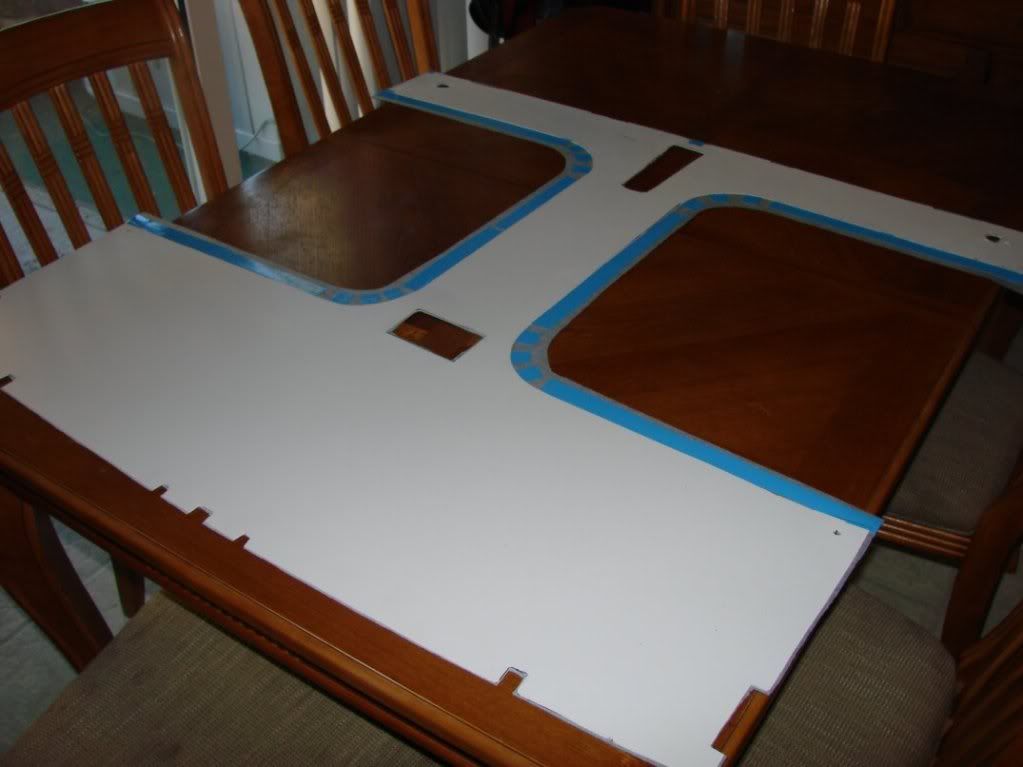
    Now that the roof is prepped we are ready to start making the headliner! You will need a large work area like a big dinning room table to do the next steps. You will need to trace your old headliner board onto your new headliner board. Keep in mind, alignment is extremely important here especially for the T-top cars. If alignment is off too much it will make it difficult to install in the car. Also do not trace the sun visor mount points on your headliner board yet! The location of the sun visors will need to be done after the new headliner is installed in the car. I put mine in first and found out the hard way they weren't exactly in the right place!


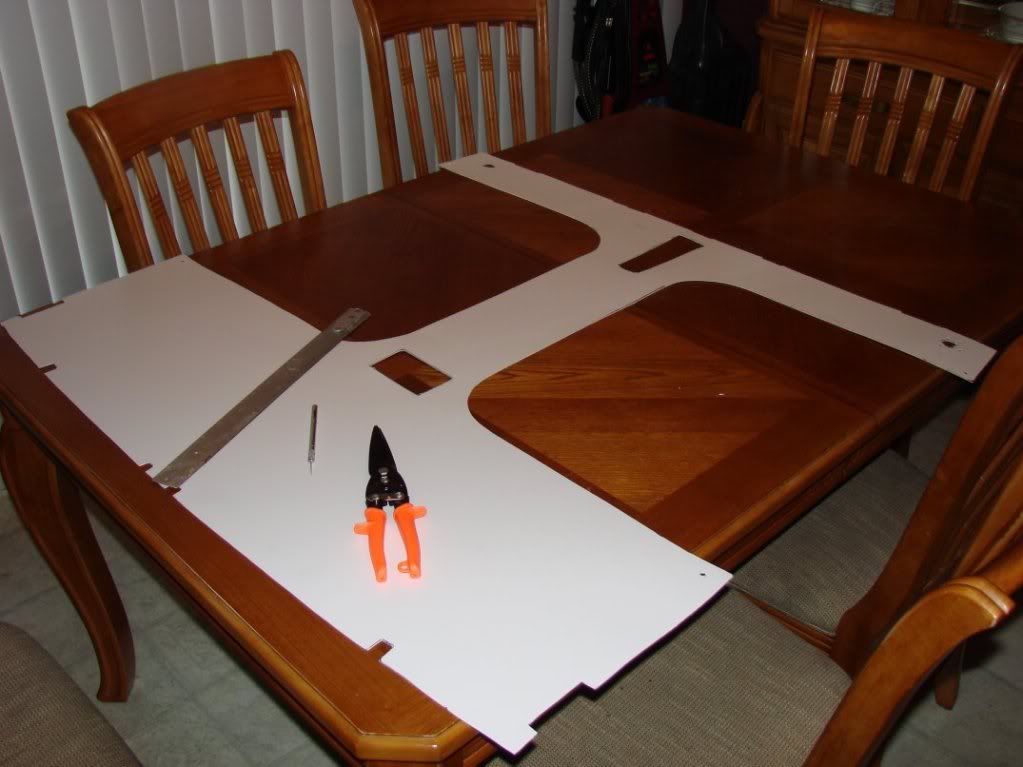
    The next job is to cut out the board pattern. I found that a regular pair of scissors was not enough to cut the plastic sheet so I went to Home Depot and bought a set of industrial ones made for cutting heavy plastic and light metal. The new snips were around $14. I didn't include the price of the tools I bought in the price of the headliner because I figure a tool I don't have is an investment. With the new scissors it was actually fun to cut LOL!


    The next part of this is a decision you will need to make as far as what type of glue you would like to use to mount the vinyl/cloth to your board. Here are the recommendations of the company that makes the board.


    I tested a small section of vinyl and plastic with some 3M Super 77 spray glue I had used before for a another project I had done and it should work fine for a T-top car layout seeing as there isn't any real large sections of fabric that isn't being supported in some way by a panel, molding or dome light. If I was going to do this on a standard roof car though, I would choose a stronger glue. Remember to leave the unglued vinyl in the T-top glass area until the next step.


    The next step is to apply the double sided duct tape in 1/2 strips to the headliner edges in the T-top glass area. I got my tape at Lowe's. This tape will secure the vinyl to the T-top frame work to make it easier to re-install the rubber strip that holds the headliner vinyl and covers the metal frame edges. It will also make a much smoother edge to look at under the strip. The picture below shows the taped areas after I cut the excess vinyl away from the T-top glass area. This step is very important!


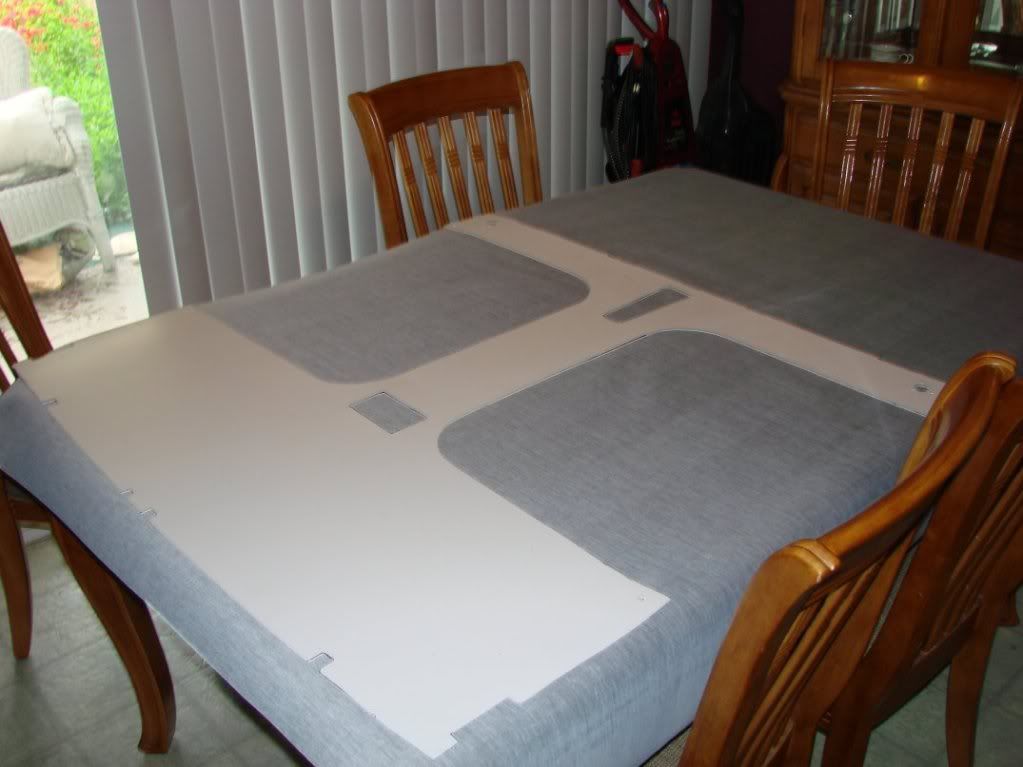
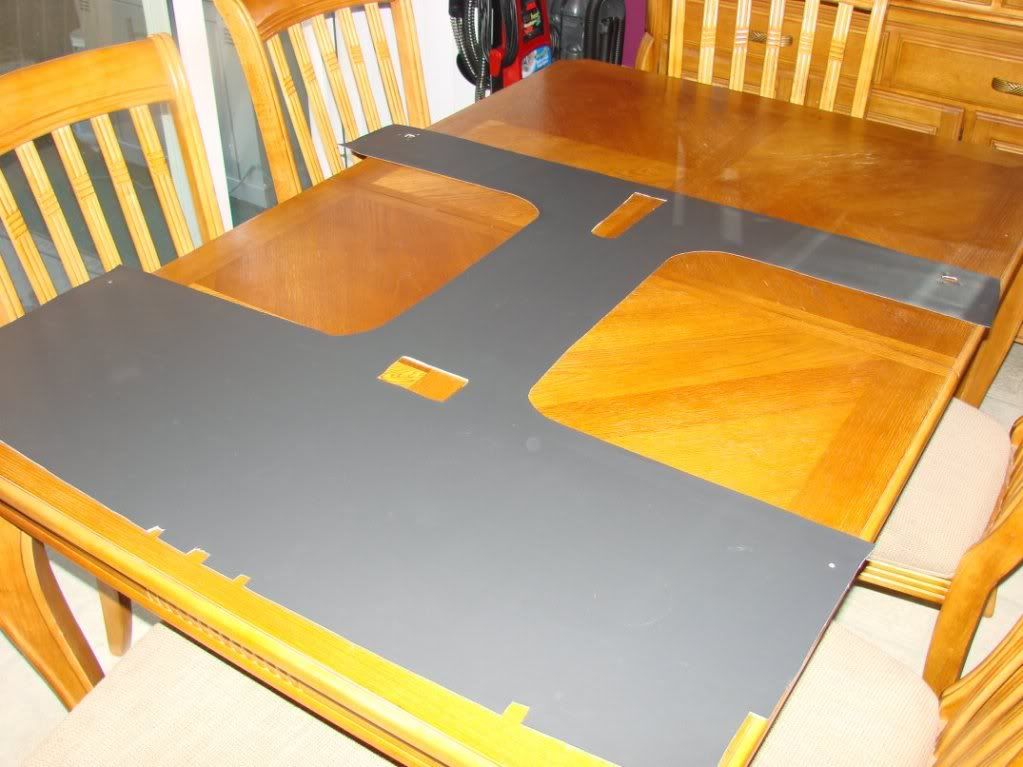
    The finished headliner


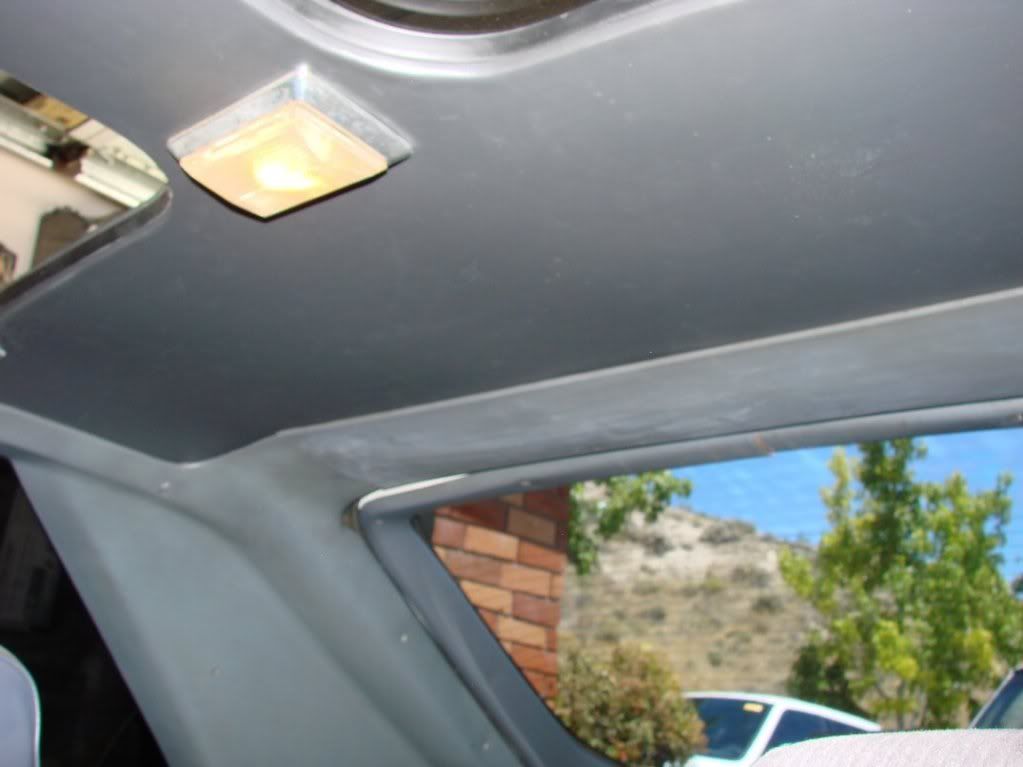
    This is the headliner installed in the car. I still need to clean up the molding, it is dirty from saw dust and being kicked around my work bench for the last week or so.


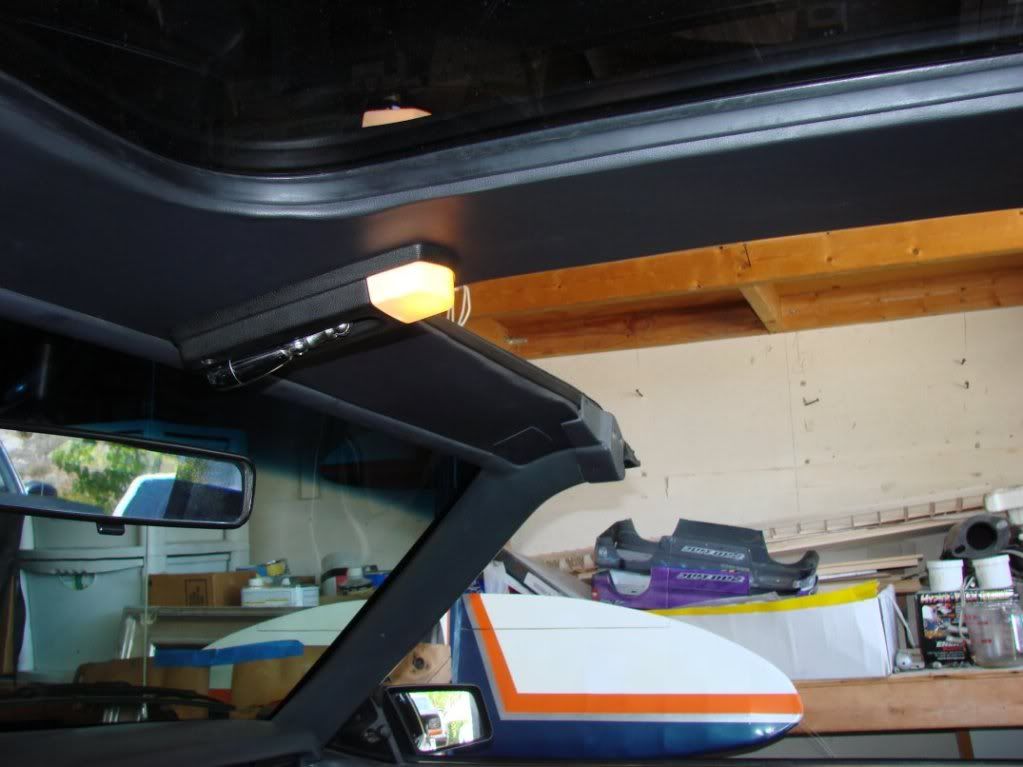
    Another angle. I decided at the last minute not to re-install the Sun Visors because I am not a big fan of sun visors in the first place and the factory ones are worn out and fly around when I jump on the gas. I just put a square of the new vinyl with double sided tape on where the visors would normally mount. I wish I had never cut out the holes for them. Just remember my message from above. DO NOT cut out the holes for the sun visors until after you have the new headliner installed in the car. They will not line up!


    Be sure to post any questions you might have here or just send me a PM, I will help any way I can.

    Thanx for reading,
    Robert
    1984 RS 347 Capri, To many car parts to list, check out my car build page here for the story on my car and a full parts list/setup!:

    My RS in Action

  2. #2

    Default

    THIS IS EXACTLY WHAT I HAVE BEEN THINKING ABOUT DOING!!!!!!!

    Yes, I was yelling because I'm glad somebody else did it first! lol
    '83 GT - 545 - C6 - 3.90 - it's alive!

  3. #3
    FEP Senior Member '86 5.0L's Avatar
    Join Date
    Aug 2005
    Location
    Calexico, CA
    Posts
    576

    Default

    excellent write up :thumpsup:
    Car: 1986 Mustang GT Hatchback || 5.0L H.O. || Borg-Warner T5 || 171,000 Miles || 25 mpg

    Mods: Bfg G-Force T/A KDW || K&N/silencer removed || Hood pins

    Times: faster then a speeding Prius

  4. #4
    Venomous Moderator Hissing Cobra's Avatar
    Join Date
    May 2002
    Location
    Wareham, Massachusetts
    Posts
    9,721

    Default

    Nice job! I too, did my own in my Cobra and it's easier than most people think. I've tried all sorts of different glues because mine has sagged multiple times since I've done it in 2001. The best glue that I found is Vinyl Floor Adhesive! It's almost like a paste but it works awesome. My brother just recovered the headliner board in his '85 GT and used the vinyl floor adhesive and he said that it worked great for him too.
    Pete Slaney

    1979 Mustang Cobra

    347/T-5/4.30's
    420 rwhp/380 rwt (New Motor)
    11.49 @ 121.86

    306/T-5/4.30's (Old Motor)
    307 rwhp/278 rwt
    12.38 @ 111.38

  5. #5

    Default

    Excellent write up

    That's what i plan to do too for my sunroof headliner once i've finished Pace Car and Capri engines.
    '79 Pace Car 5.0 (well 4.2 until better days)
    '80 Capri 2.3 (sold ) - '79 Hatchback 2.3 (sold ) - '80 Notchback 3.3 (junk yard )

  6. #6
    FEP Power Member craigerSS's Avatar
    Join Date
    Jun 2009
    Location
    nova scotia
    Posts
    1,375

    Default

    did my own too,but my cardboard was good,cost me about $20 and very easy to do
    here's to the freakin' weekend,I'll drink to that

  7. #7
    FEP Power Member Hemlock's Avatar
    Join Date
    Jan 2007
    Location
    Quartz Hill, California
    Posts
    2,230

    Default

    My cardboard was still good too but I didn't want to take the time trying to get the old crusty foam off of it. LOL

    Robert
    1984 RS 347 Capri, To many car parts to list, check out my car build page here for the story on my car and a full parts list/setup!:

    My RS in Action

  8. #8
    Venomous Moderator Hissing Cobra's Avatar
    Join Date
    May 2002
    Location
    Wareham, Massachusetts
    Posts
    9,721

    Default

    Quote Originally Posted by Hemlock View Post
    My cardboard was still good too but I didn't want to take the time trying to get the old crusty foam off of it. LOL

    Robert
    Very easy to do! It's a 5 minute job if you have a towel soaked with lacquer thinner. It dissolves the glue within seconds and will leave the board looking brand new when done.
    Pete Slaney

    1979 Mustang Cobra

    347/T-5/4.30's
    420 rwhp/380 rwt (New Motor)
    11.49 @ 121.86

    306/T-5/4.30's (Old Motor)
    307 rwhp/278 rwt
    12.38 @ 111.38

  9. #9
    FEP Power Member Hemlock's Avatar
    Join Date
    Jan 2007
    Location
    Quartz Hill, California
    Posts
    2,230

    Default

    Wow, I will have to try that!

    Robert
    1984 RS 347 Capri, To many car parts to list, check out my car build page here for the story on my car and a full parts list/setup!:

    My RS in Action

  10. #10
    FEP Senior Member
    Join Date
    Mar 2010
    Location
    Manteca, CA
    Posts
    697

    Default

    nice job on the work and the install, just a question though, why did you not wrap the headliner around all edges? did I not look at it right? wouldnt that help it stay in place better? how was it originally?
    1984 1/2 GT 350 finally done (well almost)
    2012 Focus SEL
    1971 Ranchero - needs bodywork
    1995 F150 4X4 Flareside - it is fun!
    2014 F150 Tremor - Holy Smoke!

  11. #11

    Default

    Quote Originally Posted by Hemlock View Post
    My cardboard was still good too but I didn't want to take the time trying to get the old crusty foam off of it. LOL

    Robert
    On the '79, I scraped all of the crusty foam off of the cardboard with a putty knife. It didn't take very long. The 77 spray adhesive has held up well for about 14 years now.
    Project "WinBacK" 1986 LX Hatchback
    - CA car, 5.0 w/5 speed
    - Cobra 17x8.5's + Modded Mach1 Chin Spoiler + 83-84 Hood & Scoop/85-86 "Blackout"+ FMS Mass Air Kit+ MM Clutch Cable & Quadrant + Fiore Cable Adjuster + MM SFC's+ Wild Rides "Battle Boxes" + Explorer Intake, Converted TB & Injectors, 70 mm Mass Air Meter + BBK Ceramic Shorties + 2.5" Bassani O/R X-Pipe & Cat-Back Exhaust w/ 3" Tips + 3L27 w/ Carbon Fiber Clutches​(out of retirement) + Pistol Grip Shifter + 99-04 GT Front/00 Cobra Rear Disc Brakes

  12. #12
    FEP Power Member Hemlock's Avatar
    Join Date
    Jan 2007
    Location
    Quartz Hill, California
    Posts
    2,230

    Default

    Quote Originally Posted by bscottie View Post
    nice job on the work and the install, just a question though, why did you not wrap the headliner around all edges? did I not look at it right? wouldnt that help it stay in place better? how was it originally?
    Originally the vinyl only came up to the edge of the cardboard and it didn't wrap around. That's why the shrinkage problem occurred on it around the dome lights and front window molding. The vinyl I used was a little too thick for a wrap over. You don't see it in the pictures above but right before I put the headliner in the car, I taped a few of the edges where I thought it might be likely to have some issues. I am most likely going to make another headliner down the road. I am still a little bummed about the sun visor locations being a little off. On the next one I make, I am just going to leave the visor holes off completely, so it is just a smooth transition where they use to be.

    Robert
    1984 RS 347 Capri, To many car parts to list, check out my car build page here for the story on my car and a full parts list/setup!:

    My RS in Action

  13. #13
    FEP Super Member 86fiveoh's Avatar
    Join Date
    Jul 2008
    Location
    West chester PA
    Posts
    2,523

    Default

    Great write up. I too have the bar rattling in my T roof, but hadnt done anything about it because I didnt want to pay for a new headliner. Now I just may try it myself. Anyone know of places I could order vinyl? or maybe suede?

  14. #14
    FEP Super Member 86fiveoh's Avatar
    Join Date
    Jul 2008
    Location
    West chester PA
    Posts
    2,523

    Default

    How much vinyl did you buy when you did it?

  15. #15
    FEP Power Member Hemlock's Avatar
    Join Date
    Jan 2007
    Location
    Quartz Hill, California
    Posts
    2,230

    Default

    Quote Originally Posted by 86fiveoh View Post
    How much vinyl did you buy when you did it?
    You will need a minimum of 1.5 yards of fabric to do the job. The T-top headliner was approximately 44"x 44". I don't know the measurements for the standard roof car but I am pretty sure it won't be too much different.

    Also if you buy vinyl online make sure they send you some samples first before you buy. The color on the browser is never right.

    Robert
    1984 RS 347 Capri, To many car parts to list, check out my car build page here for the story on my car and a full parts list/setup!:

    My RS in Action

  16. #16
    FEP Member cbratch67's Avatar
    Join Date
    Feb 2009
    Location
    From TX, stuck in Cincinnati
    Posts
    142

    Default

    The headliner was completely out of my car when I got it. Anyone have their old cardboard one that they would want to loan or sell me so I can use it as a template to make a new one??? Upside was no annoying rattle...

  17. #17
    FEP Super Member 86fiveoh's Avatar
    Join Date
    Jul 2008
    Location
    West chester PA
    Posts
    2,523

    Default

    Quote Originally Posted by Hemlock View Post
    You will need a minimum of 1.5 yards of fabric to do the job. The T-top headliner was approximately 44"x 44". I don't know the measurements for the standard roof car but I am pretty sure it won't be too much different.

    Also if you buy vinyl online make sure they send you some samples first before you buy. The color on the browser is never right.

    Robert
    Well my interior has been changed to black, so black should work. Found a site with foam backed suede, might try a headliner out of that.

  18. #18
    FEP Super Member 86fiveoh's Avatar
    Join Date
    Jul 2008
    Location
    West chester PA
    Posts
    2,523

    Default

    Quote Originally Posted by cbratch67 View Post
    The headliner was completely out of my car when I got it. Anyone have their old cardboard one that they would want to loan or sell me so I can use it as a template to make a new one??? Upside was no annoying rattle...
    T top or solid roof?

  19. #19
    FEP Power Member Flowpro's Avatar
    Join Date
    Jul 2008
    Location
    Waterloo, Iowa
    Posts
    1,745

    Default

    Thanks. Excellent write up Robert. I will be doing the same thing sometime in the near future. Glad to see it isn't that hard to do.
    ** Kurt **

    Current:
    1980 Mustang Cobra

    Past:
    1966 Mustang Coupe (first car!)
    1971 Mustang Grande
    1979 Mustang Hatchback

  20. #20
    FEP Senior Member
    Join Date
    Mar 2010
    Location
    Manteca, CA
    Posts
    697

    Default

    Quote Originally Posted by Hemlock View Post
    Originally the vinyl only came up to the edge of the cardboard and it didn't wrap around. That's why the shrinkage problem occurred on it around the dome lights and front window molding. The vinyl I used was a little too thick for a wrap over. You don't see it in the pictures above but right before I put the headliner in the car, I taped a few of the edges where I thought it might be likely to have some issues. I am most likely going to make another headliner down the road. I am still a little bummed about the sun visor locations being a little off. On the next one I make, I am just going to leave the visor holes off completely, so it is just a smooth transition where they use to be.

    Robert


    Thanks for the info!
    1984 1/2 GT 350 finally done (well almost)
    2012 Focus SEL
    1971 Ranchero - needs bodywork
    1995 F150 4X4 Flareside - it is fun!
    2014 F150 Tremor - Holy Smoke!

  21. #21
    FEP Super Member gr79's Avatar
    Join Date
    Jun 2009
    Location
    SE Michigan
    Posts
    5,154

    Default

    Quote Originally Posted by 86fiveoh View Post
    Well my interior has been changed to black, so black should work. Found a site with foam backed suede, might try a headliner out of that.
    If near a JoAnn Fabrics, check out auto headliner there.
    It is foam backed suede by the yard, choice of colors.
    They also carry marine grade vinyl. Real nice for card tables.

  22. #22
    FEP Super Member 86fiveoh's Avatar
    Join Date
    Jul 2008
    Location
    West chester PA
    Posts
    2,523

    Default

    Thanks for the tip, I'm sure there is one around here somewhere

  23. #23
    FEP Power Member Hemlock's Avatar
    Join Date
    Jan 2007
    Location
    Quartz Hill, California
    Posts
    2,230

    Default

    Quote Originally Posted by gr79 View Post
    If near a JoAnn Fabrics, check out auto headliner there.
    It is foam backed suede by the yard, choice of colors.
    They also carry marine grade vinyl. Real nice for card tables.
    JoAnn's Fabrics was the first place I checked when I went vinyl shopping, there is a huge store not too far from my house. They had a pretty big selection of vinyls but they didn't have anything that was even close to the dark charcoal color I needed. I also went through their book to see if I could order something as well. As far as the other colors go you might find something there that is close.

    Robert
    1984 RS 347 Capri, To many car parts to list, check out my car build page here for the story on my car and a full parts list/setup!:

    My RS in Action

  24. #24

    Default

    Quote Originally Posted by Flowpro View Post
    Thanks. Excellent write up Robert.
    X2!!! Thank you very much for sharing with everyone.

  25. #25
    FEP Power Member blue beast's Avatar
    Join Date
    Jul 2005
    Location
    Green Bay, Wisconsin, United States
    Posts
    1,908

    Default

    THANK YOU! Im redoing mine (after market sunroof) and i wasnt sure of what i could use! I have the upholstery lady do the cover but i needed to trace my old one out as its been ripped and water damaged too.
    82 Mustang GT
    T5, 8.8
    Holley 650
    Performer 289
    BBK Shorties & H-Pipe
    Waiting for a Foureyed of the month vote!!!

    Current Project: 1980 Project Green Machine

    1999 Ford Taurus SHO DD

Page 1 of 3 123 LastLast

Tags for this Thread

Posting Permissions

  • You may not post new threads
  • You may not post replies
  • You may not post attachments
  • You may not edit your posts
  •