
Awesome to see you still at it. Came across this thread for the first time years ago and always wondered what happened


Awesome to see you still at it. Came across this thread for the first time years ago and always wondered what happened
Devin
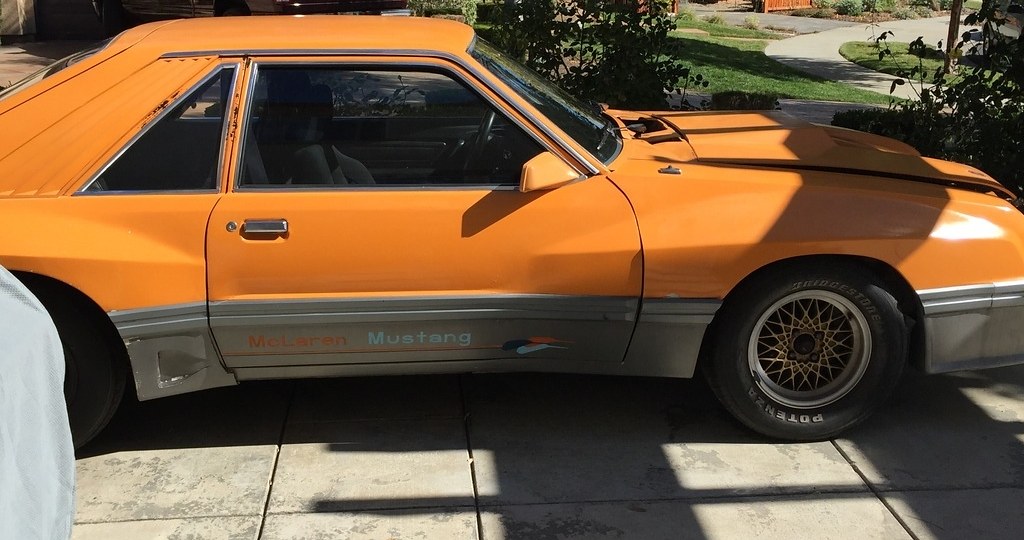
1979 Mustang Cobra - IRS, MM Suspension, 302/t5
Check out my build thread for tons of IRS info, and general restoration help. There's a little bit of everything -->goo.gl/krmqNz
Pm's welcome if you have any questions


Long time my four eyed friends! The years keep ticking away don't they. So after a great morning at the local car show my son suggested it was a good day to work on the McLaren. We unburied it from the back of the garage gave a couple drops of oil and fired it up and pulled it out. Mind you its 95 out and I thought maybe an hour or two wouldn't hurt. So 7 hours later we accomplished a few long overdue checklist items. We were able to get the rear roll bar mounts undone without dropping the gas tank
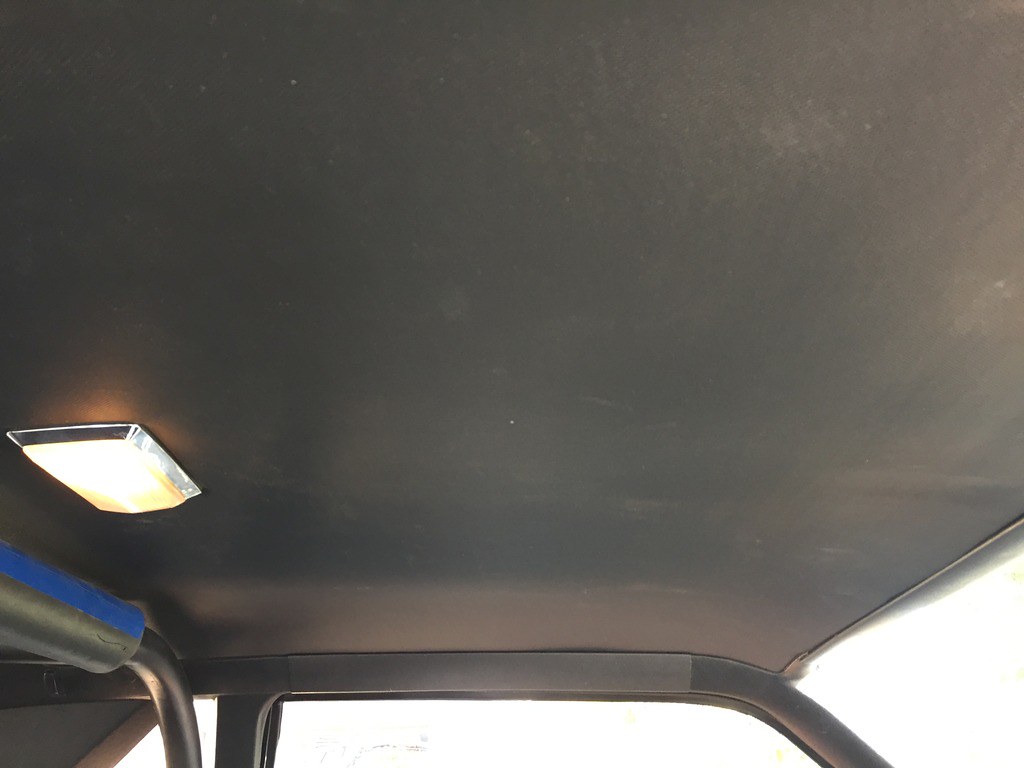
then pull the headliner
we glued back the under padding, slid the headliner back in, trimmed the extra and fought the trim pieces all back in and bolted the roll bar back in place. This took time but now that my son is 12 he is anxious to help and learn. He is extraordinarily patient and great company. The ABS backed headliner looks really good back in place and was worth the effort even though it does not show well in the pics.
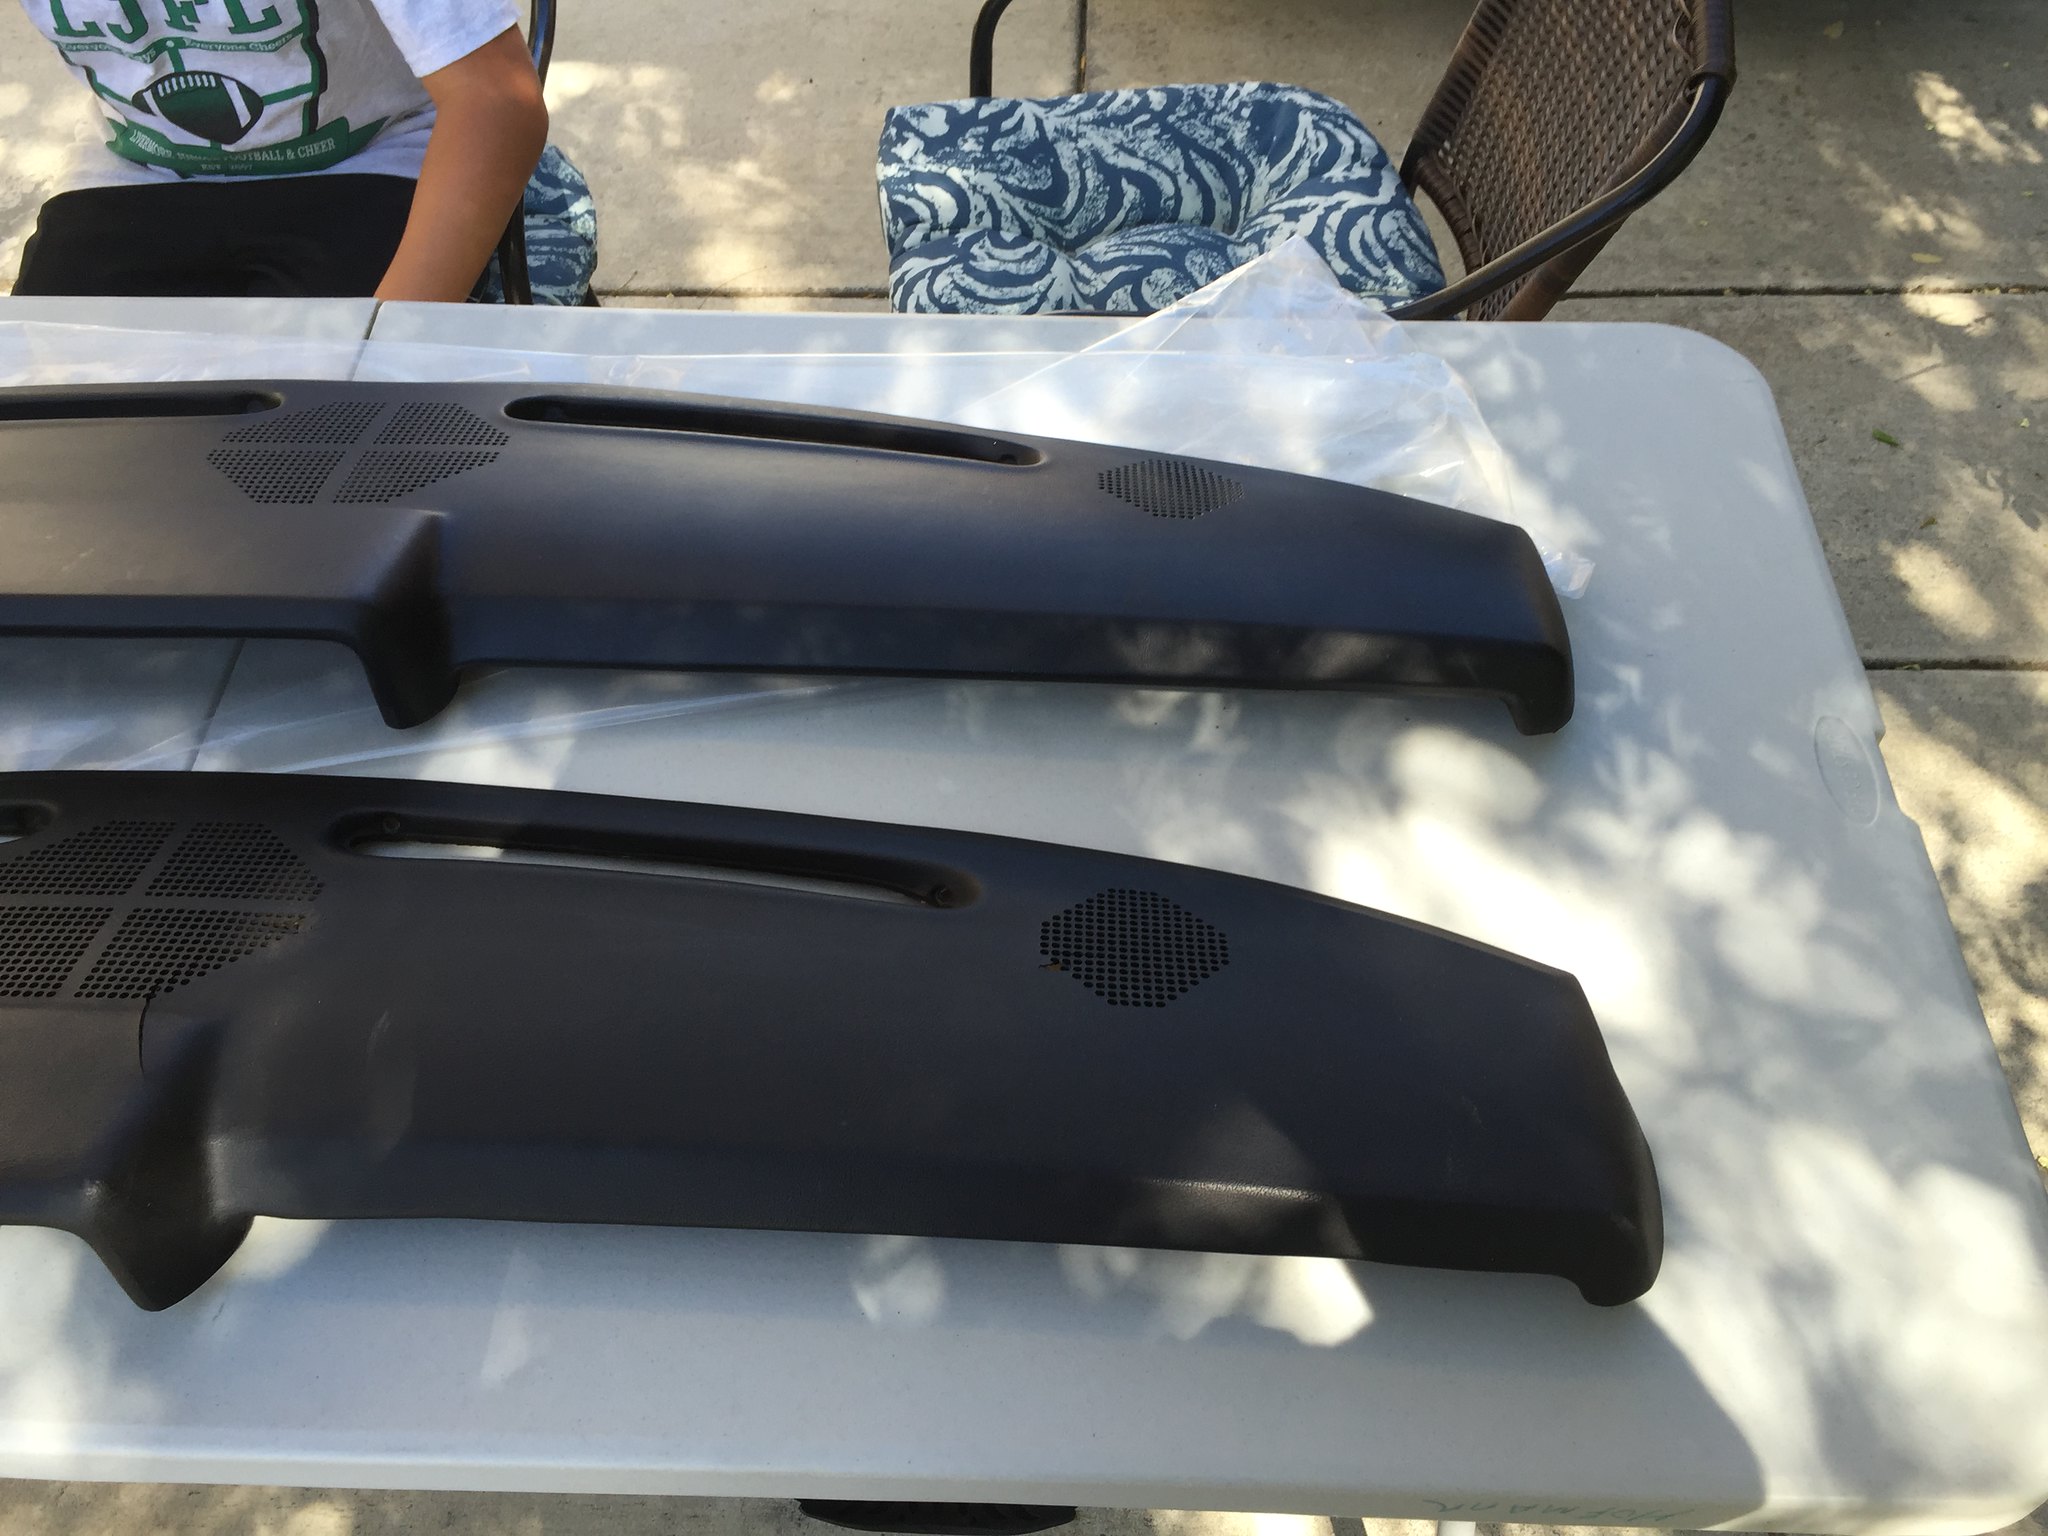
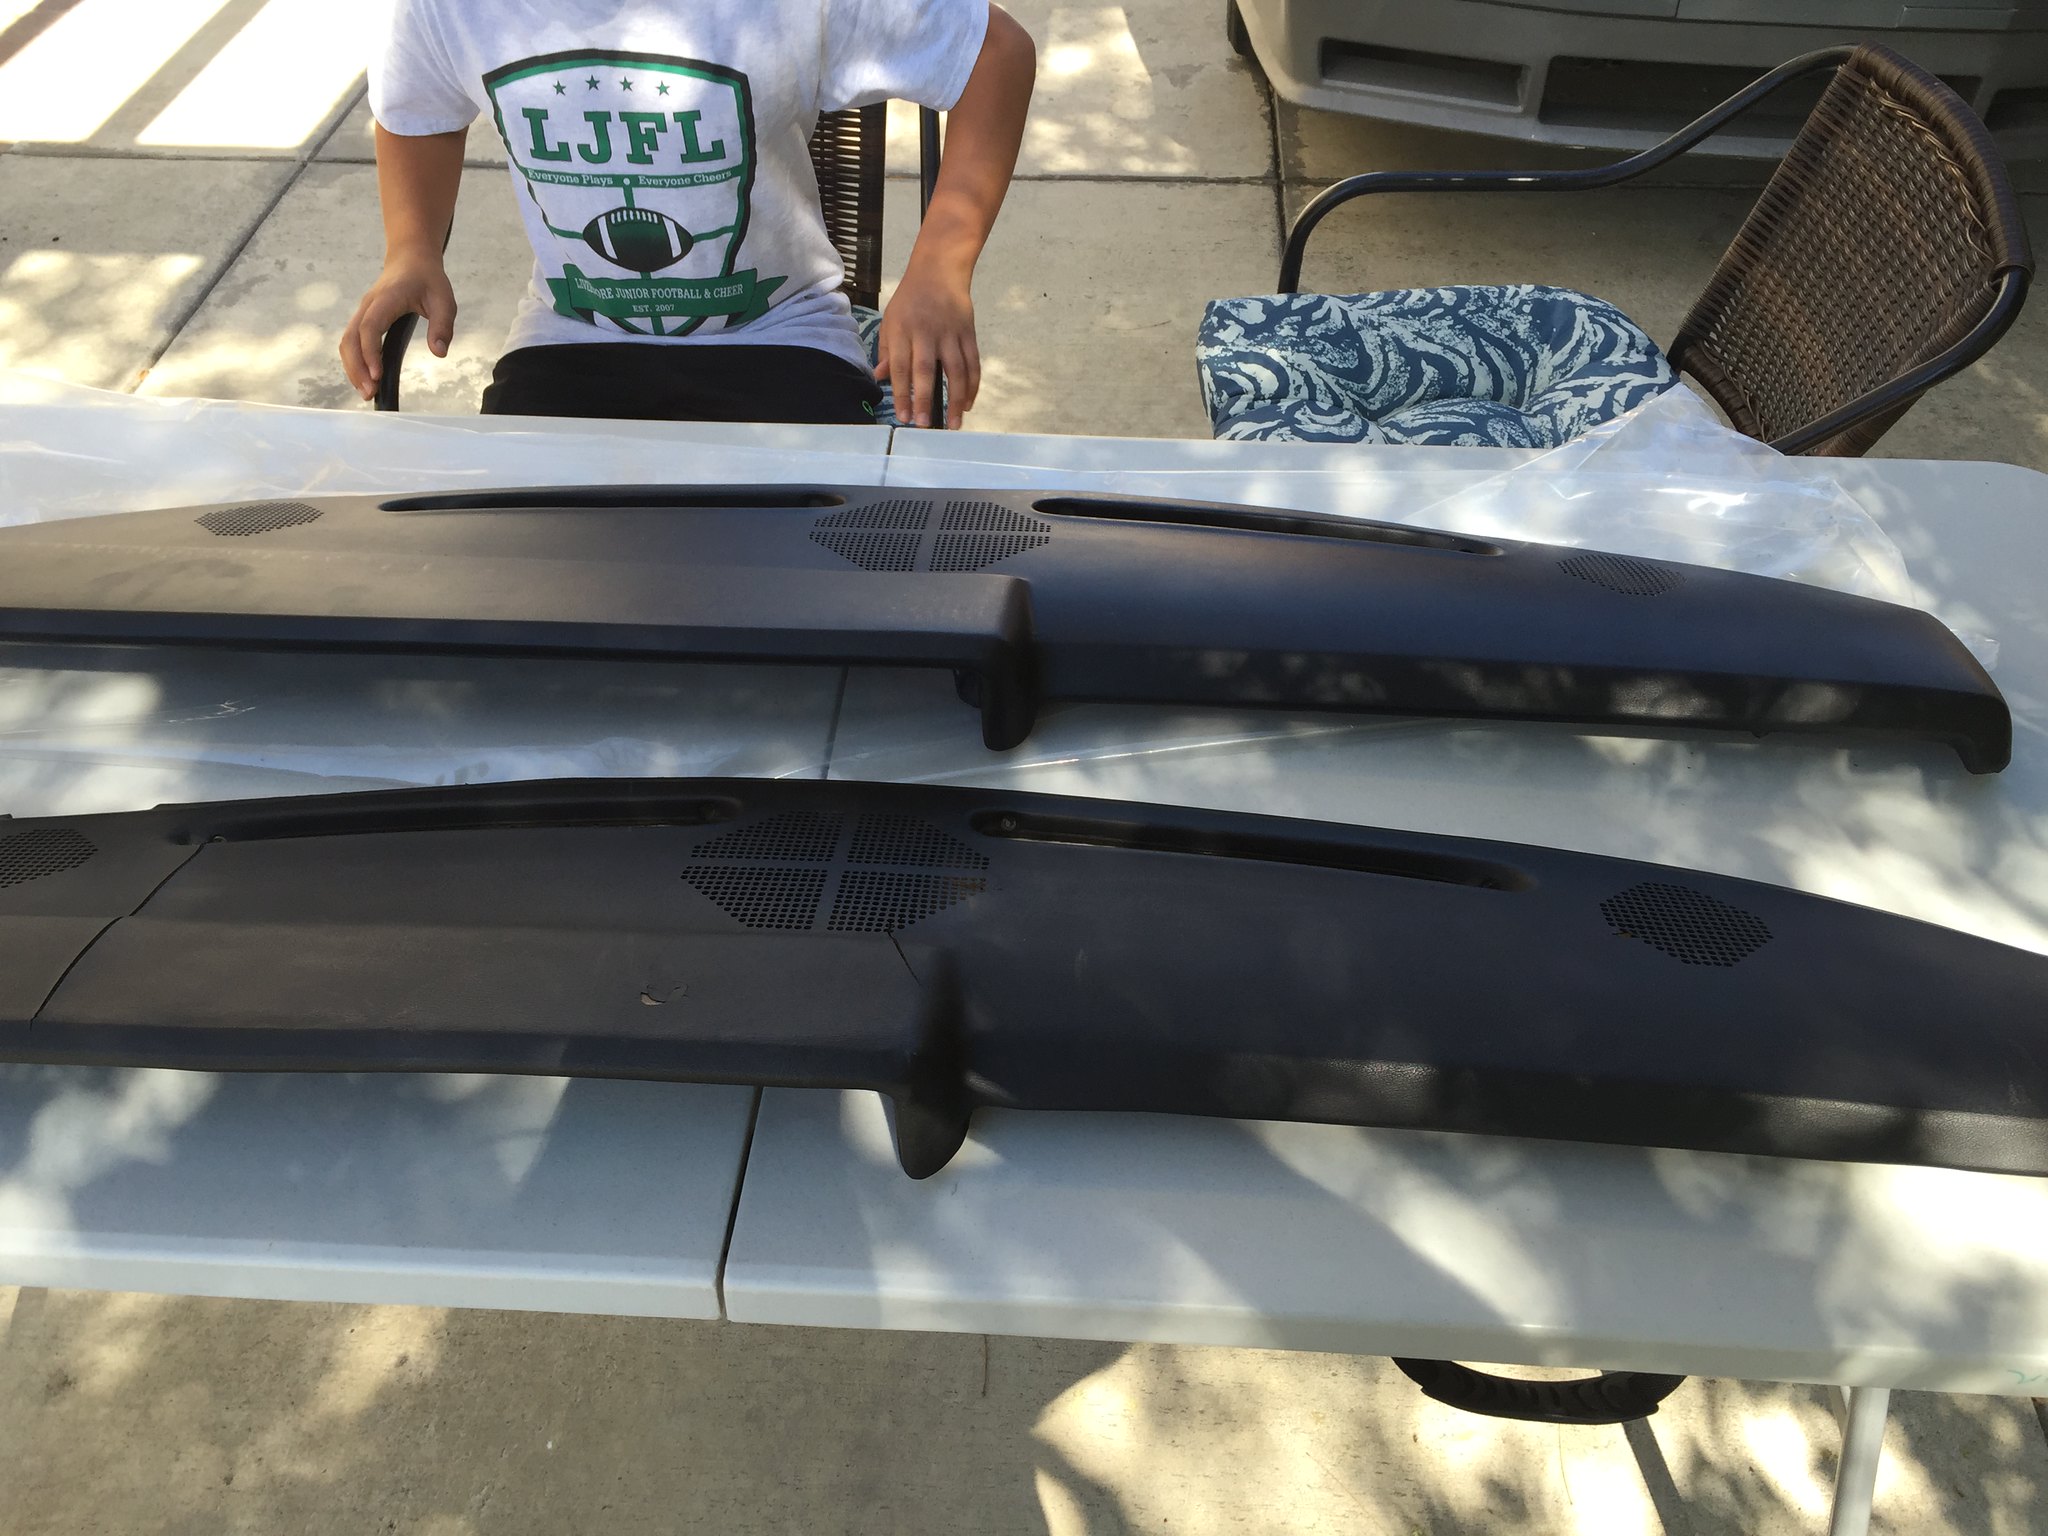
Next up was the dashes direct gen 3 dashpad
that turned out nice too and is a close match to my nice original that had a couple big cracks. The interior is getting back in to shape.
Finally got one of the correct Recaros back in to place on the passenger side after a bit of extra work on the mounts.
We went for a short drive but had to cut it short due to the exhaust plumes! A friend dropped by and checked things out and now were confirmed that the is a little bit of antifreeze on the plugs. So next up will be to pull the head and replace the gasket which has likely been the culprit that took this off the road back in 1991! While I'm looking forward to getting this running correctly and street worthy, the thought of going through and methodically tagging all of the spaghetti under the hood and attempting tearing into an engine for the first time has me on edge. But as another friend once told me "it's all just bolts" so it should be a good learning experience for my son and I.
Hopefully the head is not cracked and it can simply be gone through and bolted back together without issue. I'll clean things up a bit along the way and make it look factory again. I'll post up my progress when it happens if anyone's still paying attention!
See ya!
Last edited by m81mclaren; 08-22-2017 at 12:28 PM. Reason: Added pics
Current FEP:
1980 M81 McLaren Carb Turbo 2.3T #003P ... IT'S ALIVE after a 22 year slumber thread!
Past FEP:
1986 Capri GS 5.0- very missed but in goods hands
1985 LTD SSP- quick little fox 5.0

Love that car. Body color mirrors.
Do take time to tag the spaghet well.
Both ends, like a to a, or use number wire coding like in factory machinery electrical boxes.
Take many pics and do not trust short or long term memory.
Once zoned into it and have time, things will go fine.
First time engine or first time this engine?
Having worked at a Ford engine plant sure helped me do mine mentally and physically.
No guessing allowed unless to help solve an issue. Magnifying glass allowed.
Careful non-destructive inspection on disassembly is needed to find clues to problem(s).
Mark everything. Little wire tags work good. Freezer Ziplocks. Black Sharpie.
One notebook for notes, sketches, part list, with a diary section for thoughts.
Separate labeled boxes for sections of assy. Keeps bolts from getting mixed or lost parts.
Those 1.00 plastic shoe boxes are handy for this.
Good idea to clean parts when taken off, not when assembling. Or whatever.
Last edited by gr79; 09-26-2016 at 08:57 AM.
damn double-post!
Last edited by m81mclaren; 09-27-2016 at 11:47 AM.
Current FEP:
1980 M81 McLaren Carb Turbo 2.3T #003P ... IT'S ALIVE after a 22 year slumber thread!
Past FEP:
1986 Capri GS 5.0- very missed but in goods hands
1985 LTD SSP- quick little fox 5.0
Thanks GR, yes I did the 1-1 tagging when I pulled the carb for the rebuild and the valve cover to set a new gasket. It was very time consuming and tricky trying to keep track of everything. I took a ton of pictures, drew some diagrams, and used them both on re-assembly as time passed quickly and I had forgotten much of the details. Great tips below on keeping organized. I've never pulled a head or removed an engine from a mustang but have swapped engines on my Mk1 Rabbit Gti and a Mitsu Pickup for a friend. I understand the concepts including getting it to TDC and aligning the timing marks etc. but it's a bit intimidating as it can only go back together exactly one way or you damage all the work you have done. That said, taking things apart is the easy step (sure!) and my friend who has raced in SCCA FI turbo four Pintos for a few decades will come by after disassembly and give things a look over and see if we can determine why the HG failed in the first place. He just laughs at how complex that spaghetti is compared to his Pintos! I'll bring the head in to a shop TBD and have them check it over for cracks and refresh the guides and anything else that needs doing. I'll also run a compression check before pulling anything apart as that may also give some clues as to what is going on. If the block shows anything unusual it's time to pull that as well for a rebuild.
On the last startup Sunday, there was very light white smoke coming from the tailpipe on startup and at idle. My experienced friend could not smell any sweetness and could not make out what it was but suspected water as it was not dark or heavy smoke. The original radiator is clean with no indicated oil mixed in and no bubbles. When we pulled the plugs they looked a little wet and slightly oily. A wipe on the paper towel showed a slight green tint indicating radiator fluid. After he left and the car was warmed up we took it for a drive under light boost and the smoke became much thicker/darker indicating oil too. So it may be a combination of a cracked head, damaged HG, valve guides or maybe even warn/damaged rings. My guy suspects a cracked head/valve guides but also suggested the StaBil fuel treatment could cause some of this too. We shall see as it's time to finally just dig in and go with it!
Originally Posted by gr79

Last edited by m81mclaren; 09-27-2016 at 11:57 AM.
Current FEP:
1980 M81 McLaren Carb Turbo 2.3T #003P ... IT'S ALIVE after a 22 year slumber thread!
Past FEP:
1986 Capri GS 5.0- very missed but in goods hands
1985 LTD SSP- quick little fox 5.0

Excellent progress - you've got a future 4-eye owner in the making....
1979 Indy Pace Car Mustang 302 / 5spd
1982 Mustang GT T-Top 302 / 4spd
1986 SVO Mustang - 1C
Boy that dash pad looks great.
Back to the engine.
Removing the turbocharger to access the intake bolts for removal and install is tricky.
Heavy too. Imagine bending over and curling a bowling ball. That is with engine in car.
It connects under carb, to intake, and oil drain/mount pad at the same time.
All on different angles. Forward, sideways, and down. Tight fit too.
So is the turbocharger reinstall. Has to be set in just right while keeping all the o-rings in place.
Overtorque the turbo to the manifold pad will crack the manifold oil return adaptor= huge bummer trouble.
Unless you have a spare. Or where to get one. It is cast aluminum. Billet would be great.
The turbo has to be reseated exactly right (and clocked exactly right if rebuilt) before snugging it down.
The crossover pipe stud nuts are not fun, but i found a ratchet wrench that works great from above.
Otherwise its a hard job. Tight spot with a very long socket extension from under the car.
http://www.harborfreight.com/t-bar-w...het-98484.html
Antiseize is great for future removals here.
Timing belt, pulleys, distributor, need to be correctly lined up of course.
Major engine repair with engine out of car is much much easier.
Of course taking it out is another story, but easier than it looks even with trans attached.
Have rebuilt the Mustang 2.3T once (year 2000) and a 70 Type 1 VW 1600 once back in the 70's.
Successfully passed 100k+ on both.
This work can be done with limited repair experience, good knowledge and skills, and positive attitude.
The higher boost levels of the M81 engine for the sake of added power prob did not help its longevity.

I'll bet they were relying on the cold air management hood and thermo fan to keep the engine out of the detonation zone.
The engine was presented as a 100% stock emissions engine, just the variable boost HP screw. I always woundered how they were even legal to release it with HP boost without engine mapping changes.
Must have been quite a car on 11 pounds boost, and the claimed 175 hp at that!
About Respect https://www.youtube.com/watch?v=2bk9WG8KWW0
X's Album http://vb.foureyedpride.com/album.php?albumid=2922
Oz JPS Stang http://www.nzmustang.com/Images/Hist...cecars/jps.htm
4V (A)US Race V8's https://www.youtube.com/watch?v=Tqk18A-ibjA
ITZOLD 81 Fox http://vb.foureyedpride.com/showthre...-fun-and-games
6V i6's @ http://www.xecltd.info/?rd=10 ; AWD i6's @ http://www.apetracing.co.nz/
113 mph 84 5.0 at Amaroo https://www.youtube.com/watch?v=iTezv3Pzdls&t=8s
Techno KCM Loop Out: Severed Heads 1m³ Angels 1985 https://youtu.be/Wll6G1KpLqQ
Future Shock https://youtu.be/rDKGkWU0lWQ

Only two of them had 11 pounds of boost, it didn't have an intercooler so the air management was only for down force over the top of the car. Funny thing is only the street cars had the air ducts from the radiator, the two race cars didn't, they did have the holes in the hood.
Kendal
ya 11 is a lot for the early turbo config.
No doubt they are blueprinted engines and who knows what else.
The compression ratio, cyl pressure must have been way up there 12 to 1+ under boost
Fooling with the waste gate hose can get 5+ easily. Mix in some racing fuel to be on the safe side.
Definite noticeable increase of power at 7#, about as high as i want to go.
On my carb 2.3T, there is a check valve in that hose that affects how the gate works.
Also uses a DY 237A ignition module which retards timing in relation to manifold signal.
Has 3 harness connectors.
The turbo engine sensor array on the fender apron near the washer fluid tank does the timing map.
Noticed in the M81 pic the item in the engine bay near there right were the array is on mine.
Ig box mounted higher?
Changes to the vac lines and added parts, calibrations, compression ratio, premium fuel, etc.
I used the Felpro 8993 PT-1 head gasket that was in their HS 8993 PT-1 gasket set.
Regular 87 fuel. Boost is detuned to 4# for everyday driving. Even then has a good kick.
Maybe the M81 uses the Felpro 1035
http://www.felpro-only.com/break_roo...ad.php?tid=773
I live near the McLaren shop location. Wonder if anyone is left that worked there in the 80's on this engine.
That is one reason i visit local car shows here in the Detroit area when i can.
Especially the August Ford event at the Ford Develop Center in Dearborn.
To gather info on these early turbo engines by meeting anyone that may share real factory style tech info.
gr79, thanks for this. I have 2 bulging disks that slow car work progress as it is. The bending over the hood is already an issue for me and when I took the carb off for the rebuild and saw what a tight fit and how chunky (heavy!) the turbo system was, I shivered at the thought of trying to pull it all apart! I concluded that removing the engine would be easier and less painful but my friend convinced me to give it a go in the car to avoid the whole "while I'm in here" issues. I'll start the process and see where it takes me (and if my body will allow)!
The PO had a shop replace the turbo in an effort to try and fix the smoking issues so I hope that it was installed/clocked correctly and nothing is broken or cracked. I'll pay particular attention to find the turbo drain line restrictor mentioned by others & for the check valve. I don't trust the manual boost adjuster as it's impossible to tell what position it is in. This may be a future swap to something more reliable to ensure the boost level stays reasonable once the engine is back in good order. I'm convinced the carb was out of spec and the engine was put under too much load which damaged the HG. Hopefully the rings are not damaged as others have suggested they are a weak link on this engine.
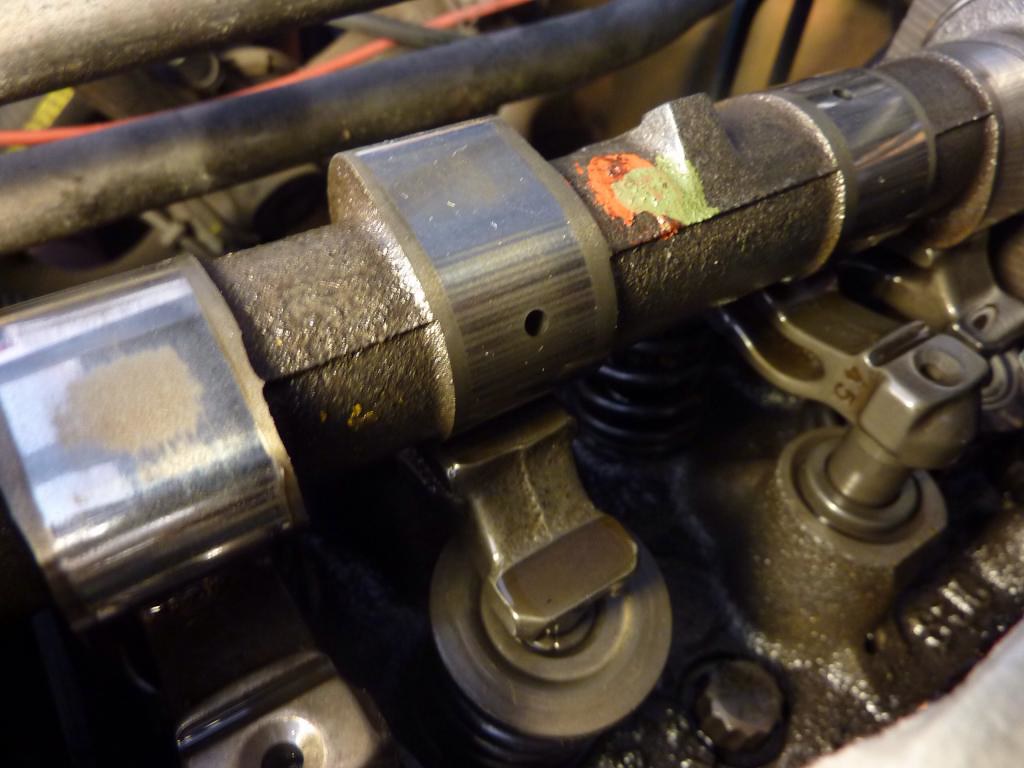
I've found some good videos on YouTube by a guy in England "Fast Rush" working on his Capri 4 cyl 2.0 SOHC. This looks very similar to the 2.3 and has given me confidence to tackle this on my own. Mainly the pointers on timing mark alignment and T belt replacement which are important steps in the HQ replacement process. The valve adjustment procedure was interesting (although my 2.3 does not look adjustable like his- see my previous pics of the lifter section in comparison).
https://www.youtube.com/user/fastRU5T/videos
M81
Last edited by m81mclaren; 10-04-2016 at 11:57 AM.
Current FEP:
1980 M81 McLaren Carb Turbo 2.3T #003P ... IT'S ALIVE after a 22 year slumber thread!
Past FEP:
1986 Capri GS 5.0- very missed but in goods hands
1985 LTD SSP- quick little fox 5.0
I have a couple of questions as I think through my plan here.
1) I looks like I have the 12 point head bolts which are reusable is that correct?
2) Is the FelPro 1035 still the ticket (I will ensure a flat block and will have the head decked flat and gone through) or is the 8993 better. I do not plan on driving this car hard once done and am thinking something a bit more forgiving may be needed. Thoughts?
3) Is this head hydraulic lifter type; i don't see any way to adjust the valves like on the Pinto SOHC motors
4) what other consumables are needed for a HG job? or anything else as I pull the head? I am considering a full engine gasket kit which would include the 8993 which may be the smart way to go. I know for sure I need a exhaust mani gasket as it's starting to putt-putt a bit
Thanks, M81
Last edited by m81mclaren; 08-22-2017 at 12:34 PM.
Current FEP:
1980 M81 McLaren Carb Turbo 2.3T #003P ... IT'S ALIVE after a 22 year slumber thread!
Past FEP:
1986 Capri GS 5.0- very missed but in goods hands
1985 LTD SSP- quick little fox 5.0
Planning is a key to success.
From my notes when i did my engine back in 2000:
Went with new ARP head bolts because i redid the whole motor. New parts can be piece of mind.
HG
Maybe the old gasket has markings or a design to give a clue if they used something else like the 1035.
Lifters
2.3 uses hyd lash adjuster. Act like hyd lifters in push rod engines.
Mech lifter engines have adjusters on the rocker tips. Old VW beetles were mech.
Lifters contact cam lobes. Lash adjusters do not.
I used assy lube on most of the parts when putting the engine together.
Everything was inspected, clearances checked, and torqued to spec per Ford shop manual.
The shop did inspection on the parts i gave them and recorded that for me to save.
I still remember recalling this as to pattern after doing mine:
"McLaren Engines blueprinted, polished, de-burred and reassembled an essentially stock variation of the 2.3L Turbo for the M81. At 5psi of boost, horsepower was comparable to a stock 2.3L turbo, but the extra attention from McLaren to the rolling assembly allowed the M81 to have a much higher and variable boost. The boost control was inside the car and adjustable from 5-11psi. Top output was estimated 175hp (Motor Trend magazine reported the adjustability of the boost up to 12psi and top horsepower at 190hp. 12/80)".
Wonder if the head and turbo intake assy could be removed as one with a cherry picker?
Cant see why not. Work invested pulling the engine leads to temptation to go all the way.
Maybe drain the block taking the bottom hose off and flushing block with plain water.
How to get rid of all that is work.
So when the head comes off its not so messy with the residual dumping out.
I always have that mental pic of coolant on the top of pistons....
Compression check before tearing apart. Cant recall if you did that already.
Today we finally ran a compression test. I was only able to warm it up for 2 minutes because we ran out of gas.We get:
cyl 1= 135 psi dry
cyl 2= 20 psi dry & 20 psi wet (Houston we have a problem!)
cyl 3= 135 dry
cyl 4= 133 dry
From what I have read the fact that it did not change when wet means the bottom end/rings are potentially ok. Do I have that right? I guess a hole in piston #2 might not change when wet!
My buddy thinks it could be a stuck valve and said to just pull the head and go from there. Is it possible to have such low compression with a bad valve guide? Should I try a leak-down test?
Likely next on the list is to go ahead and pull the head and get it checked out unless you guys suggest another path.
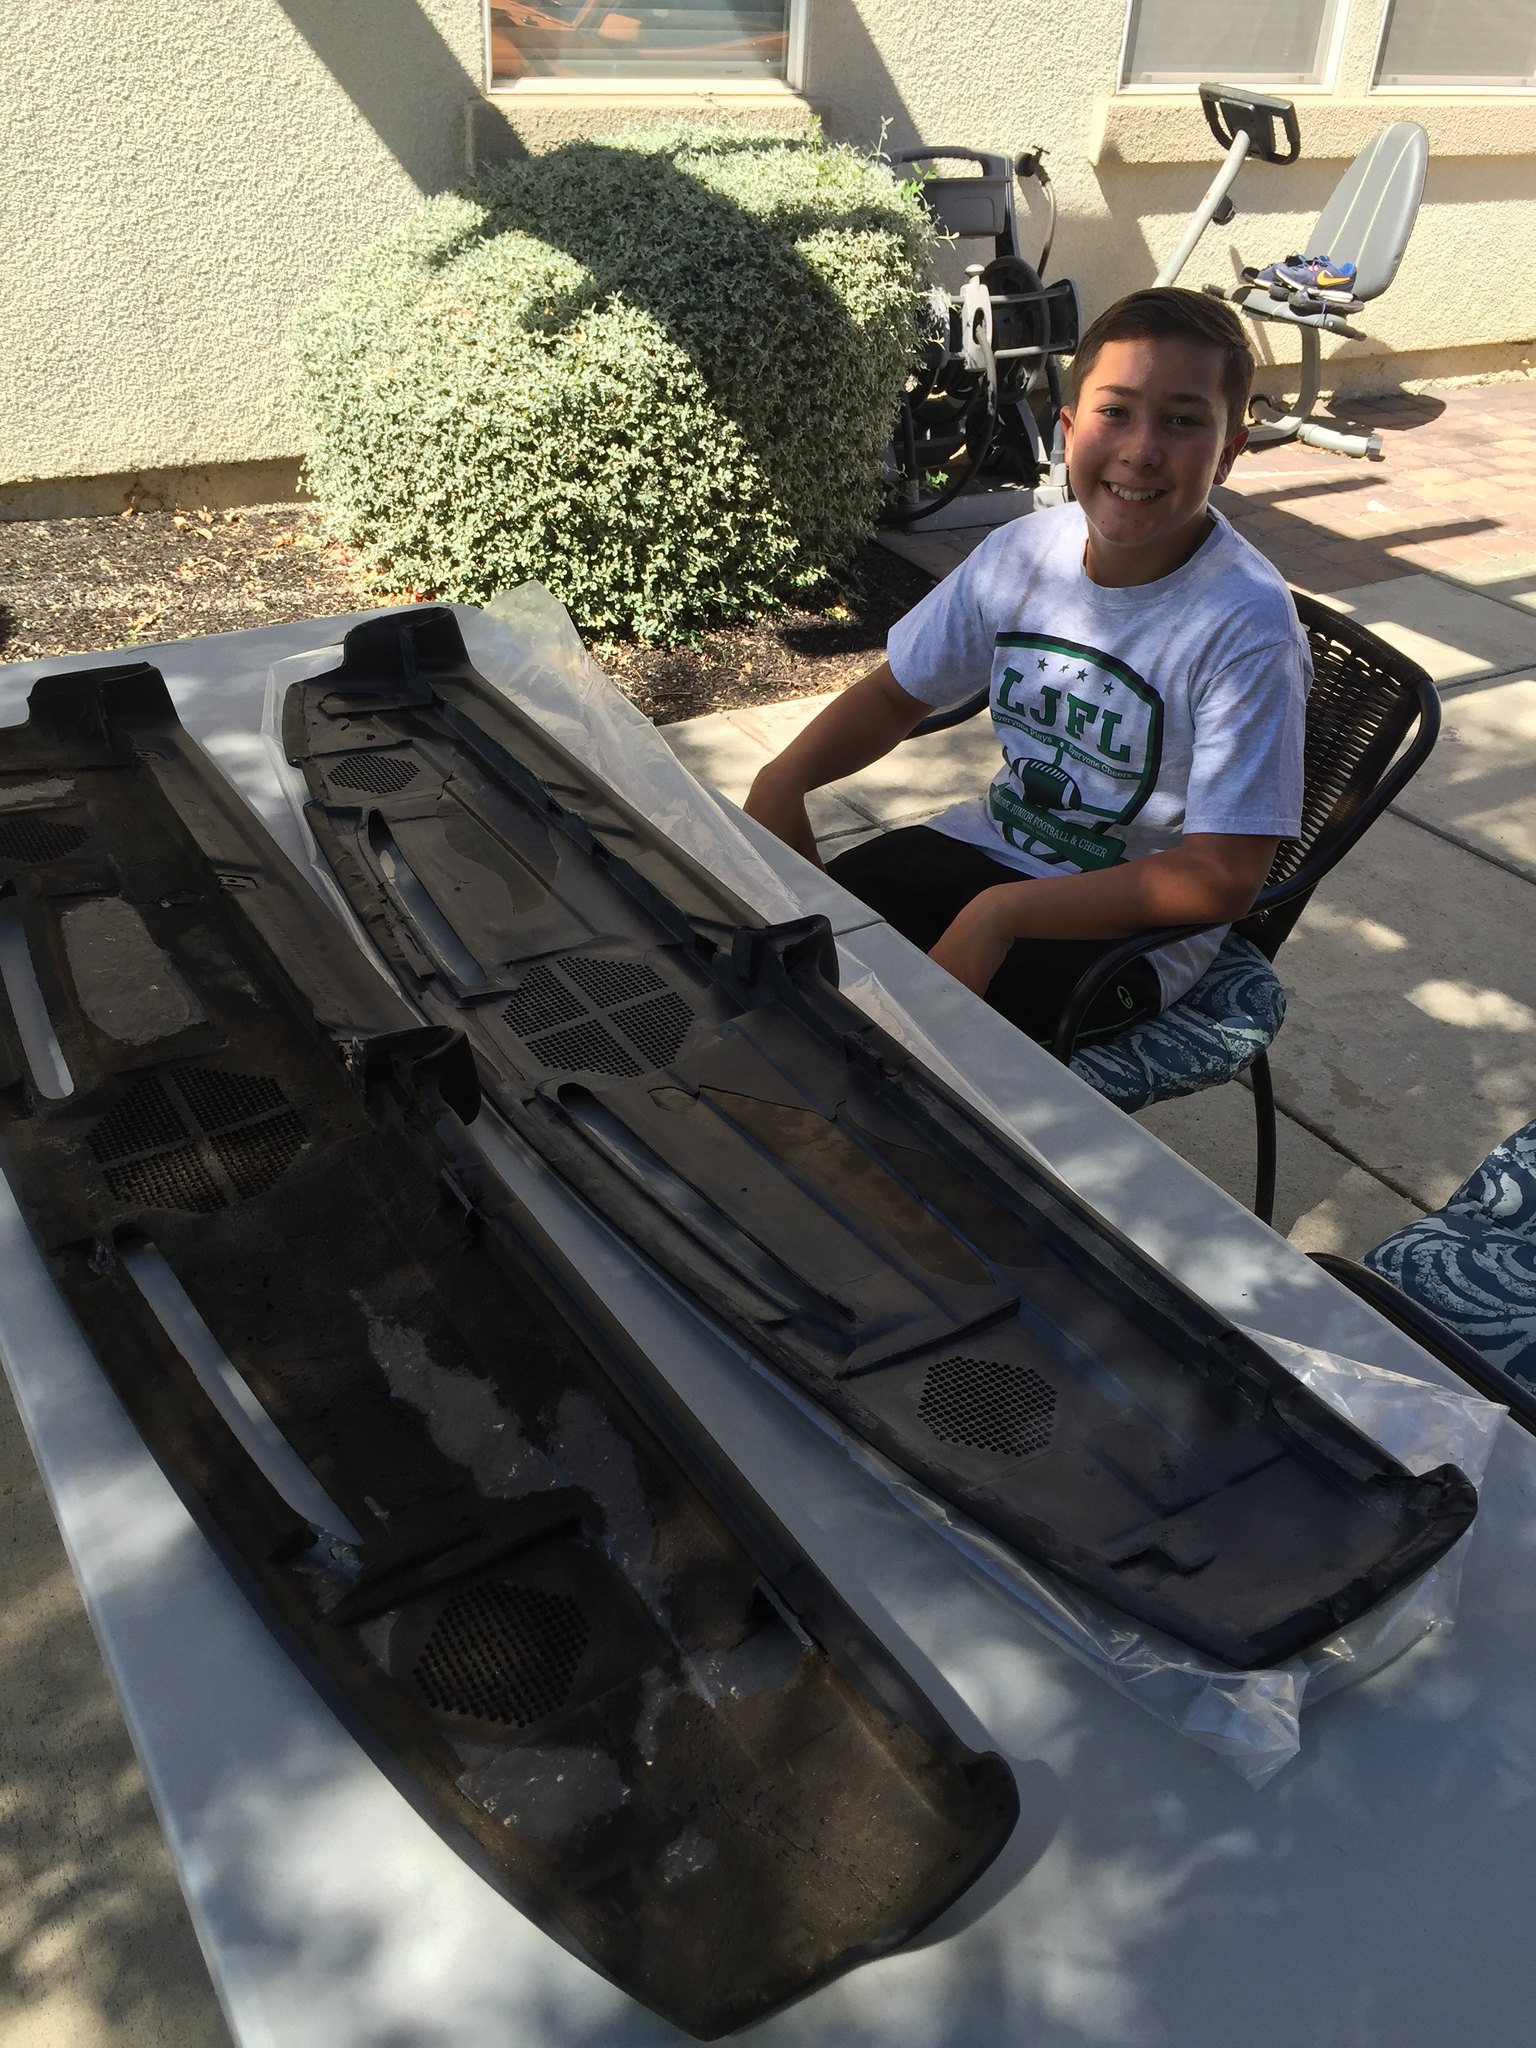
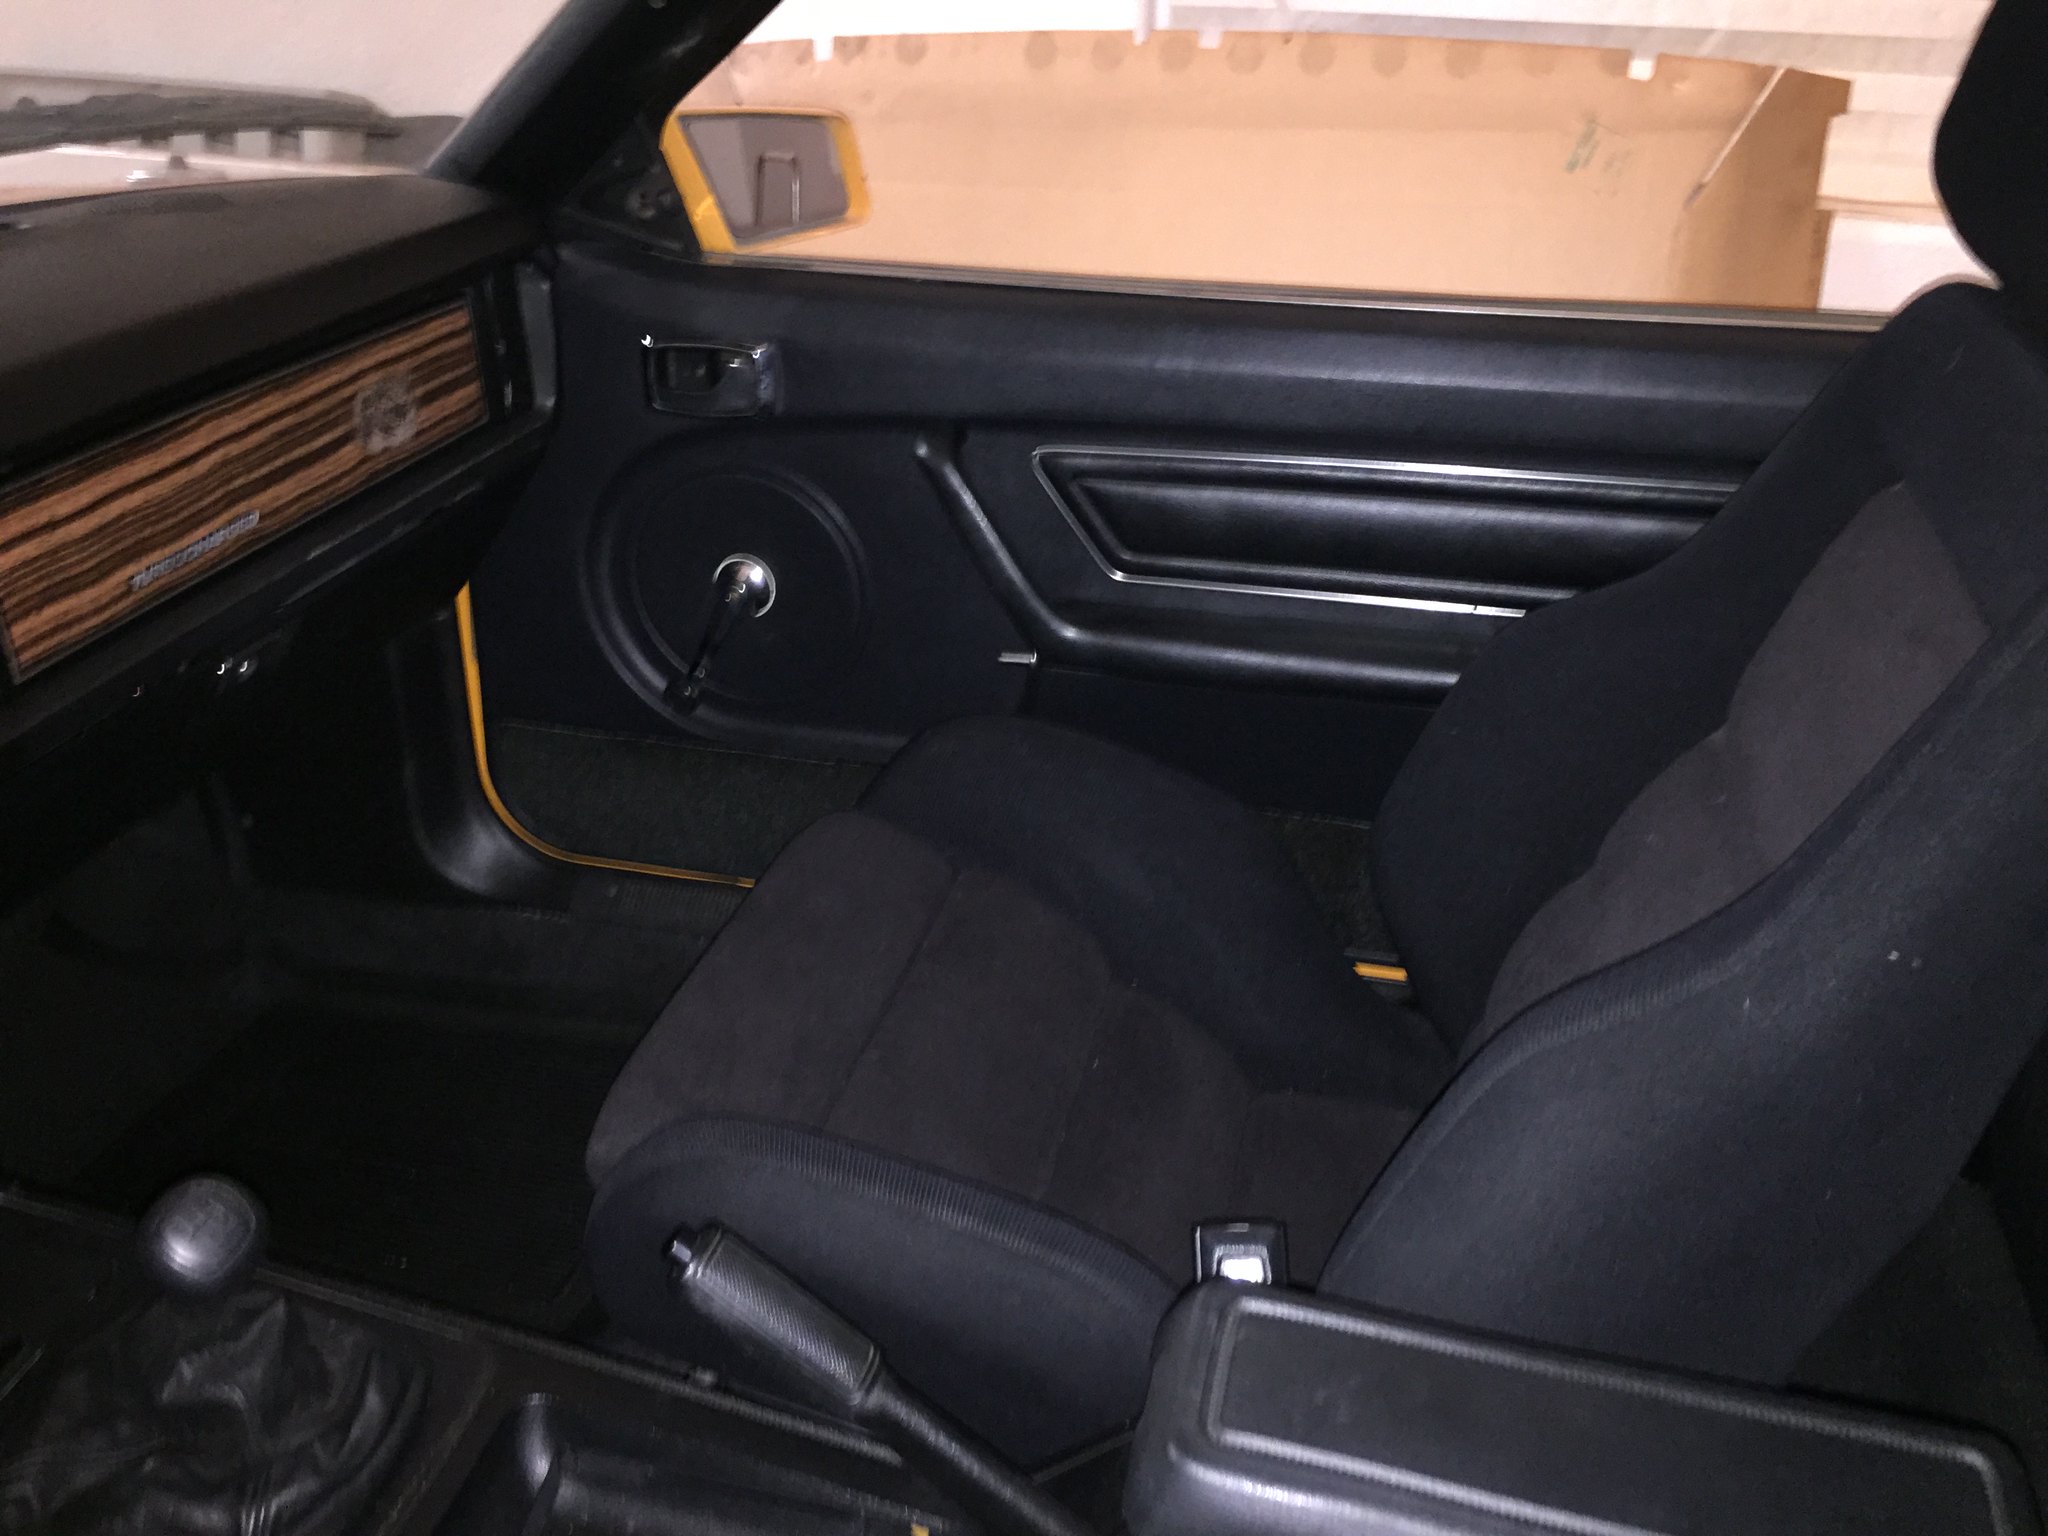
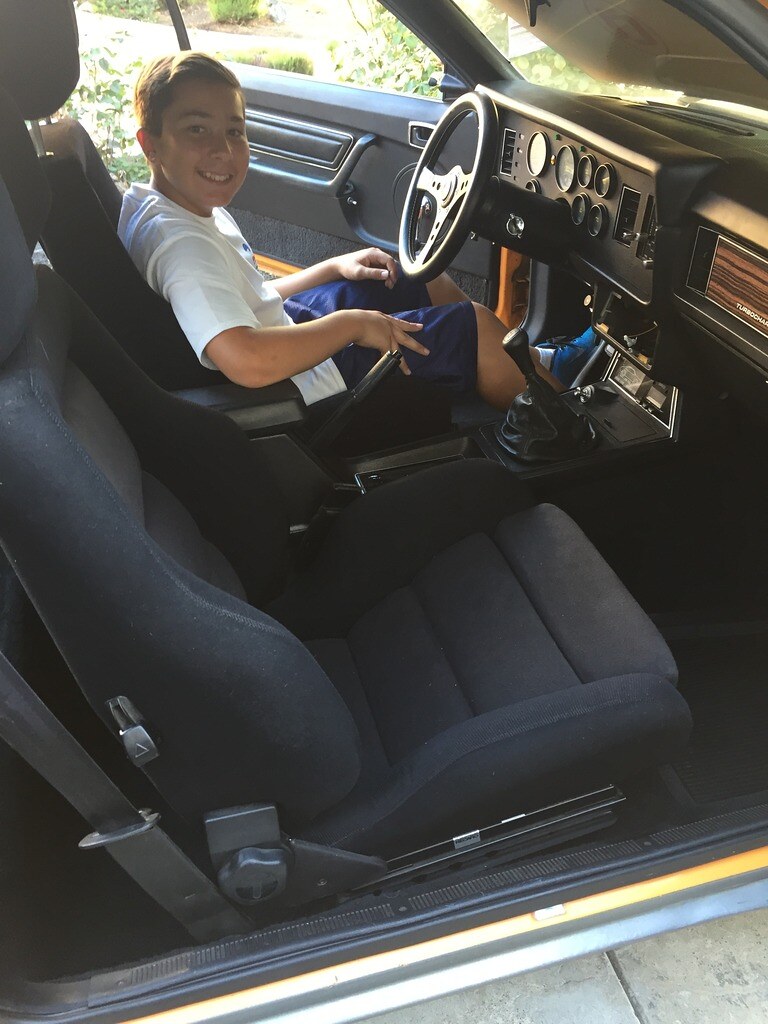
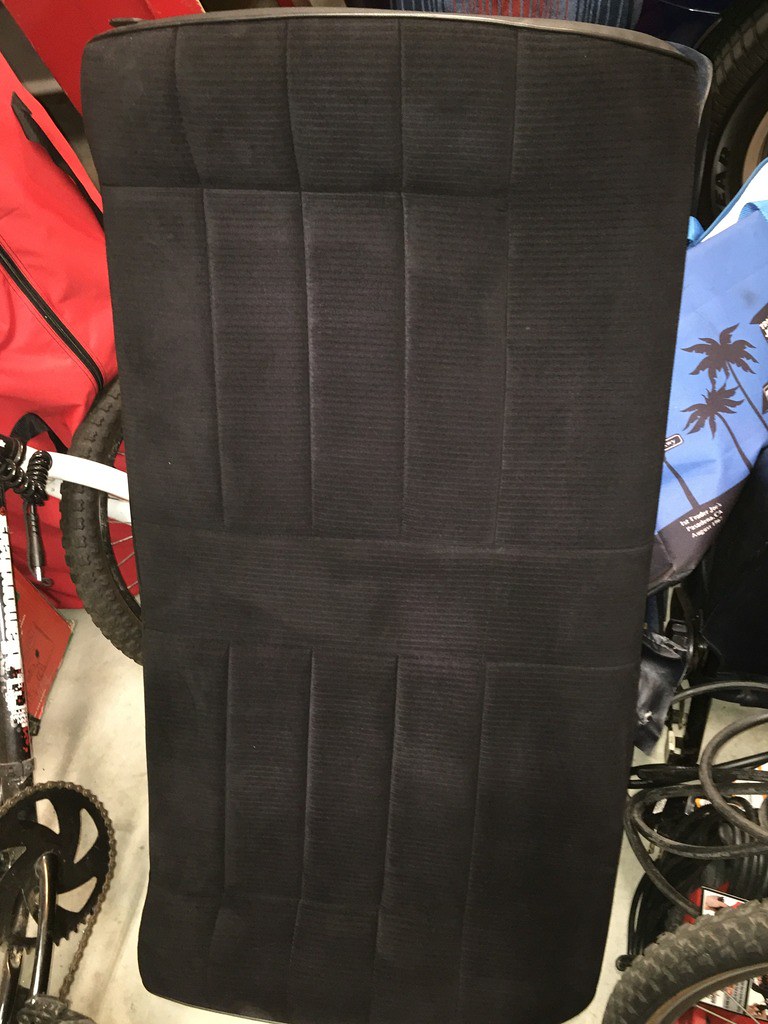
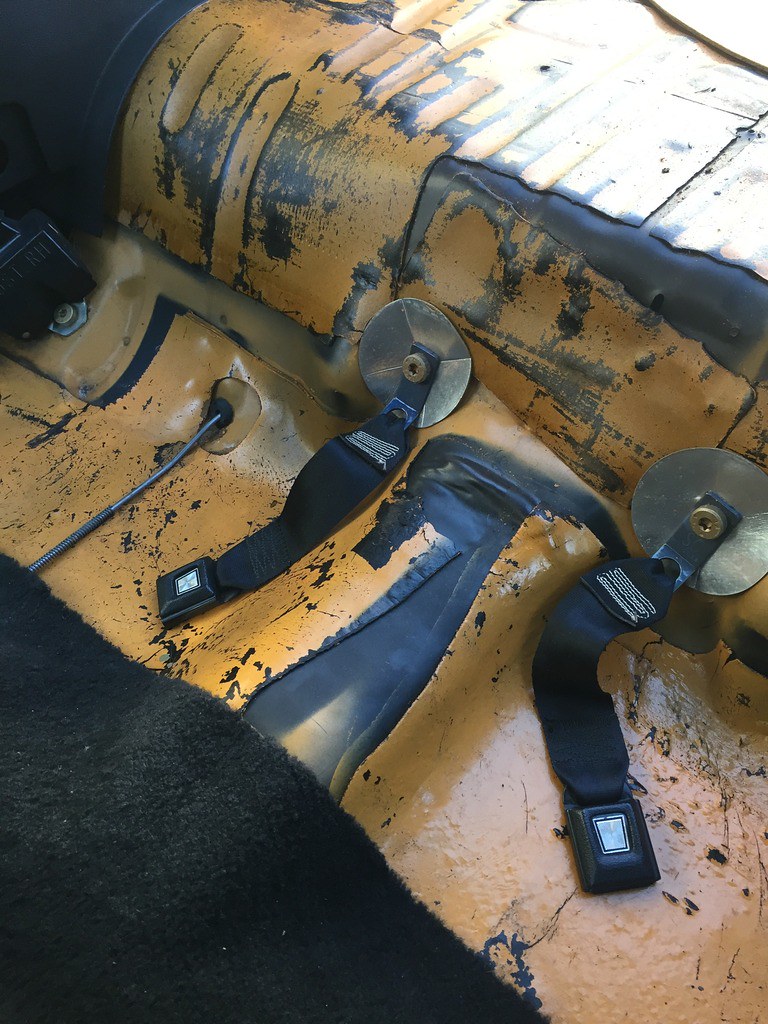
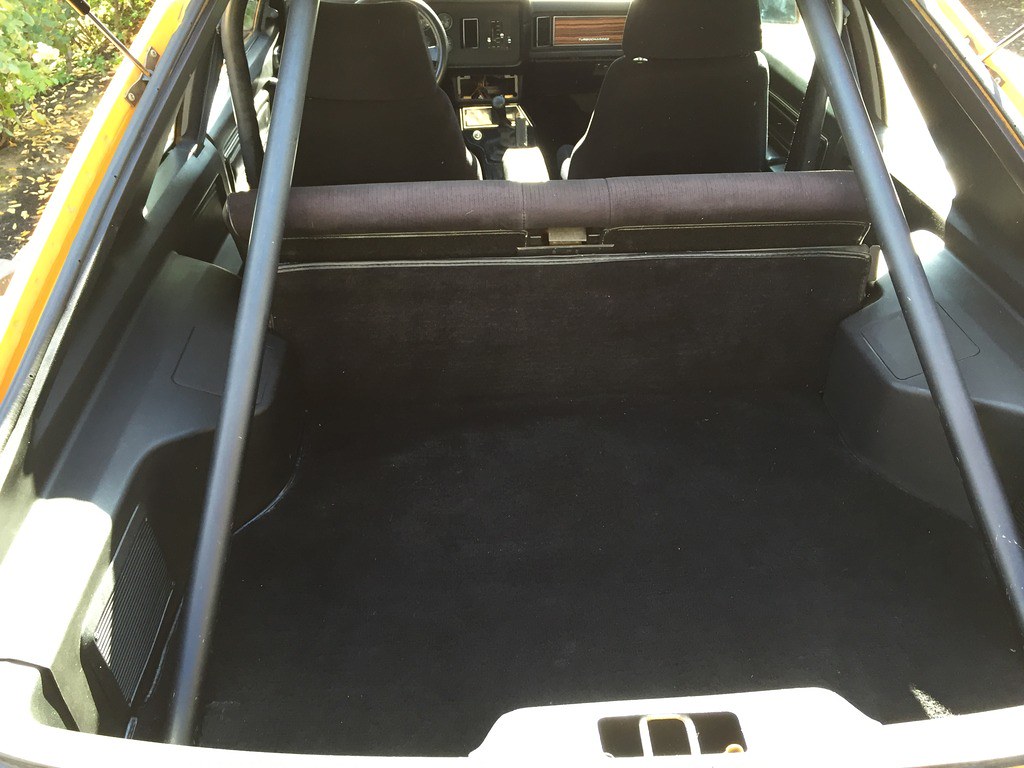
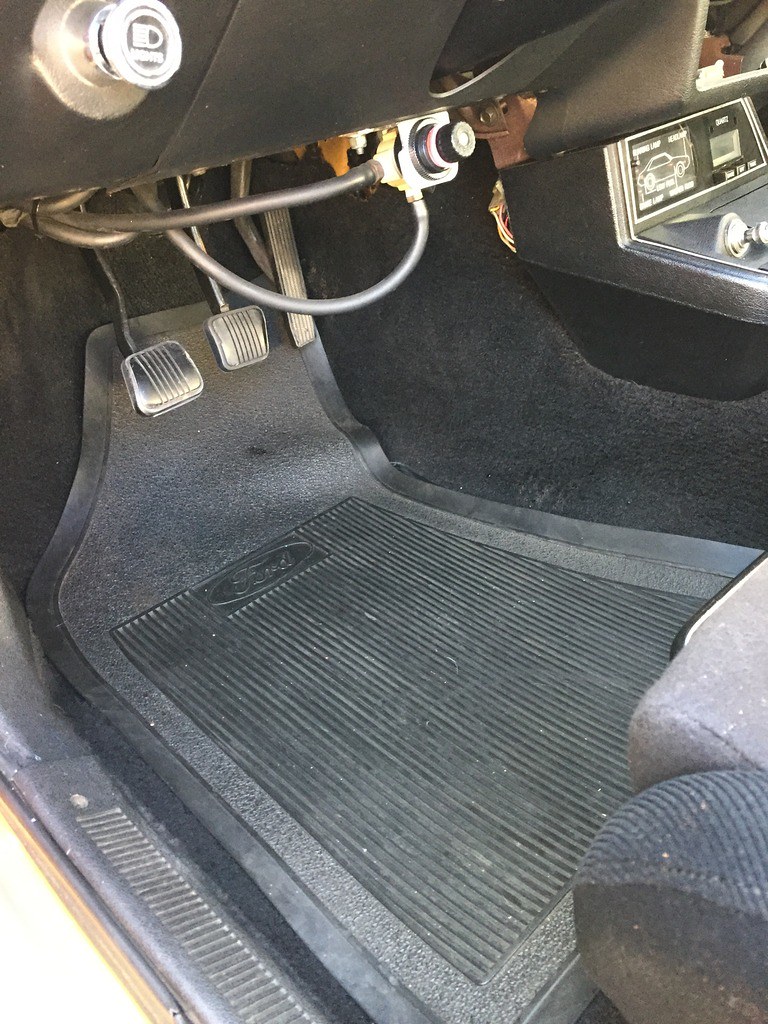
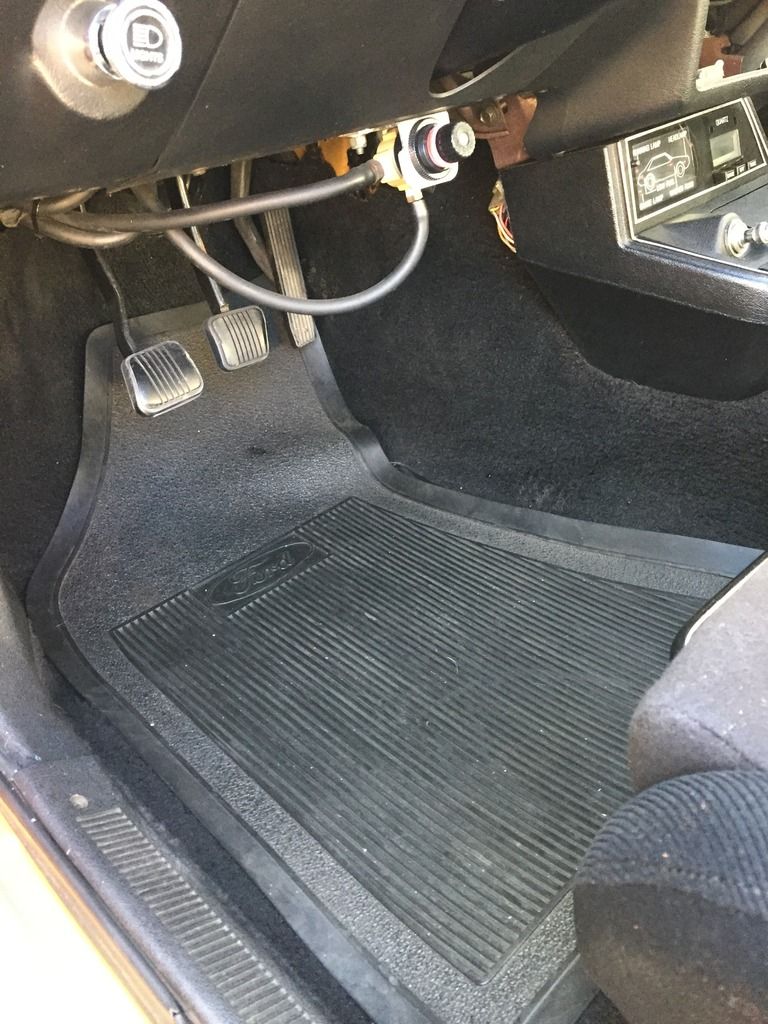
We finished the interior by installing the DS Recaro and cleaning up the carpets front and back. We pulled the back seat upper section and cleaned up a nice used one we picked up from a super cool dude maybe 6 years so who was tossing it.
Interior is finally back to mint!
Floors are nice but still could not find the build sheet. Maybe it's high up under the dash as its not under the seats, rear carpet or
main carpet.
Last edited by m81mclaren; 08-22-2017 at 12:48 PM. Reason: added images replaced dead photobuckets
Current FEP:
1980 M81 McLaren Carb Turbo 2.3T #003P ... IT'S ALIVE after a 22 year slumber thread!
Past FEP:
1986 Capri GS 5.0- very missed but in goods hands
1985 LTD SSP- quick little fox 5.0
We finished up the interior and could not be happier. It came out great and my son and I are learning a lot and having fun!
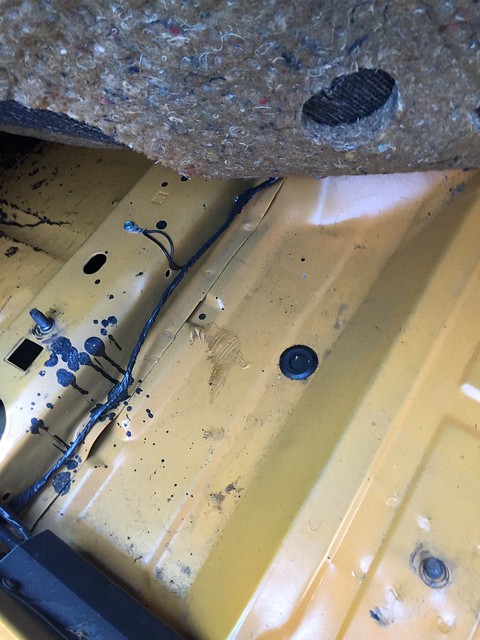
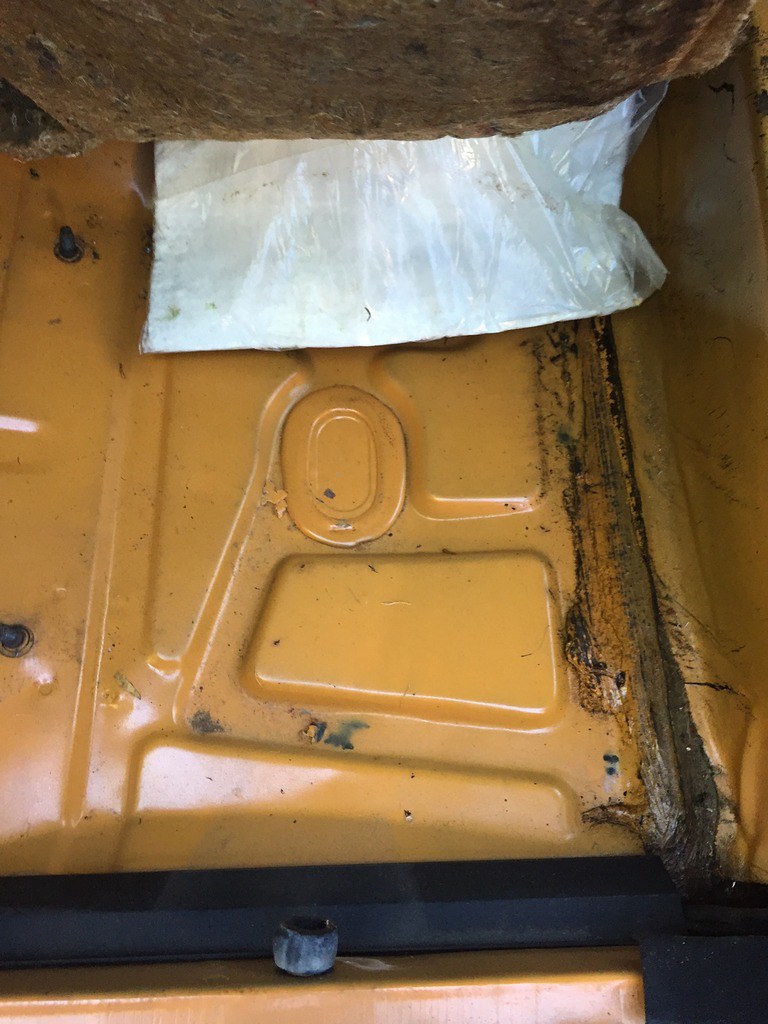
There is some kind of factory tar sheets applied over the metal which I guess is heat/sound insulation.
Sunlight and phone are not playing well together but tried to get a better shot of the headliner. It looks awesome and would highly recommend the Just Dashes Gen3 vinyl to anyone. It required some edge trimming to get they trim to sit properly but otherwise straightforward.
At 15 feet it does not look half bad...
Looking forward now to remove the head and some deep inspection/refresh where needed. It fires up right away and runs well, the oil and coolant are clear and colored as they should be with no milkshake/bubbles. I'll post up our progress in 2 weeks and hope to report that a burned valve and new stems is all it needs.
Last edited by m81mclaren; 08-22-2017 at 01:32 PM.
Current FEP:
1980 M81 McLaren Carb Turbo 2.3T #003P ... IT'S ALIVE after a 22 year slumber thread!
Past FEP:
1986 Capri GS 5.0- very missed but in goods hands
1985 LTD SSP- quick little fox 5.0
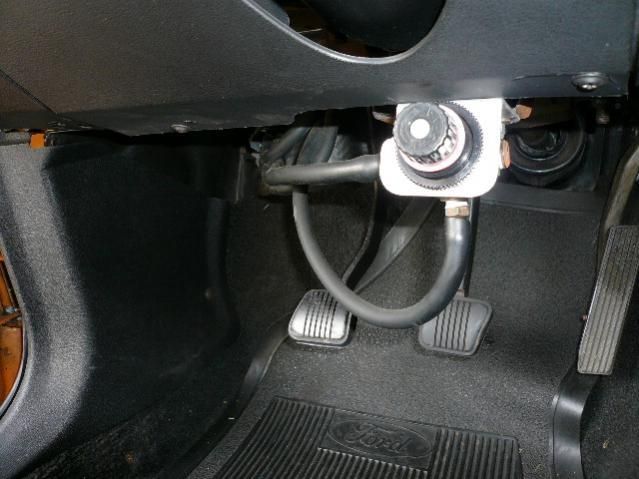
I L-O-V-E the horsepower screw...
Ooooohhhhh, somebody Stop Me!!!!!!!
About Respect https://www.youtube.com/watch?v=2bk9WG8KWW0
X's Album http://vb.foureyedpride.com/album.php?albumid=2922
Oz JPS Stang http://www.nzmustang.com/Images/Hist...cecars/jps.htm
4V (A)US Race V8's https://www.youtube.com/watch?v=Tqk18A-ibjA
ITZOLD 81 Fox http://vb.foureyedpride.com/showthre...-fun-and-games
6V i6's @ http://www.xecltd.info/?rd=10 ; AWD i6's @ http://www.apetracing.co.nz/
113 mph 84 5.0 at Amaroo https://www.youtube.com/watch?v=iTezv3Pzdls&t=8s
Techno KCM Loop Out: Severed Heads 1m³ Angels 1985 https://youtu.be/Wll6G1KpLqQ
Future Shock https://youtu.be/rDKGkWU0lWQ
I'm thinking that little adjuster may have something to do with with this car's issues!
Last edited by m81mclaren; 08-22-2017 at 01:34 PM.
Current FEP:
1980 M81 McLaren Carb Turbo 2.3T #003P ... IT'S ALIVE after a 22 year slumber thread!
Past FEP:
1986 Capri GS 5.0- very missed but in goods hands
1985 LTD SSP- quick little fox 5.0
Well, like one of Bruce McLarens countryman said on the top of the tallest mountain
http://i1215.photobucket.com/albums/...astard_off.jpg
Like we discussed way back when,
We had been told the 2.3 Carb Turbo got 132 hp stock at 5200 rpm (and 143 lb-ft at 2,800 rpm with 1/4 mile ET's from 17.8 to 17.36 at 75 to 79.3 mph) with the factory standard 5.5psi,
then 175 hp at 7 psi,
and 190hp at 12 psi.
Not all M81's had it,
It is the Indy car style variable HP screw for the hi boost carby 2.3 turbo
I think Timmy (thmpsn70) said there were some issues with the quoted HP levels as the boost knob was screwed in, but 11 to 12 psi is what the Motor Trend 10/1980 article said was on offer in the test M81 they used.
They tested it at 7 psi, and got basically the same performance figures as the 5.5 psi boost stock 2.3 Carb Turbos.
That car didn't even break the 100 mph barrier flat out and was about the same over the 1/4 mile. Not talking trap speed, but top speed, that test cars top speed was actualyy 10 mph slower than another 2.3 Carb Turbo tested in Great Britain that did 109 mph.
Anyway, after the M81, the HP Screw was ditched forever.
The 1984 SVO boost variable was octane related by a swich.
http://vb.foureyedpride.com/showthread.php?160881-2-3
Well, here's the original picture you shot that Gave me the Love....
http://vb.foureyedpride.com/showthre...5-years!/page2
Your 2.3 upgrade is going fine...I'm sure you'll get to enjoy the device the way the engineers intended. You've got Hi Test unleaded fuel with Benzene and Tolulene oxygenation now, and lookes like you've got unmatched expertise and advice.
Don't stop me now...https://www.youtube.com/watch?v=HgzGwKwLmgM
Last edited by xctasy; 10-28-2016 at 08:56 PM.
About Respect https://www.youtube.com/watch?v=2bk9WG8KWW0
X's Album http://vb.foureyedpride.com/album.php?albumid=2922
Oz JPS Stang http://www.nzmustang.com/Images/Hist...cecars/jps.htm
4V (A)US Race V8's https://www.youtube.com/watch?v=Tqk18A-ibjA
ITZOLD 81 Fox http://vb.foureyedpride.com/showthre...-fun-and-games
6V i6's @ http://www.xecltd.info/?rd=10 ; AWD i6's @ http://www.apetracing.co.nz/
113 mph 84 5.0 at Amaroo https://www.youtube.com/watch?v=iTezv3Pzdls&t=8s
Techno KCM Loop Out: Severed Heads 1m³ Angels 1985 https://youtu.be/Wll6G1KpLqQ
Future Shock https://youtu.be/rDKGkWU0lWQ
Progress was made last weekend
that A/C bracket is a bear. Looks like we'll have to get to it from underneath. We called it quits at this point so we could get to my sons basketball game on time after a quick cleanup!
Our goal for the weekend is to get the AC out of the way and the manifold/turbo out.
Last edited by m81mclaren; 08-22-2017 at 01:42 PM. Reason: photobucket change
Current FEP:
1980 M81 McLaren Carb Turbo 2.3T #003P ... IT'S ALIVE after a 22 year slumber thread!
Past FEP:
1986 Capri GS 5.0- very missed but in goods hands
1985 LTD SSP- quick little fox 5.0
We got the AC unit and brackets out and the exhaust mani off. What a major pain as there is hardly any room to turn a wrench! Progress though so we're happy. Ran out of time so the turbo and intake mani will have to wait for next weekend.
Last edited by m81mclaren; 08-22-2017 at 05:35 PM.
Current FEP:
1980 M81 McLaren Carb Turbo 2.3T #003P ... IT'S ALIVE after a 22 year slumber thread!
Past FEP:
1986 Capri GS 5.0- very missed but in goods hands
1985 LTD SSP- quick little fox 5.0

http://bringatrailer.com/listing/198...-mustang-m-81/
Amazing cars.

I wish you good luck with your car they are such a Kool car Keep us posted on your progress
IF ITS FORD POWERED YOU GOT TO LOVE IT

Great to see your patience and hard work! Don't loose any of those original parts!!!
It's nice to see your son is so inspired - you can tell in the photos of him.
Such a great car! Thanks for sharing.
2007 SL55 - Capri Blue - Leather, 487/560 WHP/WTQ at 13.5PSI
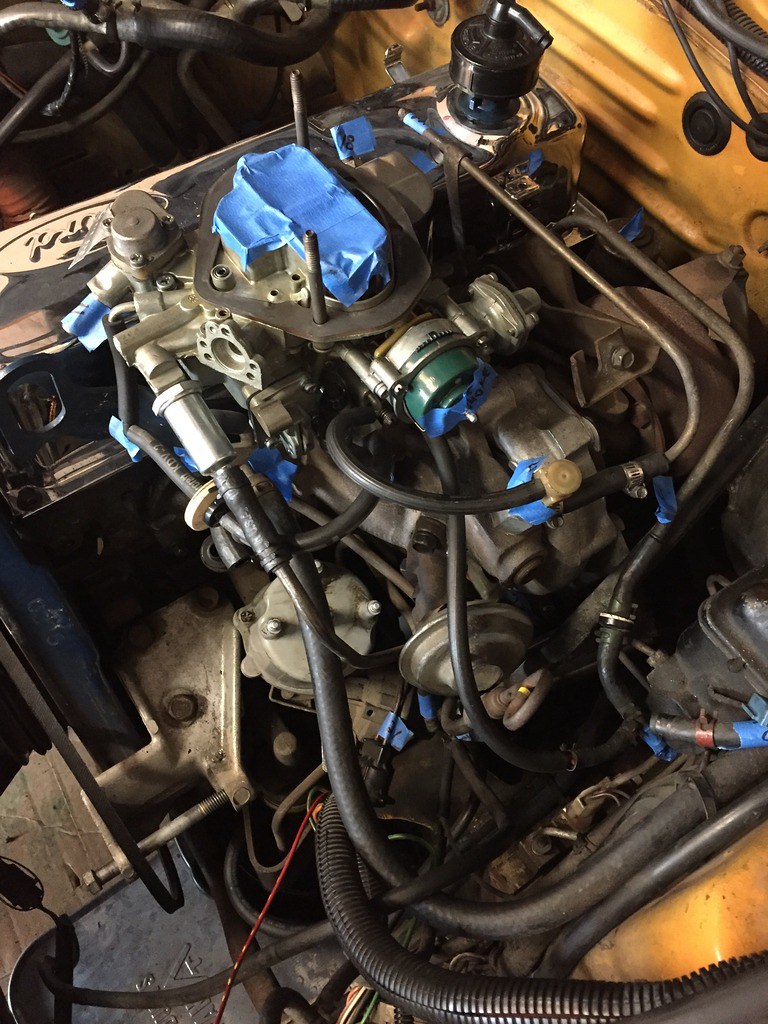
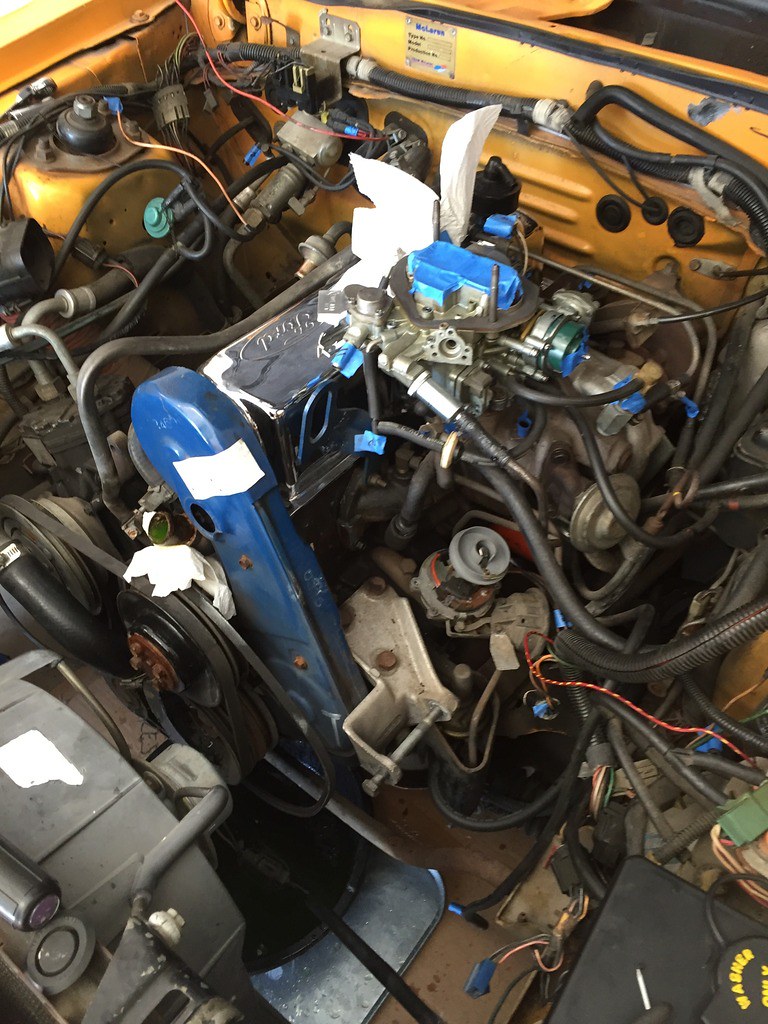
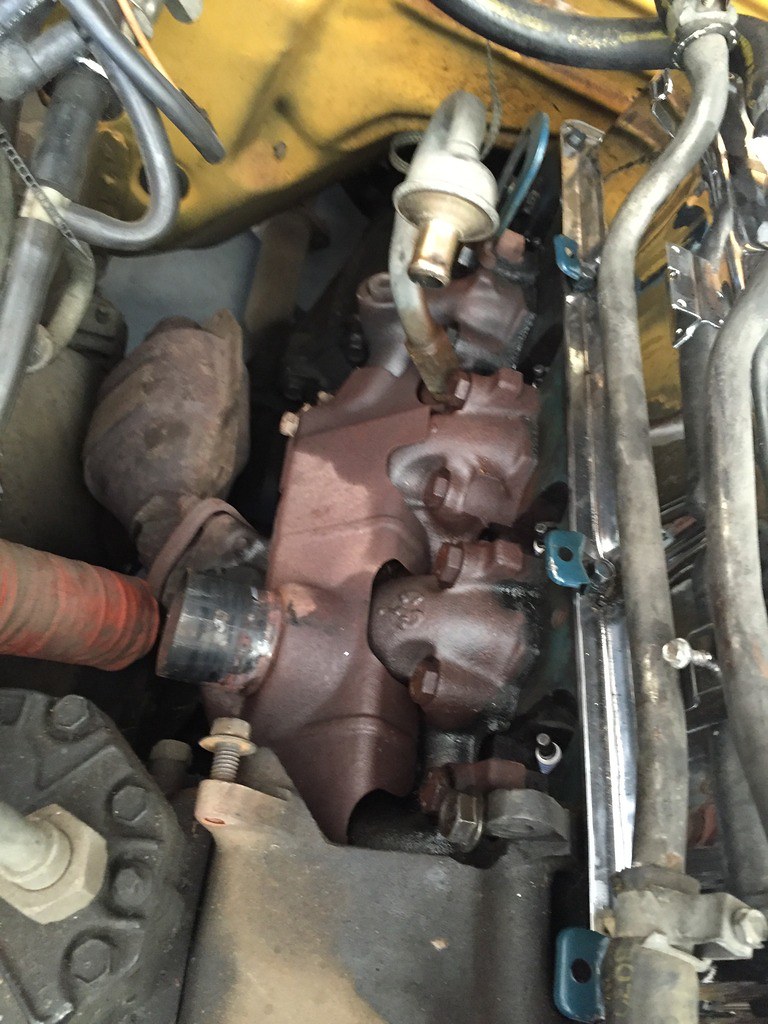
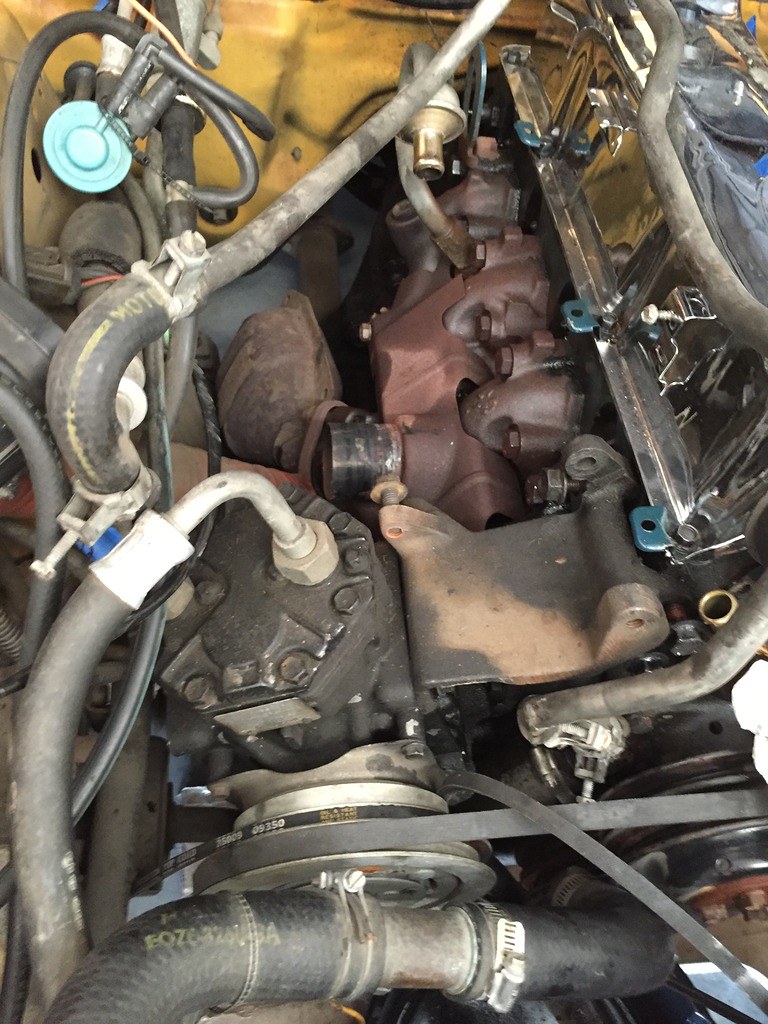
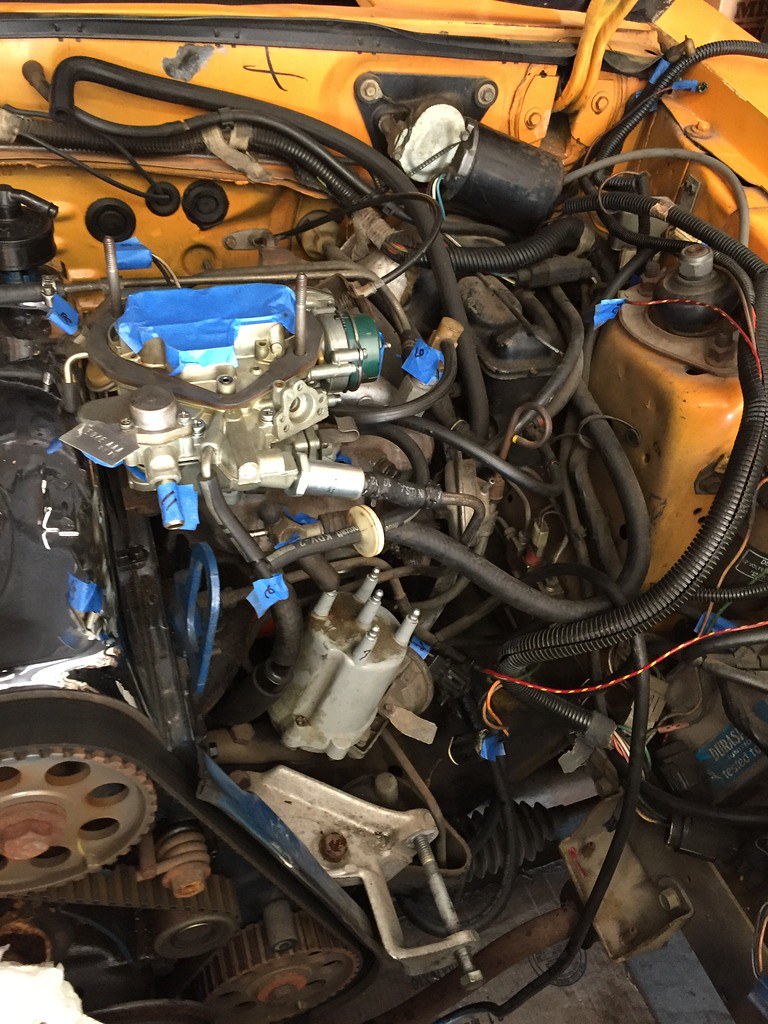
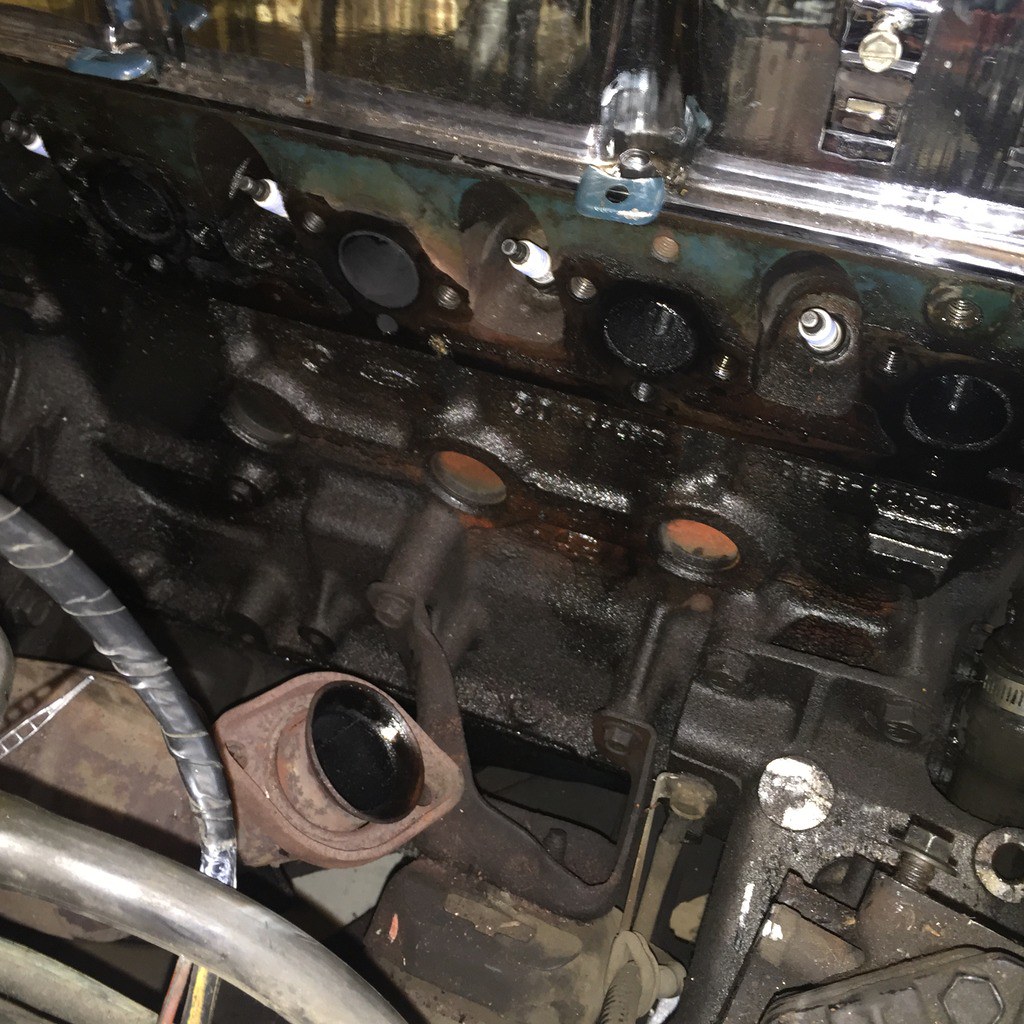
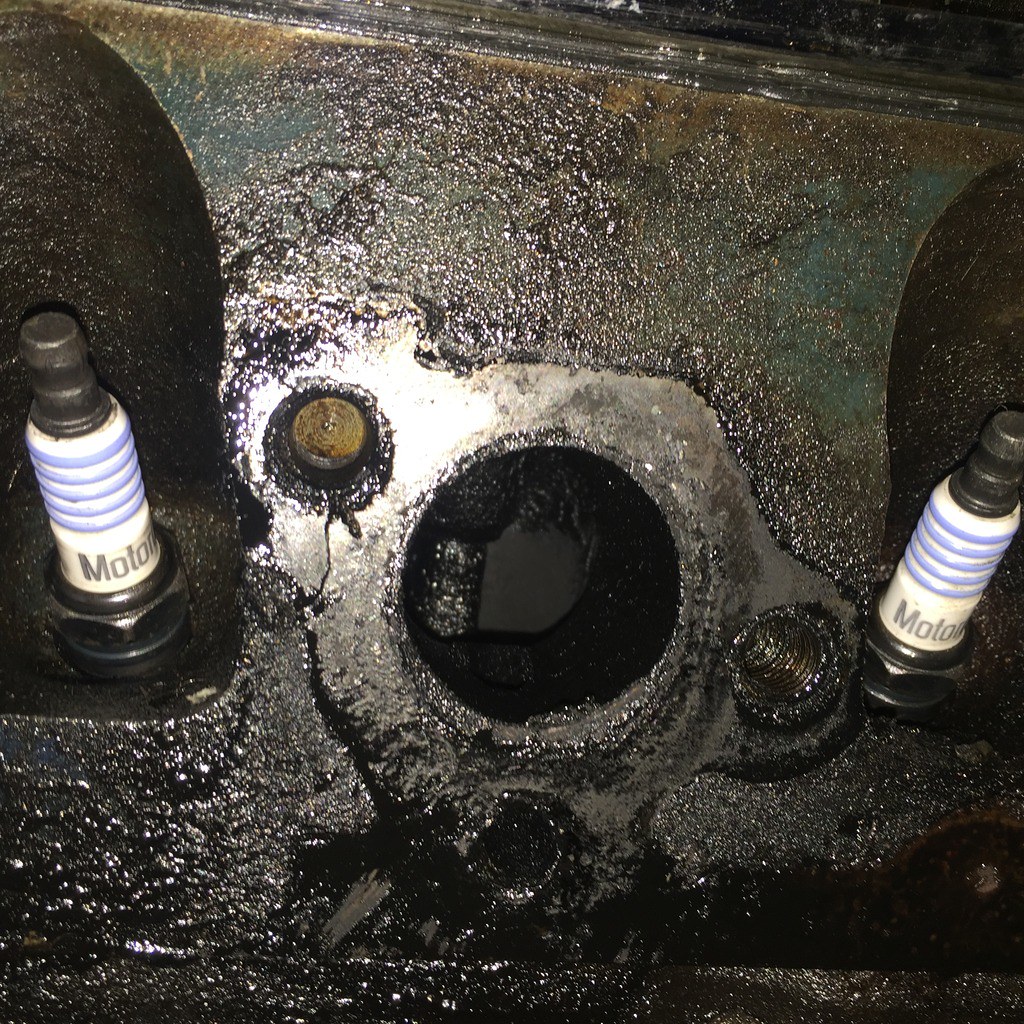
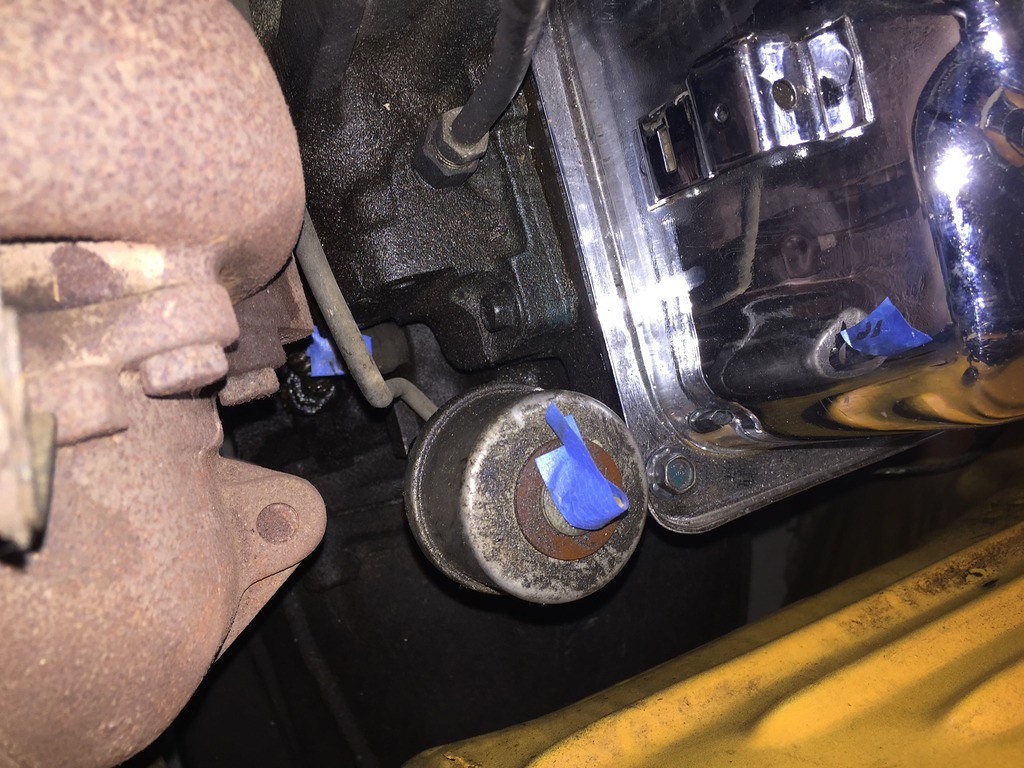
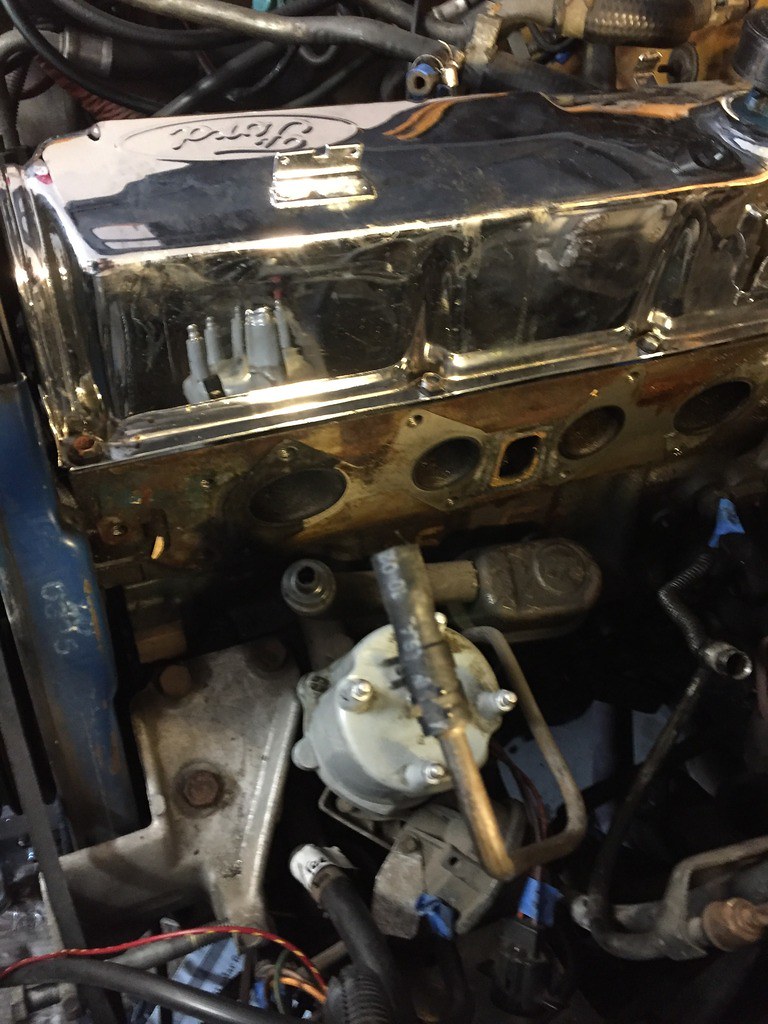
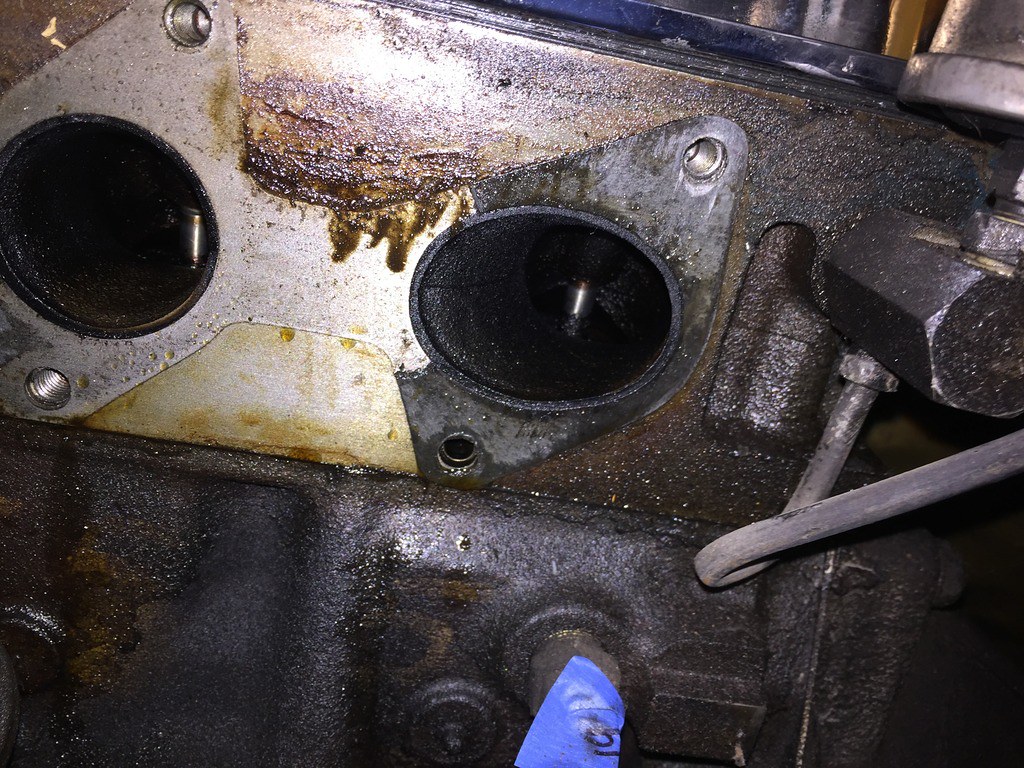
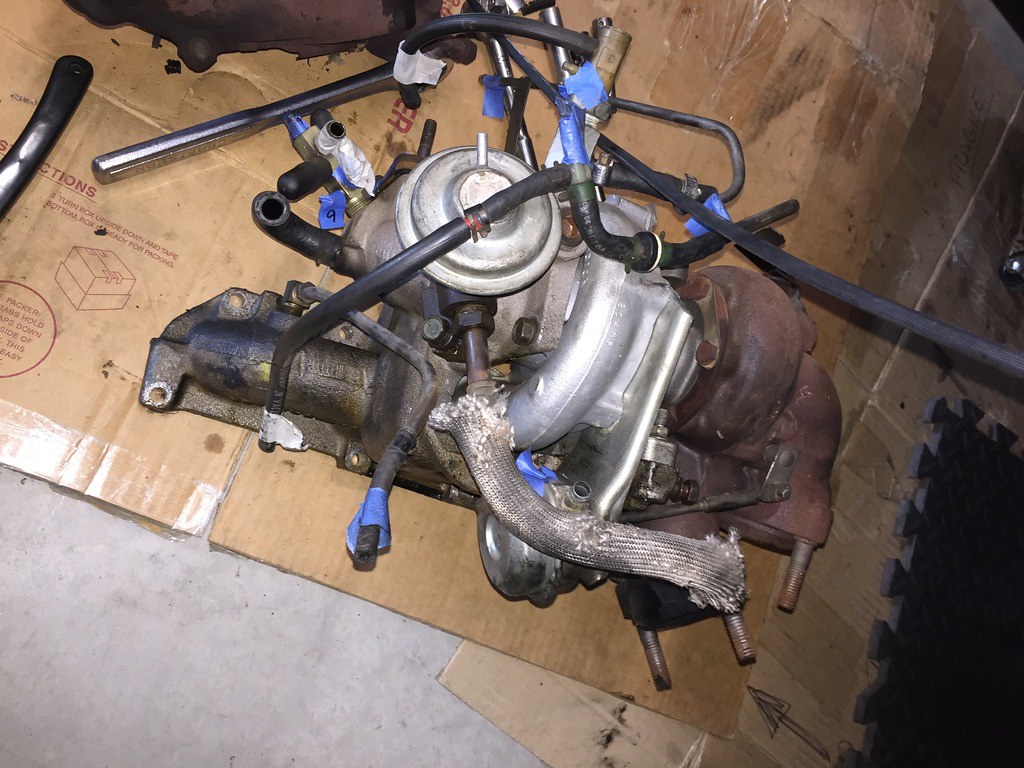
It's been too long but here's an update on the McLaren. Today my son and I finally got the intake manifold and Turbo out as a unit. It was very challenging as the mani bolts are tucked tight and out of the way with the turbo and mount blocking most access. Small wrenches, extensions and swivel socket elbows were absolutely the only way to get it done. Took about three hours too and only minor damage; a stripped bolt for a line to the turbo which I'm sure is NLA. If anyone is considering this job on their turbo 2.3 I'd highly suggest just pulling the engine. It will save you time and give you 10x better access not to mention saving body wear and tear!
Next time we'll get the head off and inspect then decide best path forward. One to some pics...
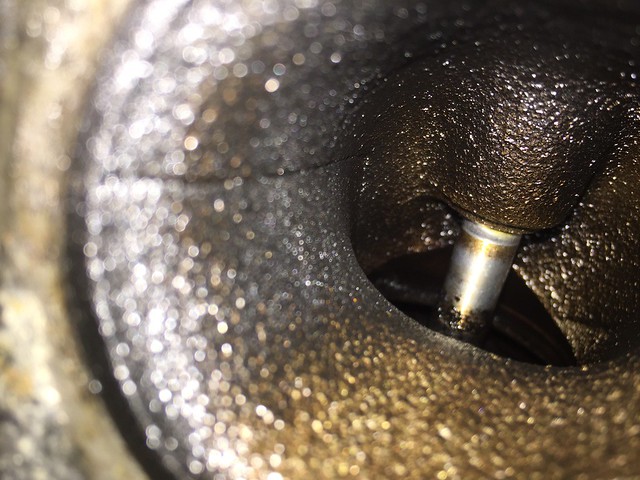
And here is the line I stripped the head on but will still able to get off. Will need to find a replacement.
I'm icing the back and neck now but feel satisfied with the progress we've made today and looking forward to taking that head off. A great day with my son wrenching is one of the best kind you can have!
Last edited by m81mclaren; 08-22-2017 at 05:57 PM. Reason: fix images that did not copy over correctly
Current FEP:
1980 M81 McLaren Carb Turbo 2.3T #003P ... IT'S ALIVE after a 22 year slumber thread!
Past FEP:
1986 Capri GS 5.0- very missed but in goods hands
1985 LTD SSP- quick little fox 5.0
That's the trade off for an extra 50% more power! The complication is like 70 cubic inches of hard ware to make the power of a car with 210 cubic inches.
Metric threads and quasi German engineering with Ford USA's big bore spacing block and best draw through turbo.
Its tighly compacted all around the engine for sure, and thats why its so hard to access everything.
It was that way because Ford US engineers felt a blow through turbo was at risk of developing an internal fuel leak. Butcha know, I think Ford Dearborn were right with the M81...the Feugo turbo was a carb turbo car that proved blow throughs for America were a bad idea.
It was either electronic fuel control carb, EFI or draw through, no fourth option.
http://www.ascmclarencoupe.com/Liter...ust1978_06.jpg
On all the early carb turbo European Fords, the Finnish Sierra 1.6 liter cars, the Broadspeed Capri, the first RS1600 Turbo prototype, the Zakspeed Capri 2.8 Turbo, it was Weber or Solex 2-bbl carbs, and they survived just fine with signifcant power boosts. 67% for the 3.0 v6, 40% for the 2.8, and a reported 25% for the 6 psi boost 1.3/1.6/2.0 carb turbos.
Last edited by xctasy; 02-19-2017 at 04:34 AM.
About Respect https://www.youtube.com/watch?v=2bk9WG8KWW0
X's Album http://vb.foureyedpride.com/album.php?albumid=2922
Oz JPS Stang http://www.nzmustang.com/Images/Hist...cecars/jps.htm
4V (A)US Race V8's https://www.youtube.com/watch?v=Tqk18A-ibjA
ITZOLD 81 Fox http://vb.foureyedpride.com/showthre...-fun-and-games
6V i6's @ http://www.xecltd.info/?rd=10 ; AWD i6's @ http://www.apetracing.co.nz/
113 mph 84 5.0 at Amaroo https://www.youtube.com/watch?v=iTezv3Pzdls&t=8s
Techno KCM Loop Out: Severed Heads 1m³ Angels 1985 https://youtu.be/Wll6G1KpLqQ
Future Shock https://youtu.be/rDKGkWU0lWQ
 Posting Permissions


 Reply With Quote


Connect With Us