


[QUOTE=1qk50;905337]Sweet!!!!! What steering wheel is that and what kind of door skins are those?
I have to agree you did a really excellent job in the interior or the car
~LES~
157 HP @ 4200 RPM
240 ft/lb @ 2400 RPM
"Yeah Baby Feel That Pure Power"
Capri:
Is a Mustang With Hips And Class

If i use all autometer gauges can i eliminate all the wires going to the stock gauge cluster?
84' notch
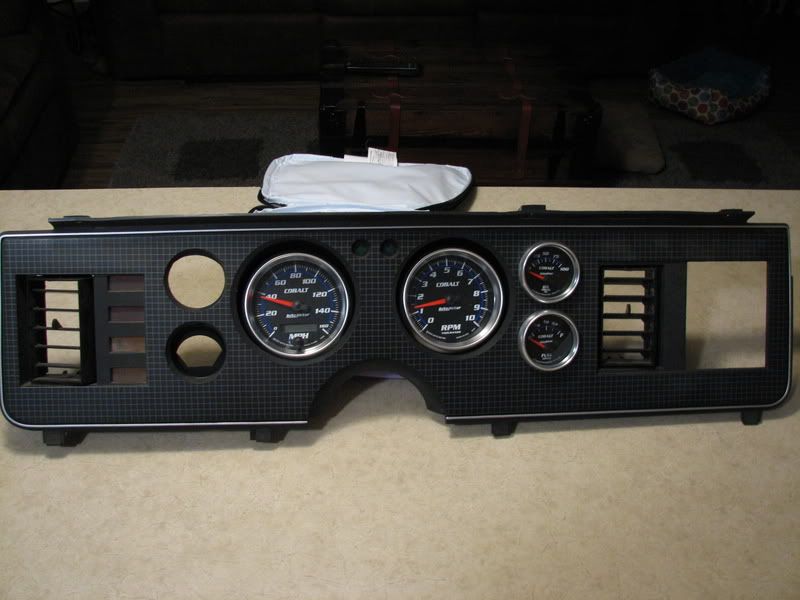
Here's mine with cobalt gauges. Still a rough mock up but you get the idea.
32v 86 coupe under construction
http://vb.foureyedpride.com/showthread.php?t=63991

Any more pictures of the seats? What brand and model are they?Originally Posted by 69clark

--Vince
+ Jalapeño Red 1985 Mustang GT, 347 in^3, Canfield heads, 650DP, X-Celerator, & 1-5/8" LT's
+ Tremec 3550, D&D shifter, 3.73:1 gears, & TrueTrac differential
+ EVM watts & 3-link, Homemade LCA's, & Koni SA's
+ '00 Cobra R Brembos in front and SN95 Cobra rear brakes, R58 rims, & 275/40R17 Falkens
www.1985mustanggt.com

I don't actually have other pics that I have taken, but I found this pic on the net. They are Sparco Chrono road. I love them and they are a little bit different design then most seats you normally see.
http://www.sparcousa.com/pseats_street.asp?id=645
Tom
CAMMED & SLAMMED! For more build pics and updates: http://www.facebook.com/SINISBuilt
For being "BUILT not BOUGHT" I am still broke!
I thought they were Sparco's. What did you need besides the seats? Base, sliders, etc...
Thanks,
Vince
+ Jalapeño Red 1985 Mustang GT, 347 in^3, Canfield heads, 650DP, X-Celerator, & 1-5/8" LT's
+ Tremec 3550, D&D shifter, 3.73:1 gears, & TrueTrac differential
+ EVM watts & 3-link, Homemade LCA's, & Koni SA's
+ '00 Cobra R Brembos in front and SN95 Cobra rear brakes, R58 rims, & 275/40R17 Falkens
www.1985mustanggt.com
Well, I custom fabbed some adaptors to bolt them in. I didn't want them high in the car like some aftermarket seats tend to be so I skipped out on the sliders to keep them lower in the car.
Tom
CAMMED & SLAMMED! For more build pics and updates: http://www.facebook.com/SINISBuilt
For being "BUILT not BOUGHT" I am still broke!


I changed my setup and am now working on this one. Got the gauge cluster modified, just need to locate some bulbs and wire it all up. I plan on installing it either tomorrow or Friday.
?????????
84' notch
Yes
Bitchen, thanks.
84' notch
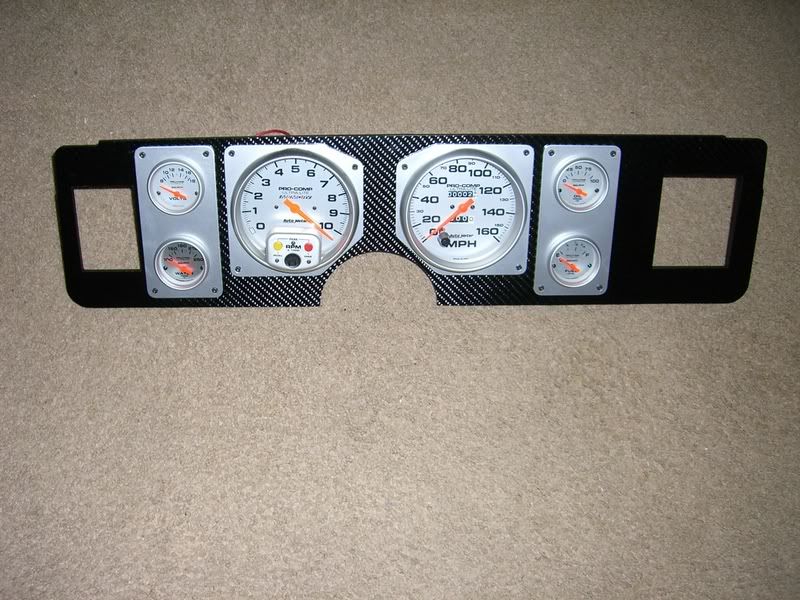
Alright, been working on this for a couple days, here is what I have so far:


^^^ SWEET l got to do that to my 83 ^^^

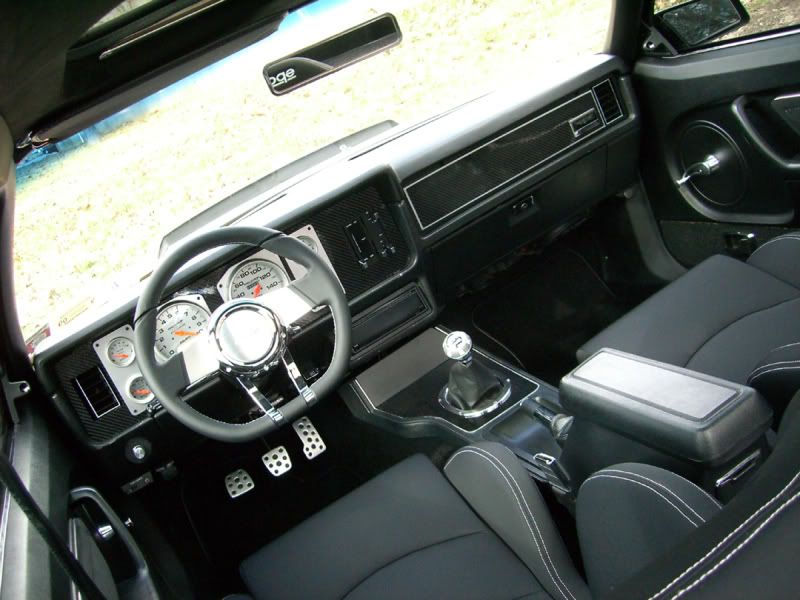
Dude! Your interior is SICK!!!!!!!!! AWSOME Job!
1986 GT Convertible
1986 Mercury Capri RS (1st Project)
2007 F150 Fx4 - Daily Driver
2004 Harley Davidson Fat Boy
2004 F150 Lariat (Had)
2001 F150 Lariat (Had)
1997 F350 (Had)
1997 Explorer Limited (Had)
1993 Lincoln Mark VIII (Had)
1984 1/2 GT 350 - "The Begining" (Had)
Finished my gauge cluster upgrade and installed it. Made a harness so I could plug-n-play it. It's even using factory Ford connectors
And the finished product installed in the car. I kept the Autogage tach because it has a working shift light. Until I can get an RPM box that I can connect my mini-shift lite to, I'll keep it like it is:


looks good.

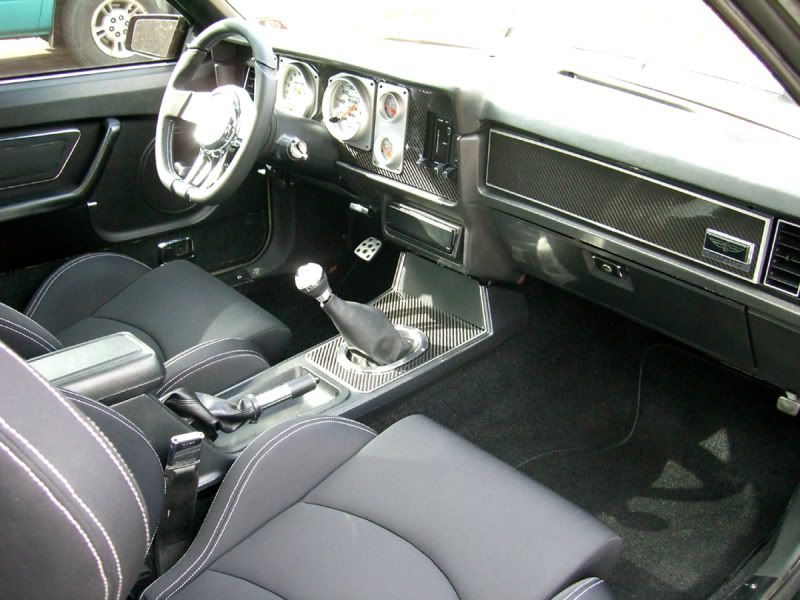
did you have a mechanical drawing to lay out your new dash plate? eventually i want to do the same thing with either carbon fiber or aluminum and im curious if there is a mechanical drawing out there someplace. it will be much easier to mill out off a good drawing rather than the napkin sketch i will end up doing.

That's exactly how I did mine, Rob. I didn't re-use my stock bezel...I used an ebay-acquired piece, formerly woodgrain that I painted. I used my hole saw to cut the 4 small gauge holes to 2 1/4" so it's easier to see them. I love it...looks stock.
Ed
"The Dude abides."
Show us some pictures!
--Vince
+ Jalapeño Red 1985 Mustang GT, 347 in^3, Canfield heads, 650DP, X-Celerator, & 1-5/8" LT's
+ Tremec 3550, D&D shifter, 3.73:1 gears, & TrueTrac differential
+ EVM watts & 3-link, Homemade LCA's, & Koni SA's
+ '00 Cobra R Brembos in front and SN95 Cobra rear brakes, R58 rims, & 275/40R17 Falkens
www.1985mustanggt.com

cobalt
sexy
now i want
man that looks god
Stable:
03 DSG GT, CAI, EXHAUST, TUNE, BLACK 03 COBRAS, Best ET: 13.98 @ 99.85
93 Strawberry LX Coupe.. roller..... for now.........
:werd: I'd like to see some pictures of it as well!!
This is all I have right now...taken for unrelated purposes. I'll take some more after I paint it grey to match interior.
My major gripe using these as a daily driver is when the weather is crappy and rainy out, they start to fog up. Sorry design I guess.
Last edited by grtskydog; 01-06-2010 at 05:42 PM.
Ed
"The Dude abides."
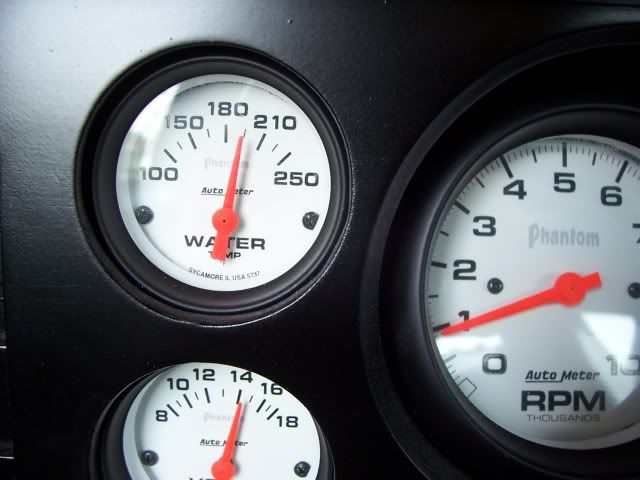
I like the way the bigger hole looks, I might have to do that.
Yea, I've noticed that as well, but it only happens on a couple of the smaller gauges. I think my roommates Autometer gauges do the same thing in his LS1 FD.
The trick is to run a little hobby filler putty inside the rings after you hole-saw it. That fills in all the porous areas where you cut the plastic. Just do that and sand it smooth.
I guess I'm glad I'm not the only one that has that issue. I'll trade that little nuisance for reliable instrumentation any day. If I get to in the next few weeks, I'll finish priming/painting that bezel and take some better pics.
Last edited by grtskydog; 01-06-2010 at 05:49 PM.
Ed
"The Dude abides."
 Posting Permissions


 Reply With Quote
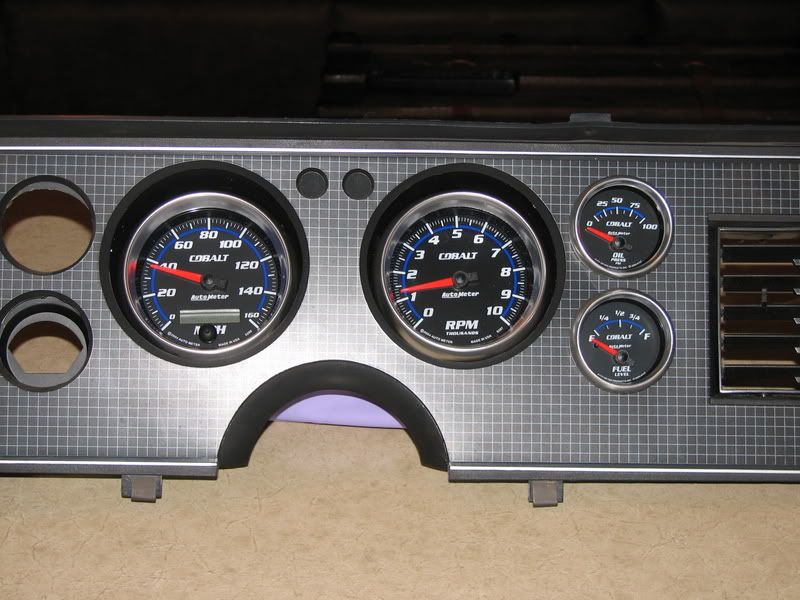


Connect With Us