Close


Page 3 of 6 FirstFirst 12345 ... LastLast
Results 51 to 75 of 131
  1. #51

    Default

    I can't answer that. This dash was an 81 dash or so that I had pulled from the junkyard and installed into my 86 vert, then pulled it again at a later date so as to install the correct dash with the right radio opening

    of course I then never installed the right radio after all that, lol......

    so when this dash went in, it likely got a grab bag of whatever screws I had laying around.
    Jeremy
    -86 mustang SSP X CHP Unit # 3788-bone stock & staying that way
    -66 Mustang, bench seat car,8.8,t5 fuel injected 92 engine
    -72 Maverick 5.0 resto in process
    -12SS Camaro 6 speed. 600 FWHP, Kraftwerks Supercharger
    -03 z71 Avalanche 9" lift on 35s Daily Driven 20k a year. 290k miles at 11.8 mpg
    Entire 1986 electrical and vacuum troubleshooting manual download
    http://slantnosefox.com/picturehosti...g%20manual.zip

  2. #52
    FEP Power Member blue beast's Avatar
    Join Date
    Jul 2005
    Location
    Green Bay, Wisconsin, United States
    Posts
    1,908

    Default

    wow! nice write up, i removed it all piece by piece last summer...wish i didnt as it fell apart in the process and i dont know exactly how to reinstall it, but hpefully wont be an issue as ill be using the cougar dash (fingers crossed)
    82 Mustang GT
    T5, 8.8
    Holley 650
    Performer 289
    BBK Shorties & H-Pipe
    Waiting for a Foureyed of the month vote!!!

    Current Project: 1980 Project Green Machine

    1999 Ford Taurus SHO DD

  3. #53

    Default

    Nice write up. Very informative. Thanks for posting.

  4. #54

    Default

    Thank you v8only for posting this for us!!!!

  5. #55

    Default

    Very good write up.. kudos
    four 5 Customs - Custom Upholstery StL

    85 Hatch 5oh EFI transplant
    93 LX Vert.... Deceased

  6. #56

    Default

    Quote Originally Posted by JACook View Post
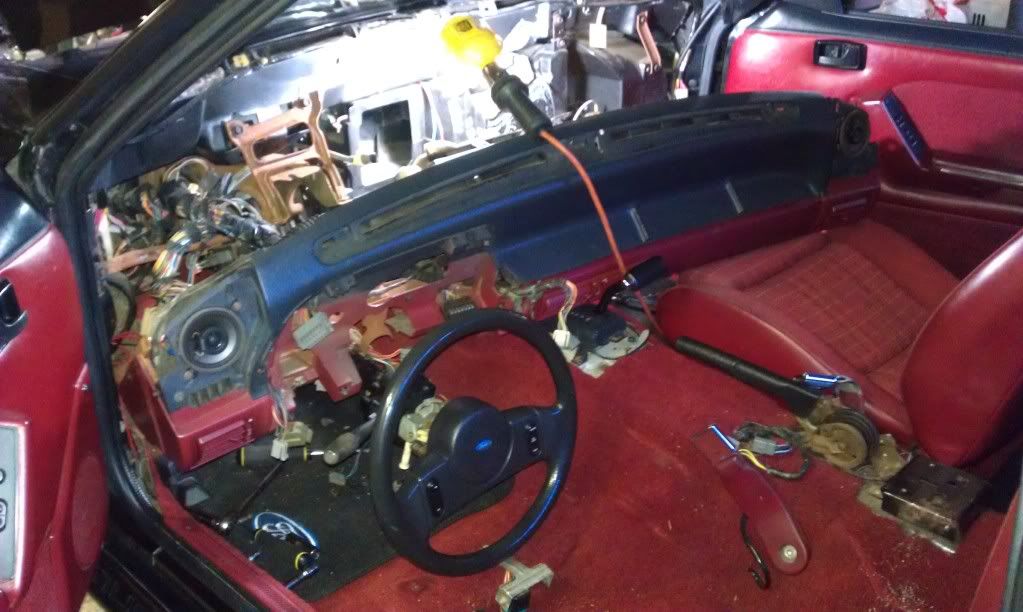
    The first trick is knowing what you need to reach. The dash assembly was designed
    to be installed (and removed) as a complete assembly. You don't even need to take
    out the instrument cluster or radio, if it's still using factory wiring. Most guys really
    overwork themselves trying to leave the harness in the car. You've got basically
    six groups of things that need to be disconnected to get the whole dash out with
    the harness, radio, and ductwork, still in it.

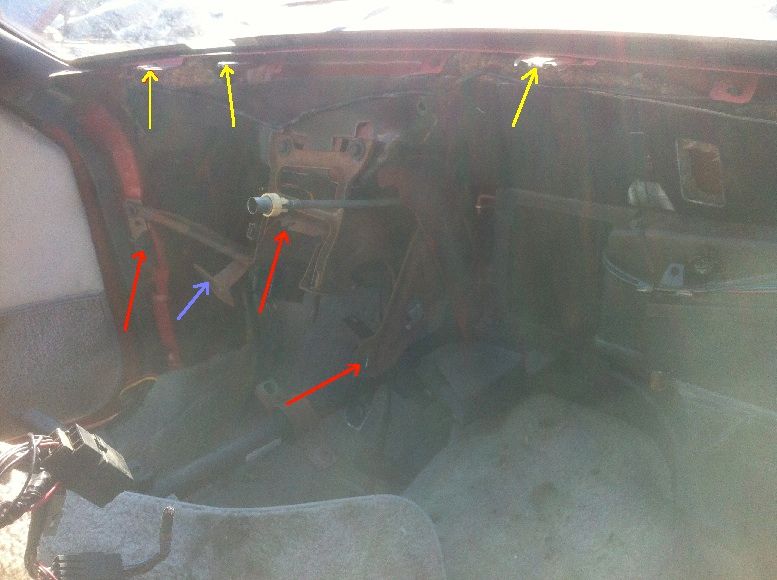
    There is a group of connectors in the left side cowl area, behind the kick panel, and
    also the foglight switch and indicator connections, if you have 'em.

    The next group of connectors goes to the switches on the steering column, the interval
    wiper control module, if equipped, and the brake light switch.

    There's another group of connectors in the area of the cowl-to-transmission-tunnel brace
    behind the radio, and also the radio antenna cable, and the connectors at the forward
    end of the console, if equipped. The console does not have to be removed, but it does
    make it a bit easier to get to it's connectors.

    To the right of the glovebox, there's a couple more connectors, more or less, depending
    on year, model, and options.

    Then you have the cables to the blower motor resistor and the blower motor itself,
    the heater temp control mechanical cable, and a vacuum hose harness plug.

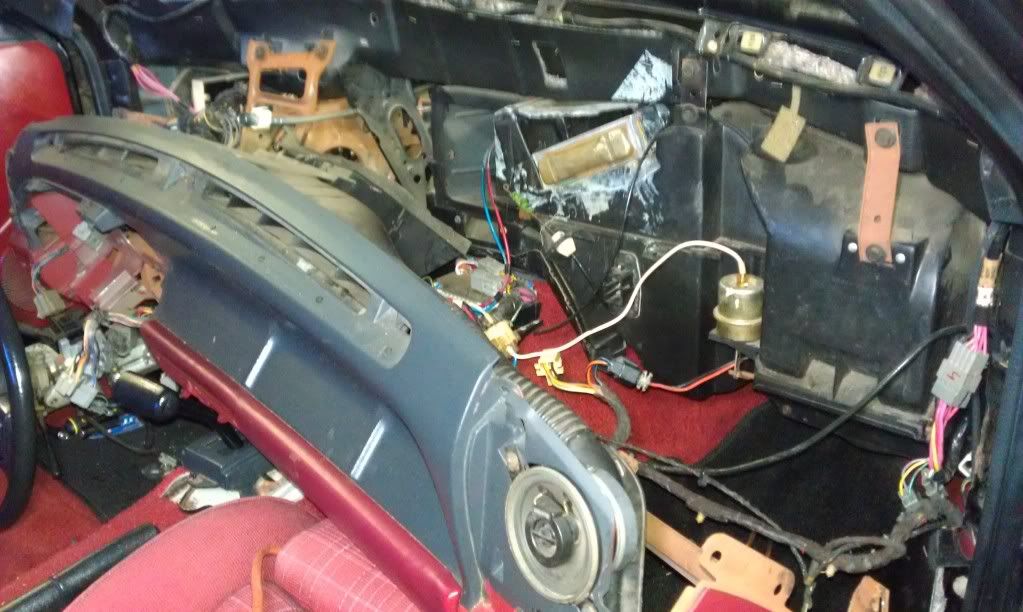
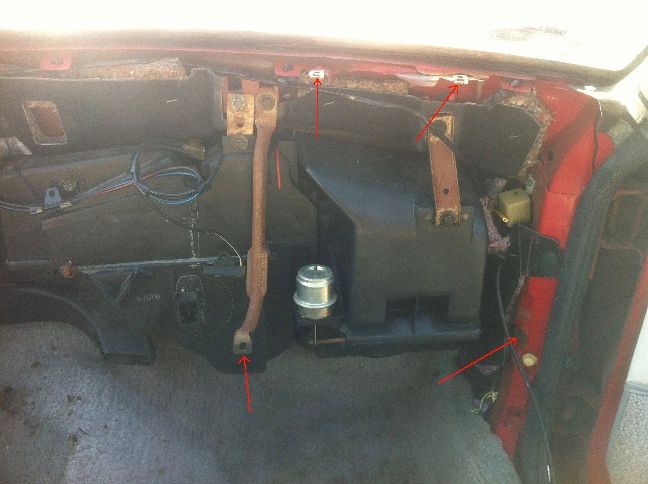
    Finally, there's another group of cables up over the top of the porkchop brace, buried
    up behind the instrument cluster area, as well as the speedometer drive cable.

    That last group is the only one that's a bit of a pain, because there is no access hole
    behind the instrument cluster, or in the top of the dash. You have to unbolt the dash,
    pull it back away, and tilt it down. Then reach in behind to disconnect the speedometer
    cable and the four harness connectors on top of the porkchop brace. Once those are
    undone, you should be able to pull the entire dash out of the car.

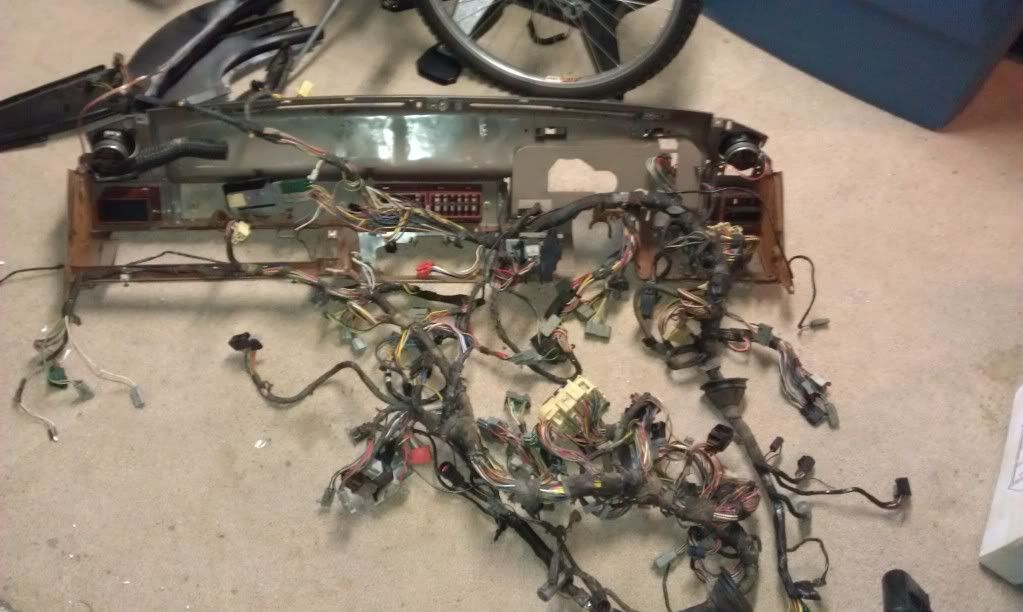
    One tip about all these connectors- They are old and kinda brittle, and the locking tabs
    Ford used are a complete pain. If you end up breaking any locking tabs, and you will,
    you can use tie-wraps to secure the connectors when you put them back together.

    I also like to put a bit of dielectric grease in each female connector pin before I plug
    things back together. If you have the dash out, it's a good idea to do that to all the
    connectors before you put the dash back in the car.
    Just wanted to reiterate this^^^^^ This write up is waaayyyyyy too much work. There is no reason to remove the instrument cluster, surround, headlight switch, HVAC controls, speakers, none of that. What a LOT of extra work. You remove the dash by unplugging the few harnesses and take it all out in one piece with the wiring harness intact. The HVAC vacuum harness unplugs right behind the glovebox . That is how it is designed to be removed.
    Liberty once lost is lost forever.

    John Adams
    July 7, 1775

  7. #57
    FEP Senior Member GIXER7502006's Avatar
    Join Date
    Dec 2011
    Location
    Lehigh Acres Fl
    Posts
    536

    Default

    doing this later today and want to mark it for future reference

    thanks homer for saving me some work
    stock 00 explorer 5.0 with 120k,comp XE274HR cam Edelbrock preformer air,fms shorty headers,x pipe and 40 series,under drive pullies, fresh t-5,king cobra 10.5 clutch,Hurst short throw shifter,fms alumin drive shaft, bbk frame conectors, 8.8 4;10 , MM camber caster plates, MM XD ADJ lower control arms

  8. #58
    FEP Senior Member Matt J's Avatar
    Join Date
    Jul 2012
    Location
    Georgia
    Posts
    620

    Default

    Thanks for this thread, it really saved my butt, and allowed me to get the chipmunk/squirrel/mouse mess out of the heat duct. Great reference!

  9. #59

    Default

    Thank you so much for the write up! saved me some time and from taking too much apart. I've been lurking here for some time now but decided to create an account to express my gratitude for this write up and the heater core one. now im so confident that i have no worries next time i take one apart to do my interior swap.

  10. #60

    Default

    Oh, so this is where I got the write up from about 2 months ago. This was key to helping me get to the heater core AND putting everything back together properly

    So, thanks to the OP

  11. #61

    Default

    Glad its still doing good for you all
    Jeremy
    -86 mustang SSP X CHP Unit # 3788-bone stock & staying that way
    -66 Mustang, bench seat car,8.8,t5 fuel injected 92 engine
    -72 Maverick 5.0 resto in process
    -12SS Camaro 6 speed. 600 FWHP, Kraftwerks Supercharger
    -03 z71 Avalanche 9" lift on 35s Daily Driven 20k a year. 290k miles at 11.8 mpg
    Entire 1986 electrical and vacuum troubleshooting manual download
    http://slantnosefox.com/picturehosti...g%20manual.zip

  12. #62
    FEP Senior Member
    Join Date
    Nov 2005
    Location
    Winnsboro, SC
    Posts
    559

    Default

    I need to be able to find this later

  13. #63
    FEP Power Member
    Join Date
    Jul 2009
    Location
    Atlanta, Georgia
    Posts
    2,361

    Default

    This look so much easier than the various threads on remving Aero Fox dashes. The 87-93 cars look like a huge PITA!

  14. #64
    Neither here nor there
    Capriman86's Avatar
    Join Date
    Mar 2003
    Location
    N.Smithfield, RI
    Posts
    17,648

    Default

    I have done both now and to be honest, one isn't any more harder than the other, once you have done 1 it's not as hard as it seems and the second one goes much quicker.

    Taking the whole DASH out scared me on our Aero, but it still wasn't THAT bad.
    I had to replace the dash harness as there was a bunch of shorted wires, along with the last owner doing a redneck heater core change and needed an new heater box.


  15. #65

    Default

    I have done both aero and 4 eye and think the aero is a little easier, but neither one is too bad. Nice write up Jeremy

  16. #66

    Default

    Is that remnants of duct tape on the heater box area? Yikes!

  17. #67
    FEP Power Member kj_80Cobra's Avatar
    Join Date
    Feb 2006
    Location
    Harrisonburg, VA
    Posts
    1,604

    Default

    Quote Originally Posted by teddy1500 View Post
    I need to be able to find this later
    Subscribe to this thread. Go up to the top of the page and click on Thread Tools, click on Subscribe to this Thread, follow instructions. Later on to find this thread, click on Quick Links at the top of the page and click on Subscribed threads.

  18. #68
    Neither here nor there
    Capriman86's Avatar
    Join Date
    Mar 2003
    Location
    N.Smithfield, RI
    Posts
    17,648

    Default

    Quote Originally Posted by poetnprophet View Post
    Is that remnants of duct tape on the heater box area? Yikes!
    There is all sorts of WTF in there....LOL

  19. #69
    FEP Power Member grtskydog's Avatar
    Join Date
    Sep 2003
    Location
    Carolina Beach, NC
    Posts
    1,567

    Default

    I'll jump in here and second what Jeff and homer said earlier on. This is a pretty easy job and many steps from Jeremy's original post are not required. I just acquired a pristine dash from an 85 at the pick-n-pull today. Thanks to this thread, I probably spent 1.5 hours pulling this dash (I could do it much faster now). I removed five 11mm bolts under the dash, and five 7mm hex-head screws from the top of the dash. --See pics-- Four 9/16 nuts come off the studs that hold the steering column up, plus the 2 holding the hood release on those studs. My donor was a vert, so there was a "gotcha" screw holding the courtesy lamp bracket to the dash near the fuse box.

    Once these were removed and the column dropped, it was easy to reach back and disconnect the speedo cable. There was plenty of room to reach back and disconnect the HVAC vacuum lines (a dedicated disconnect, not the back of the controller), and you can remove the heater/mixer cable at the ducting...not at the controller, it stays put. In my case, I took all the wiring/ducting with me, so there were no broken tabs...I cut the wires and kept both ends of the terminals (muah-hahahaha!) Now I can take my time restoring this dash (NOT breaking terminal tabs), reinforcing it, and rewiring it with the help of the diagrams on this site.


    This is the driver's side...not the best pic due to sun glare. The red arrows are the 11mm bolt locations...1 by kick panel, 1 above steering column, 1 on the brace by the radio. The yellow arrows are the ones on top of the dash. Jeremy's pics show philips head screws, but these were 7mm hex screws. There were only 5 and they were the 5 I needed to pull. The blue arrow is the "gotcha" I mentioned. It's where the screw holding the courtesy lamp went through the dash hull.


    Here's the passenger side. You can see up top where the other 2 screws were. The 11mm bolts were under the glove box and by the kick panel. Easy as pie.

    Hope this adds to the thread about pulling dashes out. I know it helped me, so I'm giving back.
    Last edited by grtskydog; 02-03-2013 at 05:58 PM.
    Ed

    "The Dude abides."

  20. #70
    FEP Super Member K PONY's Avatar
    Join Date
    Oct 2006
    Location
    Oakville, Ontario
    Posts
    4,303

    Default

    Dashes were a sub assembly built off from the main assembly line and came ready built to the mainline with all the wiring, cluster, radio, HVAC controls... a line side operator installed 60-65 dashes per hour
    Past Mustangs:
    1965 "K" Code Coupe... 289/271HP 4 speed Poppy Red
    1986 GT... Canyon Red 5 speed
    2002 GT... Silver Automatic
    2003 Mach 1... Azure Blue 5 speed

    Current Cars:
    1986 Mustang LX 5.0L Coupe
    1996 Escort LX 2 Door
    2011 Ford Fusion SEL

  21. #71
    FEP Power Member grtskydog's Avatar
    Join Date
    Sep 2003
    Location
    Carolina Beach, NC
    Posts
    1,567

    Default

    LOL, no doubt. Now here I am 28 years later taking an hour and a half to pull just one, knowing if I look at it wrong, I'll crack something. This one wasn't too brittle, though. Must have been a garage queen. I lucked out...usually at the yards, guys tear up a good dash trying to get to something else, or just don't know how to properly remove one.

    I'll be the blind squirrel on this one.
    Ed

    "The Dude abides."

  22. #72

    Default

    Quote Originally Posted by grtskydog View Post
    I'll jump in here and second what Jeff and homer said earlier on.

    Hope this adds to the thread about pulling dashes out. I know it helped me, so I'm giving back.
    Thanks for posting up! I was also trying to help when I posted a long time ago. The original post adds at least 40-50 minutes to the project for no reason. I'm not perfect, that's for sure. We ALL still have a lot to learn. I wasn't trying to insult the OP, just educate. Nobody knows everything about everything as they say.
    Liberty once lost is lost forever.

    John Adams
    July 7, 1775

  23. #73

    Default

    I only wasted about 30 minutes playing with the dash before I spent another 30 minutes finding this thread. Thanks OP!

    Sticky this>
    Last edited by ry4ns302; 04-10-2013 at 06:48 PM.

  24. #74
    FEP Super Member IDMooseMan's Avatar
    Join Date
    Oct 2011
    Location
    Nampa ID 83686
    Posts
    4,923

    Default

    I have this one subscribed for future reference.
    Craig "IDMooseMan" Peters
    1979 Mustang Ghia Notchback, 2.3L, Holley 5200, 4-spd, 3.08:1 7.5" diff, A/C, PS, PB, AM/FM/8-Track, Sunroof, Rear Defroster
    USAF SSgt 63170 1983 - 1992; Co-Founder, Vice President, Omega Delta Sigma, ID-A 2/2015
    To those that serve and have served, "Thank You", to those that haven't, "You're Welcome"
    2.3L Horsepower Potential Thread
    Buyer/Seller Experience Link
    Build Thread
    The Four-Eyed Game - 2018 Version

  25. #75

    Default

    Thanks to this thread, swapping the heater core in my Fairmont wagon was a LOT less of a headache than I thought it would be. To reward myself, tomorrow I will at least start swapping the heater core in my 80 Thunderbird. Yea?

Page 3 of 6 FirstFirst 12345 ... LastLast

Tags for this Thread

Posting Permissions

  • You may not post new threads
  • You may not post replies
  • You may not post attachments
  • You may not edit your posts
  •