Close


Page 2 of 6 FirstFirst 1234 ... LastLast
Results 26 to 50 of 131
  1. #26

    Default

    when I did my dash, Im so glad all I needed was the cluster face and dash pad. Everything else was just cut or ripped out. Nice way to drop 50lbs of wiring and heater box.

    If not that route, a very nice write up, def a job you dont want to have to do again
    86lx coupe
    351w.....its just a truck motor

    captain cave man racing!!!

    faster than your first sexual experience

  2. #27

    Default

    I thought all the pics would be fixed....if I get a chance I'll go through that article later and fix the pics
    Jeremy
    -86 mustang SSP X CHP Unit # 3788-bone stock & staying that way
    -66 Mustang, bench seat car,8.8,t5 fuel injected 92 engine
    -72 Maverick 5.0 resto in process
    -12SS Camaro 6 speed. 600 FWHP, Kraftwerks Supercharger
    -03 z71 Avalanche 9" lift on 35s Daily Driven 20k a year. 290k miles at 11.8 mpg
    Entire 1986 electrical and vacuum troubleshooting manual download
    http://slantnosefox.com/picturehosti...g%20manual.zip

  3. #28
    allenpul
    Guest

    Default

    Thanks was wondering what happened to the pics too...

  4. #29
    FEP Senior Member 86GTdriver's Avatar
    Join Date
    May 2007
    Location
    Norfolk, VA (again)
    Posts
    535

    Default

    I'm about to do a dash removal myself here in the next couple of months. I subscribed to this thread and was hoping to use it's pics as reference and the accompanying heater core thread to get this done on my GT.
    '86 Mustang GT T-Top, 5-lug Cobra brake swap done
    '96 Mustang Cobra 302rwhp 296rwtq, Sold and missed
    '11 Mustang GT/CS, Traded and will be missed
    '13 Taurus SHO, Performance Pack, hit and run, totalled
    '17 Fusion Sport, Livernois tune, Steeda CAI, Steeda Rear Swaybar, Big Mouth Ram Air, GFB+ valve, Steeda Catch can, TTR FMIC (Garrett Core)

  5. #30

    Default

    my xbox 360 just broke the other night, and I suddenly Have found myself with more time than I know what to do with. I'll repair these pictures tonight
    Jeremy
    -86 mustang SSP X CHP Unit # 3788-bone stock & staying that way
    -66 Mustang, bench seat car,8.8,t5 fuel injected 92 engine
    -72 Maverick 5.0 resto in process
    -12SS Camaro 6 speed. 600 FWHP, Kraftwerks Supercharger
    -03 z71 Avalanche 9" lift on 35s Daily Driven 20k a year. 290k miles at 11.8 mpg
    Entire 1986 electrical and vacuum troubleshooting manual download
    http://slantnosefox.com/picturehosti...g%20manual.zip

  6. #31

    Default

    TTT, FInally finished fixing all the links...pictures should all show now.
    Jeremy
    -86 mustang SSP X CHP Unit # 3788-bone stock & staying that way
    -66 Mustang, bench seat car,8.8,t5 fuel injected 92 engine
    -72 Maverick 5.0 resto in process
    -12SS Camaro 6 speed. 600 FWHP, Kraftwerks Supercharger
    -03 z71 Avalanche 9" lift on 35s Daily Driven 20k a year. 290k miles at 11.8 mpg
    Entire 1986 electrical and vacuum troubleshooting manual download
    http://slantnosefox.com/picturehosti...g%20manual.zip

  7. #32

    Default

    great write up.ive pulled alot of dashes and even did a 87 swap on my old 85 vert. you learn thinks the hard way. this is a time saving write up.
    what program did you use to put the circles in the pictures?
    i did a write up for this a while back and wanted to label pics like you did. anyways this should be a sticky as already stated
    86 w/87 motor,full cage, gutted interior,5 lug, H&R front springs, SVO A arms, jeggster subframe connectors, driveshaft loop, 2007 mustang bullitts, 25th anniversary dash, 87+ qrtrs....
    96 honda civic 4 door
    01 suzuki sv650s v twin crotchrocket

  8. #33

    Default

    Quote Originally Posted by 86GT5spdEVERETT View Post
    what program did you use to put the circles in the pictures?
    i did a write up for this a while back and wanted to label pics like you did. anyways this should be a sticky as already stated
    Just open the pics in MS Paint! You can use the brush or circle thingy to, well, circle things and use the text boxes to make labels.
    MY GARAGE | SUPPORT THE 2.3
    1982 Mustang GT T-Top
    1993 Reef Blue LX 2.3 5spd

  9. #34

    Default

    Quote Originally Posted by 1982 niGhTmare View Post
    Just open the pics in MS Paint! You can use the brush or circle thingy to, well, circle things and use the text boxes to make labels.
    ok i havent used paint in years. i ll check it out. i use acdsee for pictures but i dont think it does anything like that. i figured most used photoshop.
    86 w/87 motor,full cage, gutted interior,5 lug, H&R front springs, SVO A arms, jeggster subframe connectors, driveshaft loop, 2007 mustang bullitts, 25th anniversary dash, 87+ qrtrs....
    96 honda civic 4 door
    01 suzuki sv650s v twin crotchrocket

  10. #35

    Default

    I think it was paint....

    I must have put the circles on too before I resized the pics...hence the choppy circles. I bet if I resized them first, they would be better circles
    Jeremy
    -86 mustang SSP X CHP Unit # 3788-bone stock & staying that way
    -66 Mustang, bench seat car,8.8,t5 fuel injected 92 engine
    -72 Maverick 5.0 resto in process
    -12SS Camaro 6 speed. 600 FWHP, Kraftwerks Supercharger
    -03 z71 Avalanche 9" lift on 35s Daily Driven 20k a year. 290k miles at 11.8 mpg
    Entire 1986 electrical and vacuum troubleshooting manual download
    http://slantnosefox.com/picturehosti...g%20manual.zip

  11. #36
    FEP Super Member 83GTRAG's Avatar
    Join Date
    May 2009
    Location
    York, PA
    Posts
    3,658

    Default

    this is perfect and exactly what I am in the middle of doing. I got pissed and quit for the night. I will be on it first thing in the morning.

  12. #37
    FEP Power Member
    Join Date
    Aug 2009
    Location
    Dallas, TX
    Posts
    1,436

    Default

    If and when my heater core goes south I have to do this...I'll just bypass the dam thing and be done with it.

  13. #38
    FEP Super Member 83GTRAG's Avatar
    Join Date
    May 2009
    Location
    York, PA
    Posts
    3,658

    Default

    OK I lied.. I didnt quit for the night I did it (11:30pm) and so far so good. It is all apart, new bulbs and replaced speedo with a 140mph. I am going to get some good plastic polish before I button it all up. Oh yeah and fix my clutch cable. I thought it was the speedo cable..oops live and learn..

  14. #39

    Default

    Wow, this sure saved me from a major headache. Man thanks!

  15. #40

    Default


    I did this twice on the same car. The second time around is the pics you see here...and I just swapped it out because the first time I put in a dash that had the wrong radio opening, DOH!!!

    so I swapped out the entire dash for the right radio opening, never installed the radio, then sold the car, oh well.
    Jeremy
    -86 mustang SSP X CHP Unit # 3788-bone stock & staying that way
    -66 Mustang, bench seat car,8.8,t5 fuel injected 92 engine
    -72 Maverick 5.0 resto in process
    -12SS Camaro 6 speed. 600 FWHP, Kraftwerks Supercharger
    -03 z71 Avalanche 9" lift on 35s Daily Driven 20k a year. 290k miles at 11.8 mpg
    Entire 1986 electrical and vacuum troubleshooting manual download
    http://slantnosefox.com/picturehosti...g%20manual.zip

  16. #41
    FEP Member
    Join Date
    Sep 2008
    Location
    Columbia/Clemson SC
    Posts
    176

    Default


    i did a complete interior swap, so pulled and reinstalled two dashes... in 2 days.

  17. #42

    Default

    is there a trick to reaching all the d%$^ plugs that I cant reach? LOL
    Stable:

    03 DSG GT, CAI, EXHAUST, TUNE, BLACK 03 COBRAS, Best ET: 13.98 @ 99.85

    93 Strawberry LX Coupe.. roller..... for now.........

  18. #43

    Default

    The first trick is knowing what you need to reach. The dash assembly was designed
    to be installed (and removed) as a complete assembly. You don't even need to take
    out the instrument cluster or radio, if it's still using factory wiring. Most guys really
    overwork themselves trying to leave the harness in the car. You've got basically
    six groups of things that need to be disconnected to get the whole dash out with
    the harness, radio, and ductwork, still in it.

    There is a group of connectors in the left side cowl area, behind the kick panel, and
    also the foglight switch and indicator connections, if you have 'em.

    The next group of connectors goes to the switches on the steering column, the interval
    wiper control module, if equipped, and the brake light switch.

    There's another group of connectors in the area of the cowl-to-transmission-tunnel brace
    behind the radio, and also the radio antenna cable, and the connectors at the forward
    end of the console, if equipped. The console does not have to be removed, but it does
    make it a bit easier to get to it's connectors.

    To the right of the glovebox, there's a couple more connectors, more or less, depending
    on year, model, and options.

    Then you have the cables to the blower motor resistor and the blower motor itself,
    the heater temp control mechanical cable, and a vacuum hose harness plug.

    Finally, there's another group of cables up over the top of the porkchop brace, buried
    up behind the instrument cluster area, as well as the speedometer drive cable.

    That last group is the only one that's a bit of a pain, because there is no access hole
    behind the instrument cluster, or in the top of the dash. You have to unbolt the dash,
    pull it back away, and tilt it down. Then reach in behind to disconnect the speedometer
    cable and the four harness connectors on top of the porkchop brace. Once those are
    undone, you should be able to pull the entire dash out of the car.

    One tip about all these connectors- They are old and kinda brittle, and the locking tabs
    Ford used are a complete pain. If you end up breaking any locking tabs, and you will,
    you can use tie-wraps to secure the connectors when you put them back together.

    I also like to put a bit of dielectric grease in each female connector pin before I plug
    things back together. If you have the dash out, it's a good idea to do that to all the
    connectors before you put the dash back in the car.
    Cheers,
    Jeff Cook

    '85 GT Hatch, 5-speed T-Top, Eibachs, Konis, & ARE 5-Spokes ... '85 GT Vert, CFI/AOD, all factory...
    '79 Fairmont StaWag, 5.0, 62K original miles ... '04 Azure Blue 40th Anny Mach 1, 37K original miles...
    2012 F150 S-Crew 4x4 5.0 "Blue Coyote"... 65 coupe, 289 auto, Pony interior ... '67 coupe 6-cyl 4-speed ...
    '68 Vert, Mexican block 307 4-speed... '71 Datsun 510 ...
    And a 1-of-328 Deep Blue Pearl 2003 Marauder 4.6 DOHC, J-Mod, 4.10s and Lidio tune

  19. #44

    Default

    When I dropped the dash in my Cougar for the heater core replacement I only disconnected the speedo cable and the heater control cables. There was enough wire length to rest the dash on the seats. Access to the heater box was easy. Like others have said don't forget to undo the PRNDL from the steering column as when lowering the column may break the itsy bitsy wire on that.

    Great pictures by the way. I could have used them three years ago.
    1986 Tbird 3.8
    1992 Ford TBird LX 3.8
    1992 Ranger XLT 2.3

  20. #45

    Default

    Quote Originally Posted by tbirdsps View Post
    When I dropped the dash in my Cougar for the heater core replacement I only disconnected the speedo cable and the heater control cables. There was enough wire length to rest the dash on the seats.
    Yes, and for a heater core replacement, that's how the job is laid out in the FSM.
    Cheers,
    Jeff Cook

    '85 GT Hatch, 5-speed T-Top, Eibachs, Konis, & ARE 5-Spokes ... '85 GT Vert, CFI/AOD, all factory...
    '79 Fairmont StaWag, 5.0, 62K original miles ... '04 Azure Blue 40th Anny Mach 1, 37K original miles...
    2012 F150 S-Crew 4x4 5.0 "Blue Coyote"... 65 coupe, 289 auto, Pony interior ... '67 coupe 6-cyl 4-speed ...
    '68 Vert, Mexican block 307 4-speed... '71 Datsun 510 ...
    And a 1-of-328 Deep Blue Pearl 2003 Marauder 4.6 DOHC, J-Mod, 4.10s and Lidio tune

  21. #46

    Default

    Ok, Jeremy did a great write up. But I still disagree with having to actually removed the dash and disconnect all those wires.

    I've never had to do this with any of the 6 foxes I've replaced heater cores in.

    Basically you unbolt the dash, disconnect the speedo cable and if you have a column shift the selector wire. Then drop the steering column to the floor and move the dash away from the fire wall. You then unbolt the heater core/AC assembly from the firewall and move that away from the firewall too.
    Last edited by Marz; 01-14-2010 at 06:20 PM.
    1985 Mustang GT Mild 331 4bbl 5 spd, 1985 SEFI LTD LX AOD.
    Cardomain: http://www.cardomain.com/ride/565542
    Mid Size LTD LX Facebook page! http://www.facebook.com/groups/233213650060739/

  22. #47
    FEP Super Member Mr Joshua's Avatar
    Join Date
    Dec 2005
    Location
    Spencer, Massachusetts
    Posts
    3,659

    Default

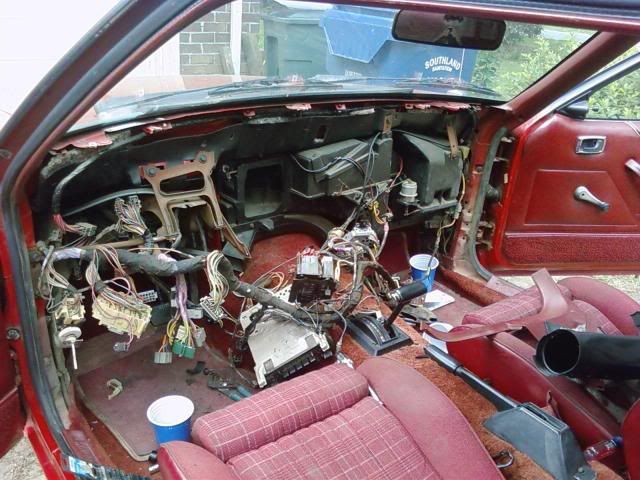
    on the pictures, helped me finish assembling the metal substructure.. as i couldn't remember how it went together as the last time i had it out was 4 years ago.
    83 GT w/ T-Tops (JeffCleaned)
    2021 Turbo Blue Audi S5

  23. #48

    Default

    sweet, great news!!!
    Jeremy
    -86 mustang SSP X CHP Unit # 3788-bone stock & staying that way
    -66 Mustang, bench seat car,8.8,t5 fuel injected 92 engine
    -72 Maverick 5.0 resto in process
    -12SS Camaro 6 speed. 600 FWHP, Kraftwerks Supercharger
    -03 z71 Avalanche 9" lift on 35s Daily Driven 20k a year. 290k miles at 11.8 mpg
    Entire 1986 electrical and vacuum troubleshooting manual download
    http://slantnosefox.com/picturehosti...g%20manual.zip

  24. #49
    FEP Senior Member
    Join Date
    Mar 2010
    Location
    Manteca, CA
    Posts
    697

    Default

    good info, both threads are very informative
    1984 1/2 GT 350 finally done (well almost)
    2012 Focus SEL
    1971 Ranchero - needs bodywork
    1995 F150 4X4 Flareside - it is fun!
    2014 F150 Tremor - Holy Smoke!

  25. #50
    FEP Super Member Mr Joshua's Avatar
    Join Date
    Dec 2005
    Location
    Spencer, Massachusetts
    Posts
    3,659

    Default

    question about the screws originally holding the dash in, under the dash pad.. looks like they had used a retaining screw with a fairly large washer, as it they left marks in the dye they used to paint the dash.. were small headed screws in your dash original?
    83 GT w/ T-Tops (JeffCleaned)
    2021 Turbo Blue Audi S5

Page 2 of 6 FirstFirst 1234 ... LastLast

Tags for this Thread

Posting Permissions

  • You may not post new threads
  • You may not post replies
  • You may not post attachments
  • You may not edit your posts
  •