
Wow man. So clean its mind blowing!Originally Posted by 82GTforME


Wow man. So clean its mind blowing!

I think he was suggesting they should have used spacers on the bracket to the bumper support to straighten it out.
The opening should just be a matter of doing a bit of sheet metal work to straighten it out with possibly some welding. It should be easier to determine what is possible once you pull the support and the mounts.


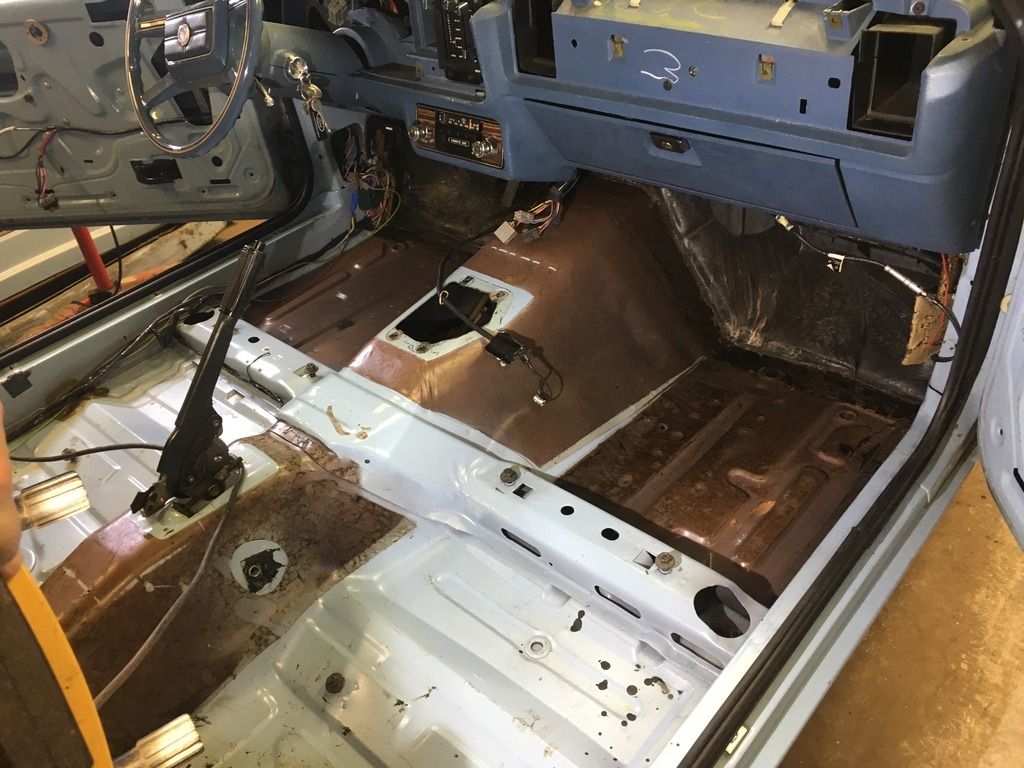
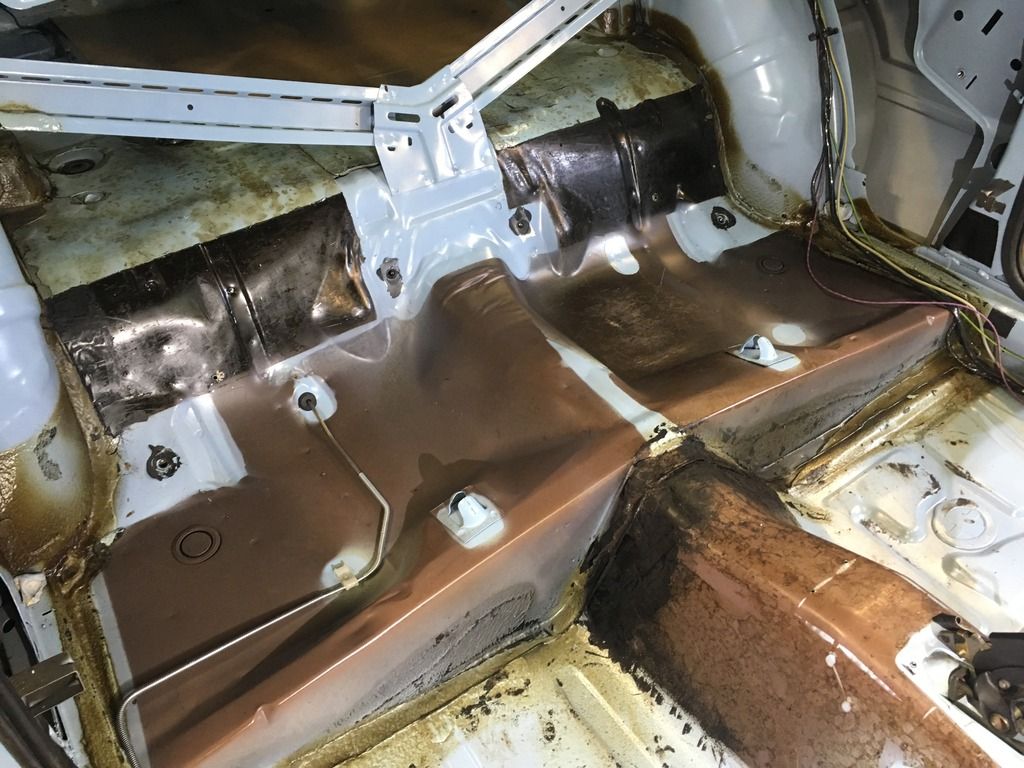
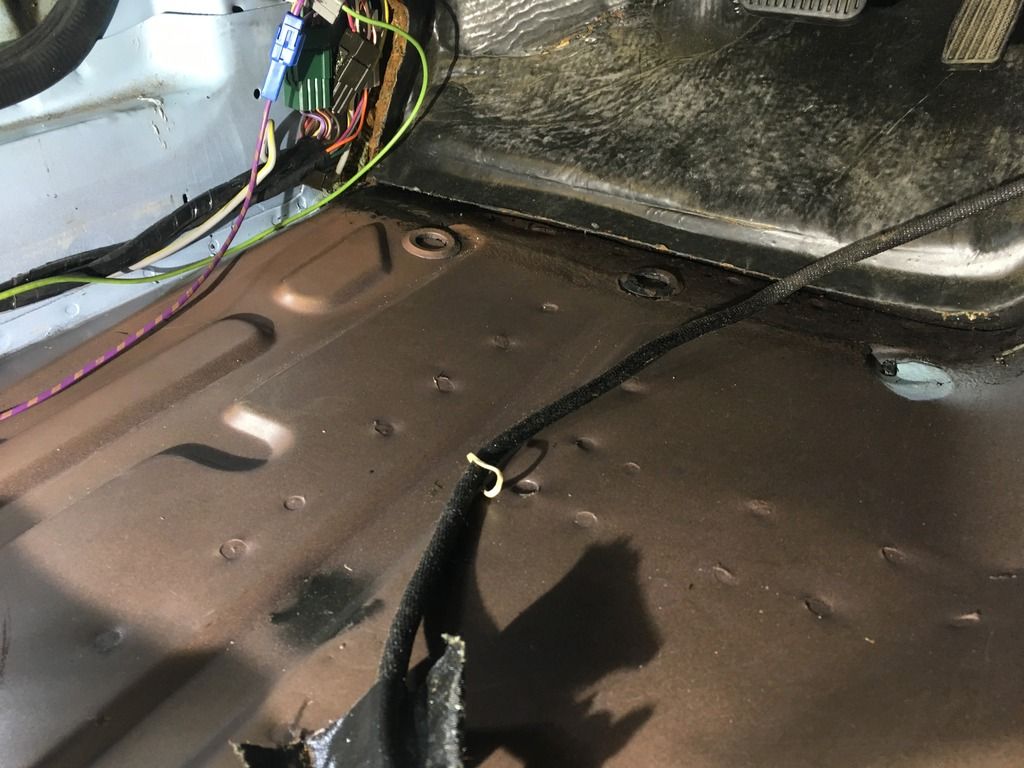
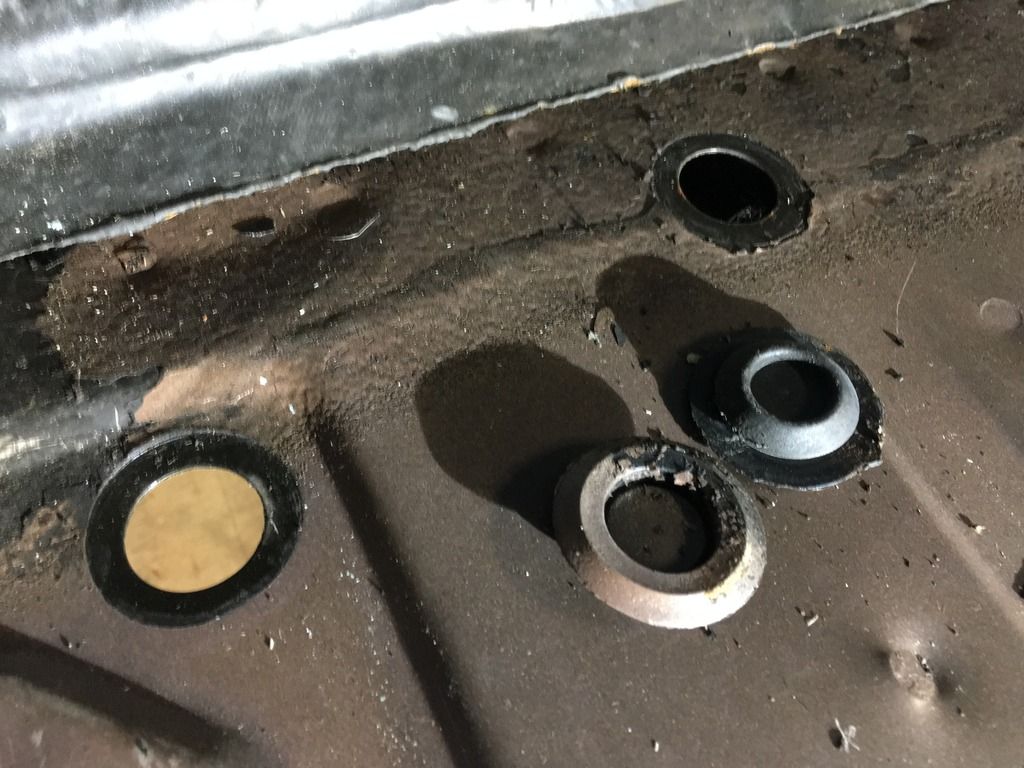
Well, it has been a while for an update. While I wish I had spent more time over the last nine or so months getting things done, I feel I have made some progress.
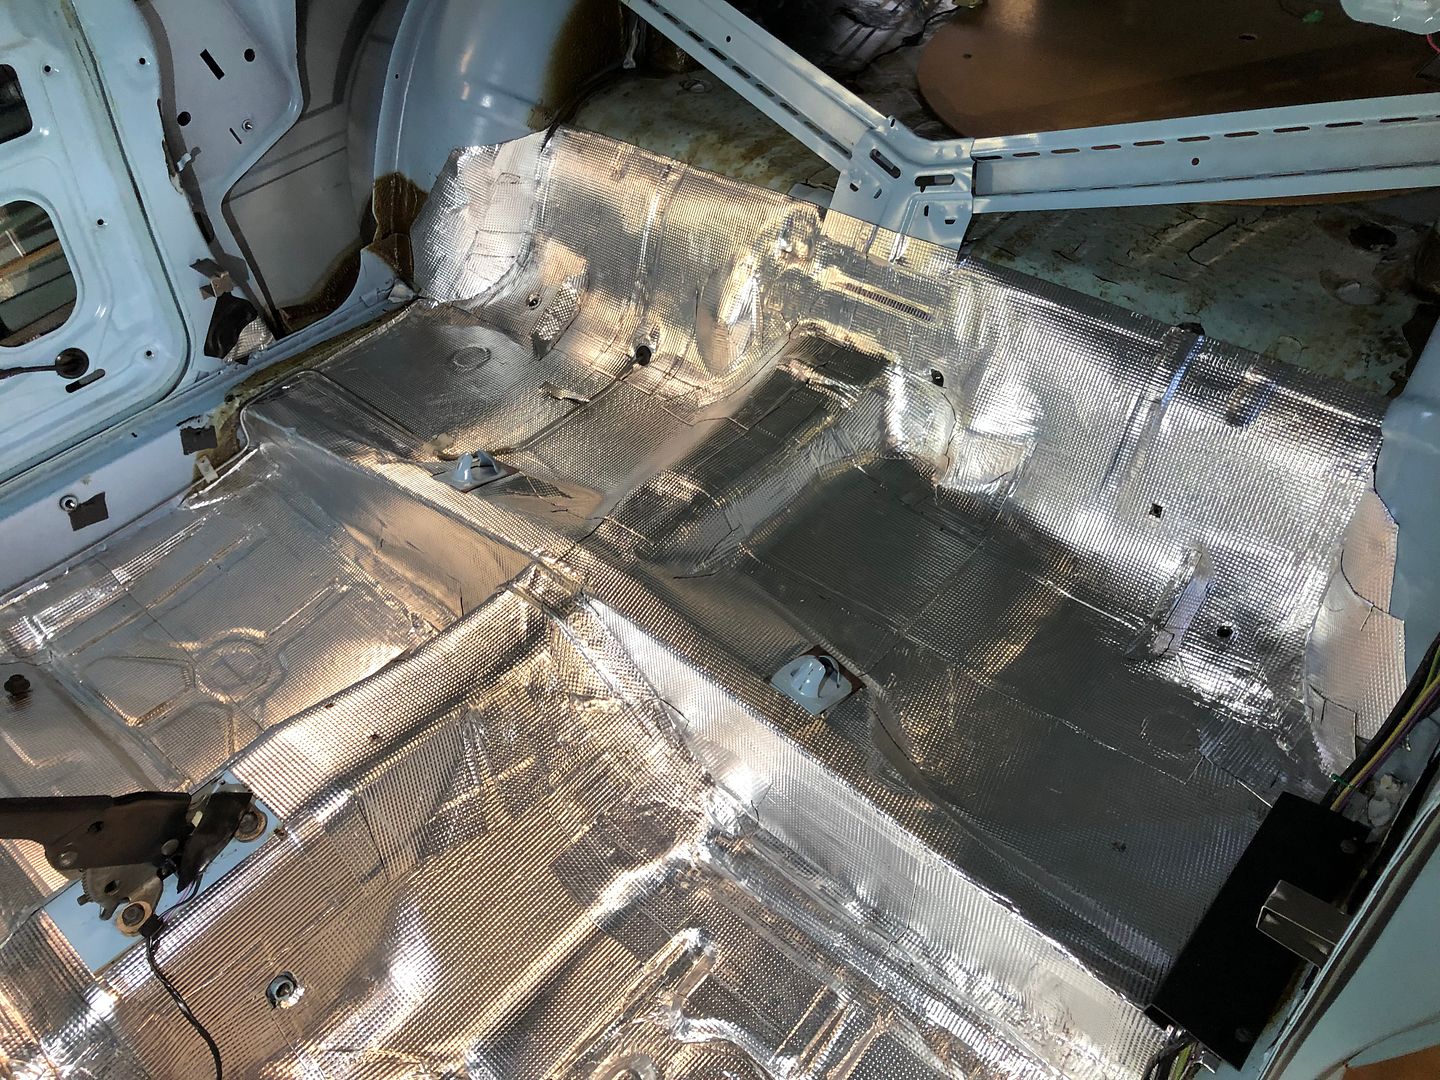
I did finish off replacing the sound deadener. I have some new jute pad to go over top of this in places prior to the final carpet reinstall in the future.
http://s1337.photobucket.com/user/82...yj47f.jpg.html
http://s1337.photobucket.com/user/82...8qly4.jpg.html
I have never replaced a heater core on one of these before. As I had noted before it looks like the dash had been pulled at one time in the past - or at least some of the fasteners have been disturbed.
Too bad the original copper heat exchangers are not available any longer. I have one but it will go in my SVO. I may just do a pressure test but with this being as stripped down as it can, the effort to change may be just as easy...
http://s1337.photobucket.com/user/82...lajzs.jpg.html
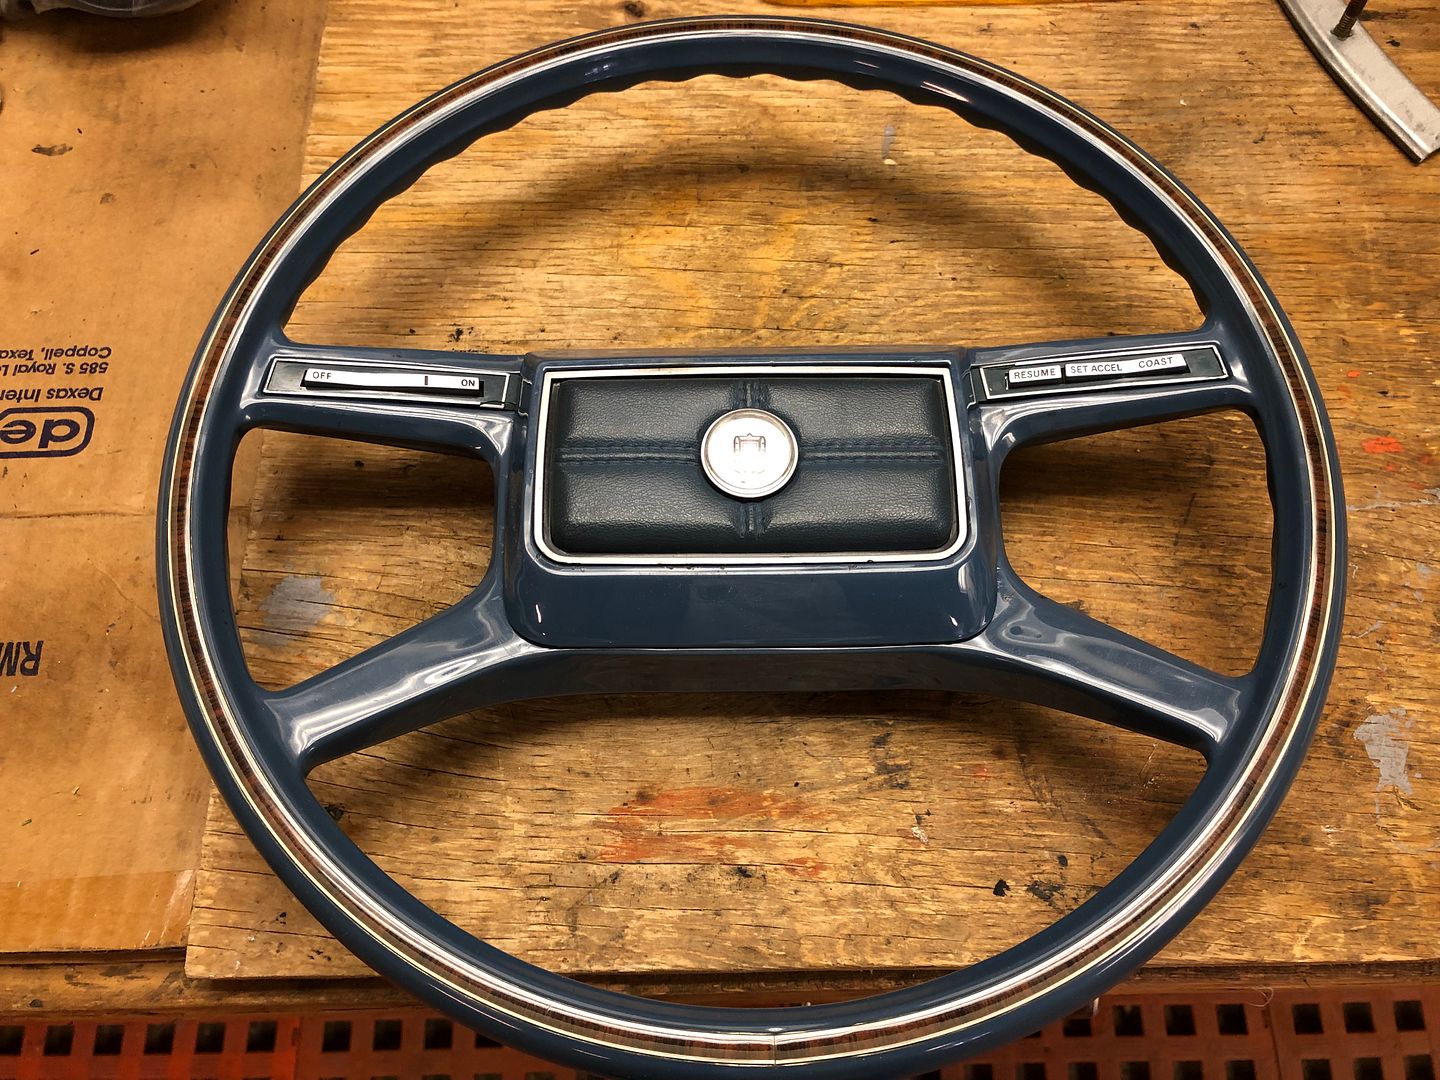
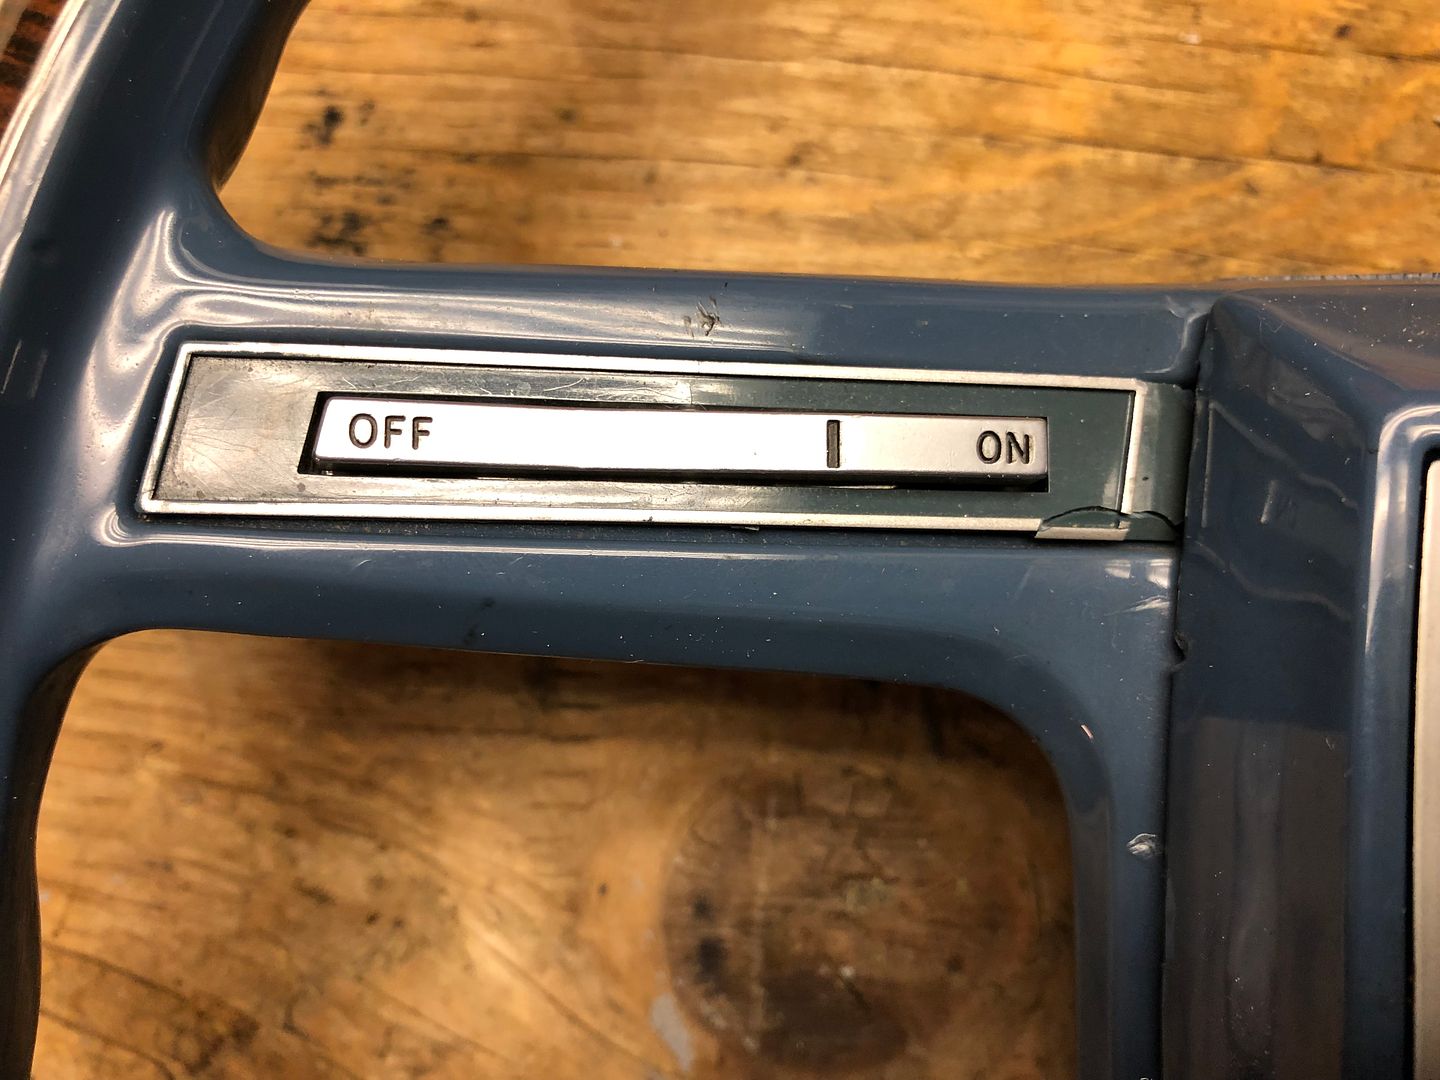
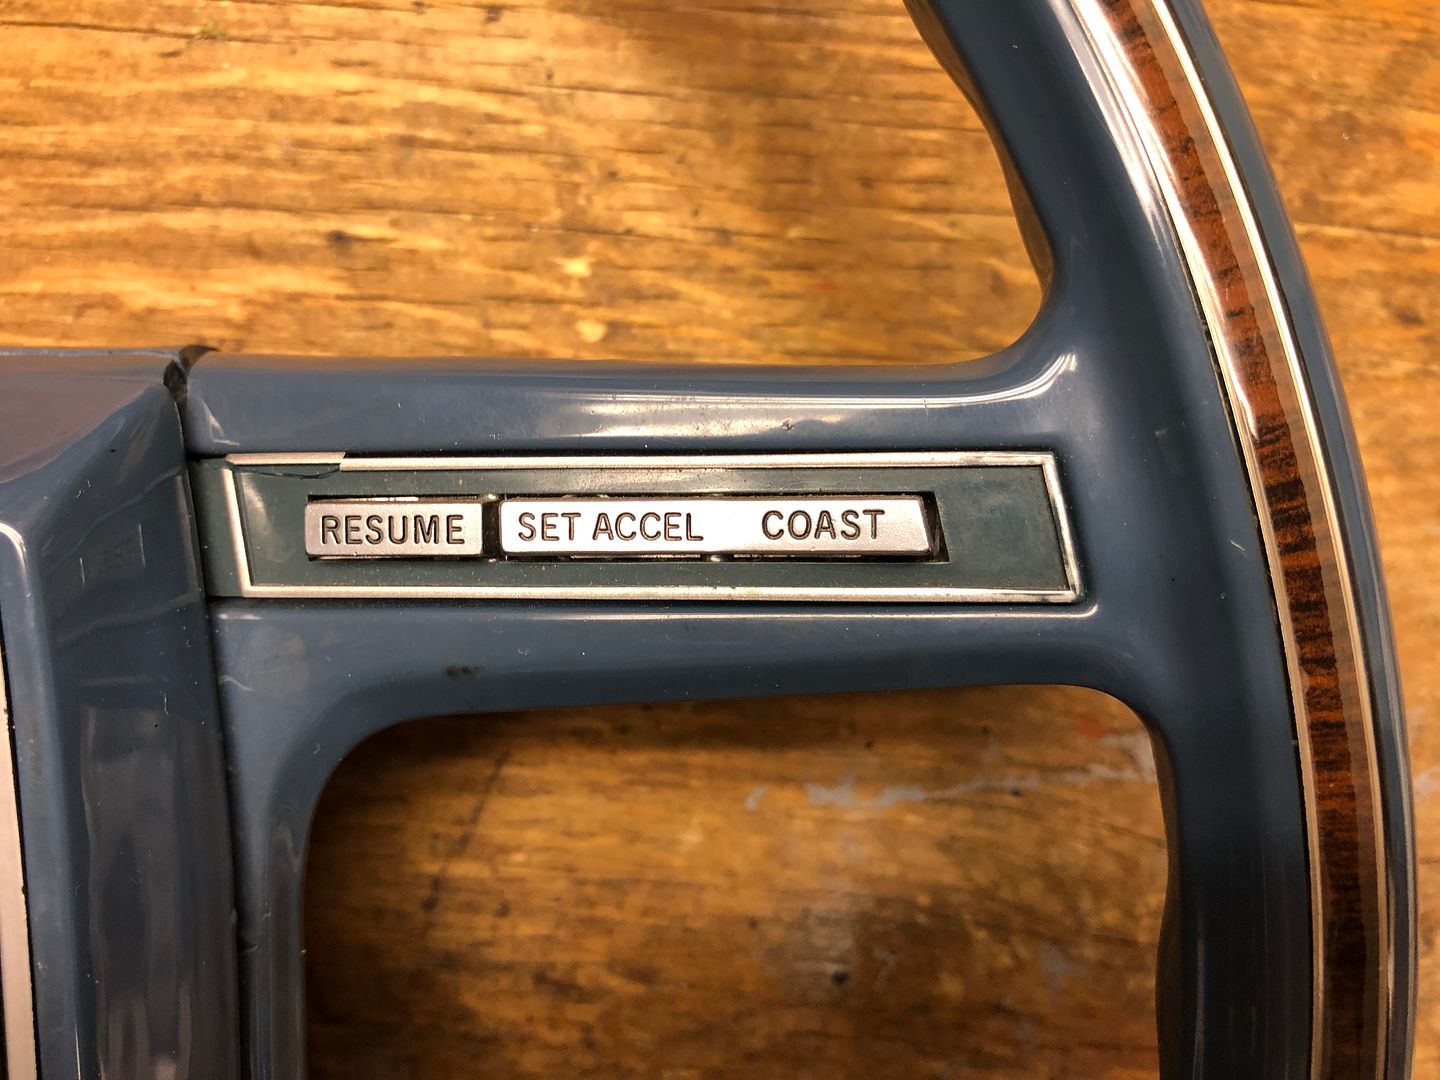
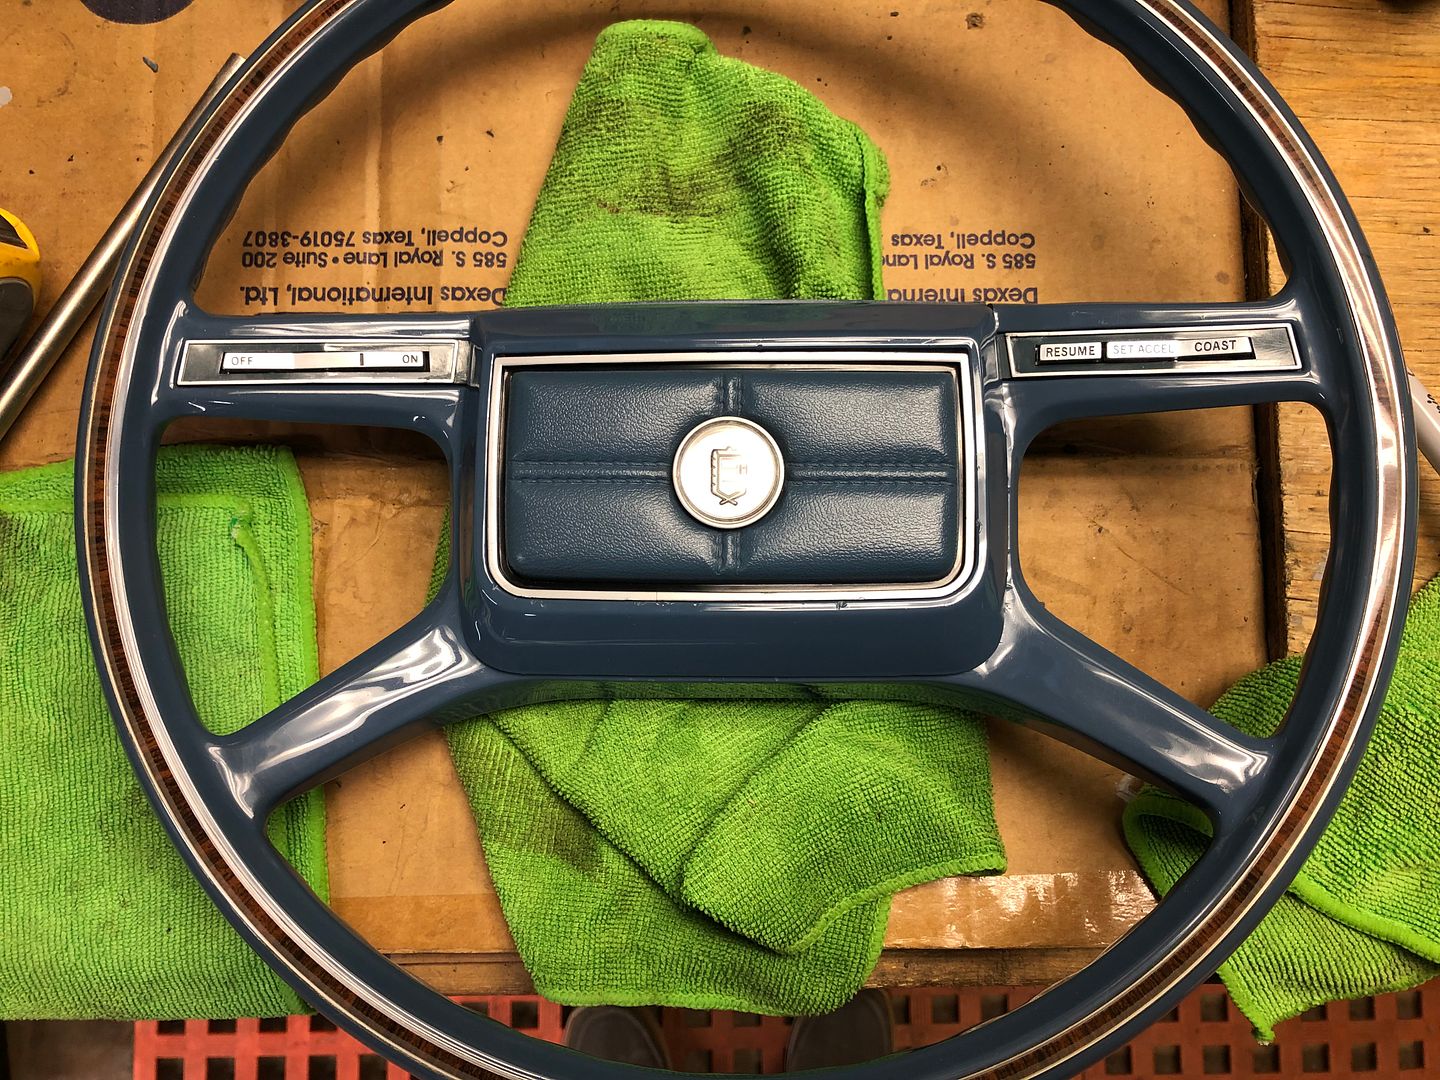
The original cruise wheel is in really good shape. It does have one of the typical cracks. The center insert fastener bosses are broken too where someone must have tried to remove it the wrong way. Inlay is very nice also.
http://s1337.photobucket.com/user/82...maend.jpg.html
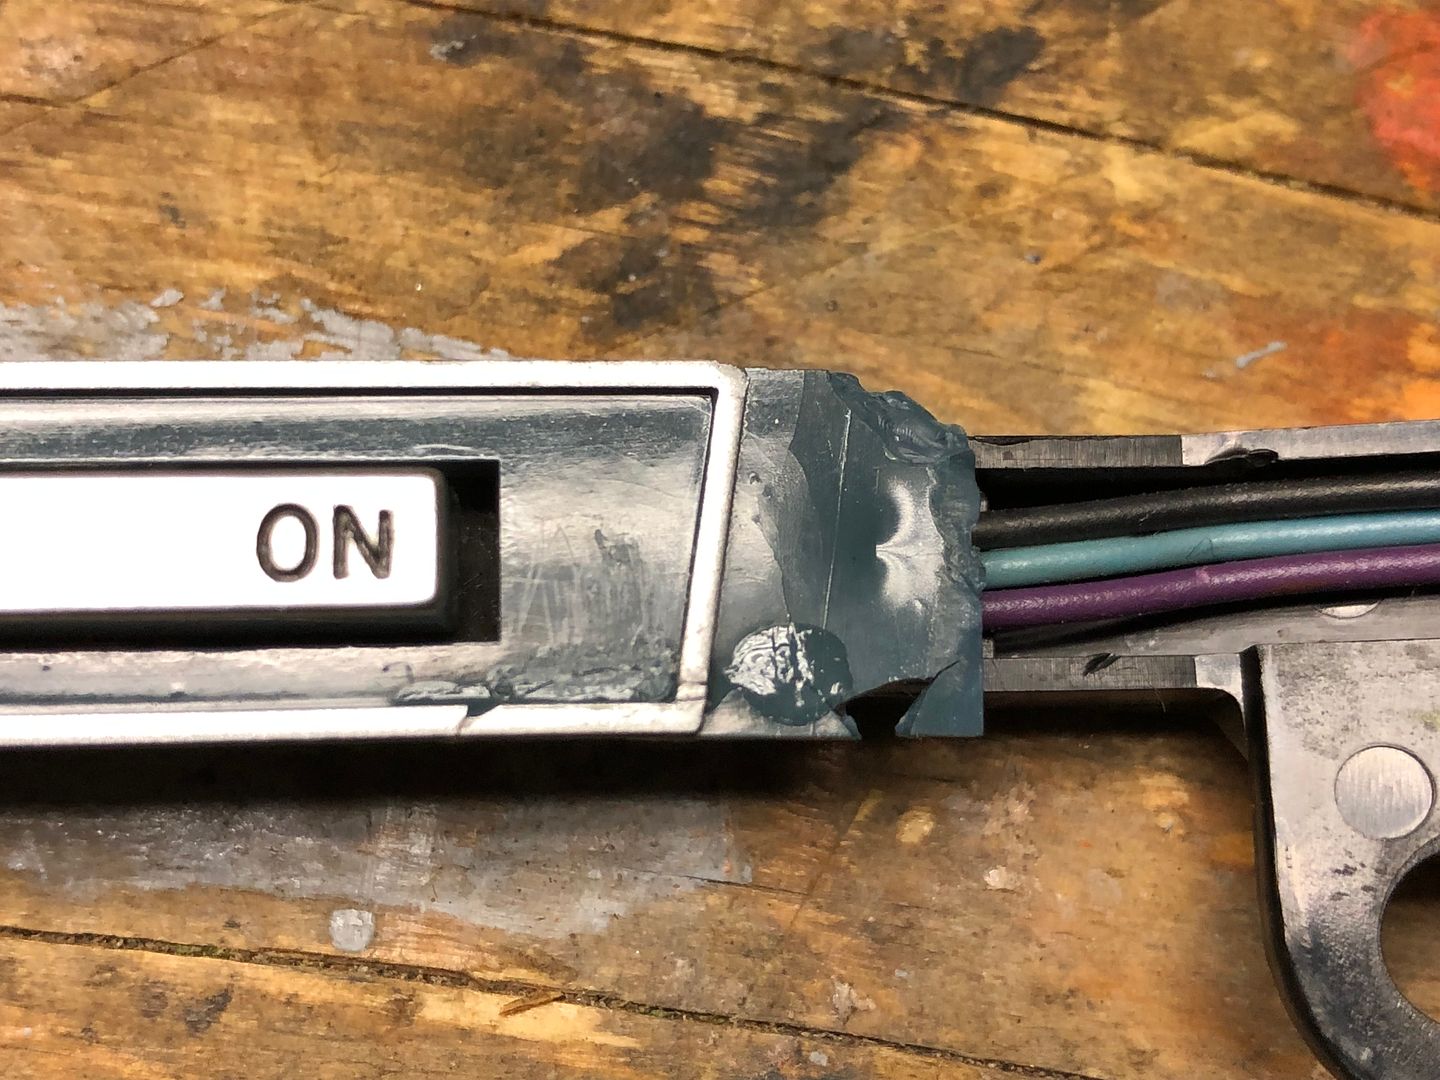
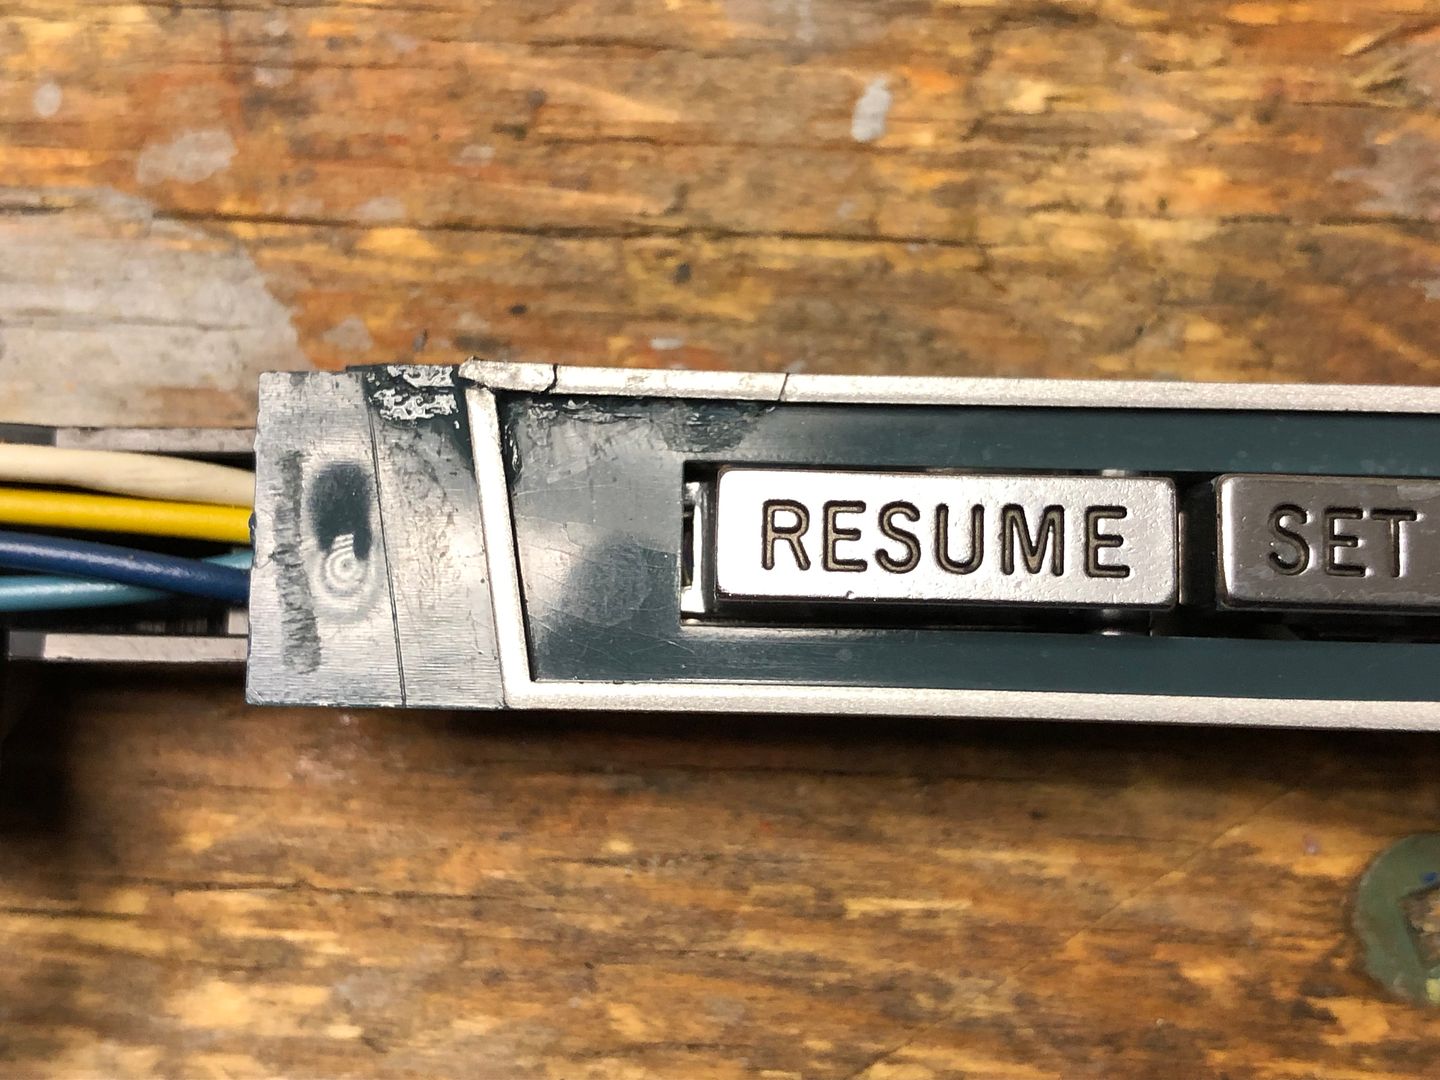
Not sure how this would happen but both of the button inserts had minor damage. I ended up taking it all apart to do a repair.
http://s1337.photobucket.com/user/82...iucwn.jpg.html
http://s1337.photobucket.com/user/82...jyrga.jpg.html
http://s1337.photobucket.com/user/82...yo2f6.jpg.html
http://s1337.photobucket.com/user/82...liwpk.jpg.html
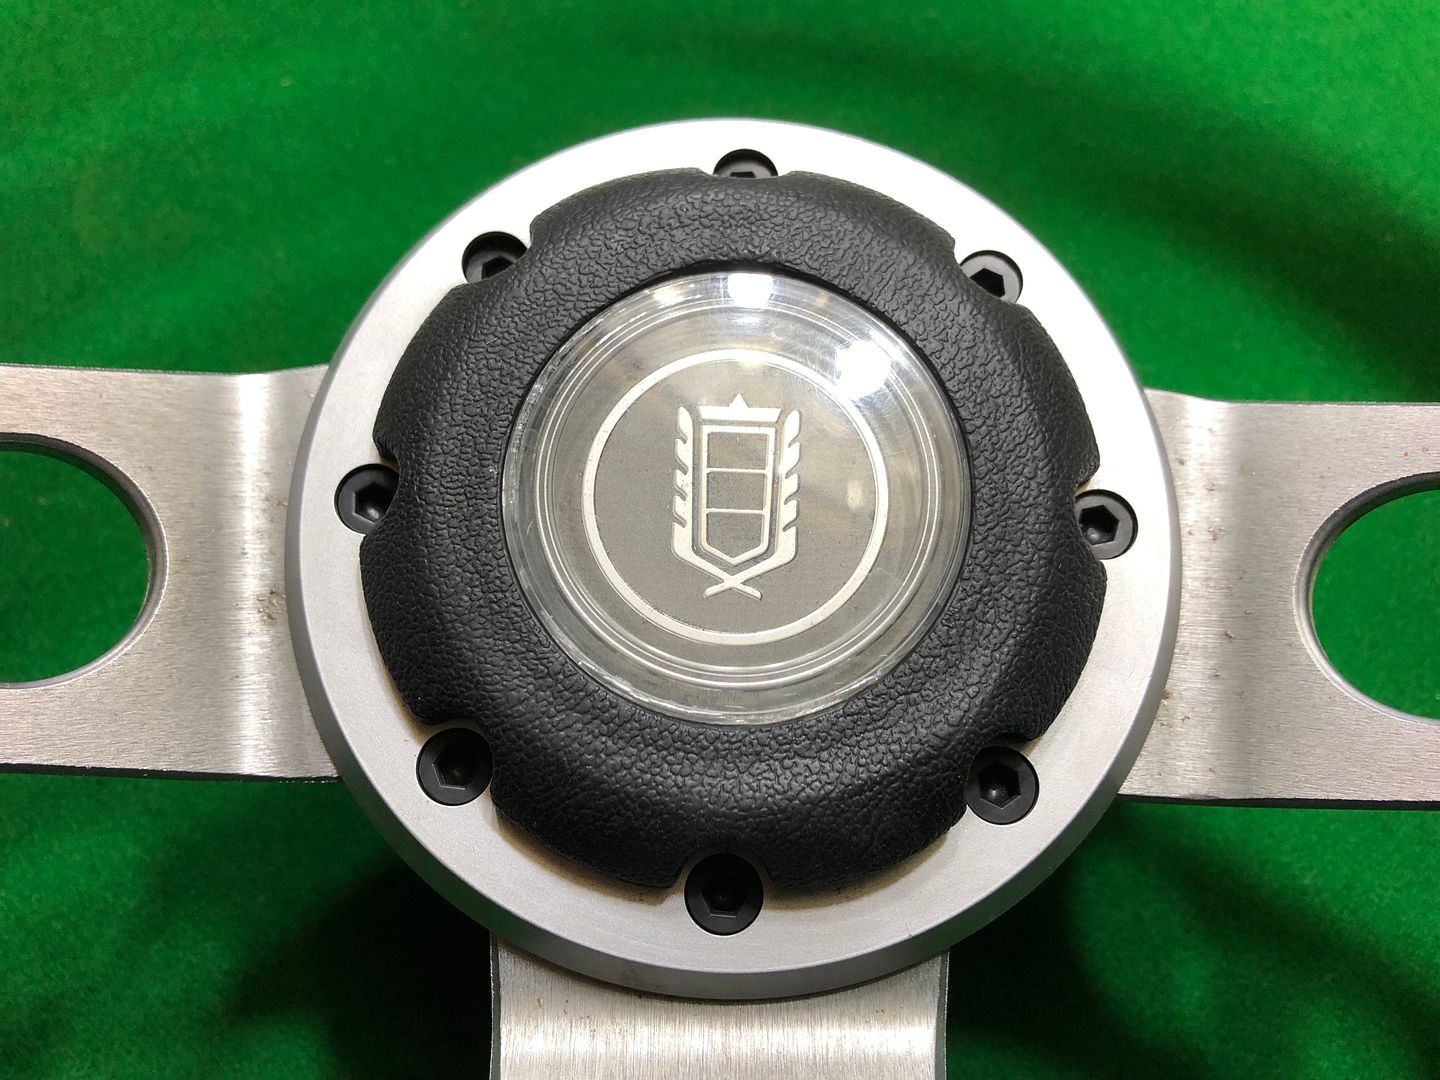
A little cleaning and polishing plus a little silver Sharpie and it is ready for install at a later date.
http://s1337.photobucket.com/user/82...hkoxg.jpg.html
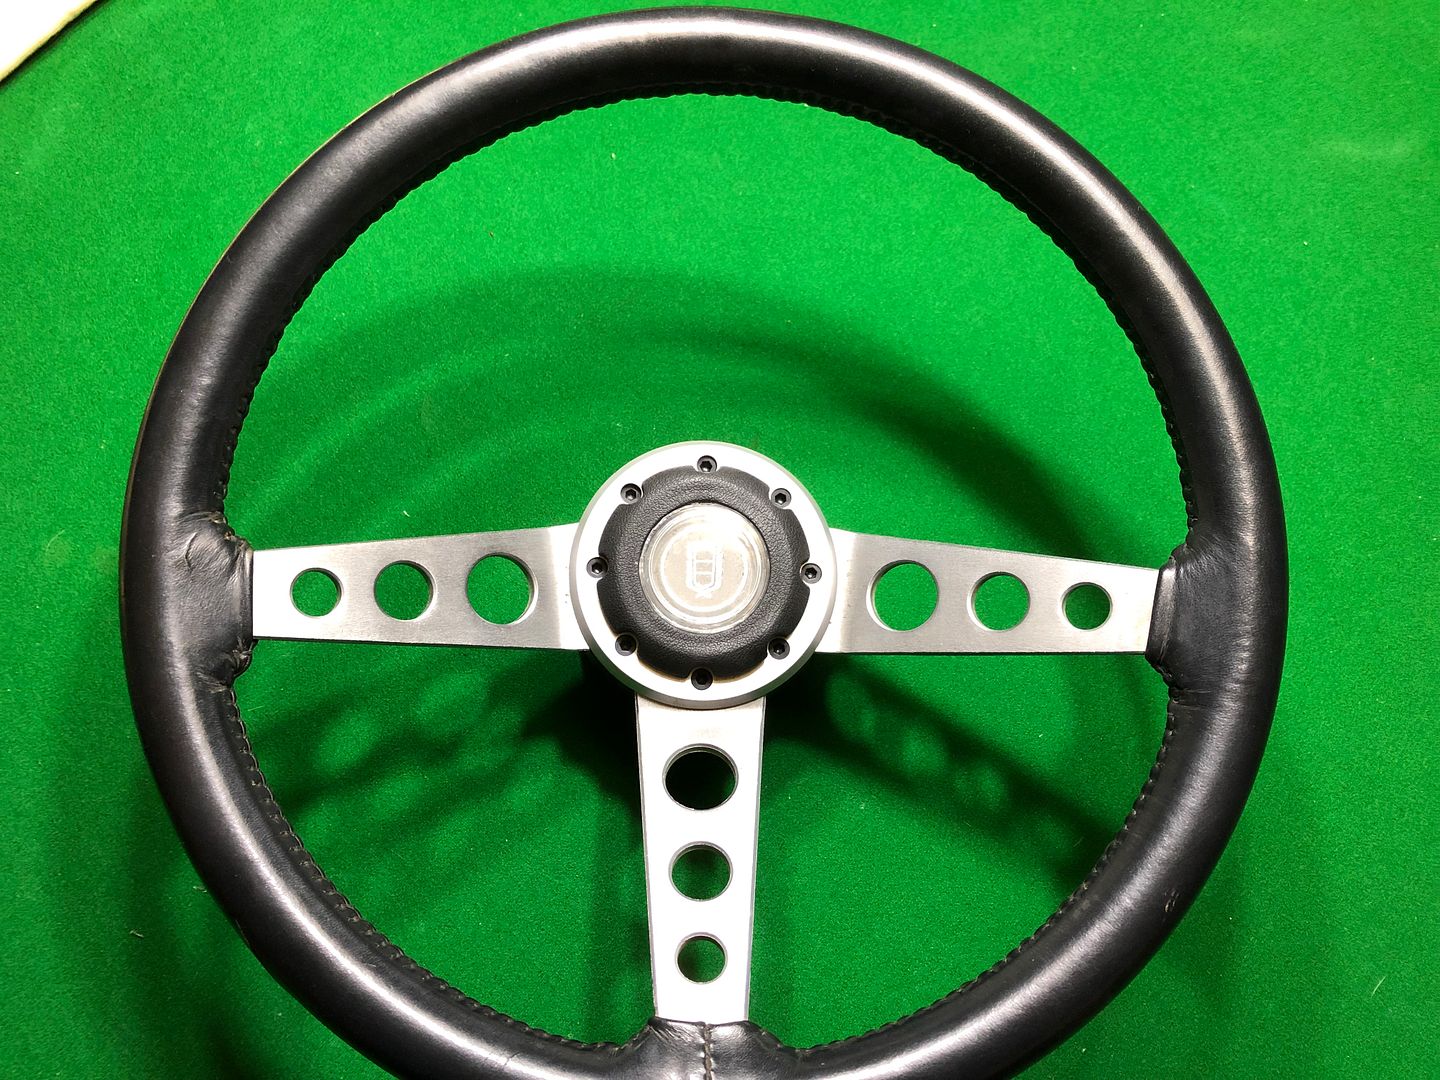
I lucked out and got some parts locally off of another 79 Ghia coupe including this nice sport wheel.
It had some minor surface rusting but came off rather easily and cleaned up really nice.
While I intend to keep the factory cruise under the hood at this time for looks it would be doubtful it I would have it working. Maybe it would. Regardless, I have a very nice Plan B if I want to change and add some contrast to all of the blue in the interior.
http://s1337.photobucket.com/user/82...ofcwc.jpg.html
http://s1337.photobucket.com/user/82...i1r4p.jpg.html
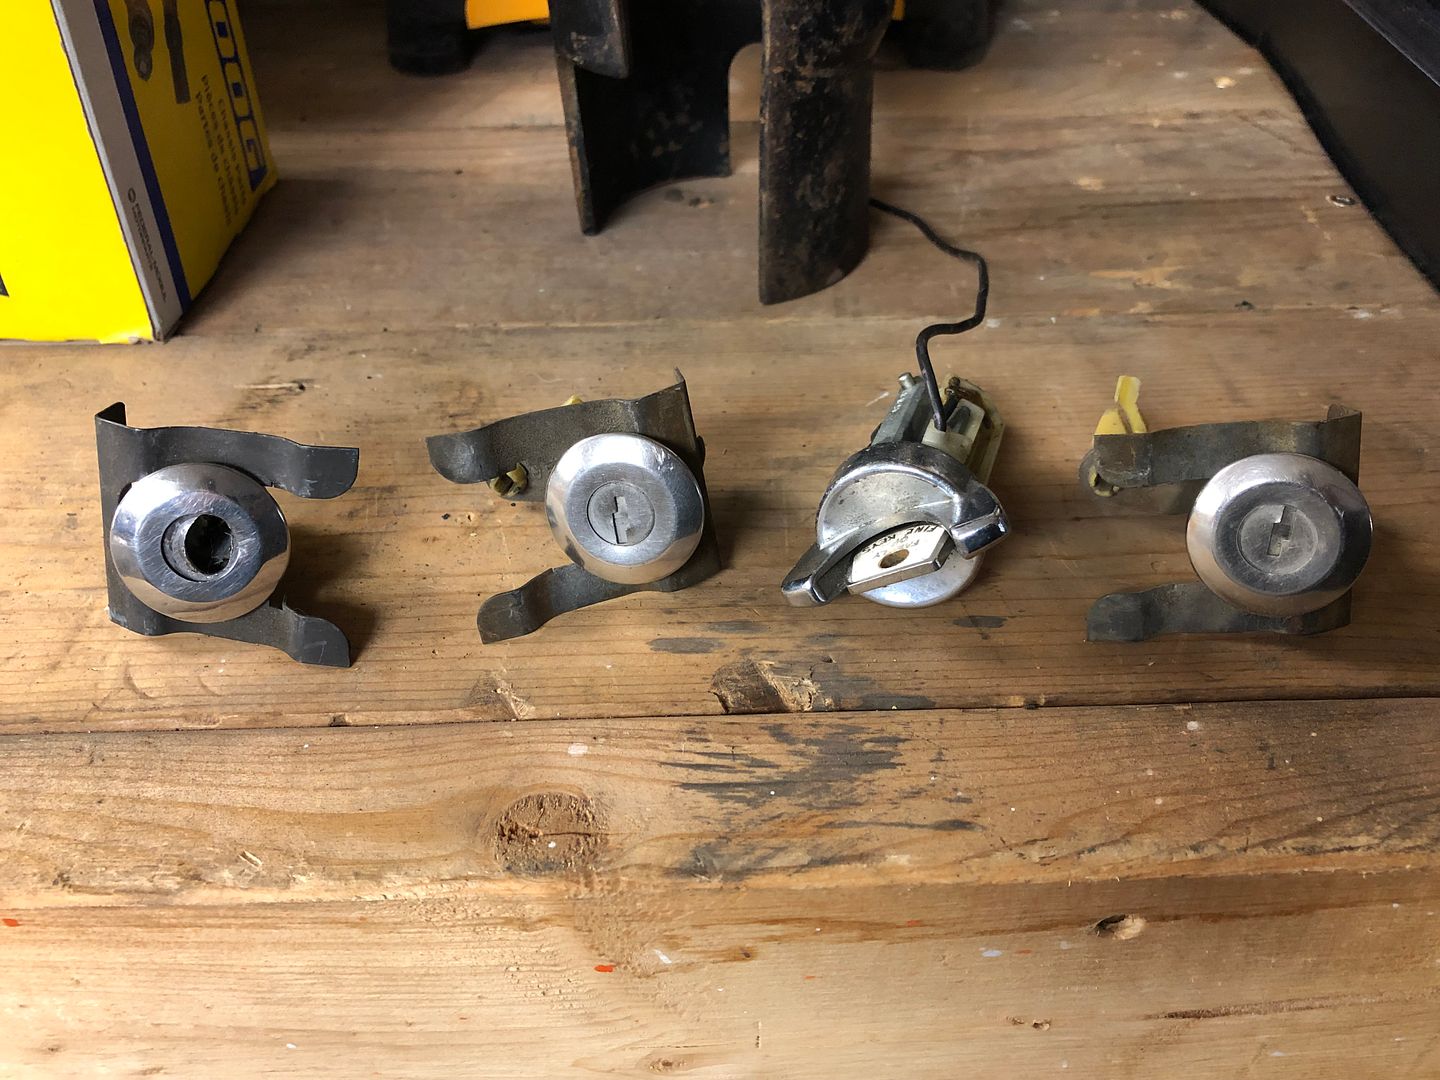
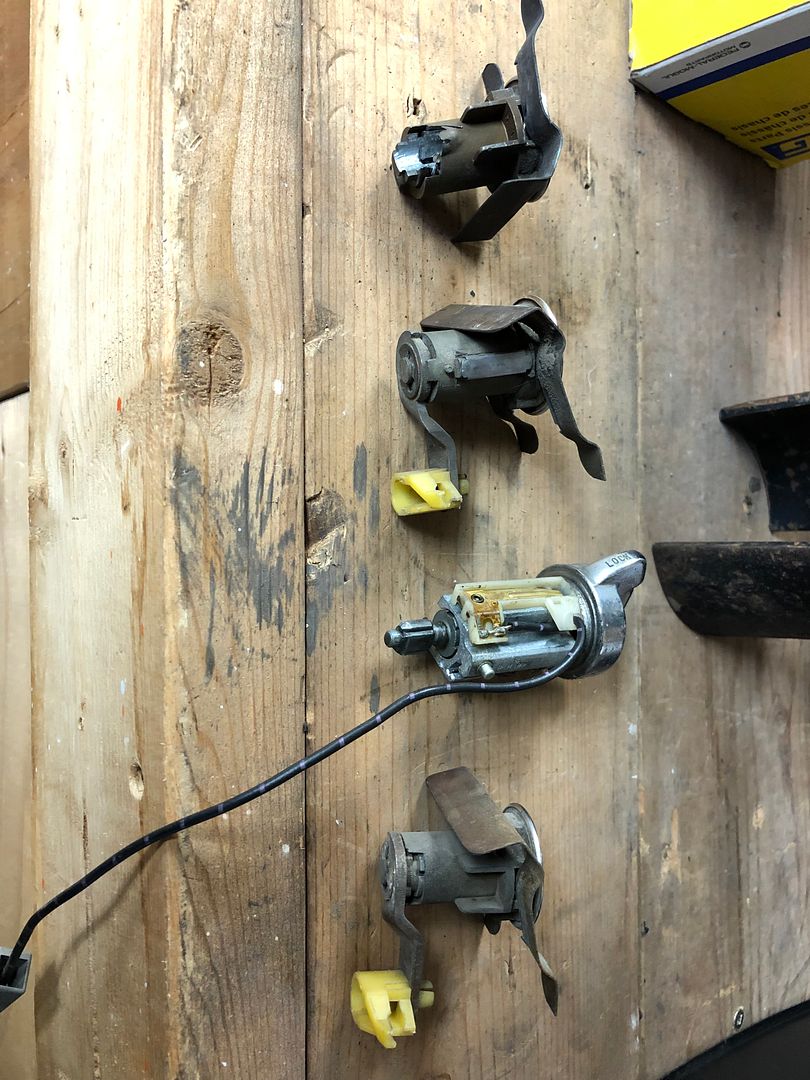
So lucky me. On the same local 79 Ghia I managed to grab some good parts including the two door locks and ignition cylinder with a key.
Can the existing ignition cylinder be re-keyed to match this new key or just better to replace all three? I am guessing the current cylinder would have less wear and tear.
http://s1337.photobucket.com/user/82...ohk55.jpg.html
http://s1337.photobucket.com/user/82...hxtyw.jpg.html
Last edited by 82GTforME; 12-03-2019 at 12:43 AM.
After getting all or most of the interior stuff done previously and out of the way, I still had a pretty bench full of take off parts to deal with. I like to keep up on organizing, cleaning and restoring parts along the way. I tend to get too much backlog during that take apart frenzy. All of that takes up the workbench counter and piled around the garage.
I cleaned, prepped and/or finished many parts taken off, bagged and tagged and put them away. Engine and engine compartment items, body and trim. Suspension and brake stuff.
I like a somewhat tidy work area plus I knew I needed a large push to keep things moving.
Some highlights I suppose:
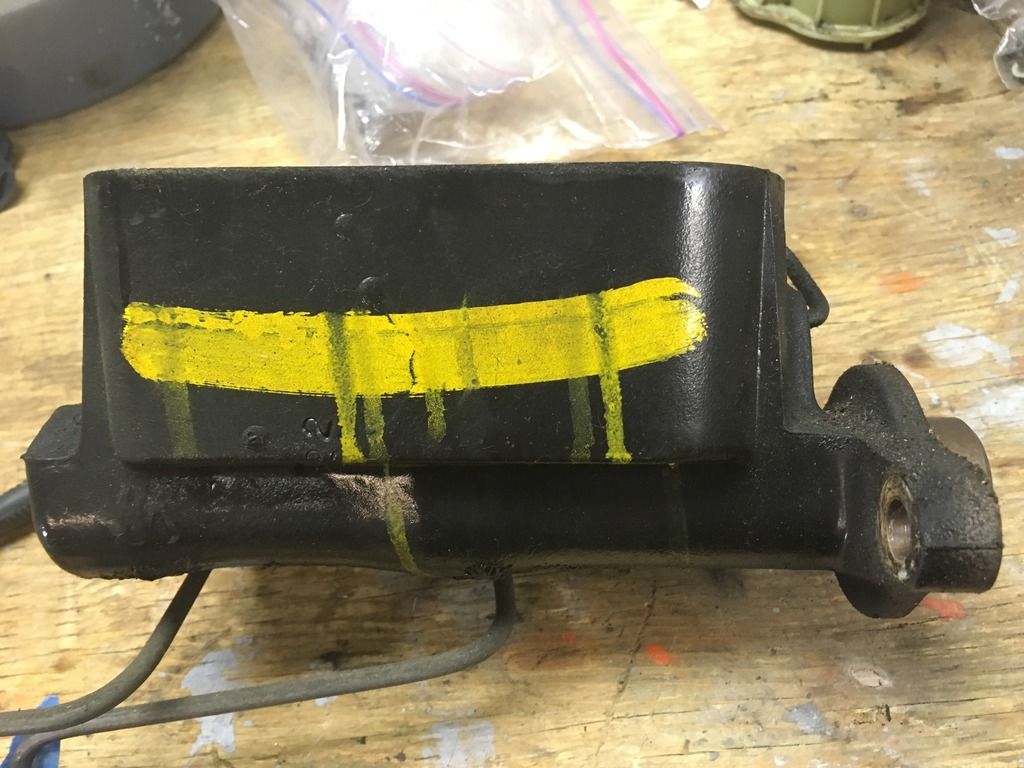
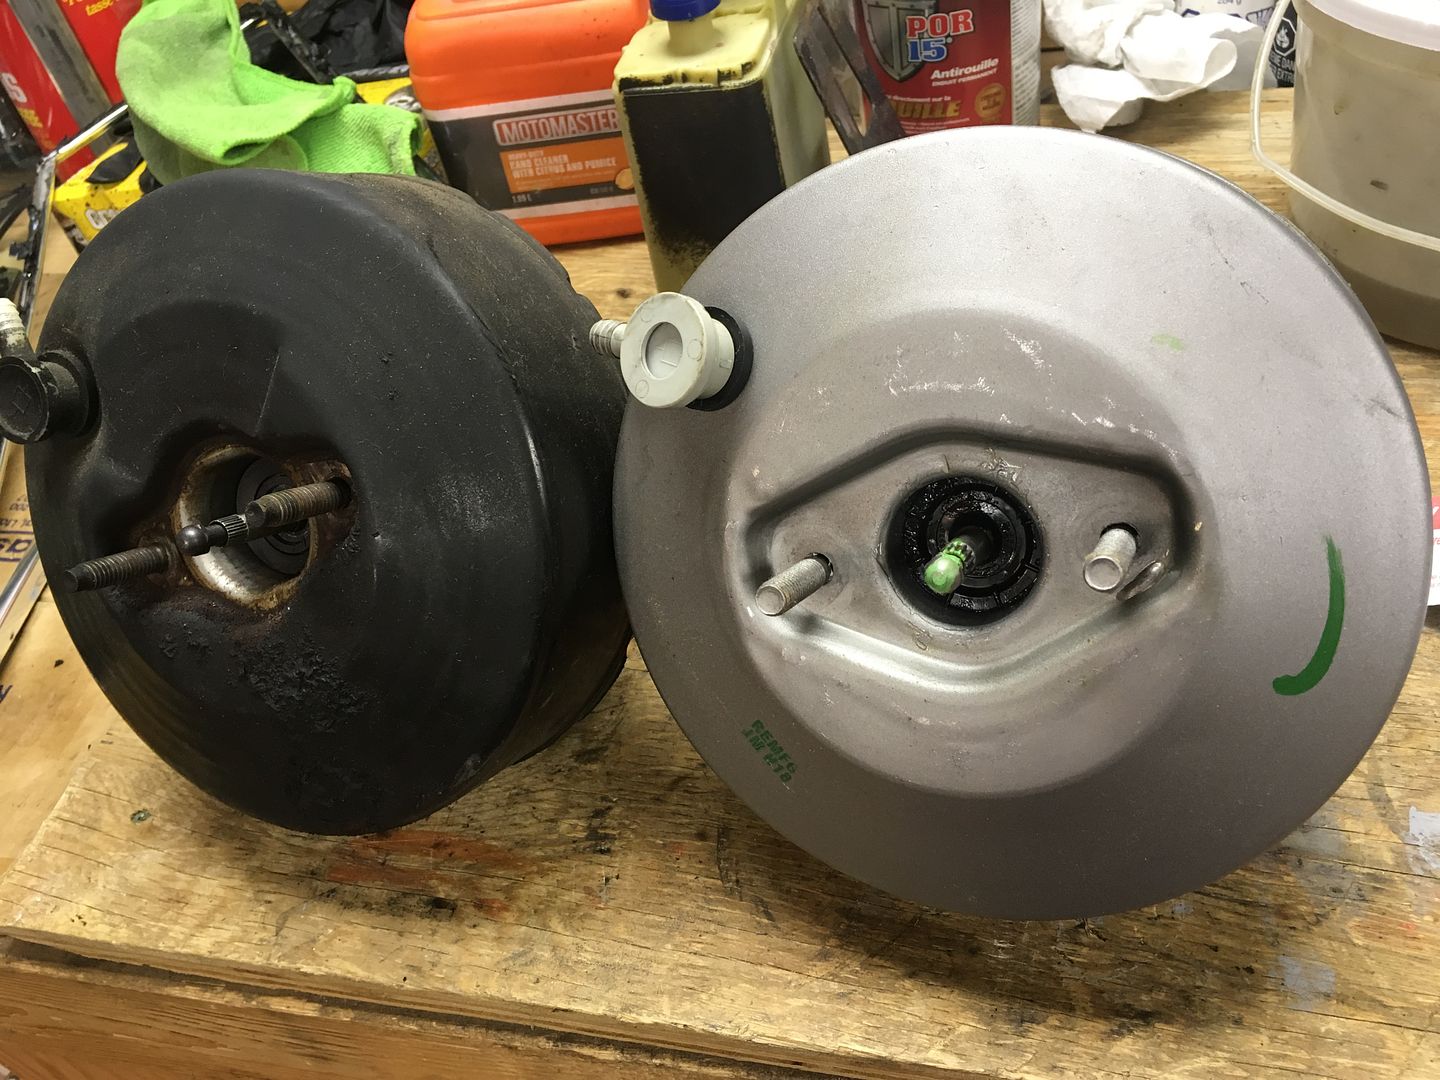
Master cylinder: intent to reuse the original but keep the look. 79's had the MC and the booster painted black. At least they were on both of ours. I ordered a replacement booster and refinished it.
http://s1337.photobucket.com/user/82...7dd2z.jpg.html
http://s1337.photobucket.com/user/82...dgjsa.jpg.html
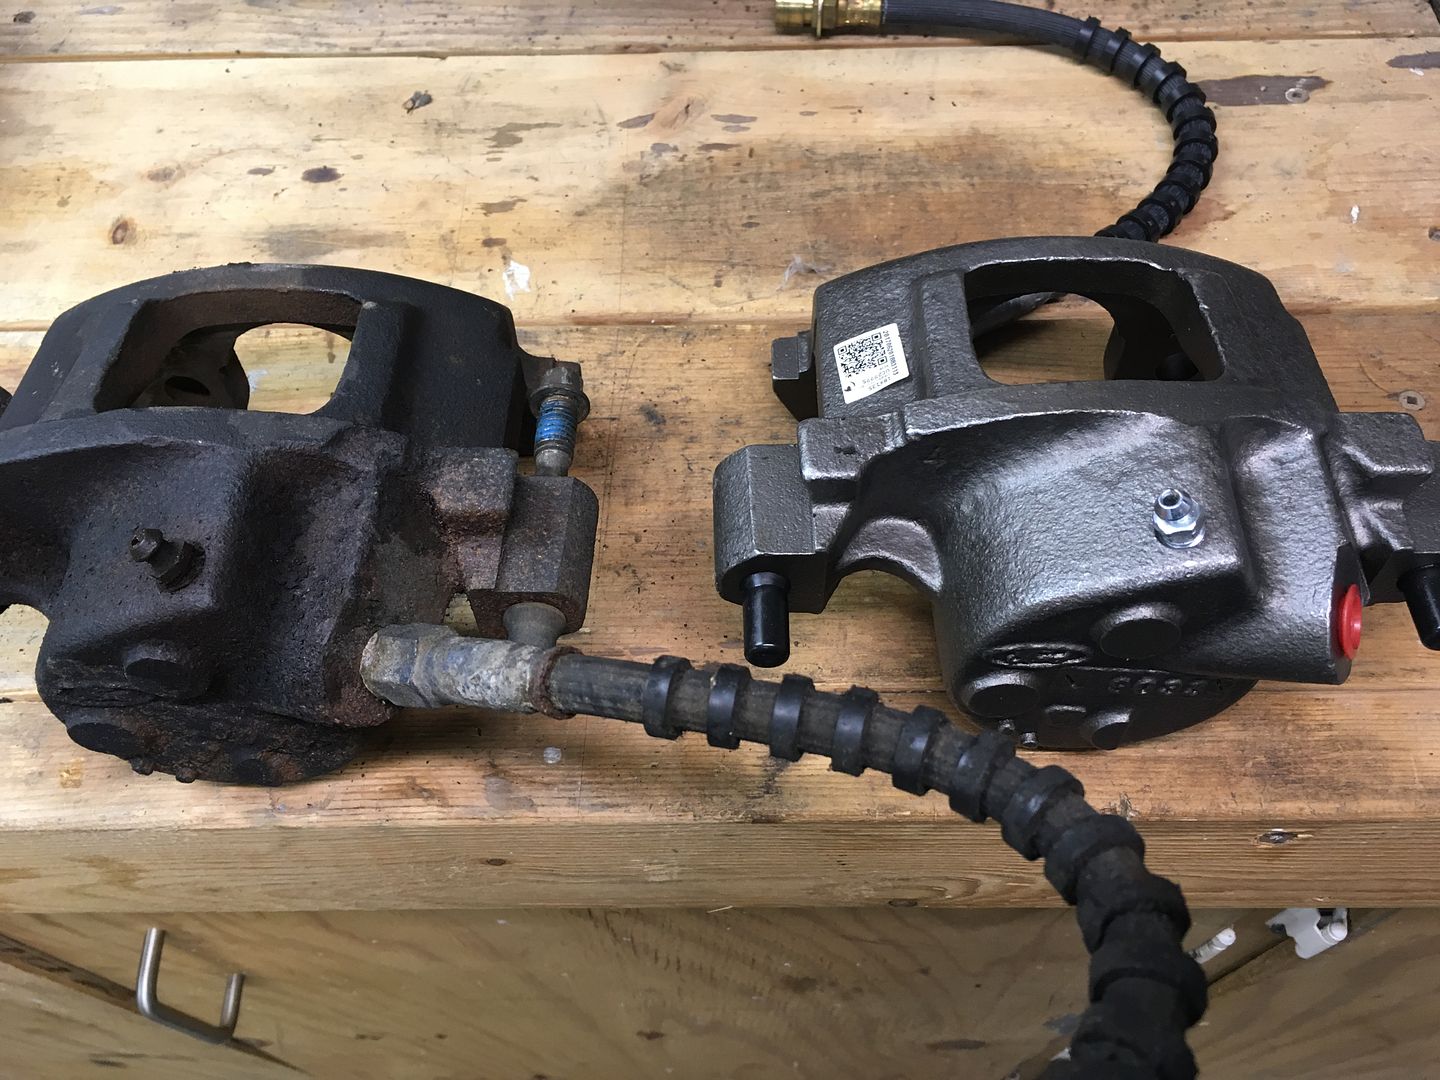
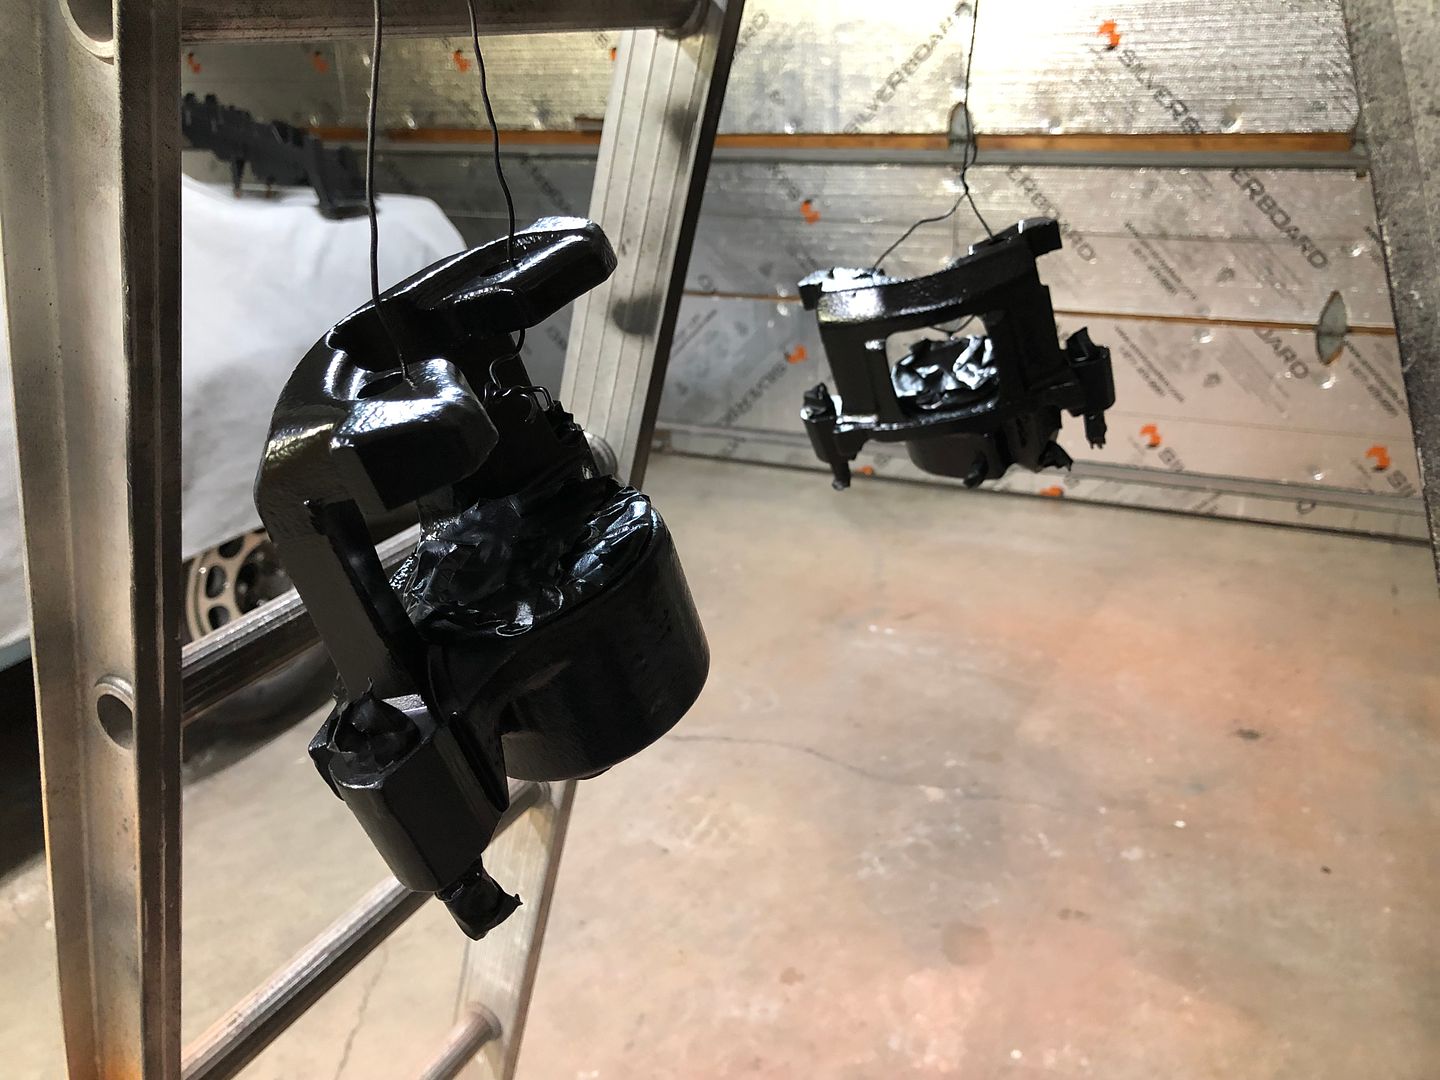
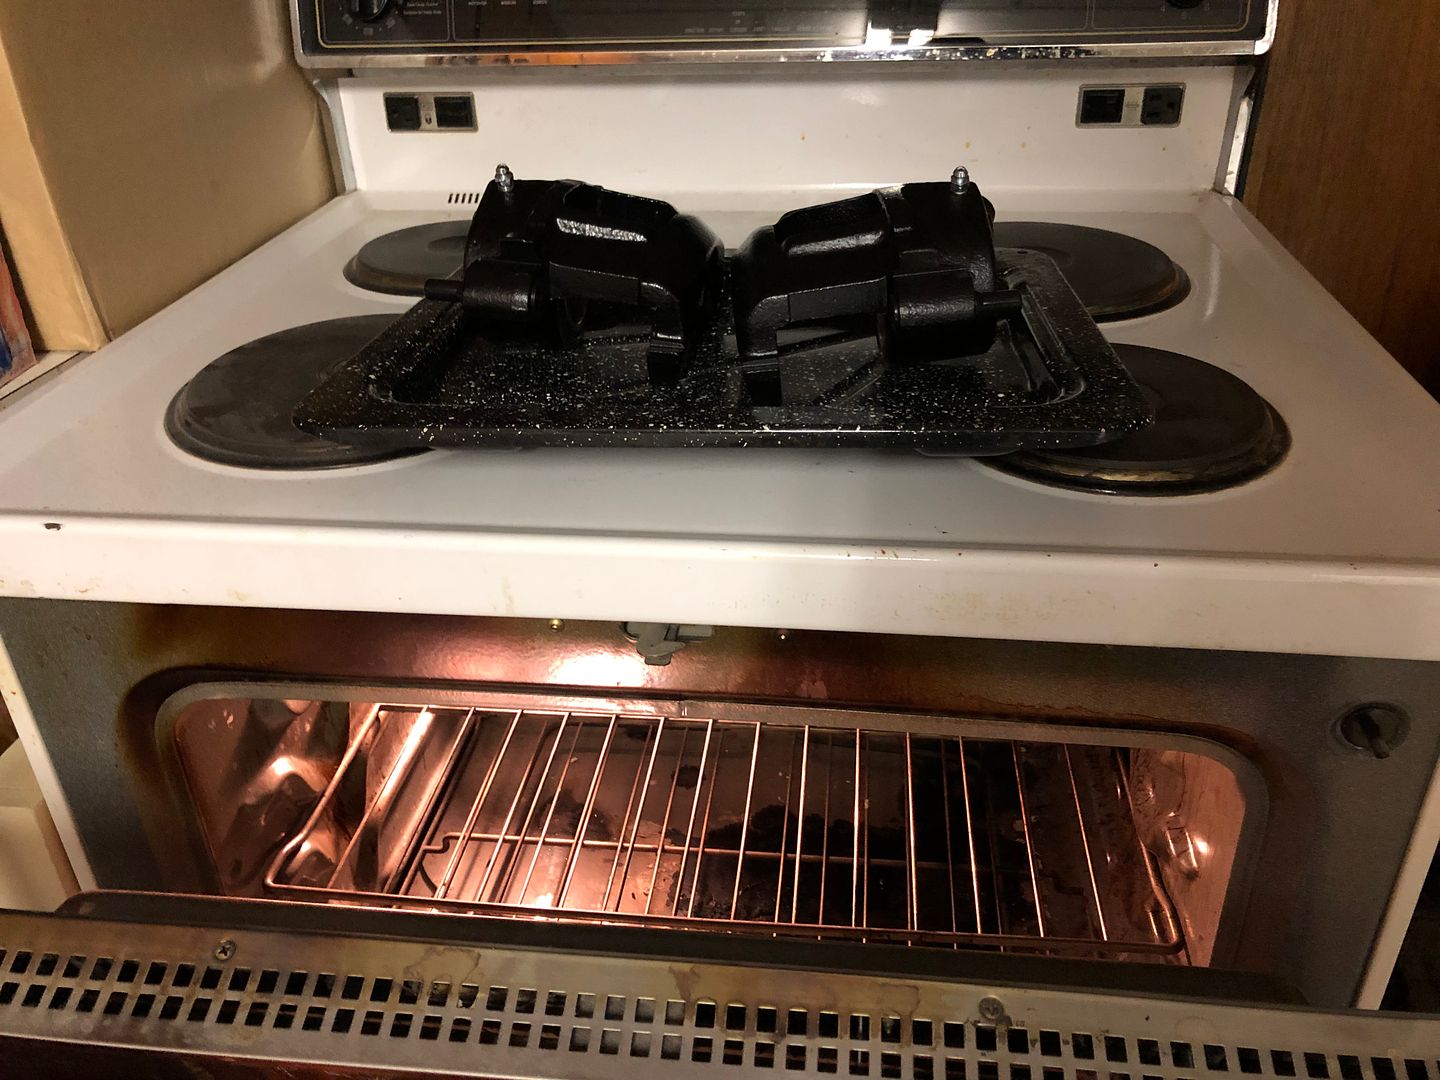
I bought some replacement factory calipers and cored the originals. I opted to paint them black even though I did contemplate clearing them and leaving the plain finish but didn't.
http://s1337.photobucket.com/user/82...jvycu.jpg.html
http://s1337.photobucket.com/user/82...12zjc.jpg.html
I used the second oven in the basement.No wifey complaints this time
http://s1337.photobucket.com/user/82...xk69c.jpg.html
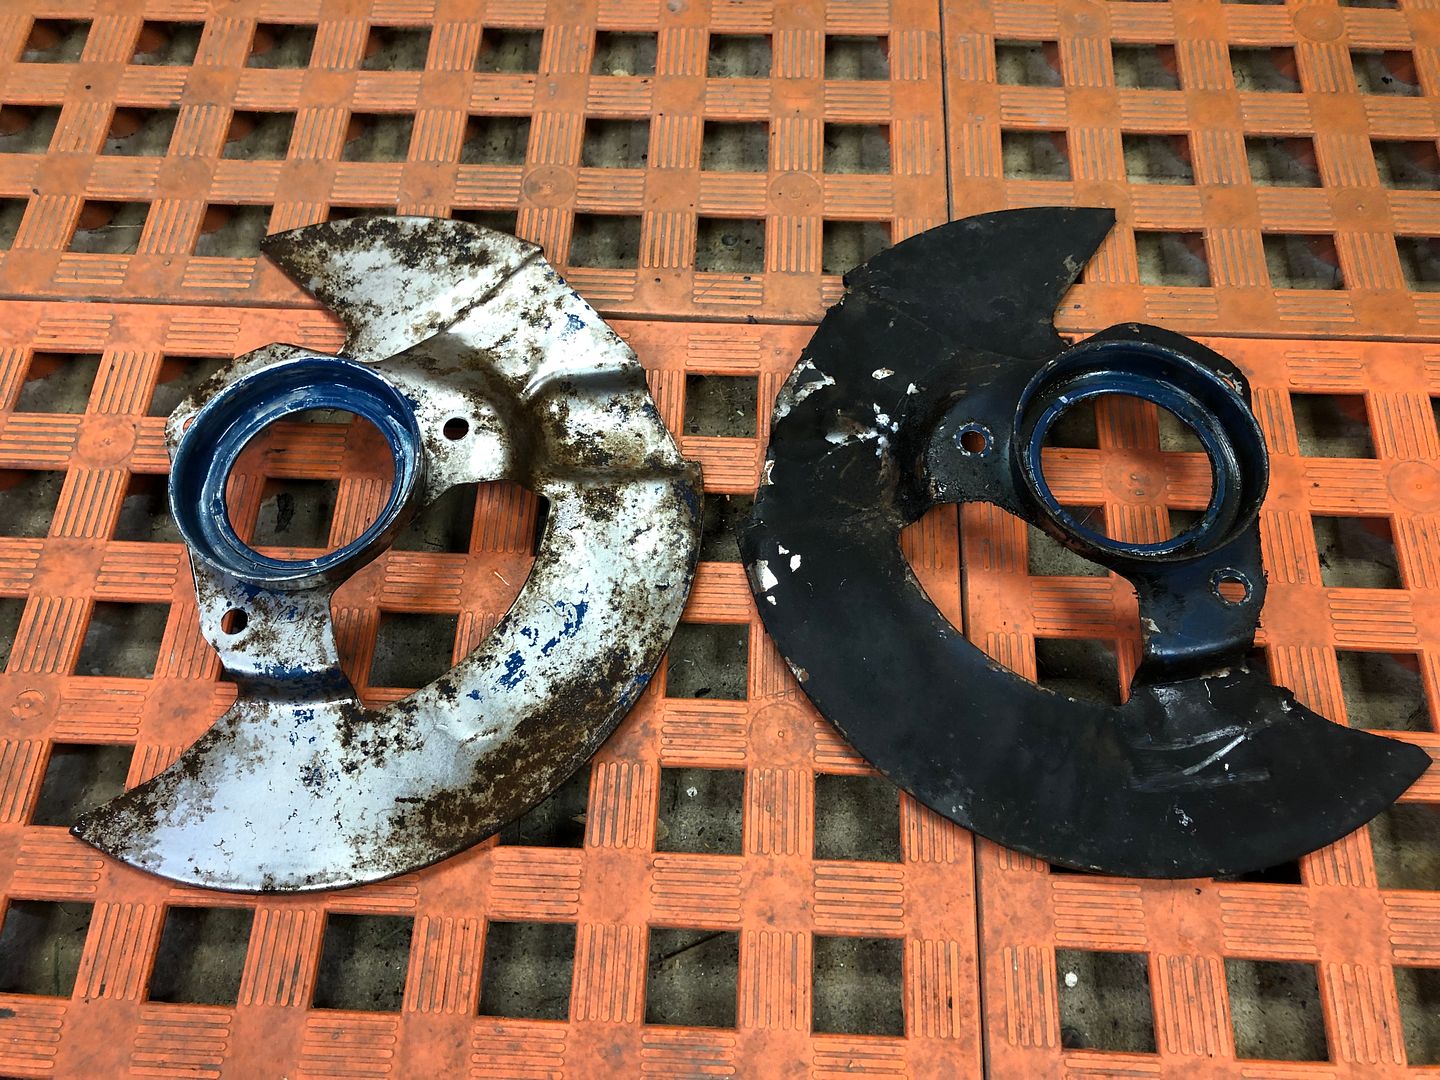
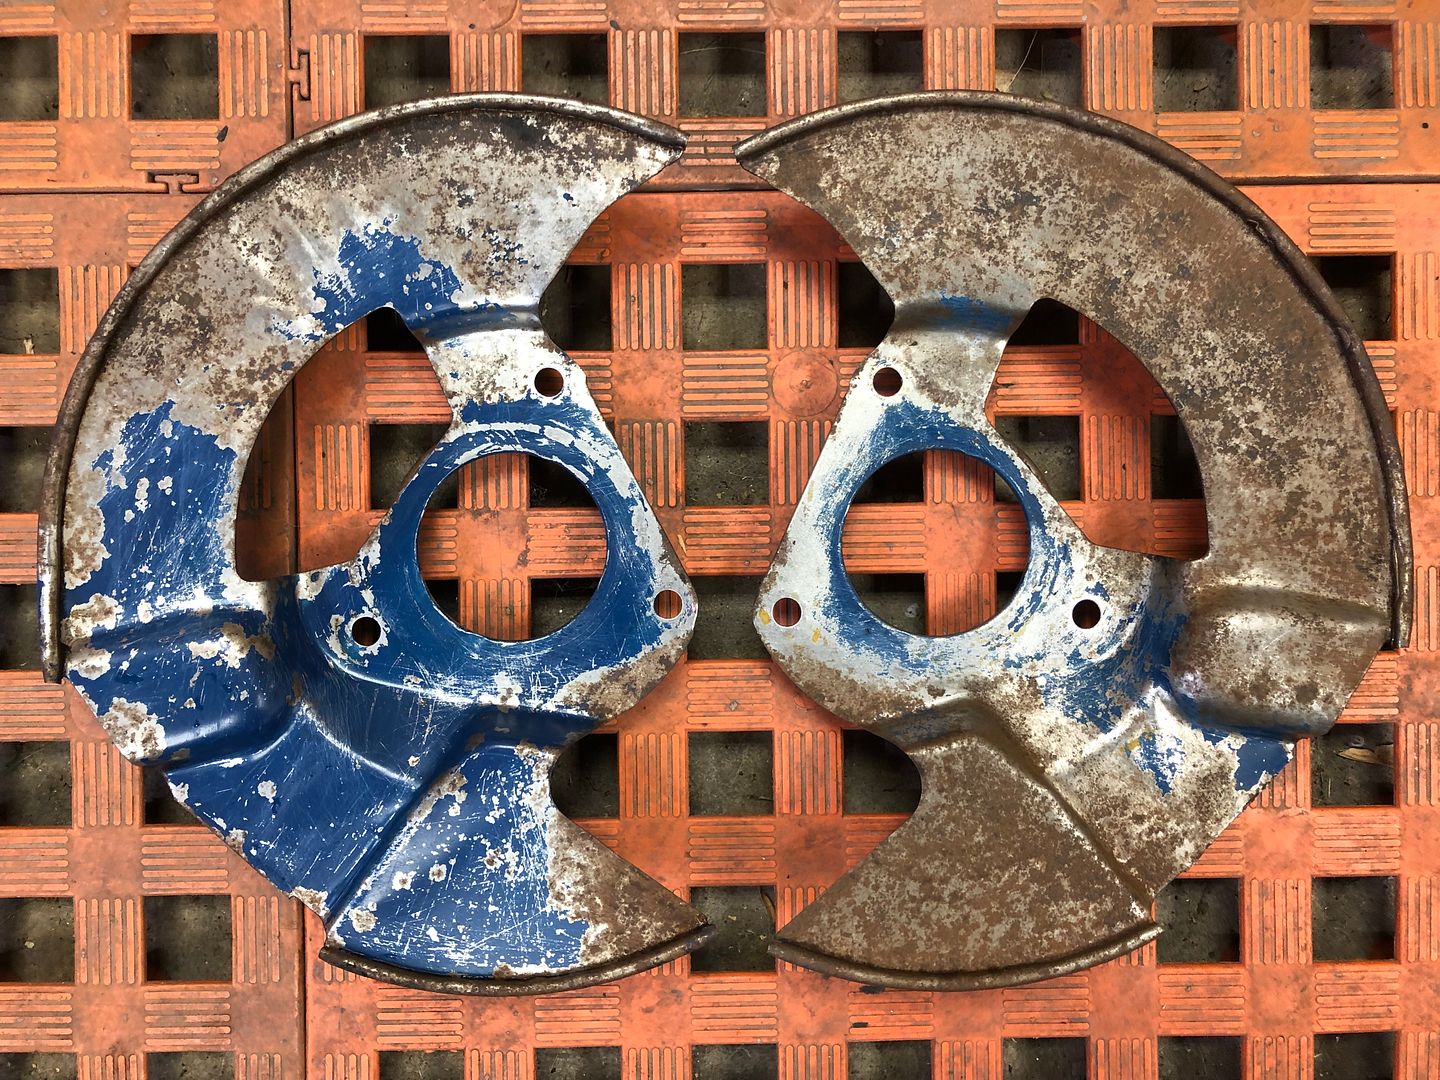
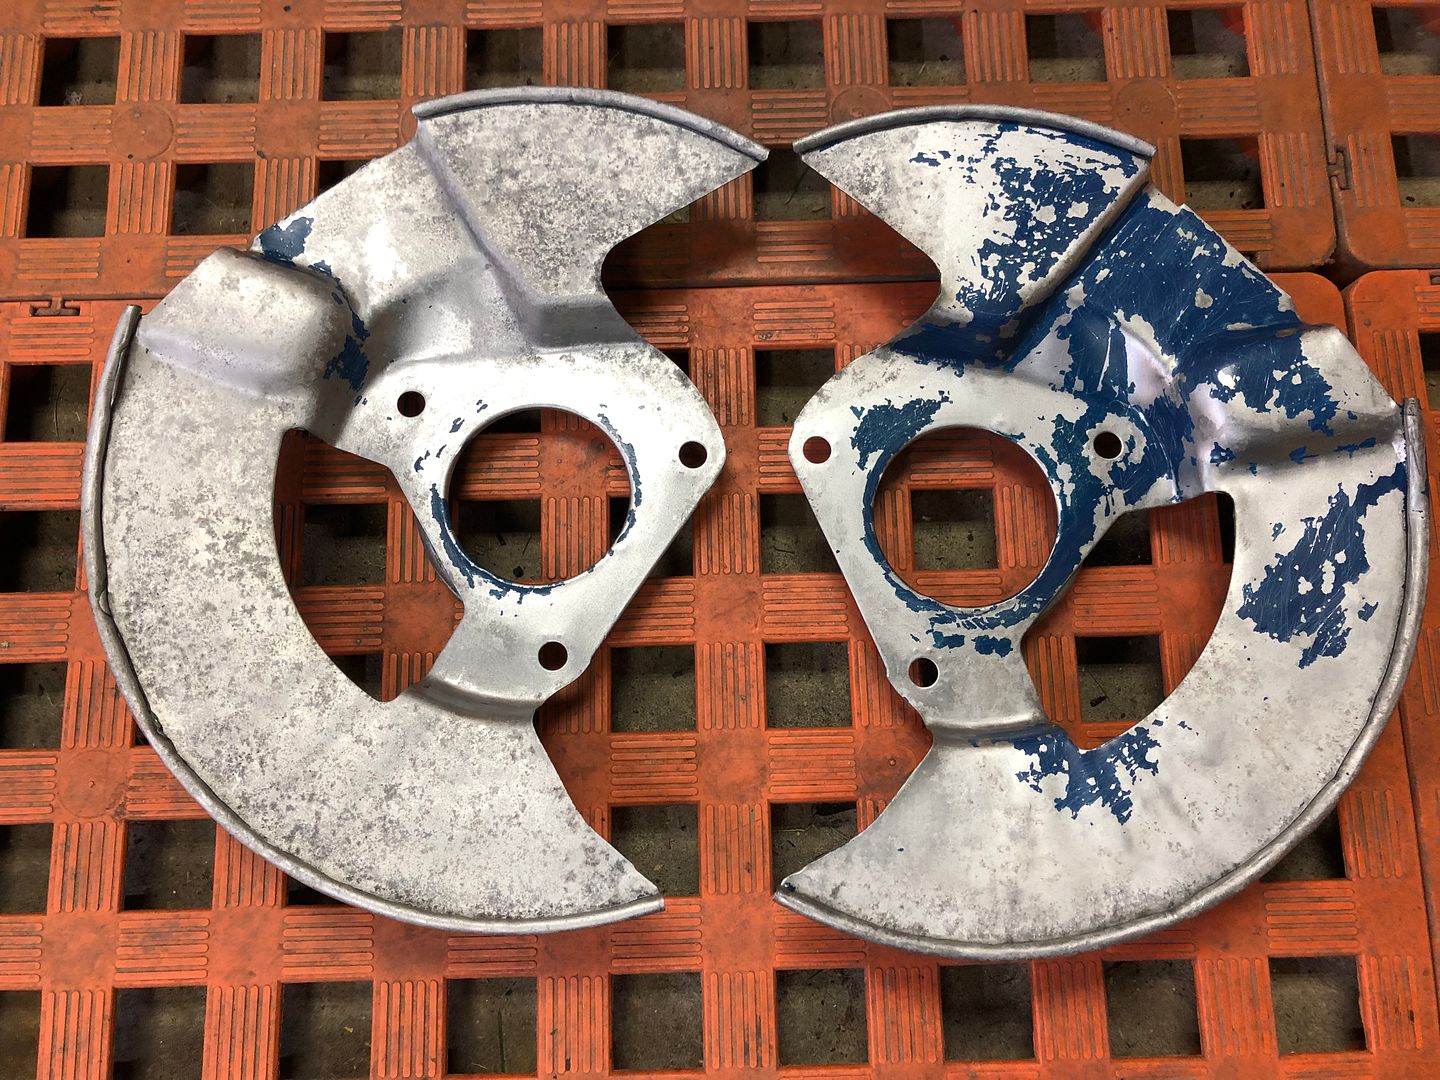
Brake shields; were the original Ford blue. Pretty scuzzy. Cleaned up decently; degreased and scrubbed, then rust convertor. Plan is to find the correct Ford blue to use, prep them properly and reuse. They were pretty nice underneath. Will need to make new foam gaskets.
http://s1337.photobucket.com/user/82...mujec.jpg.html
http://s1337.photobucket.com/user/82...pgnq6.jpg.html
http://s1337.photobucket.com/user/82...elgk3.jpg.html
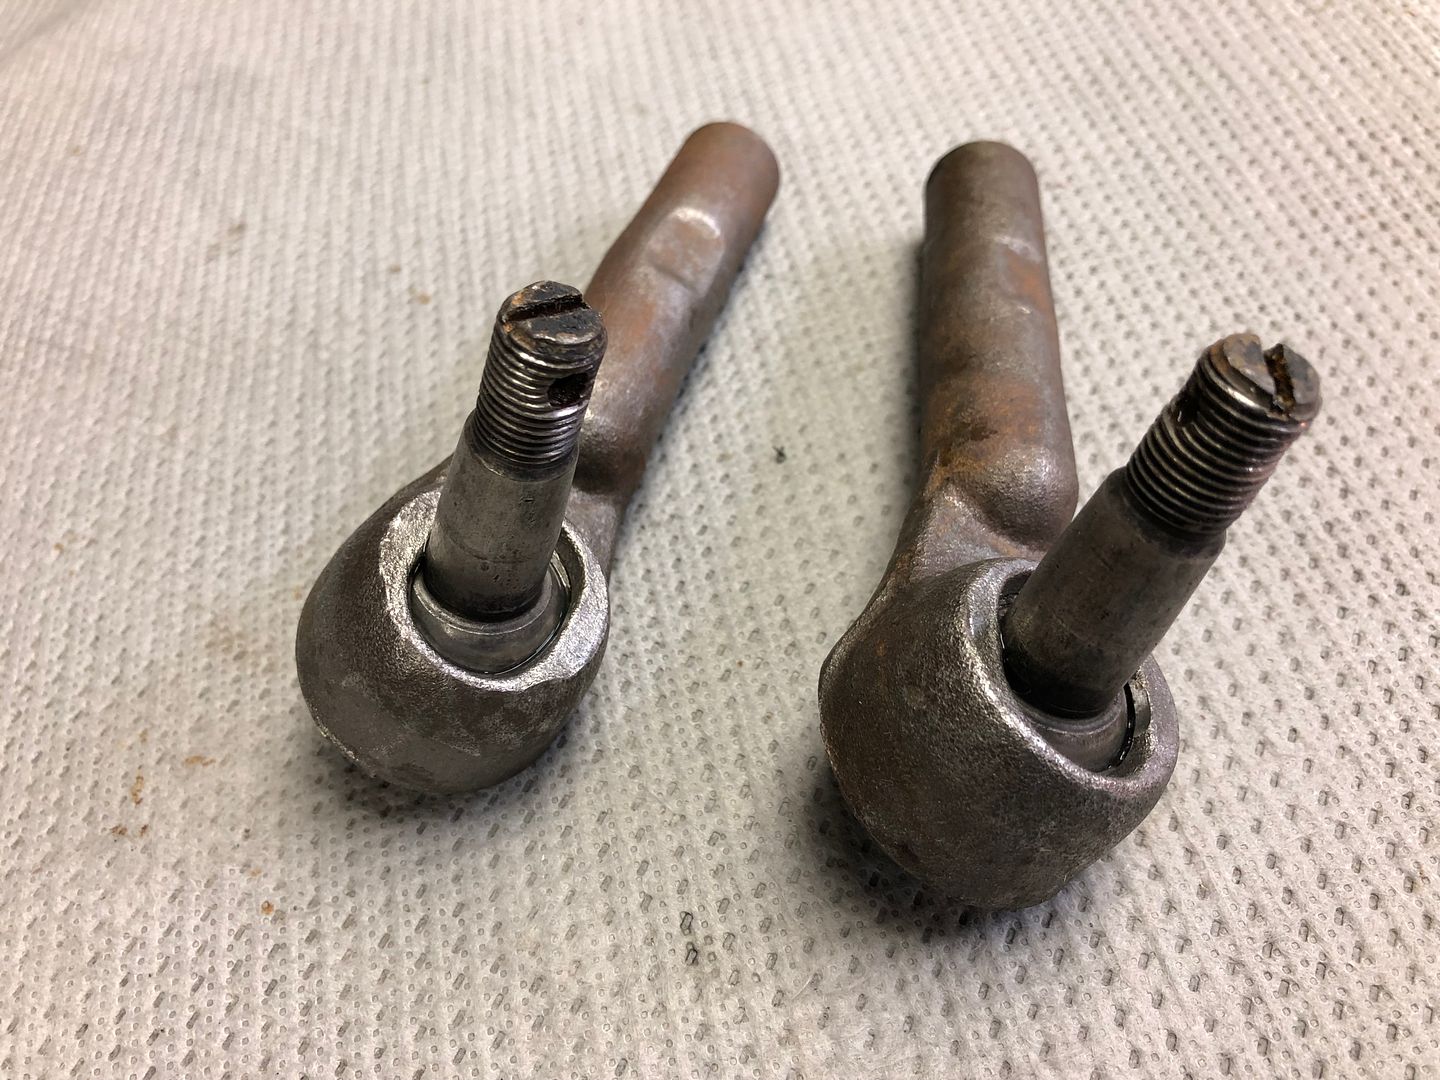
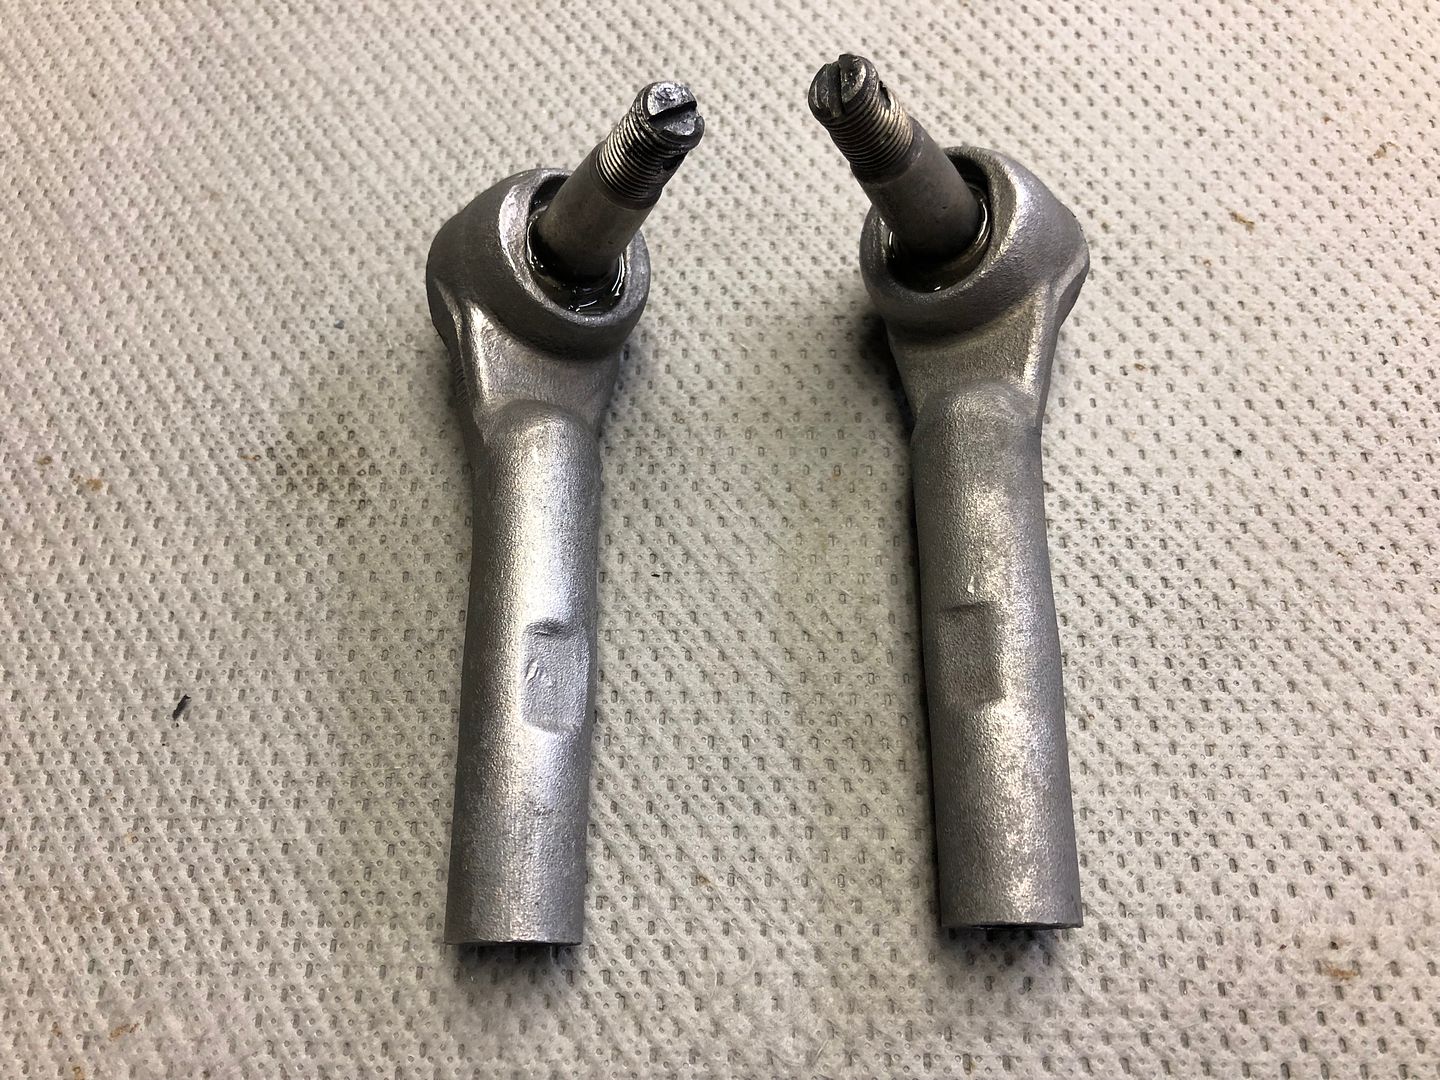
Outer tie rods; cleaned the oversprayed black and the crub and rust removed. They are tight and reusable. Still had the original boots but I'll get new ones. You could see the markings after cleaning them off.
http://s1337.photobucket.com/user/82...q20uj.jpg.html
http://s1337.photobucket.com/user/82...6lwyu.jpg.html
http://s1337.photobucket.com/user/82...xmb9x.jpg.html
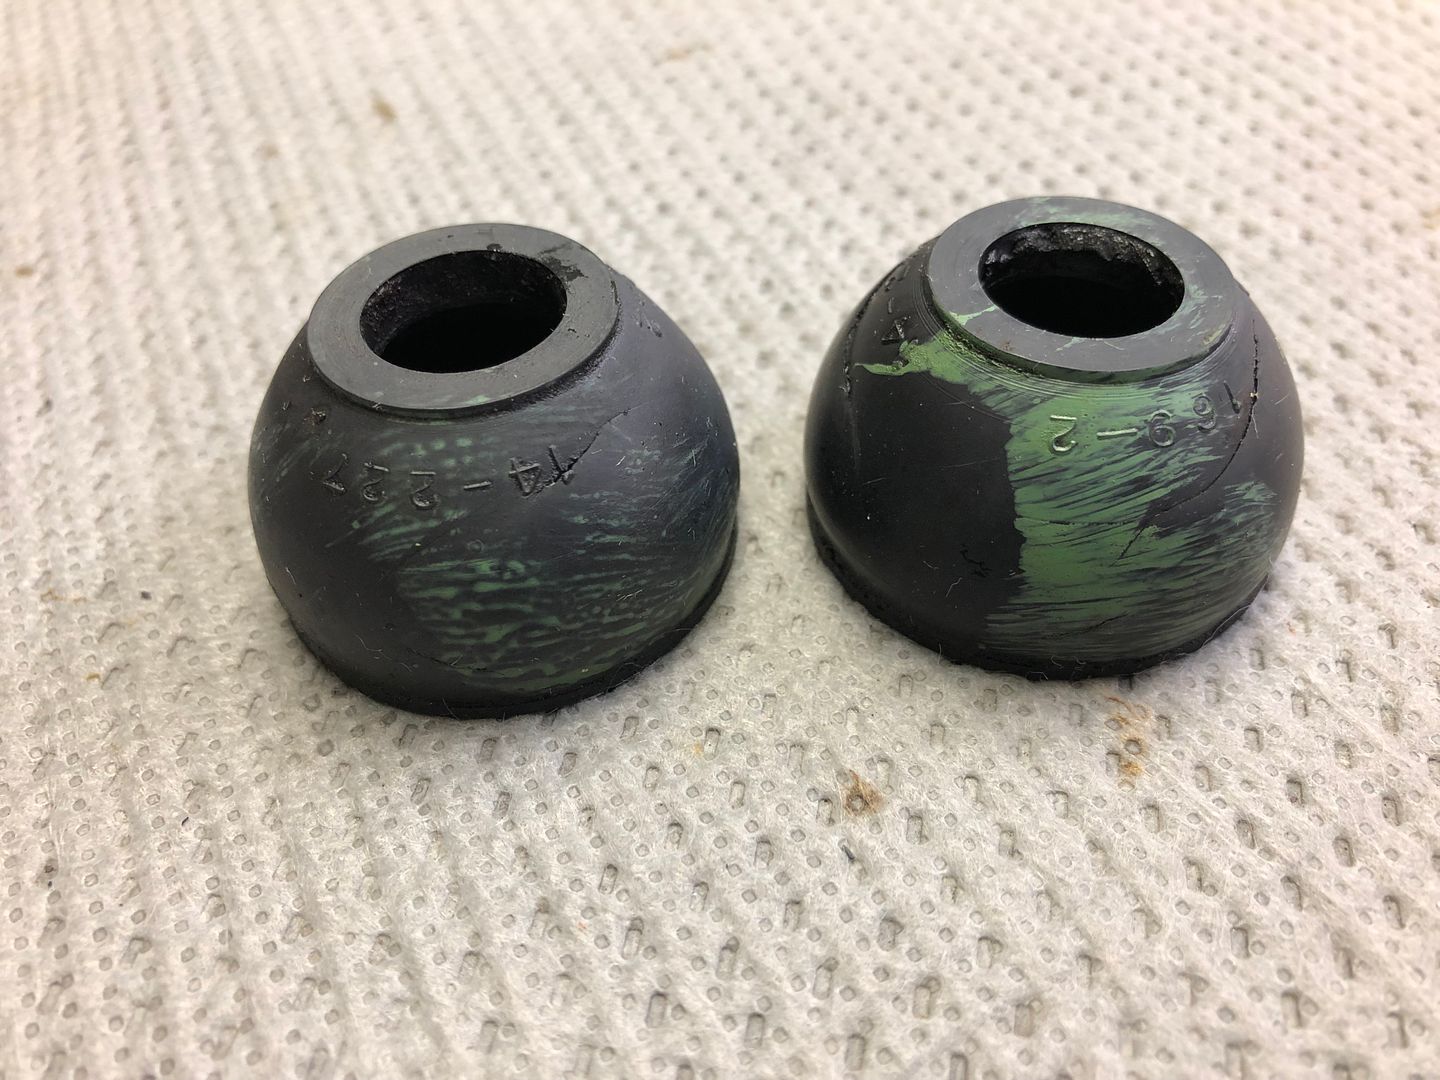
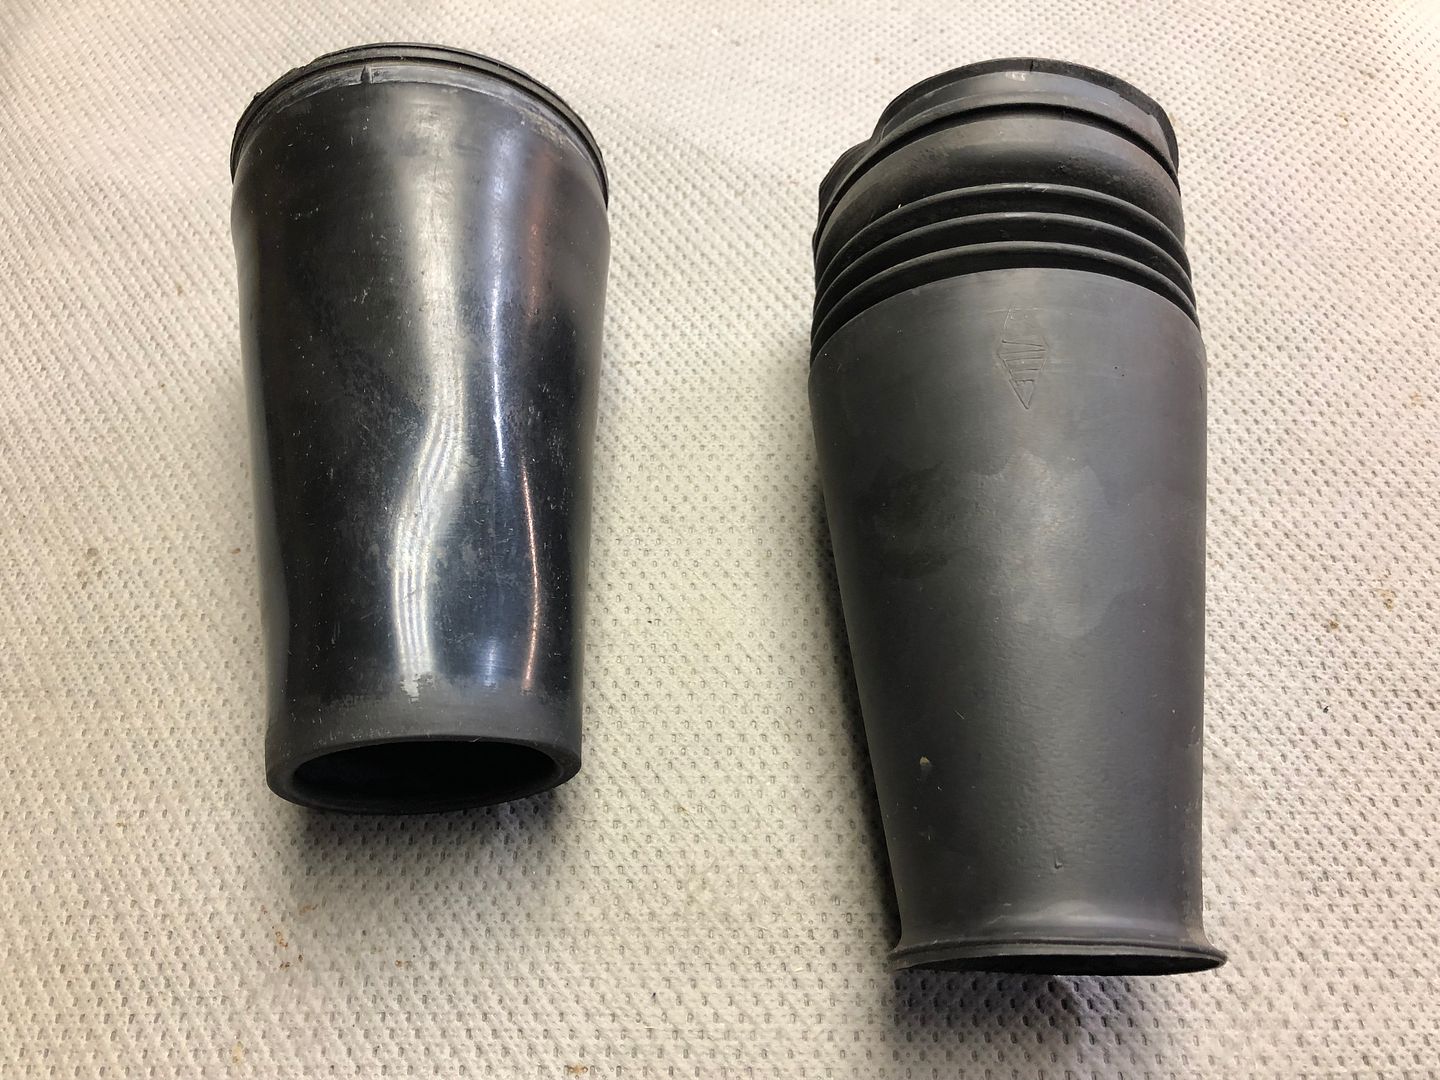
Strut boots:Once I removed noted I noted I have one replacement. The proper one should be the one on the left. I may need to track one down.
http://s1337.photobucket.com/user/82...6nyog.jpg.html
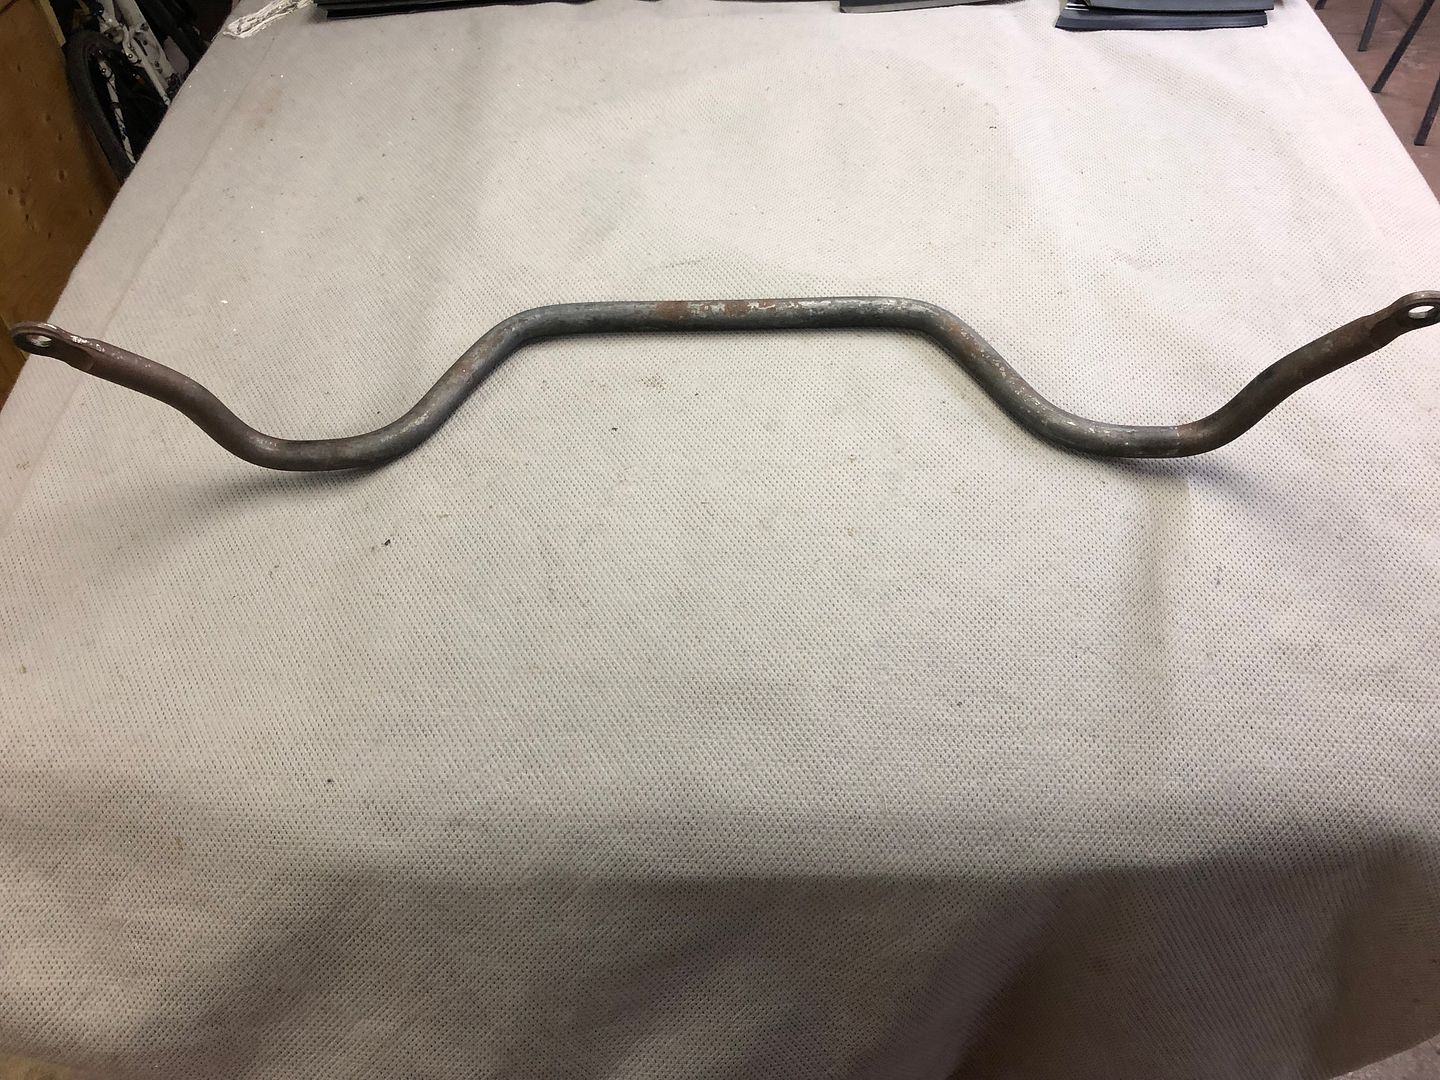
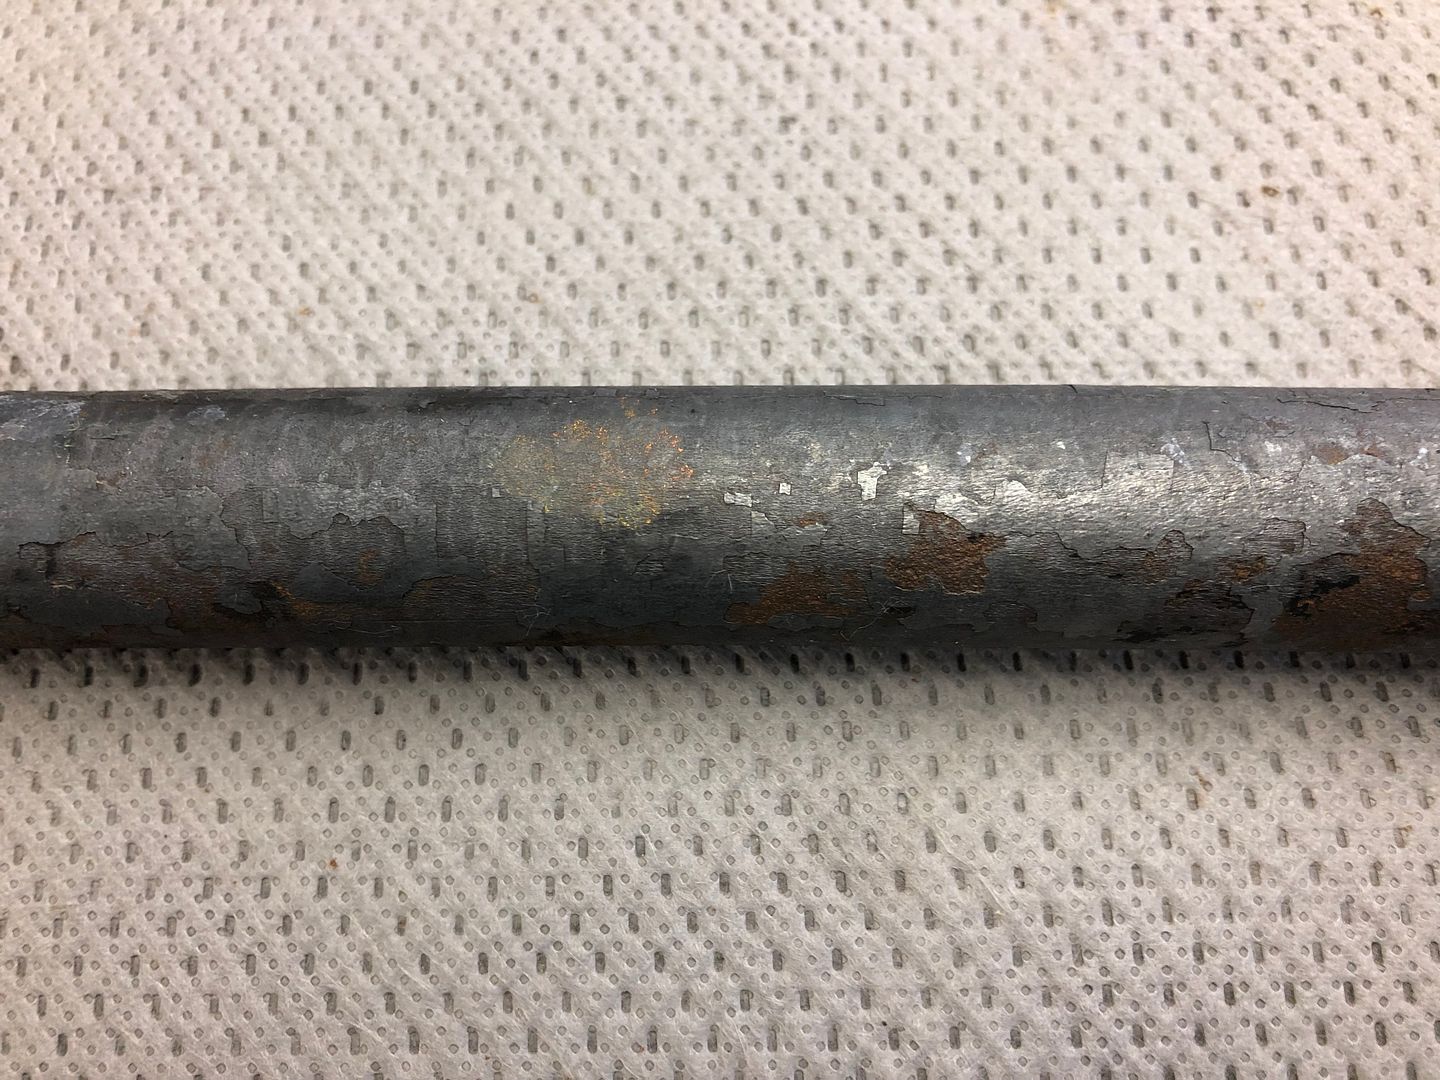
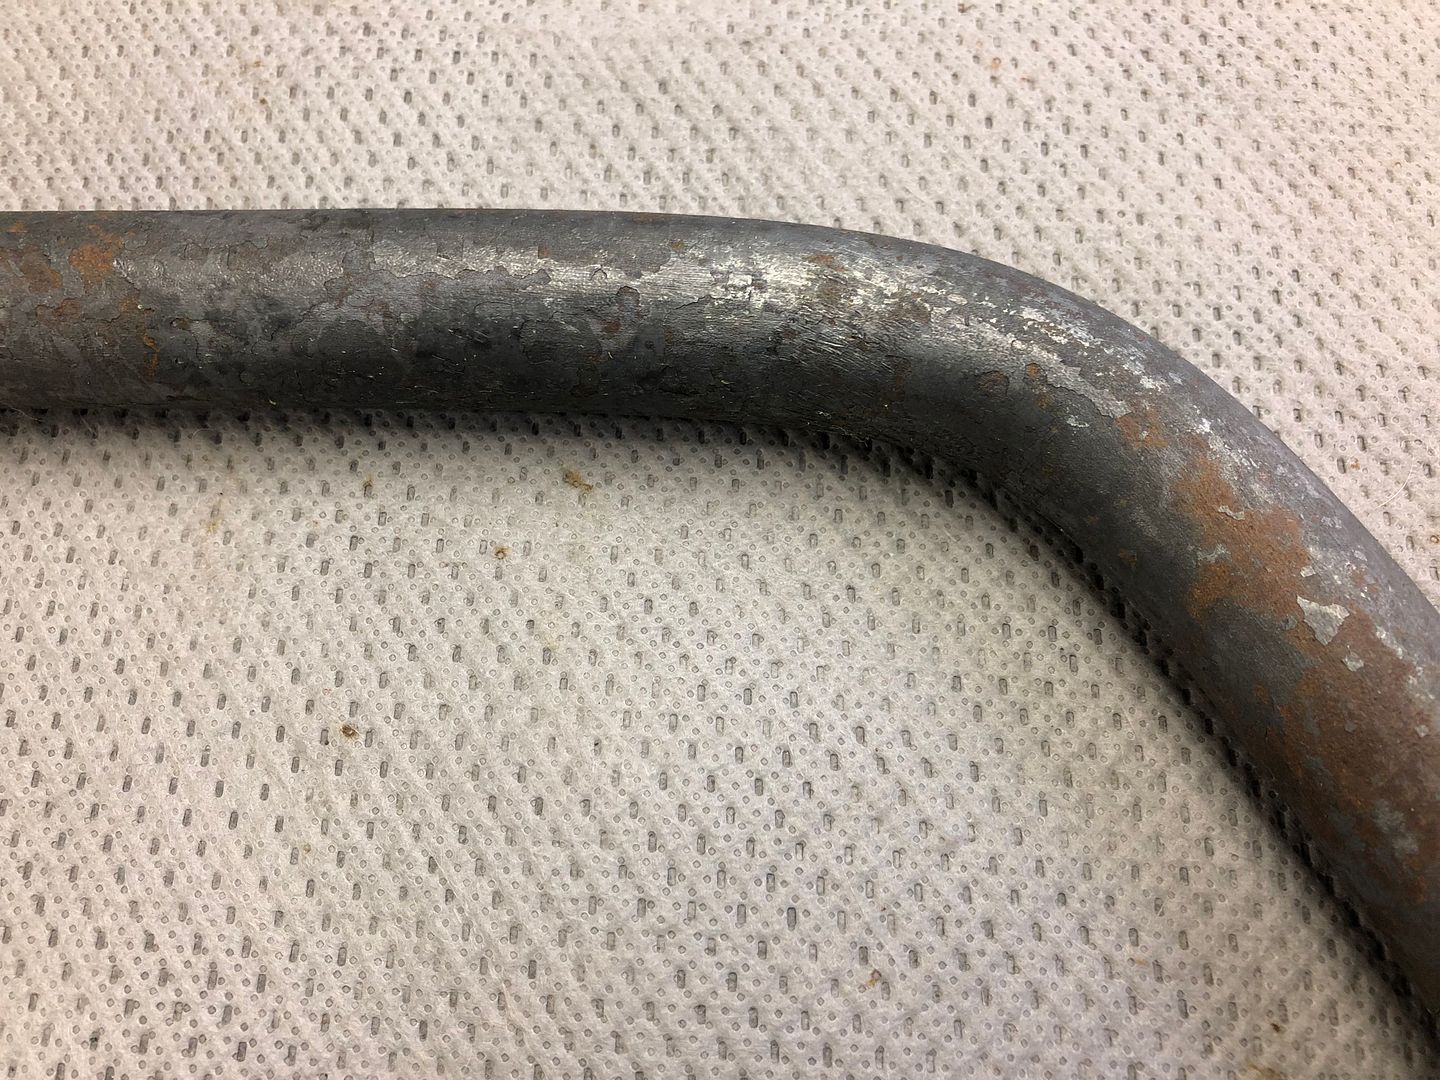
Sway bar: Again quickly oversprayed with black to hide the surface rust I think. I could not see any factory color banding or markings after I cleaned it up. The car was an original TRX suspension and wheel car so has the 1.125" bar. I painted our other car's black. I may clean the rust off and leave this one close to the natural grey color.
http://s1337.photobucket.com/user/82...tkdls.jpg.html
http://s1337.photobucket.com/user/82...lhhrl.jpg.html
http://s1337.photobucket.com/user/82...2u7zd.jpg.html
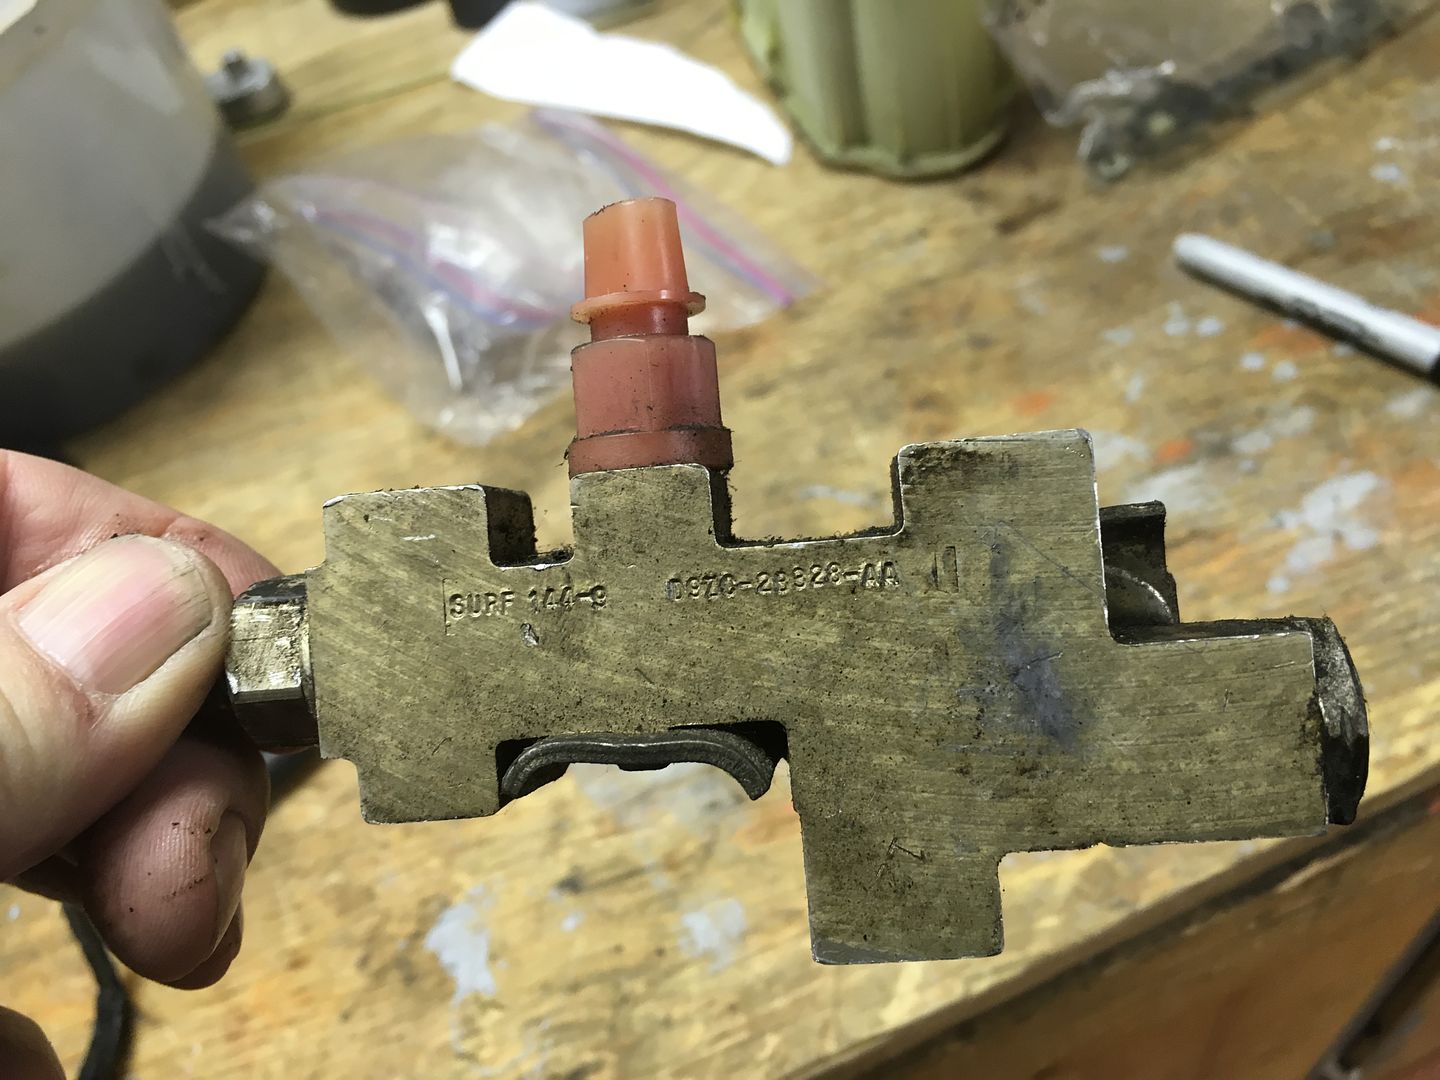
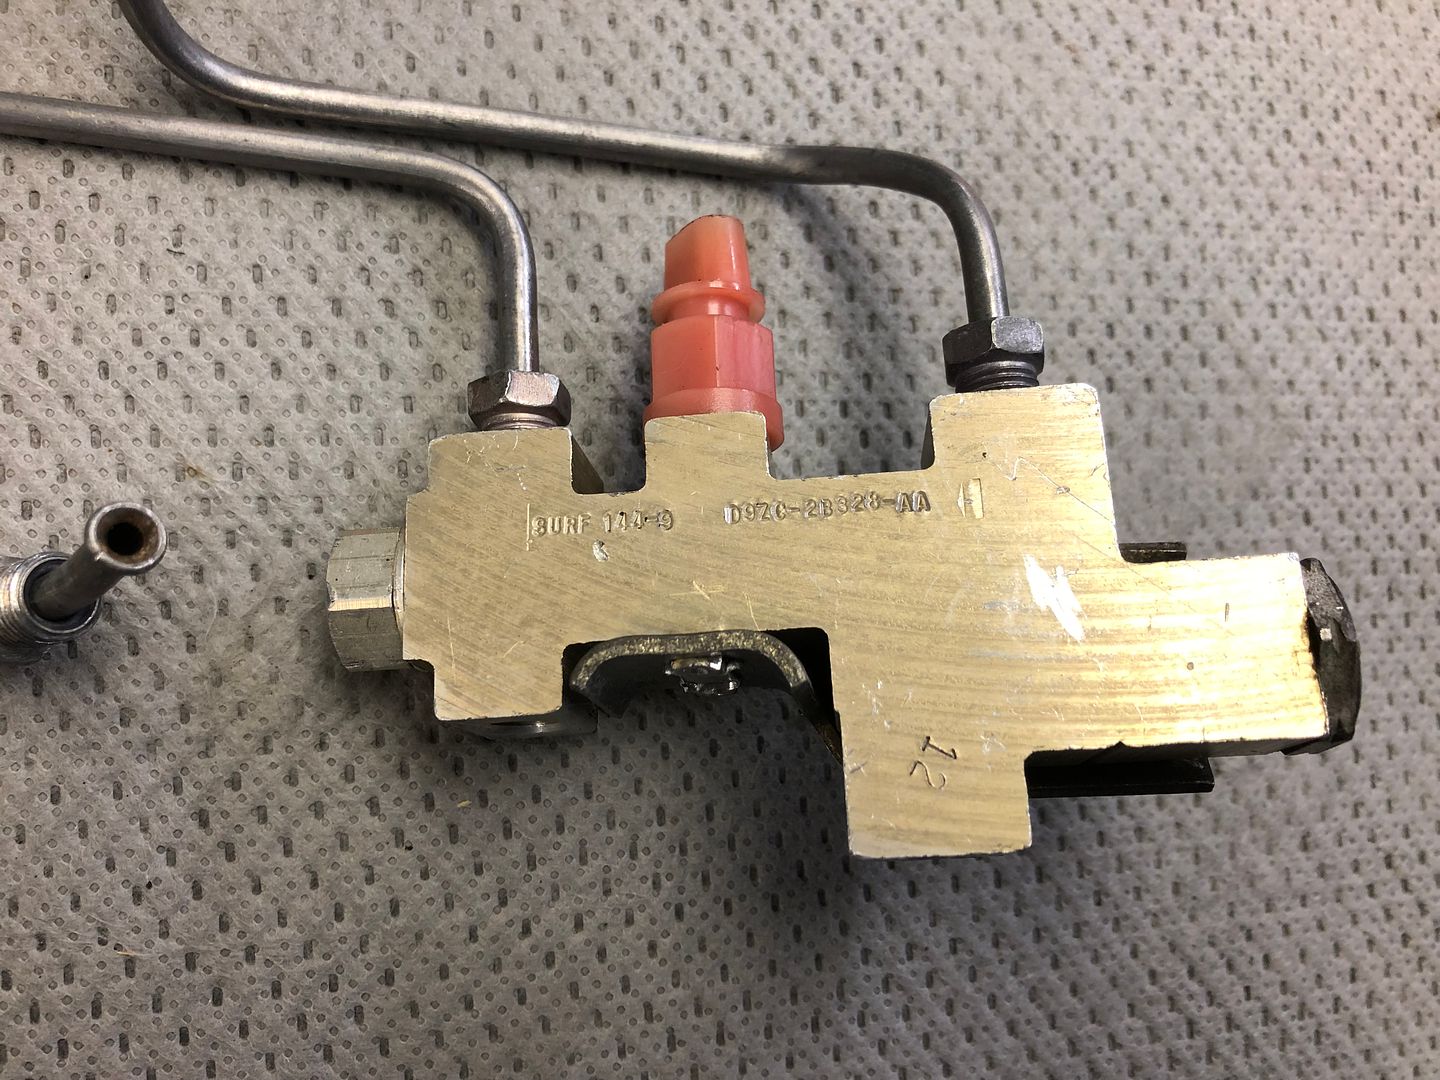
Brake lines and proportioning valve. As the original brake set up is being used, these were cleaned up and put away. The front lines shined up just as nicely
http://s1337.photobucket.com/user/82...q0il0.jpg.html
http://s1337.photobucket.com/user/82...afcps.jpg.html
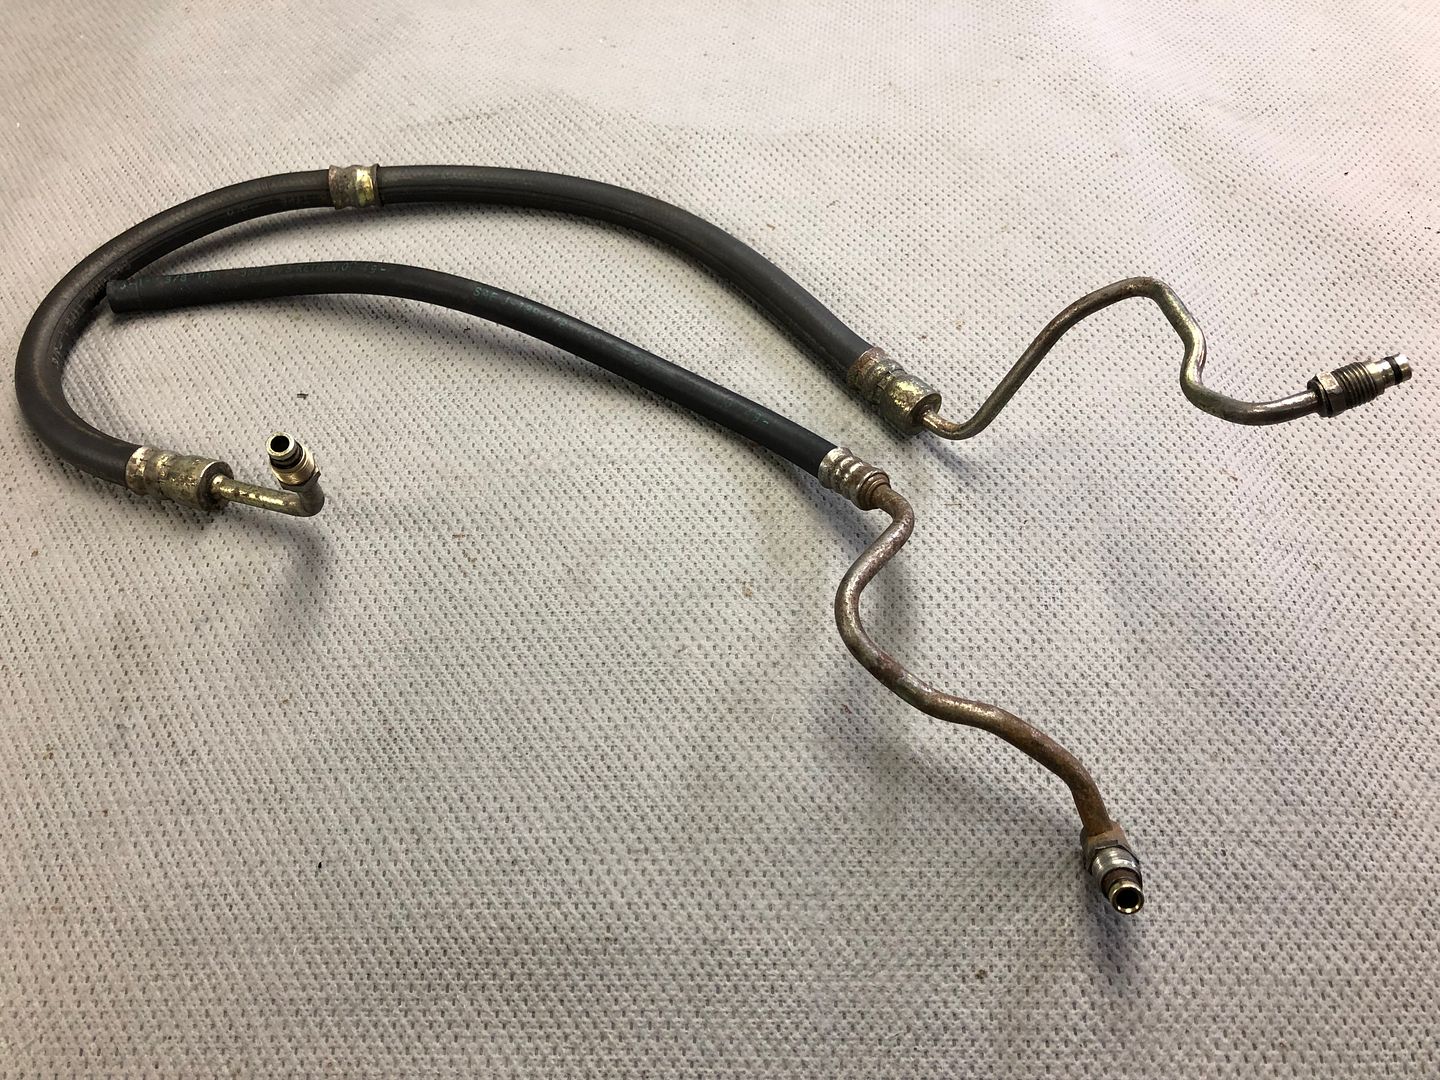
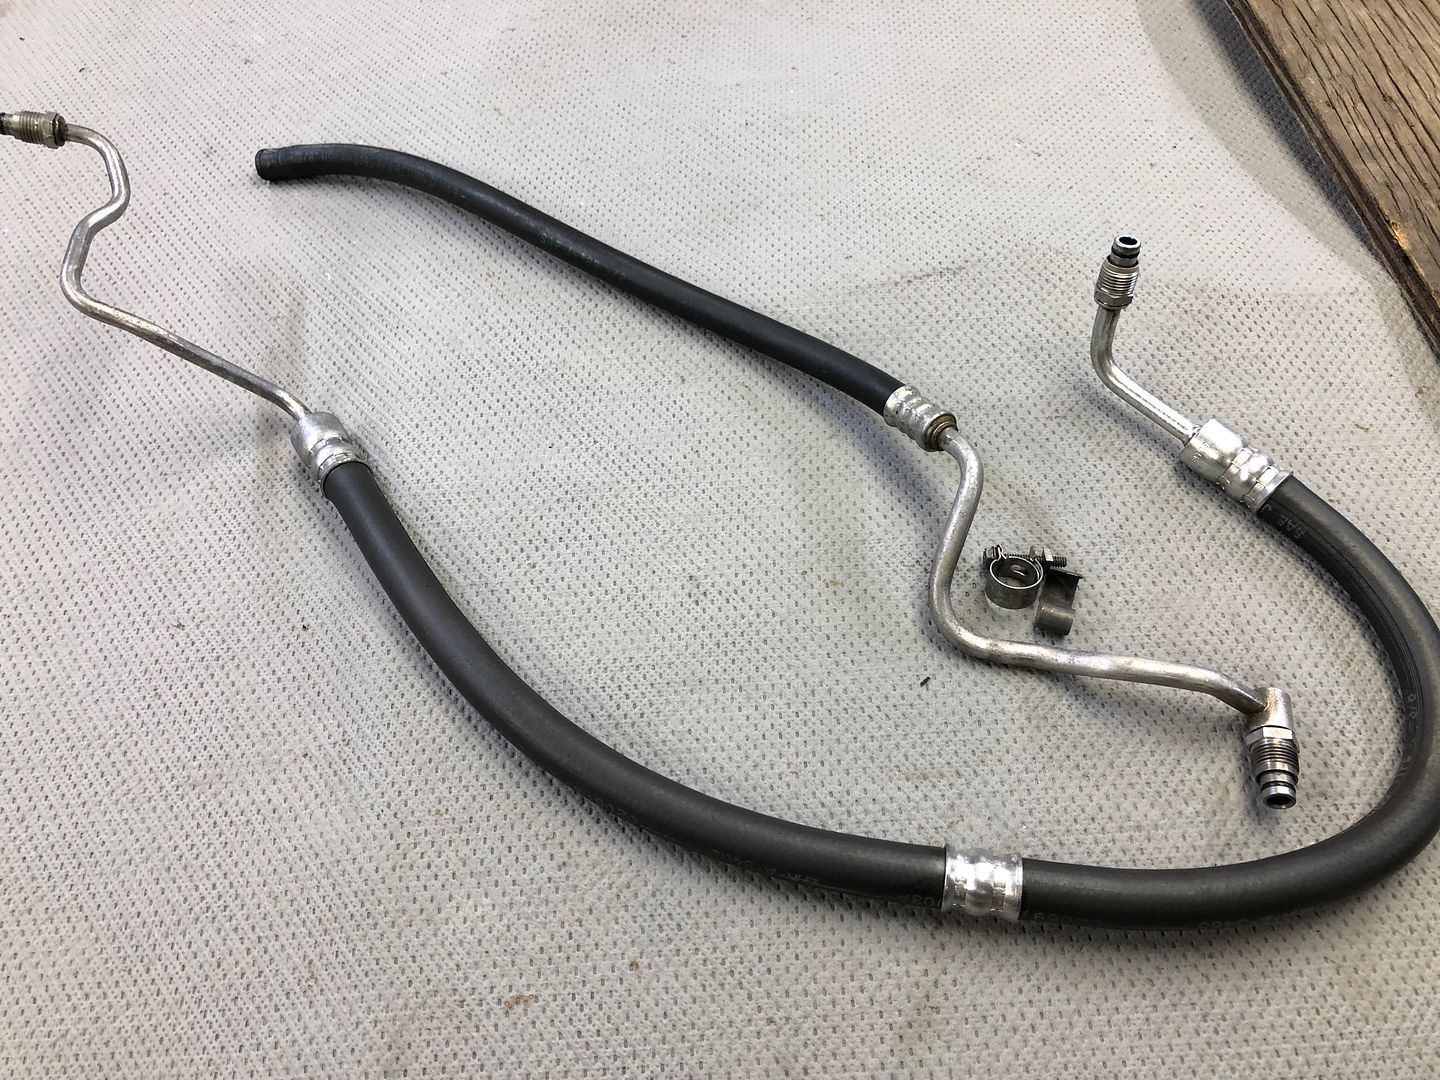
Power steering hoses. I plan to see if I can get these recoated with some fresh yellow Cadmium. There is a place locally that does restoration among industrial. I hope they can do hose ends like this. Our other car I did in the faux Eastwood Cadmium kit.
http://s1337.photobucket.com/user/82...gyrm5.jpg.html
http://s1337.photobucket.com/user/82...yrjw2.jpg.html
Last edited by 82GTforME; 03-21-2020 at 10:07 AM.
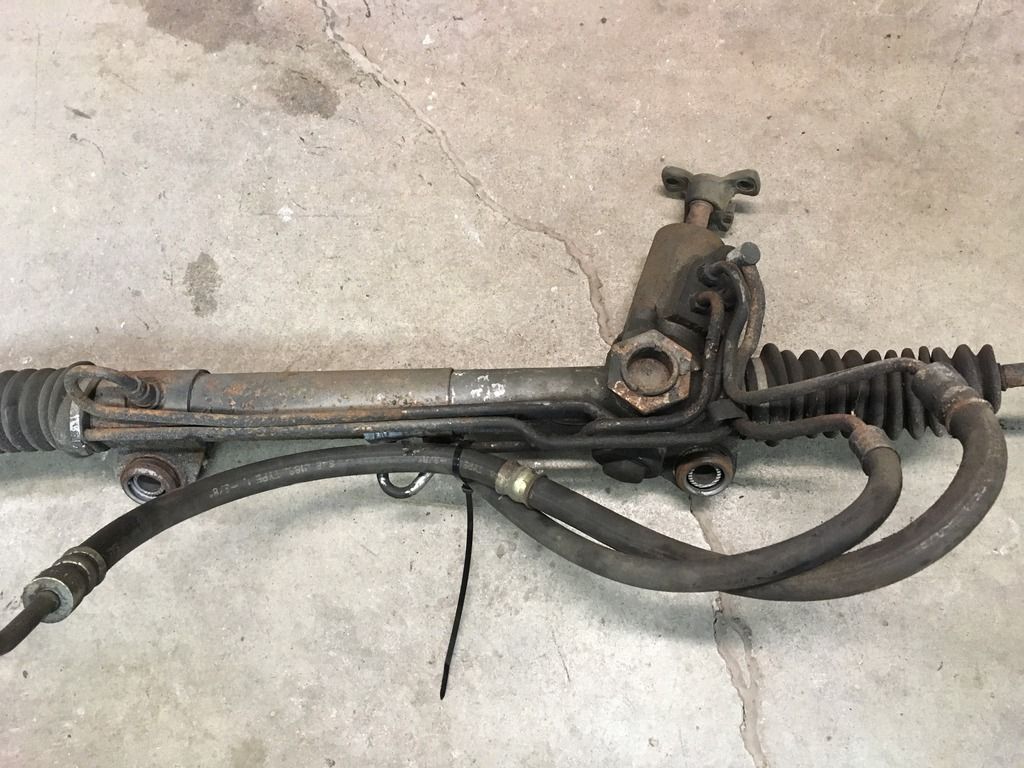
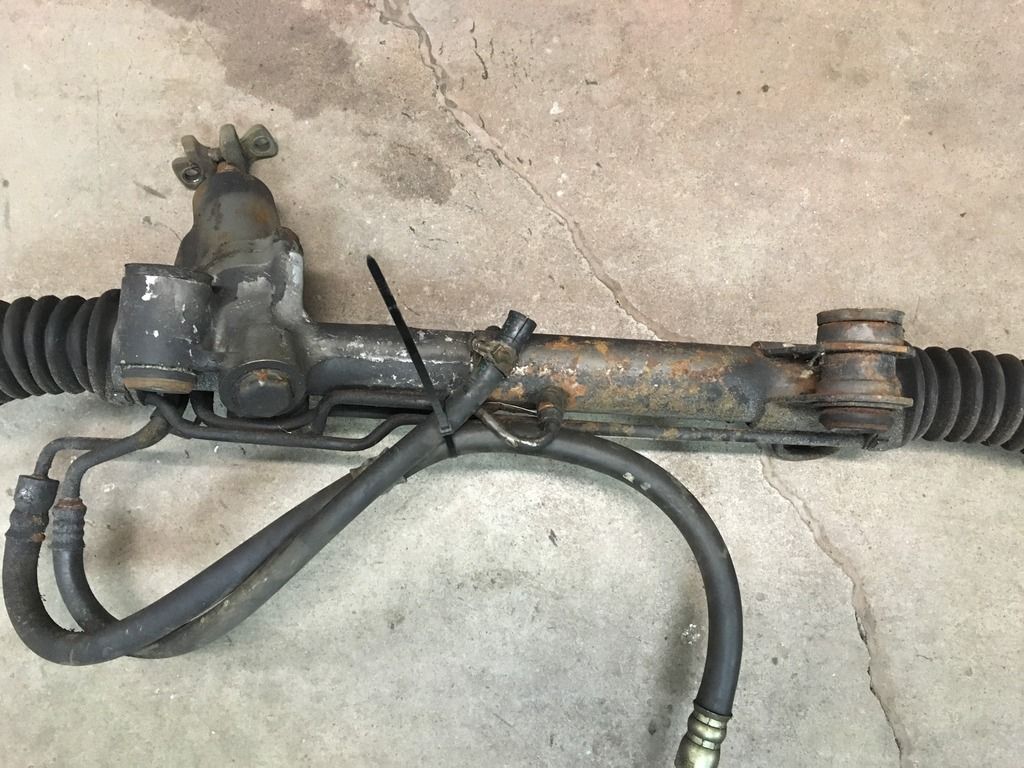
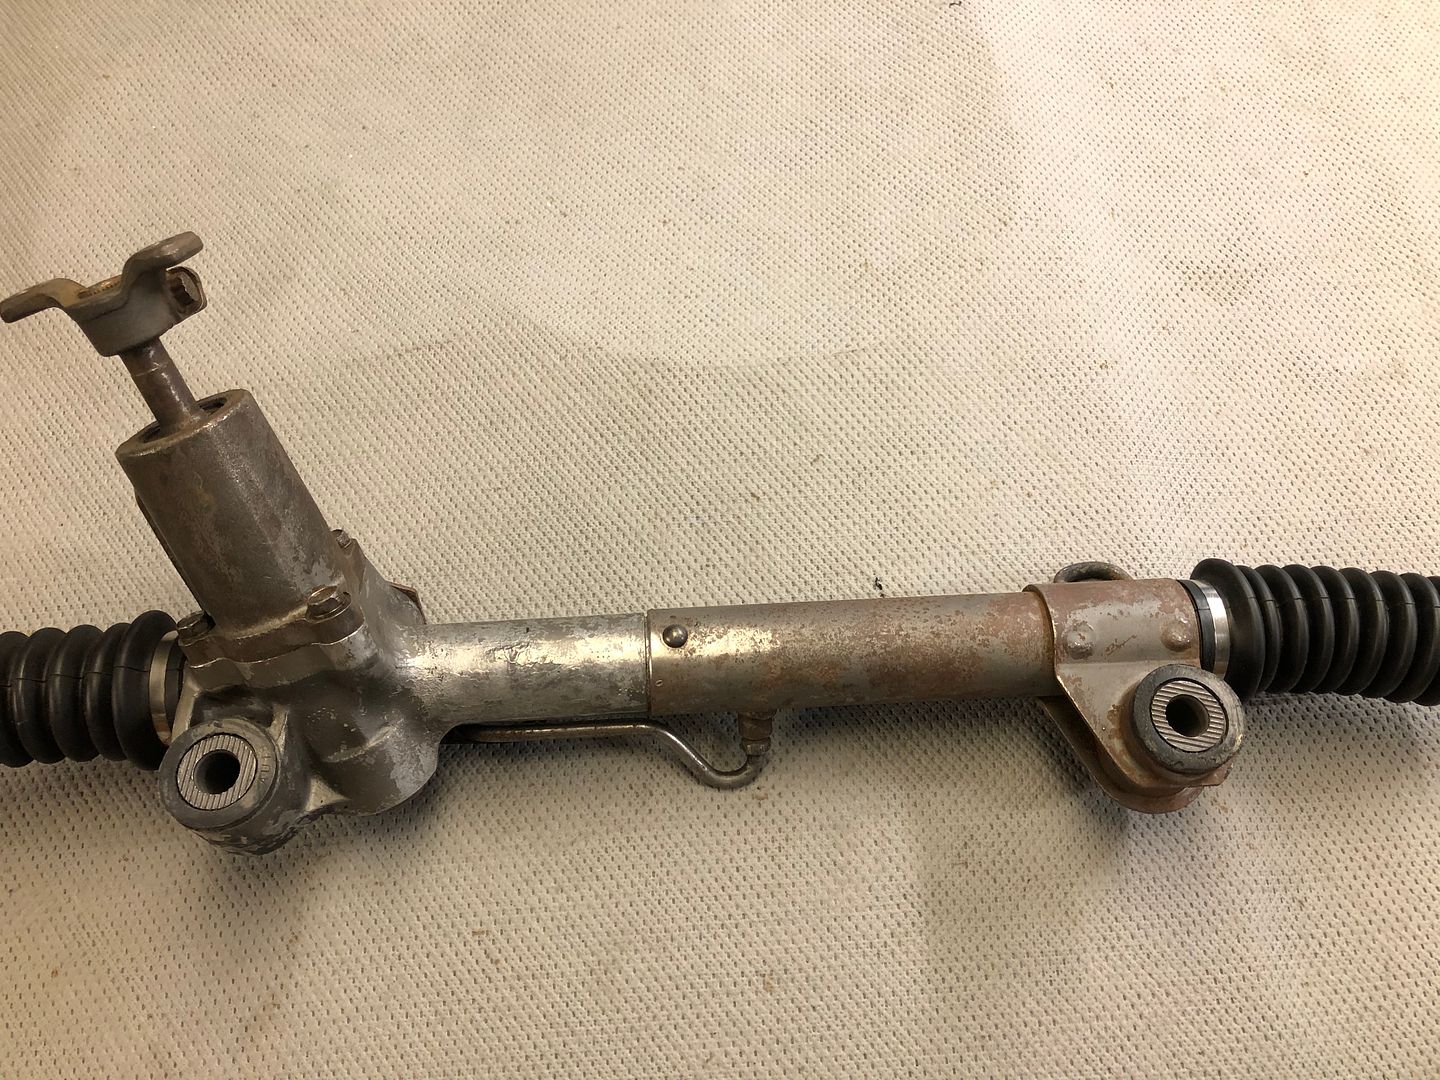
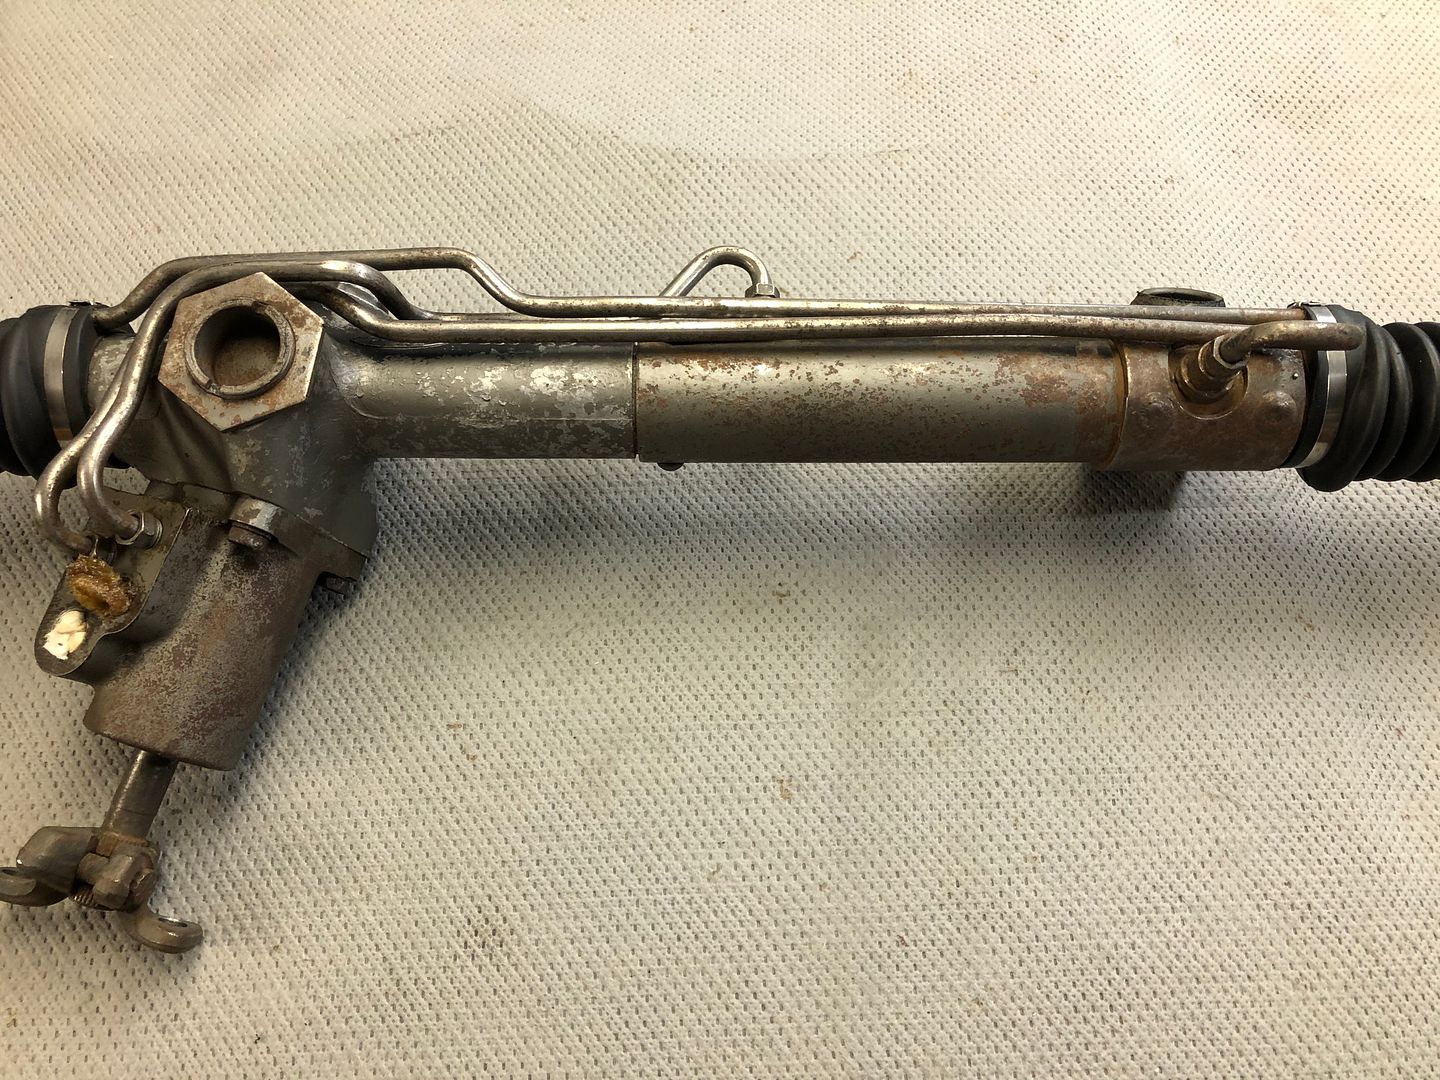
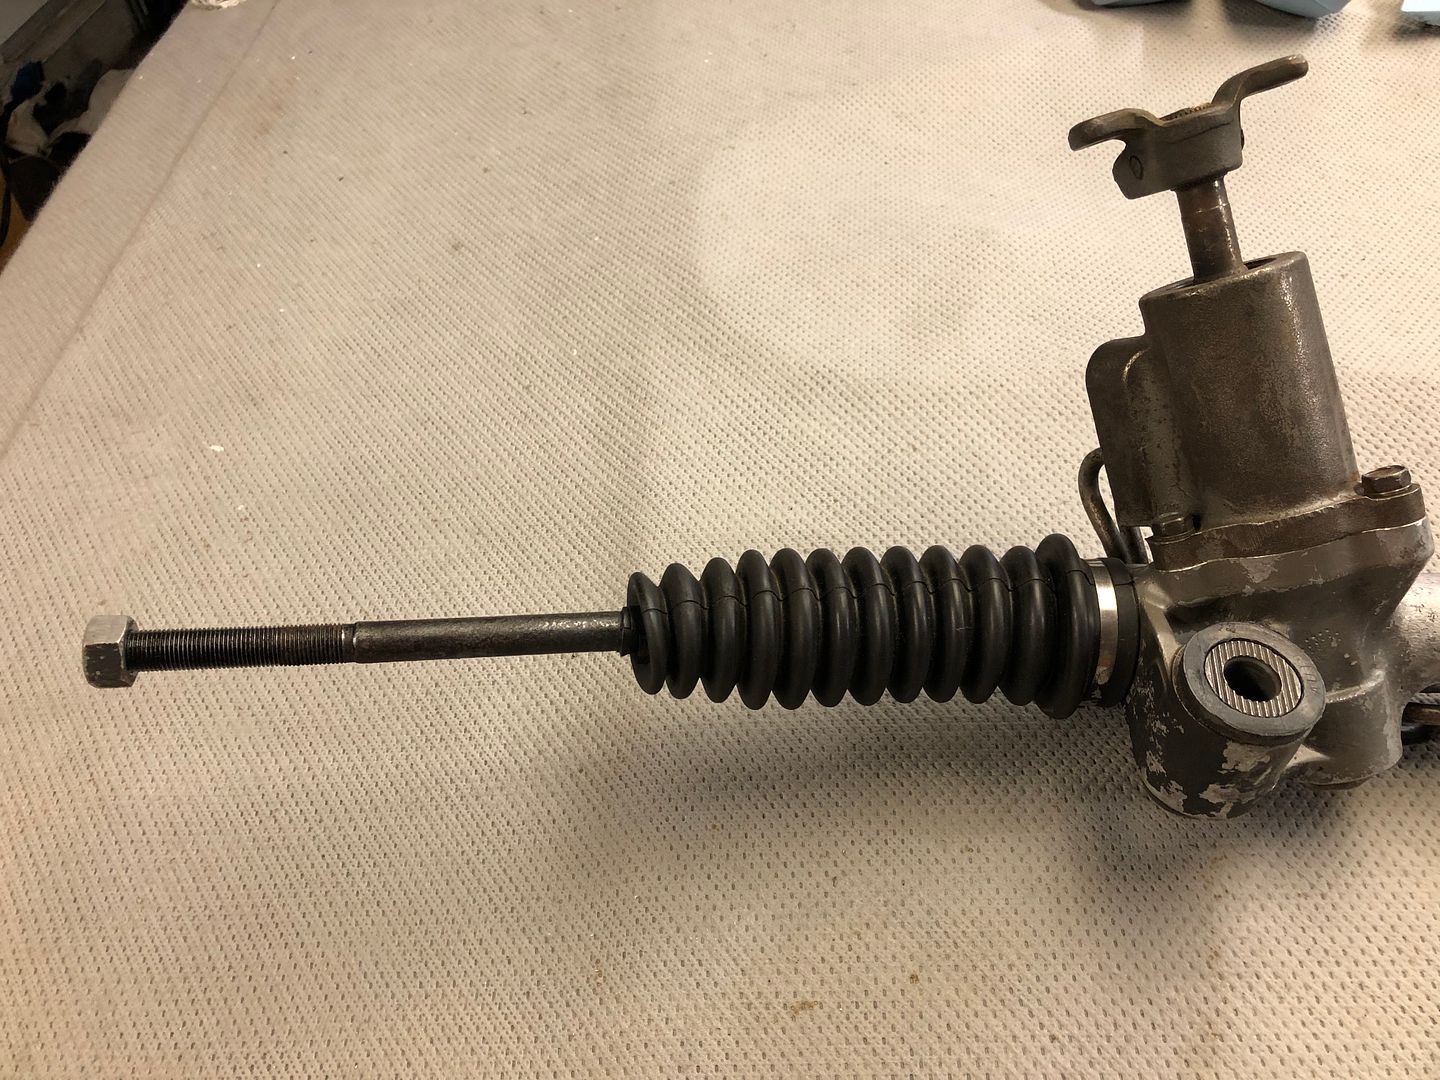
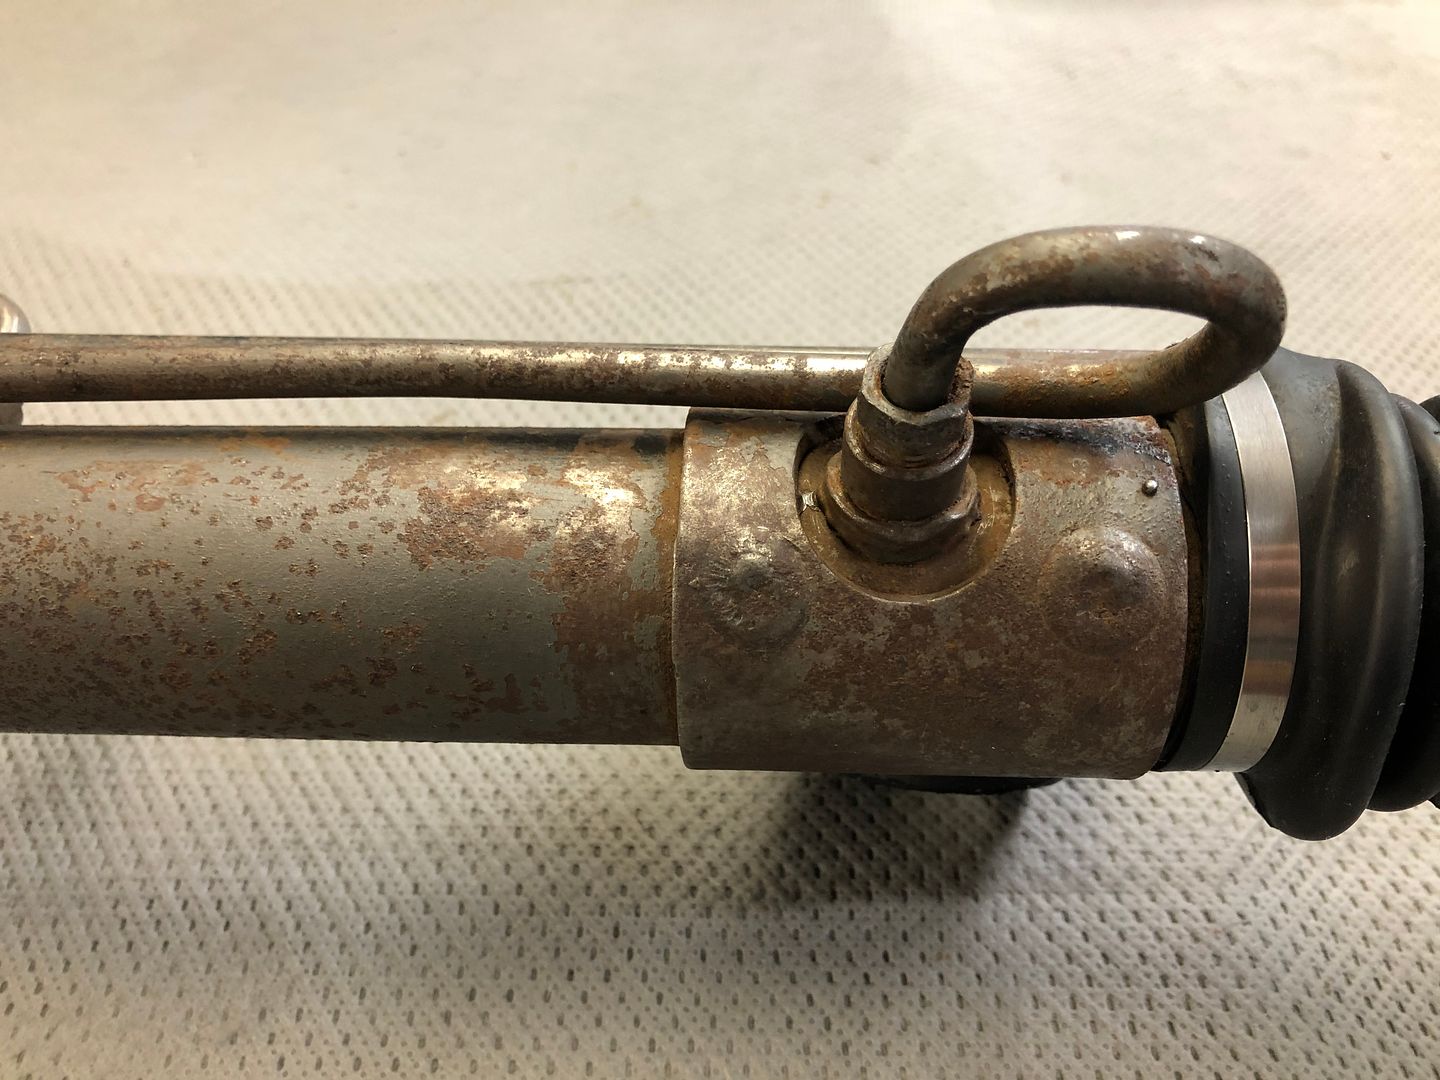
Speaking of the TRW rack from the car. Again oversprayed in a quick hiding black paint coat like a lot of the undercarriage and surface rusted areas.
After cleaning, scrubbing, and going it over once pretty decently, I have decided I am going to retry this rack in the car. There do not seem to be rebuilt TRW racks on the shelves anymore and I am not enthused to send this out through RockAuto from Canada for a rebuild. I think if I had to rebuild or replace, I would replace with the Ford rack along with the hoses and the pump to do it right.
For now this one seems tight. Maybe this shows only 17k miles... I will spend some more time detailing and refinishing but this is a good starting point.
http://s1337.photobucket.com/user/82...yysf3.jpg.html
http://s1337.photobucket.com/user/82...ym9vu.jpg.html
http://s1337.photobucket.com/user/82...smfz9.jpg.html
http://s1337.photobucket.com/user/82...iycv7.jpg.html
Last edited by 82GTforME; 12-01-2019 at 08:47 PM.
Nice attention to detail! Looking great.
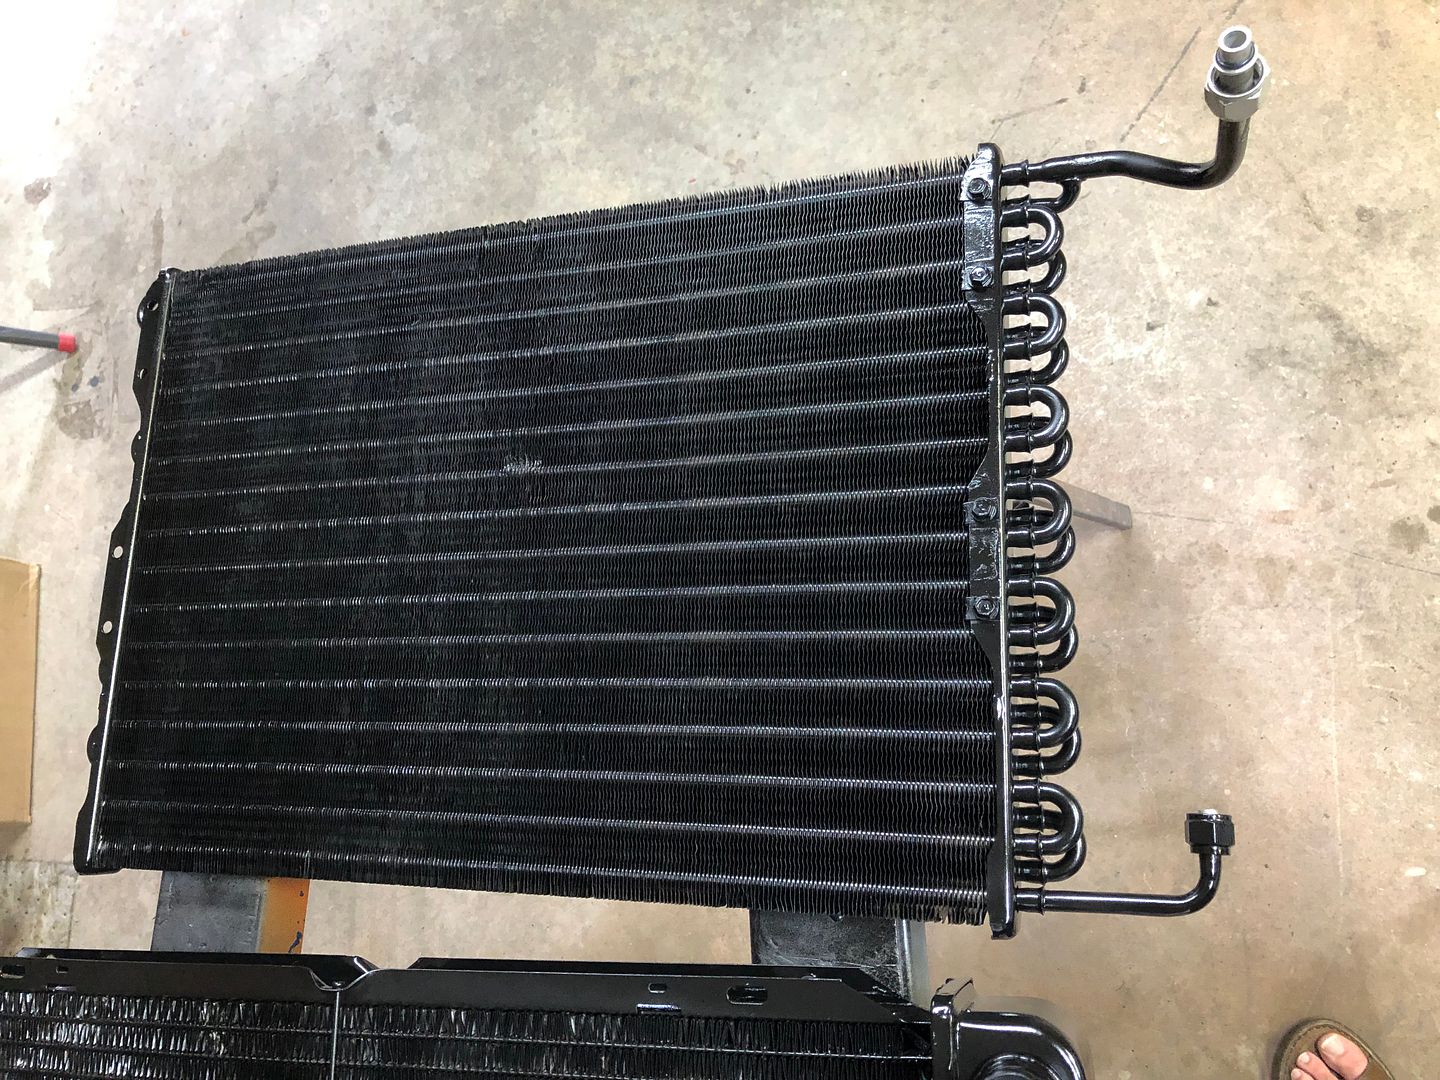
Cleaned prepped and refinished the AC condenser. Now all wrapped up, stowed and awaiting time to install.
Removed all of the brackets and tubing and did this in pieces.
http://s1337.photobucket.com/user/82...x4yyt.jpg.html
https://s1337.photobucket.com/user/8...0tt58.jpg.html
http://s1337.photobucket.com/user/82...pimgk.jpg.html
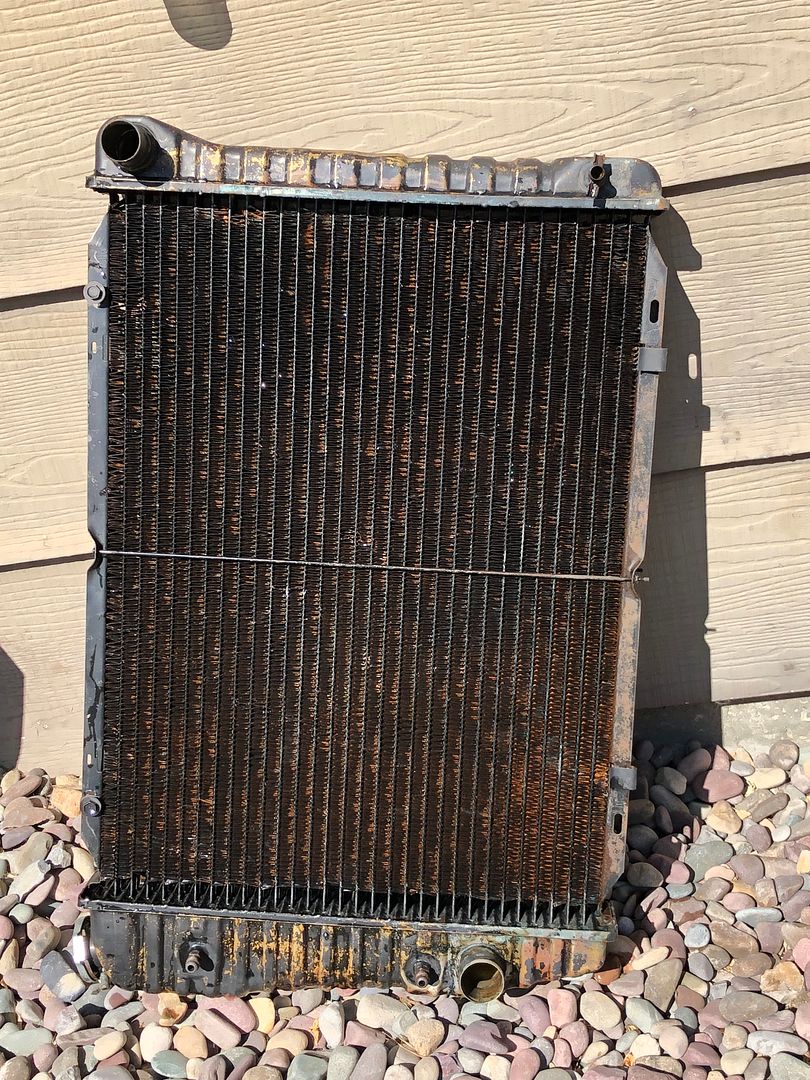
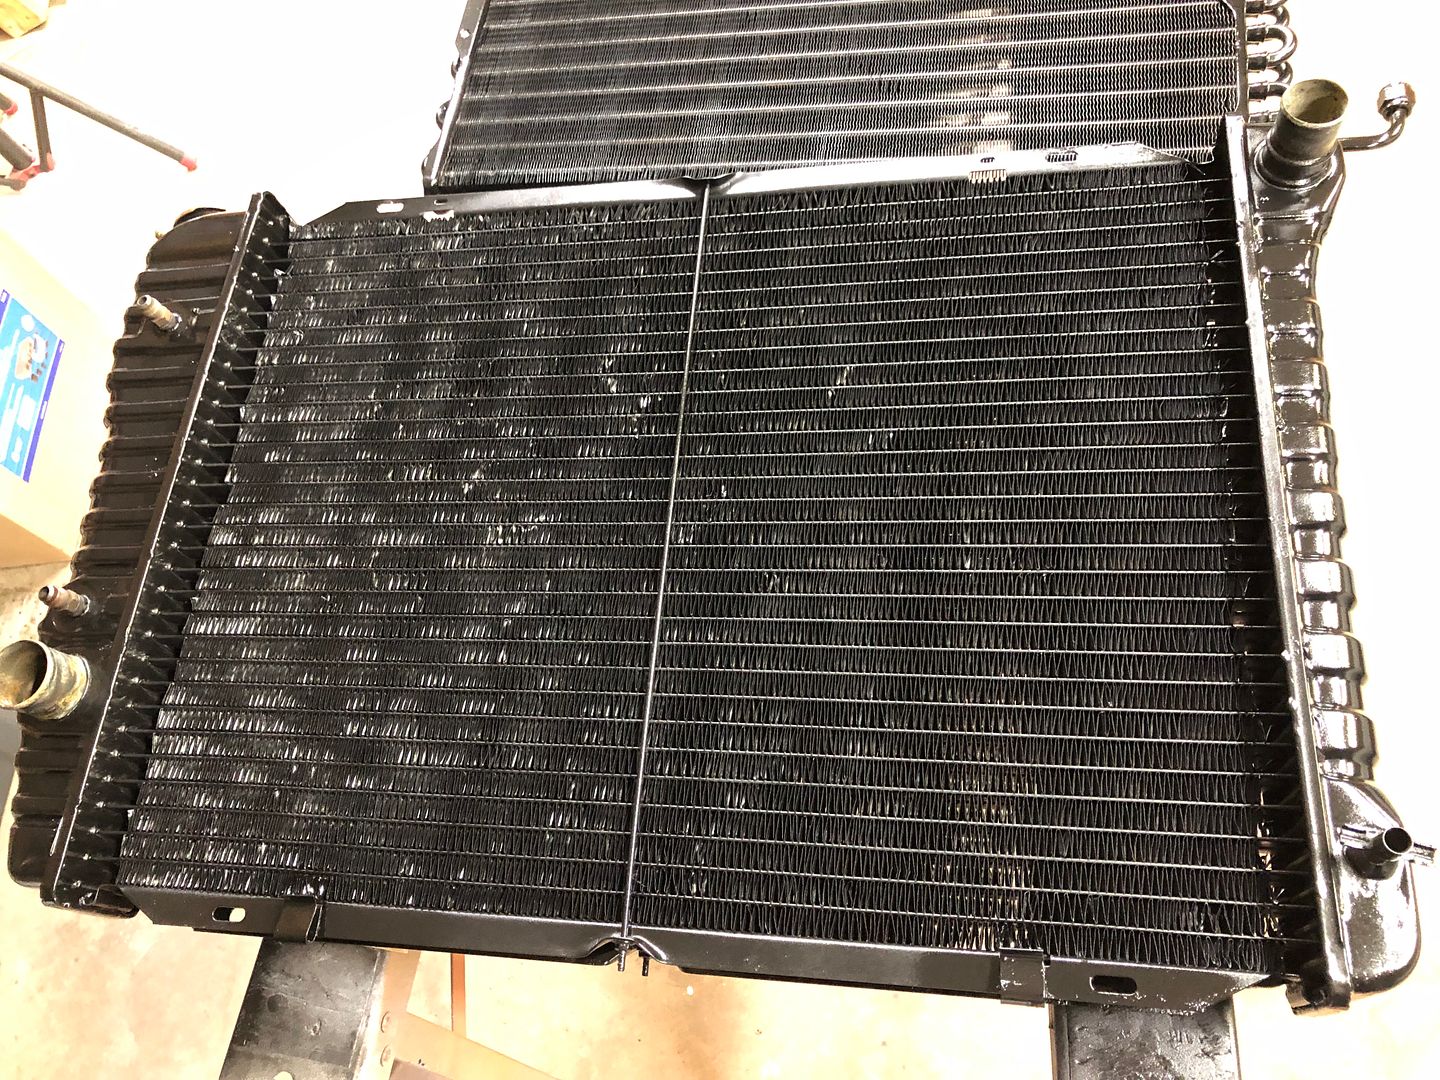
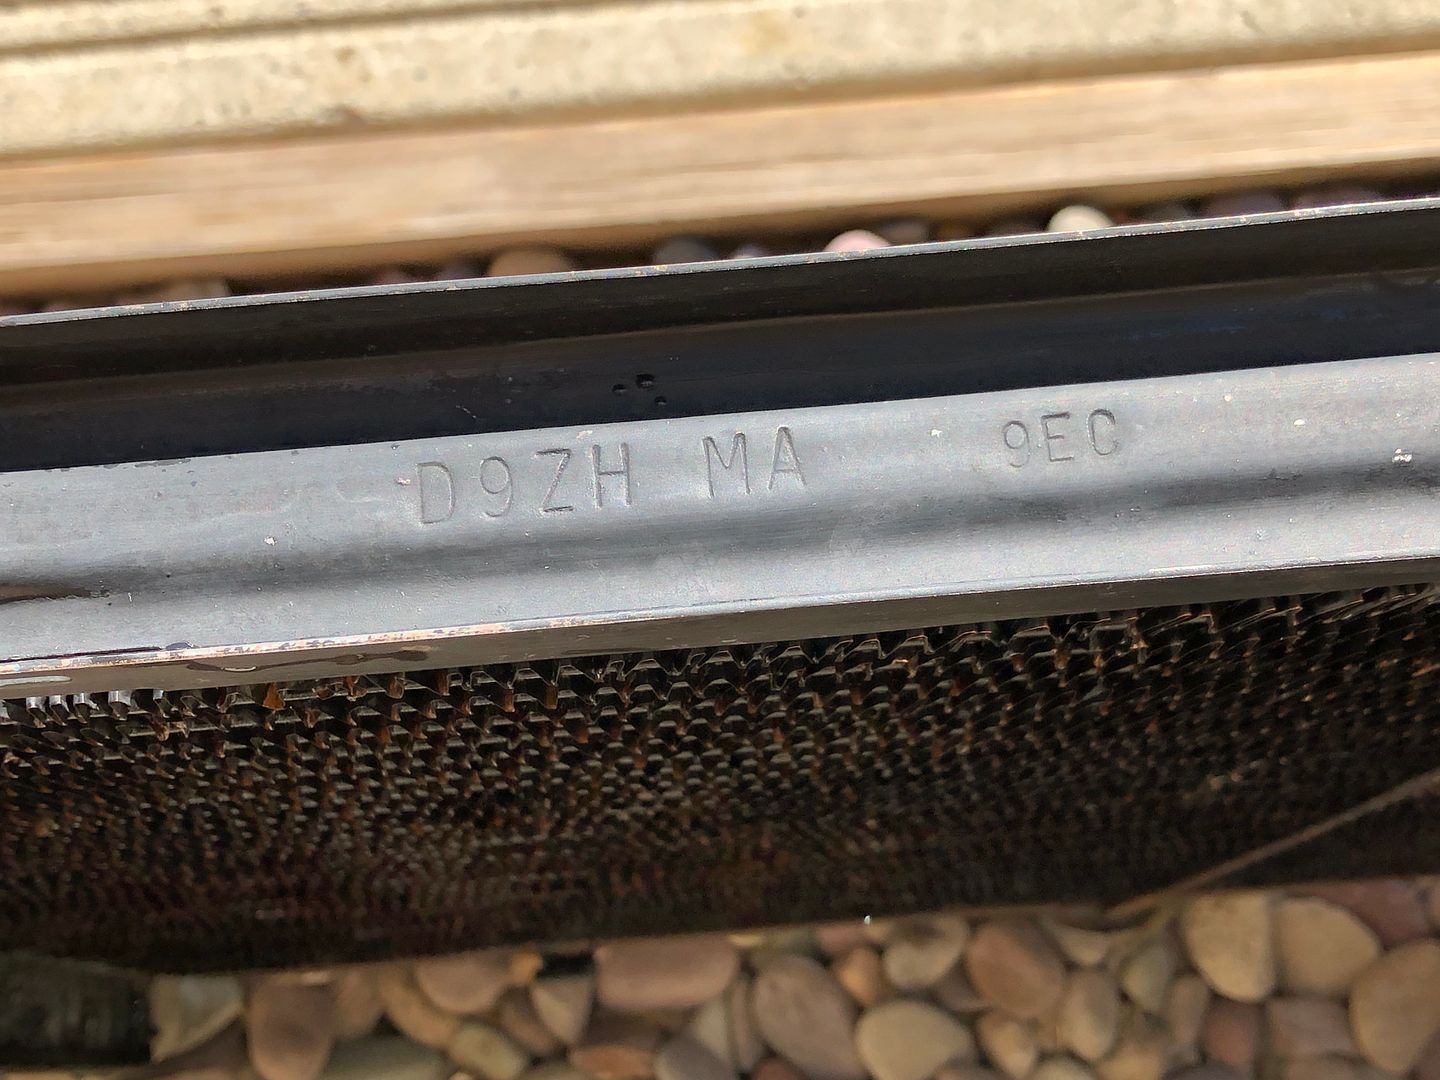
And the radiator:
http://s1337.photobucket.com/user/82...yhn4q.jpg.html
http://s1337.photobucket.com/user/82...mgmwn.jpg.html
Looks to be the original radiator and pretty clean inside. Maybe 17k clean...
http://s1337.photobucket.com/user/82...1xpj7.jpg.html
http://s1337.photobucket.com/user/82...edtb1.jpg.html
Last edited by 82GTforME; 12-01-2019 at 08:53 PM.
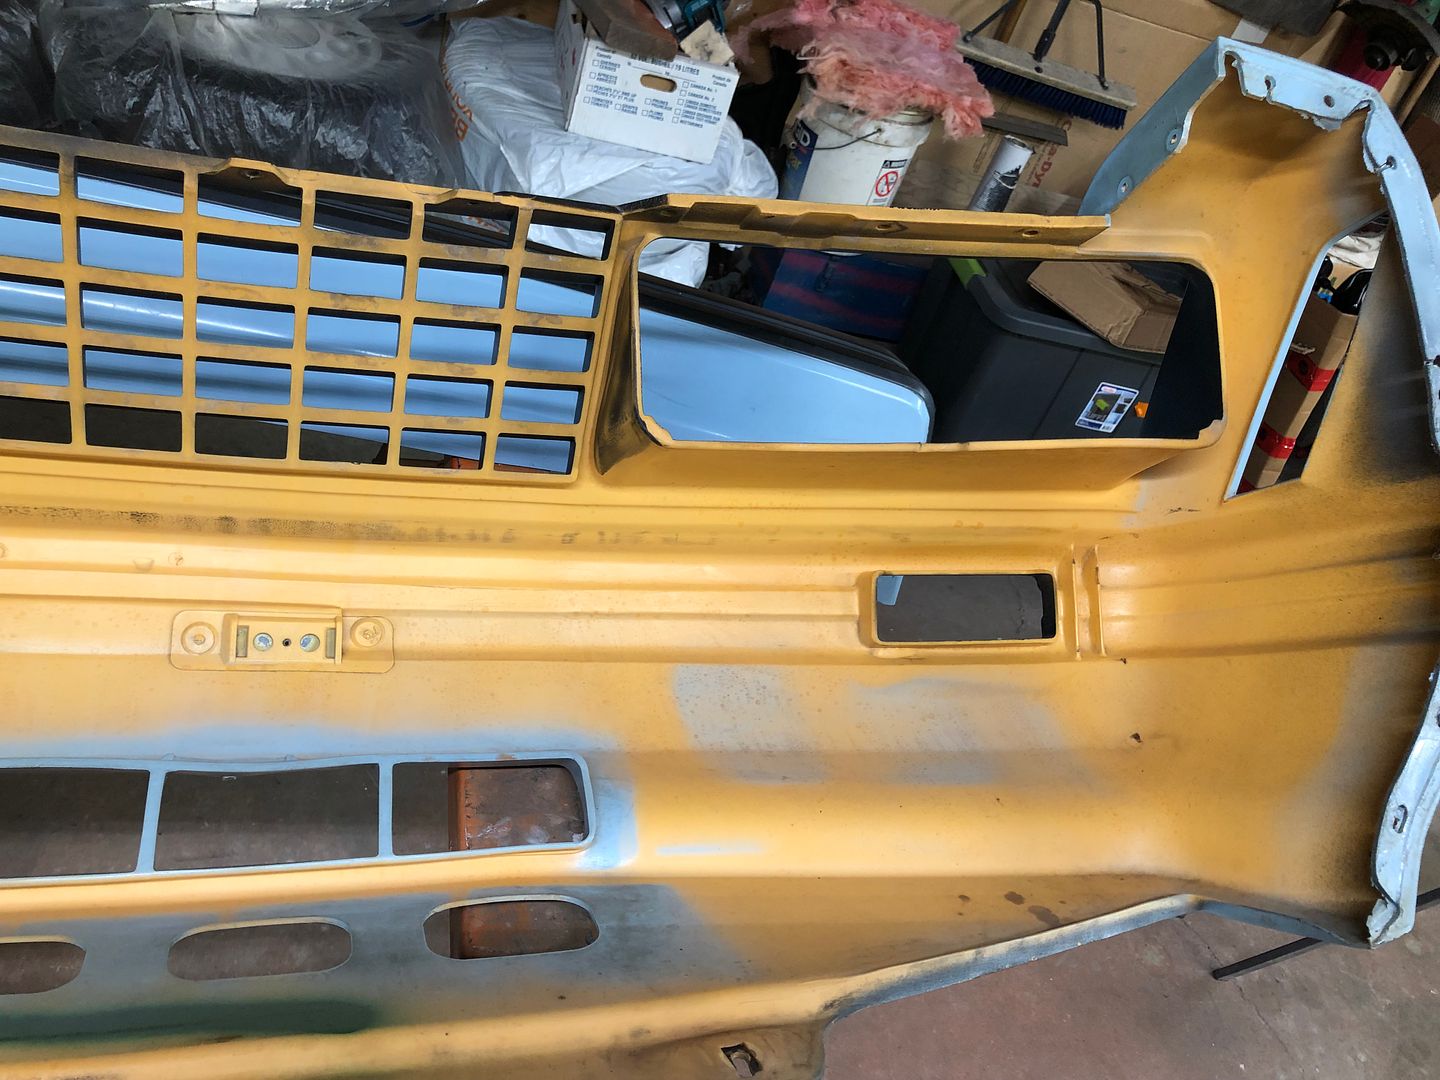
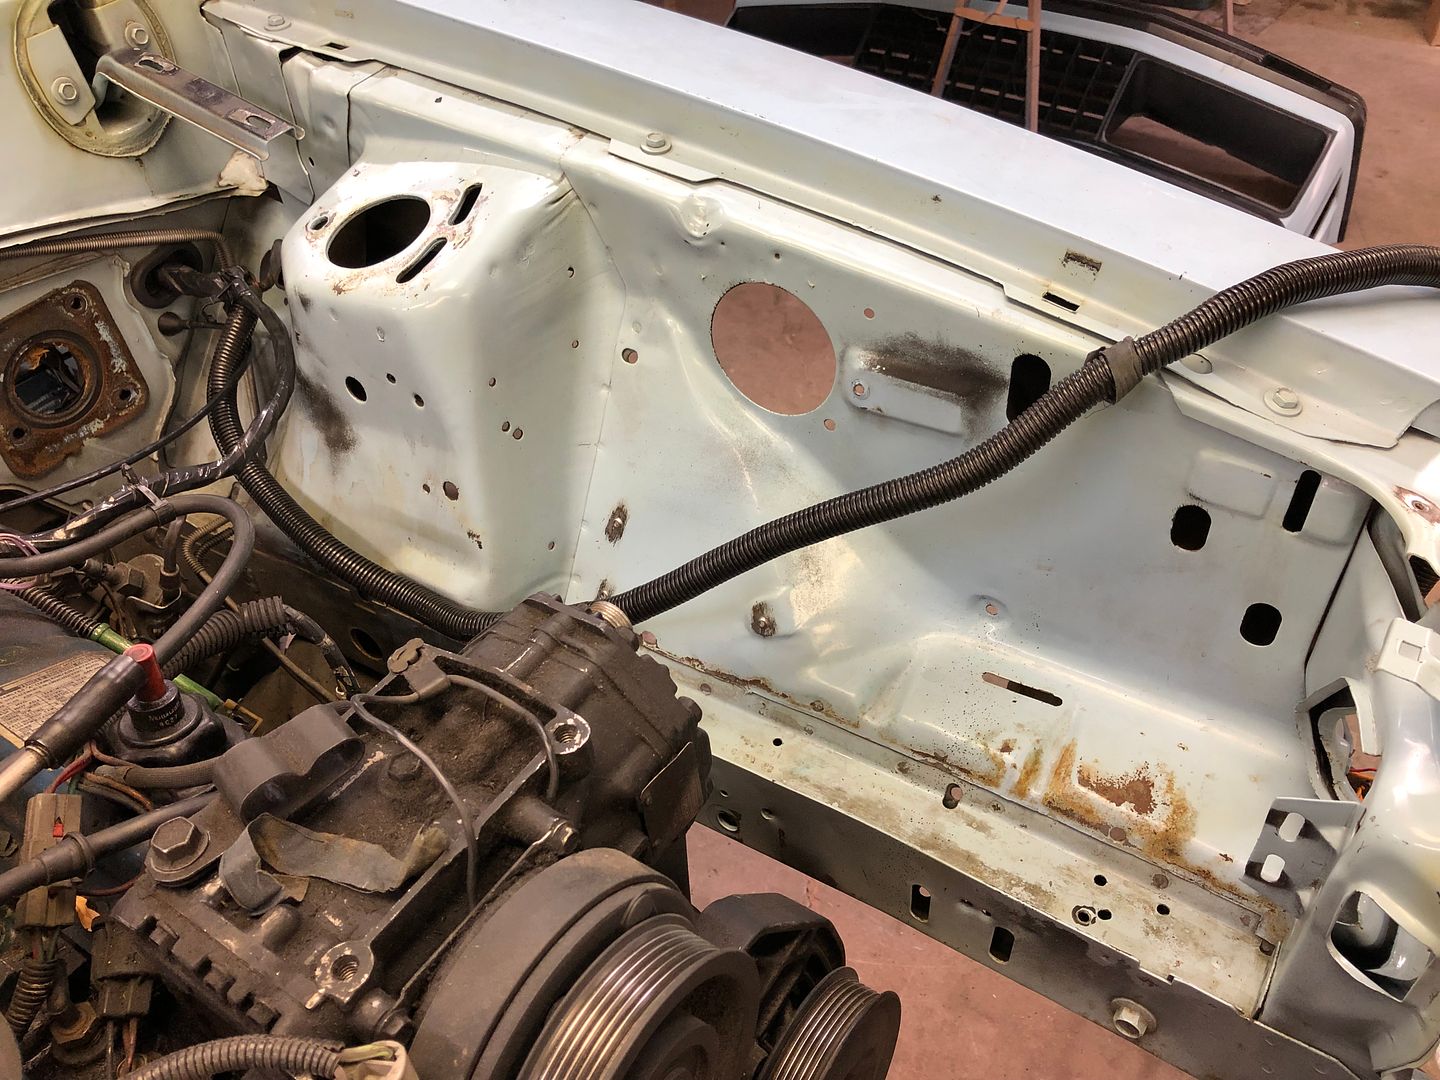
As evidence has grown about some repaired damage, maybe some new evidence.
I took the header panel out of the cover, dismantled, cleaned and painted it.
The front cover is in very good condition. You can see by the condition of the inside.
http://s1337.photobucket.com/user/82...qpnj3.jpg.html
http://s1337.photobucket.com/user/82...bmzth.jpg.html
http://s1337.photobucket.com/user/82...pxwhs.jpg.html
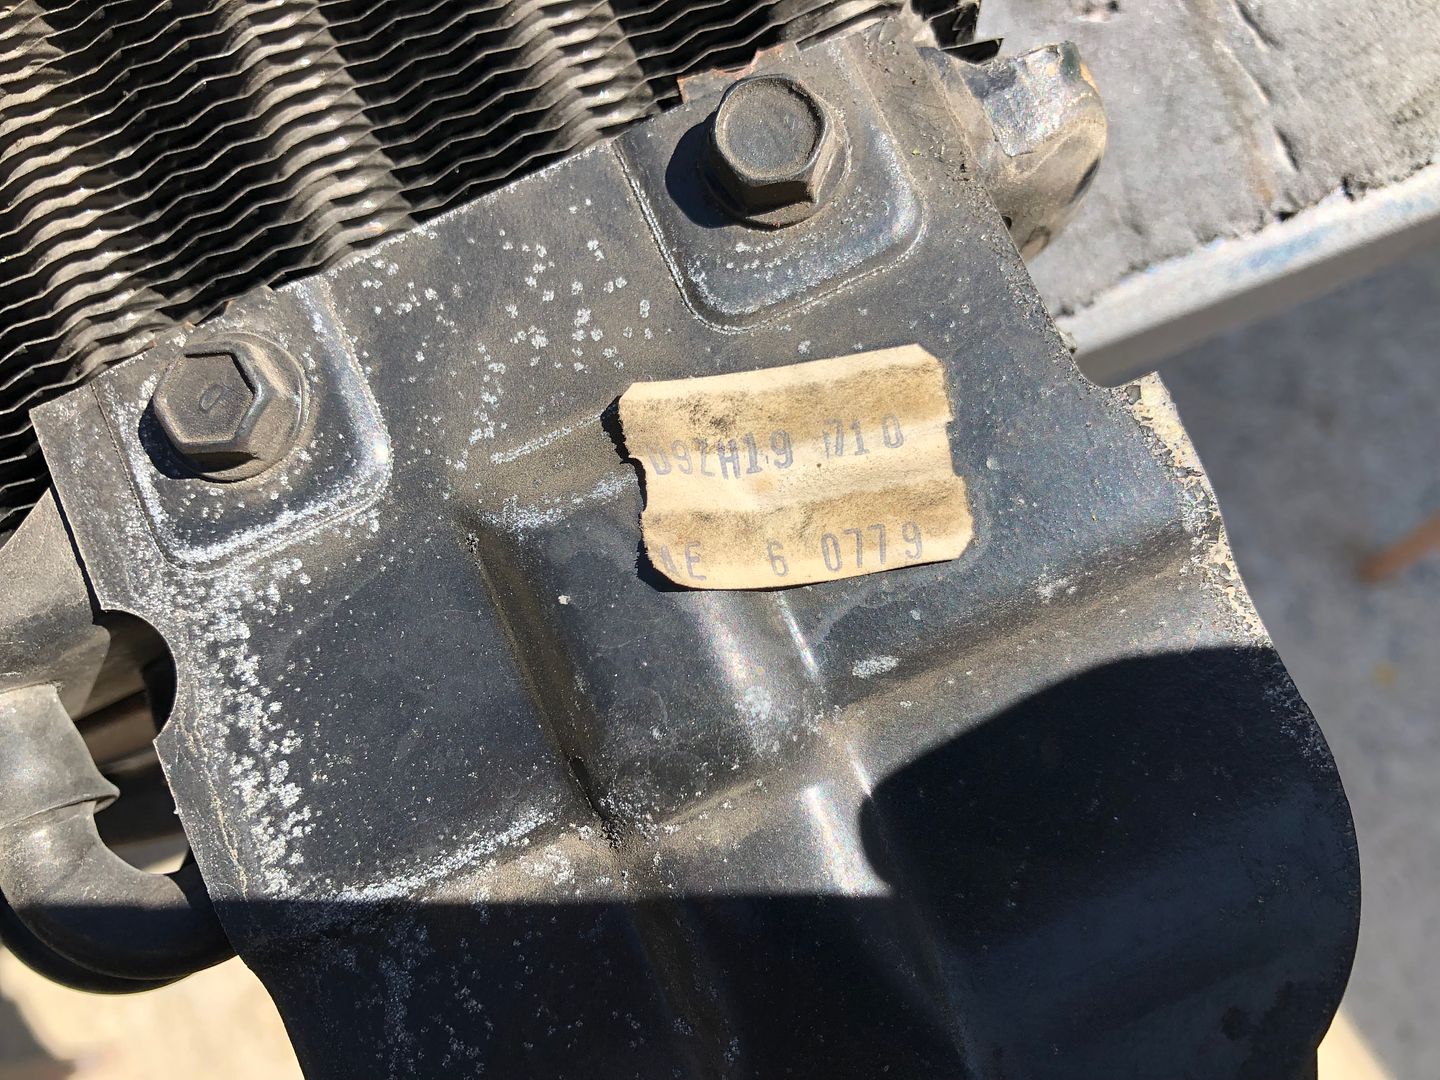
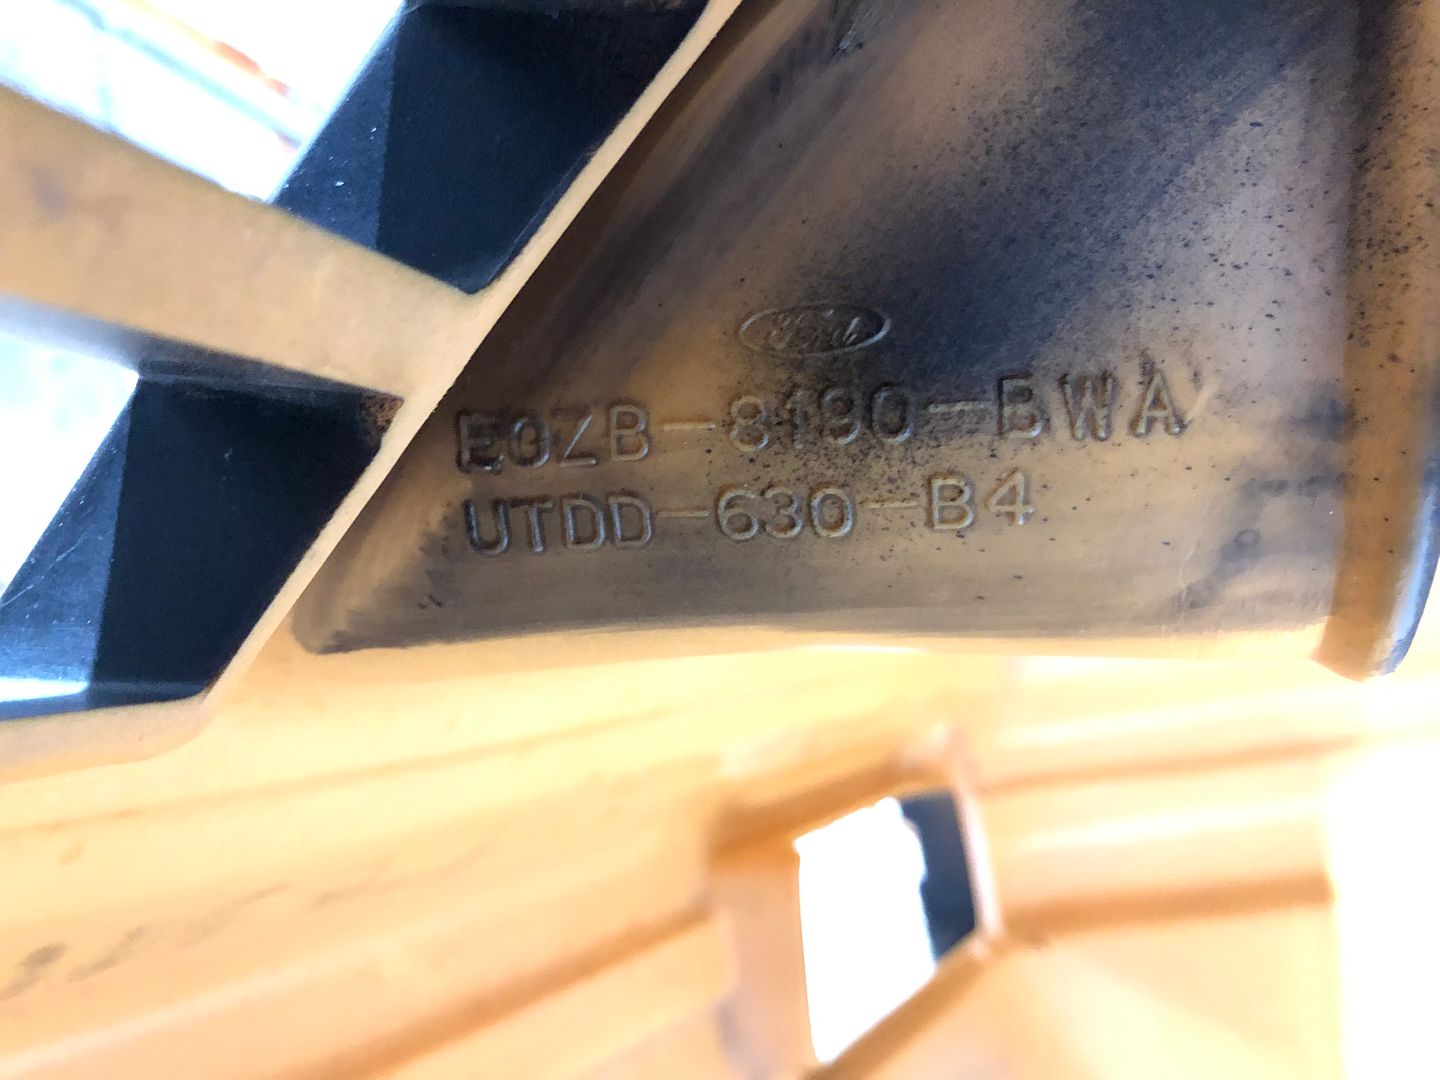
The thing I noted is the number formed in the header. Starting with the E0ZB- I am guessing this is a later part than the "later" 79 production update. Likely a replacement early in the car's life. Maybe the rear damage ties into a replacement?
http://s1337.photobucket.com/user/82...jcsrf.jpg.html
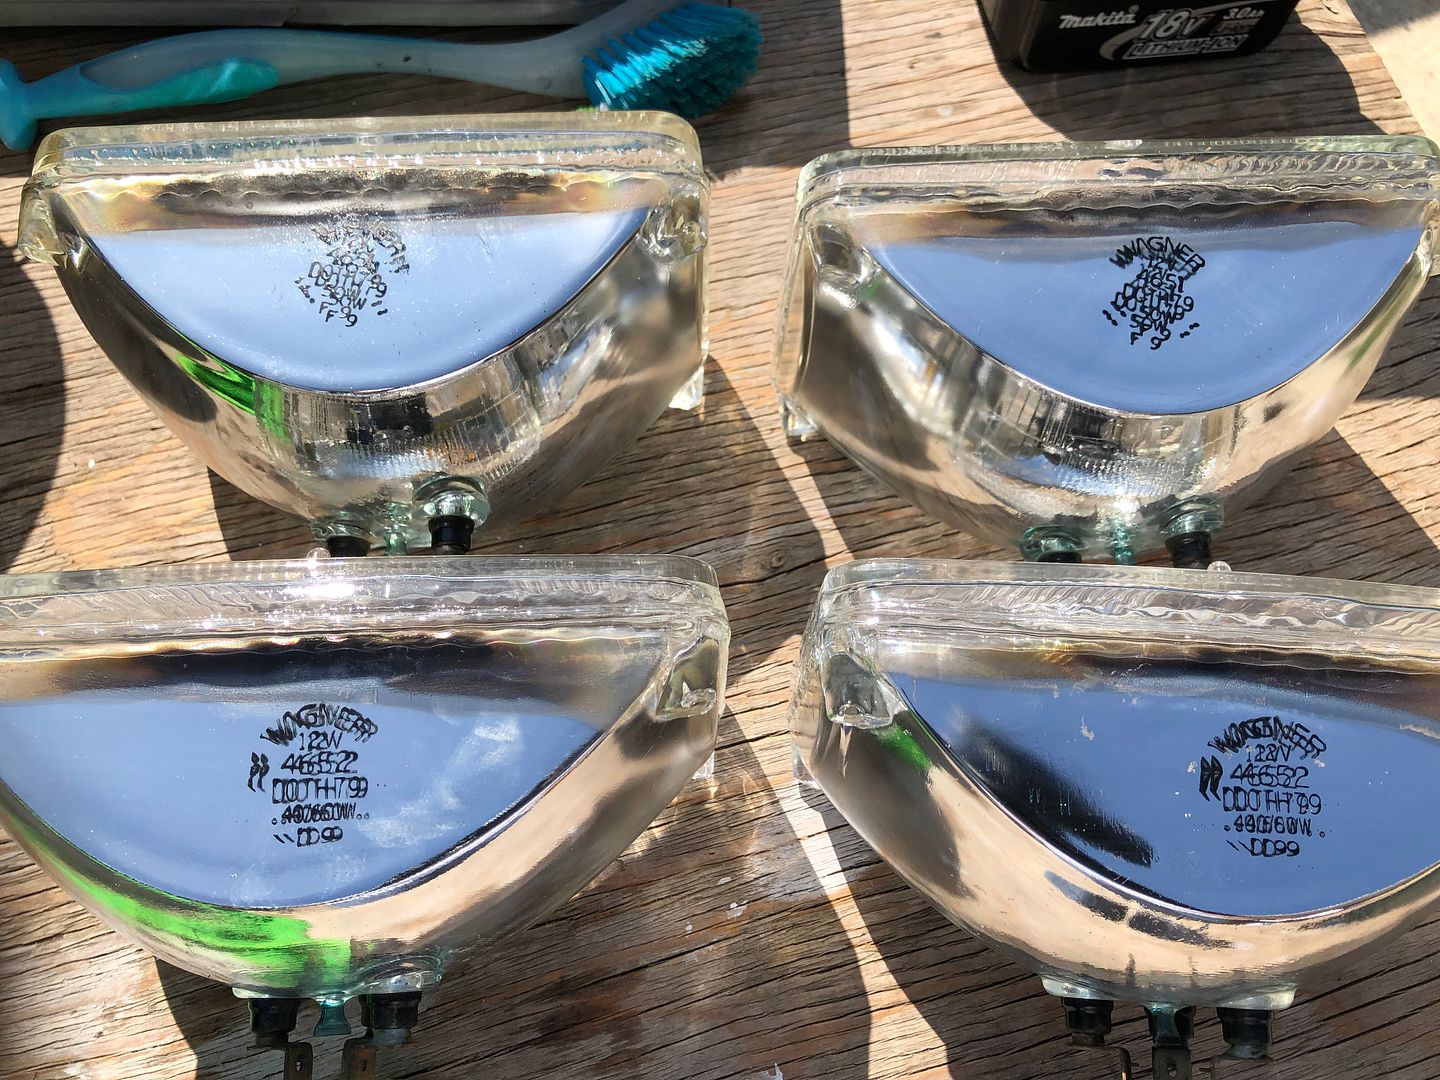
One other item of note after taking the front cover apart. It sure looks to have all four original non-halogen Wagner bulbs. Too bad one low beam has a chip and small crack...
http://s1337.photobucket.com/user/82...ubdmk.jpg.html
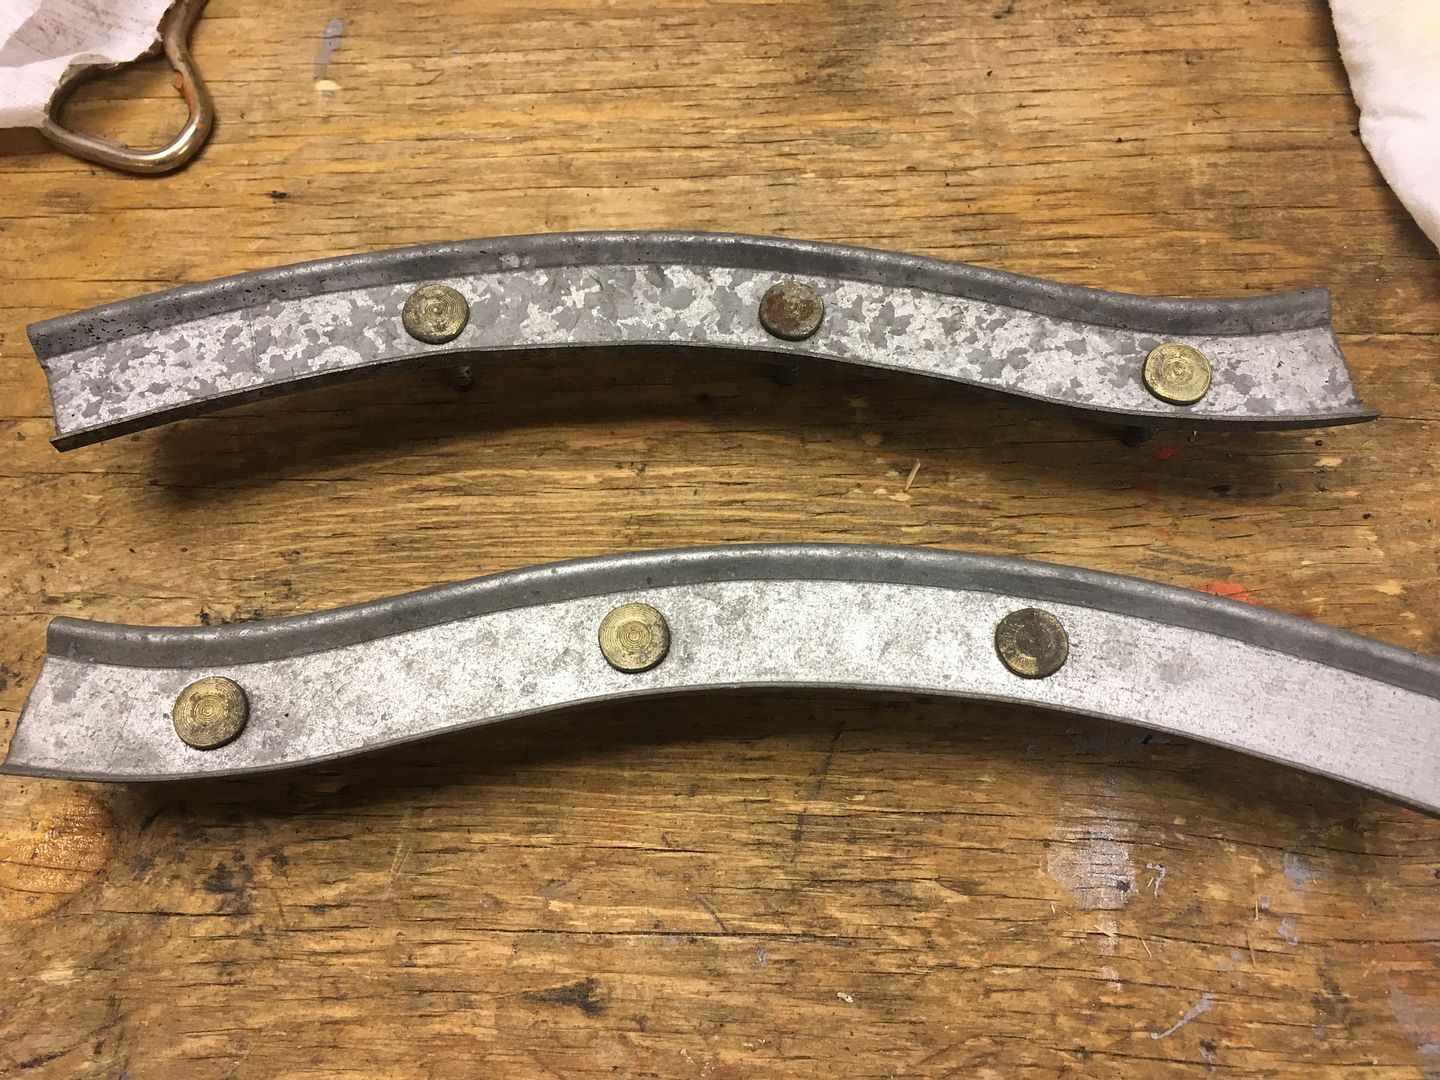
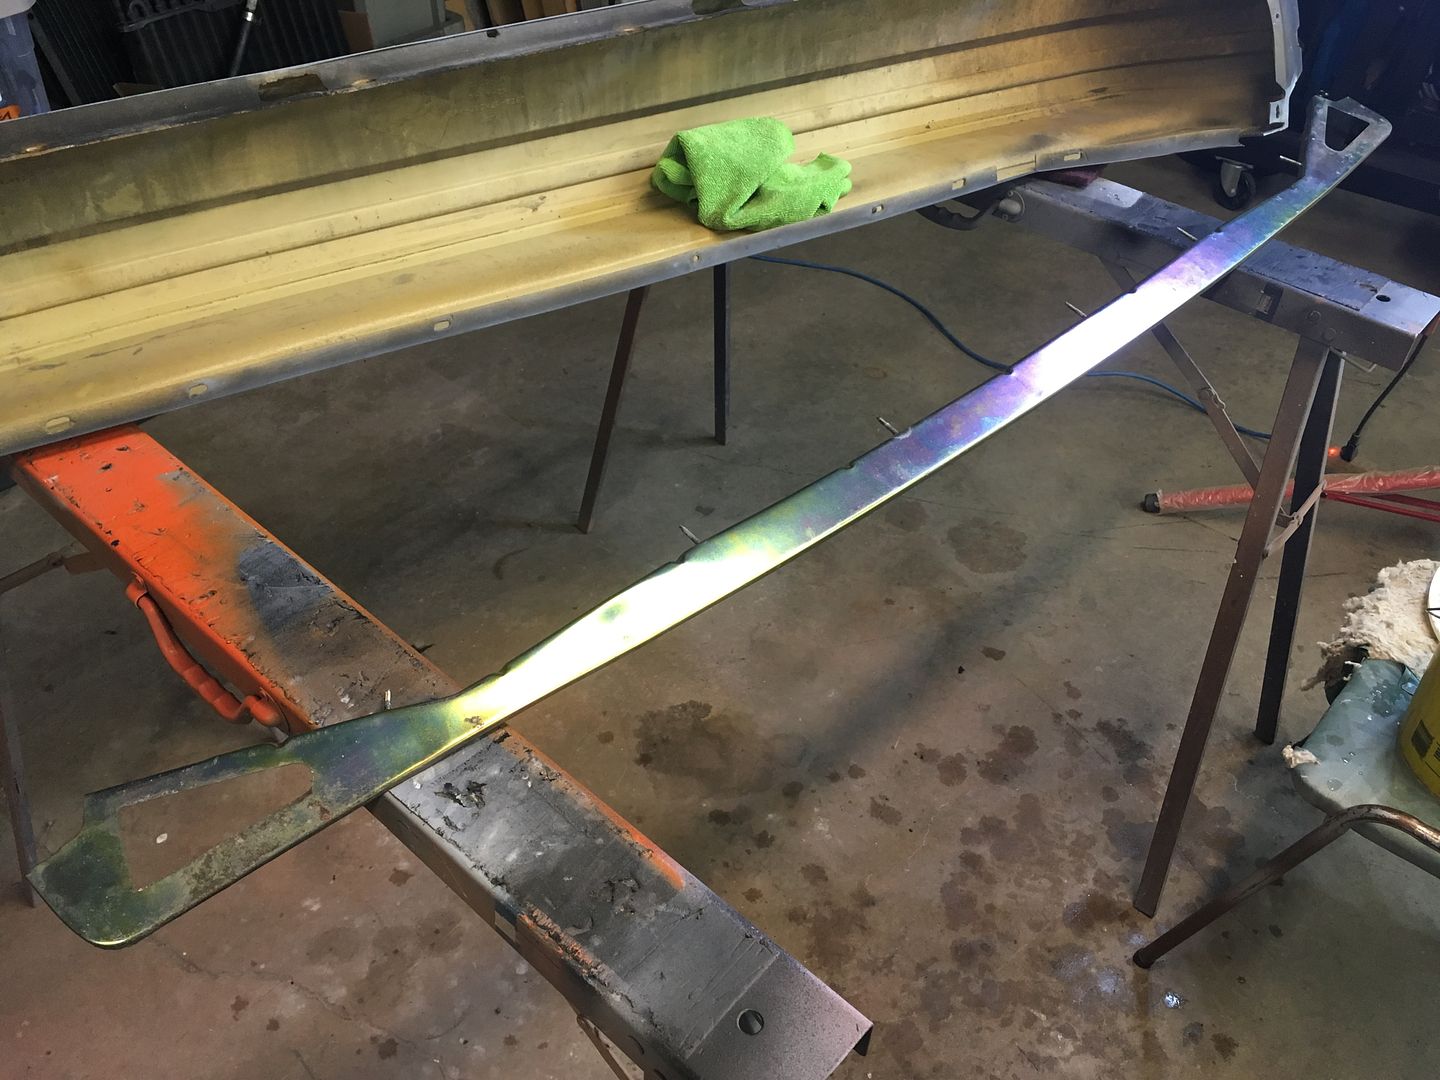
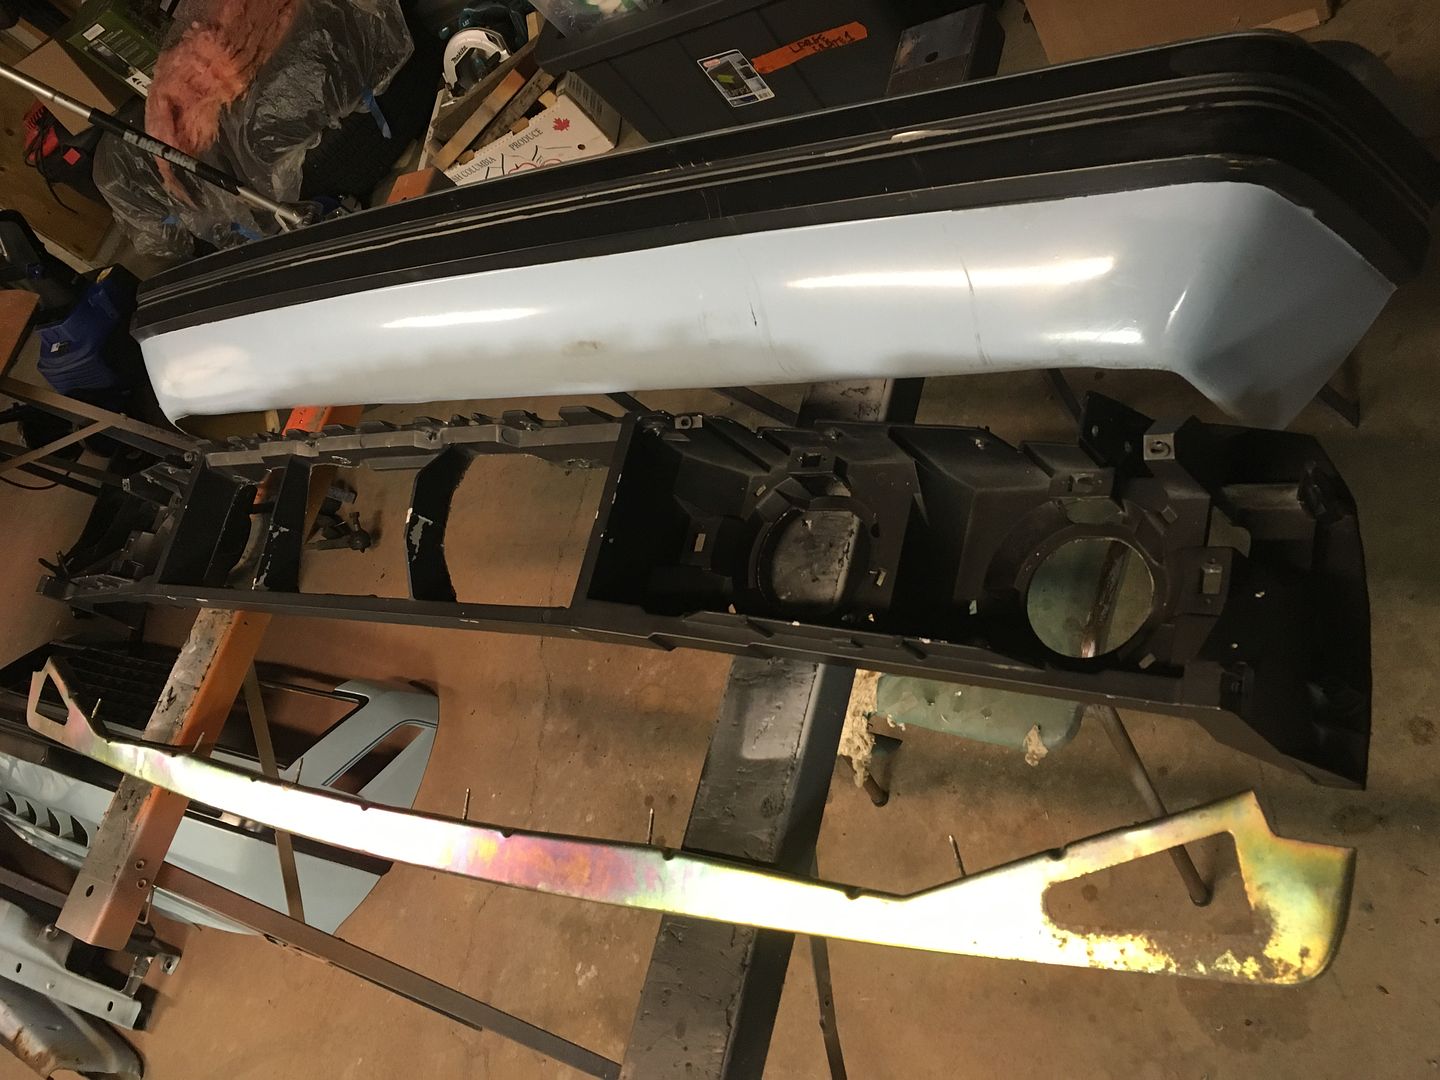
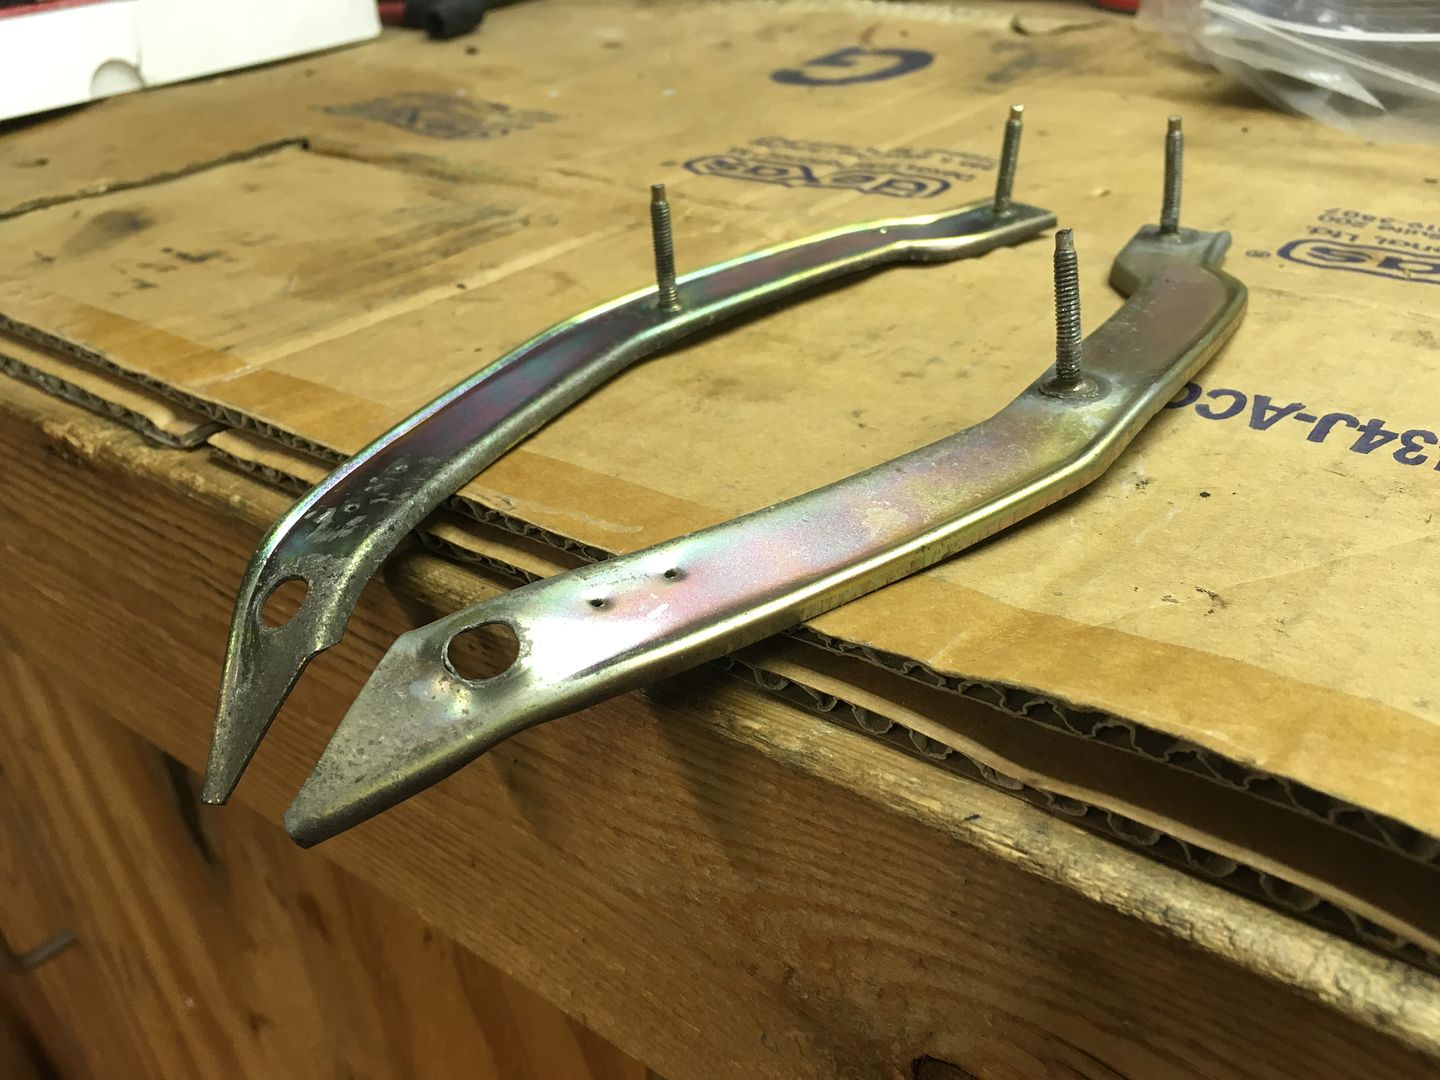
The rear cover has a D9 part number and judging by the condition was not replaced when the other rear damage was repaired. You could see that in my previous post of it. The condition of the attaching hardware and the metal reinforcement strip is surprisingly good though. It did have a bend which looked to have been from the impact that bent the rear bumper mount.
http://s1337.photobucket.com/user/82...qz1tg.jpg.html
http://s1337.photobucket.com/user/82...vy6by.jpg.html
http://s1337.photobucket.com/user/82...ezuw9.jpg.html
Looks good Darran. I've got the full set of original headlights in my car still and am willing to swap them out for newer halogens if you ever want them.
Thanks Jon. I knew you'd like seeing the details. How's your Brown Capri doing or are you onto another project?
Thanks Ed. I was surprised this had all of these. The other 79 Ghia car I grabbed parts from had two but more high beams. I put a new set of Wagner sealed beam halogens in the orange car and am okay with them. I don't drive much at night so it's not a real bother. Non-halogen originals, while cool to have may not perform these days. Hang onto them for a while longer just in case. I'll still be a little before I get to that point
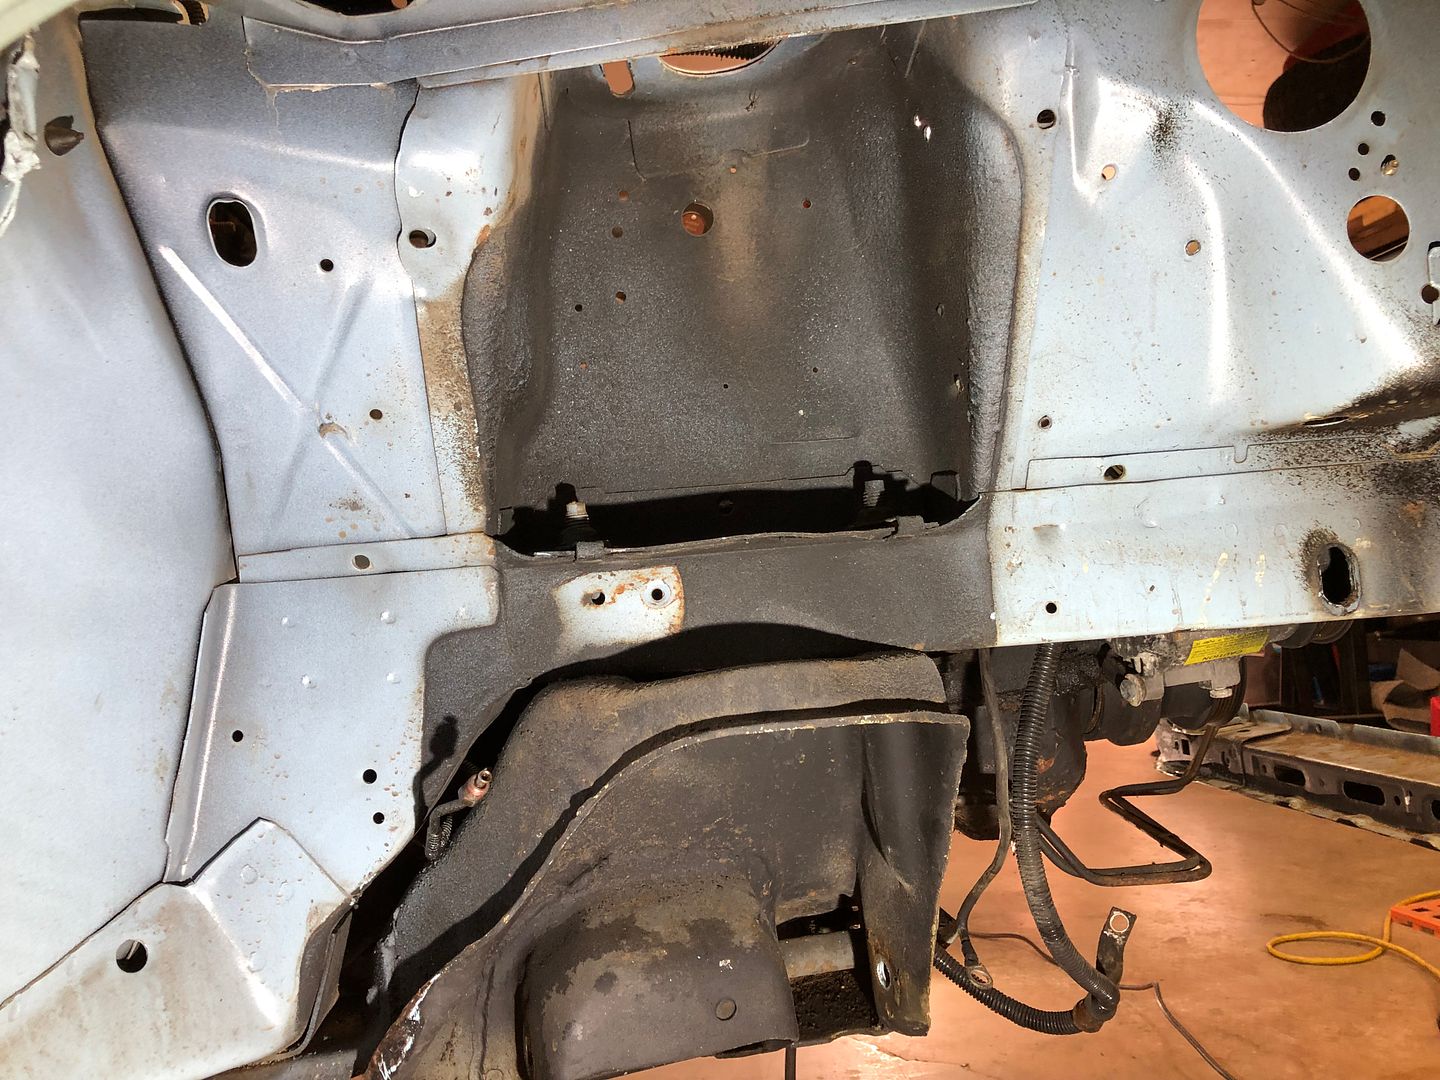
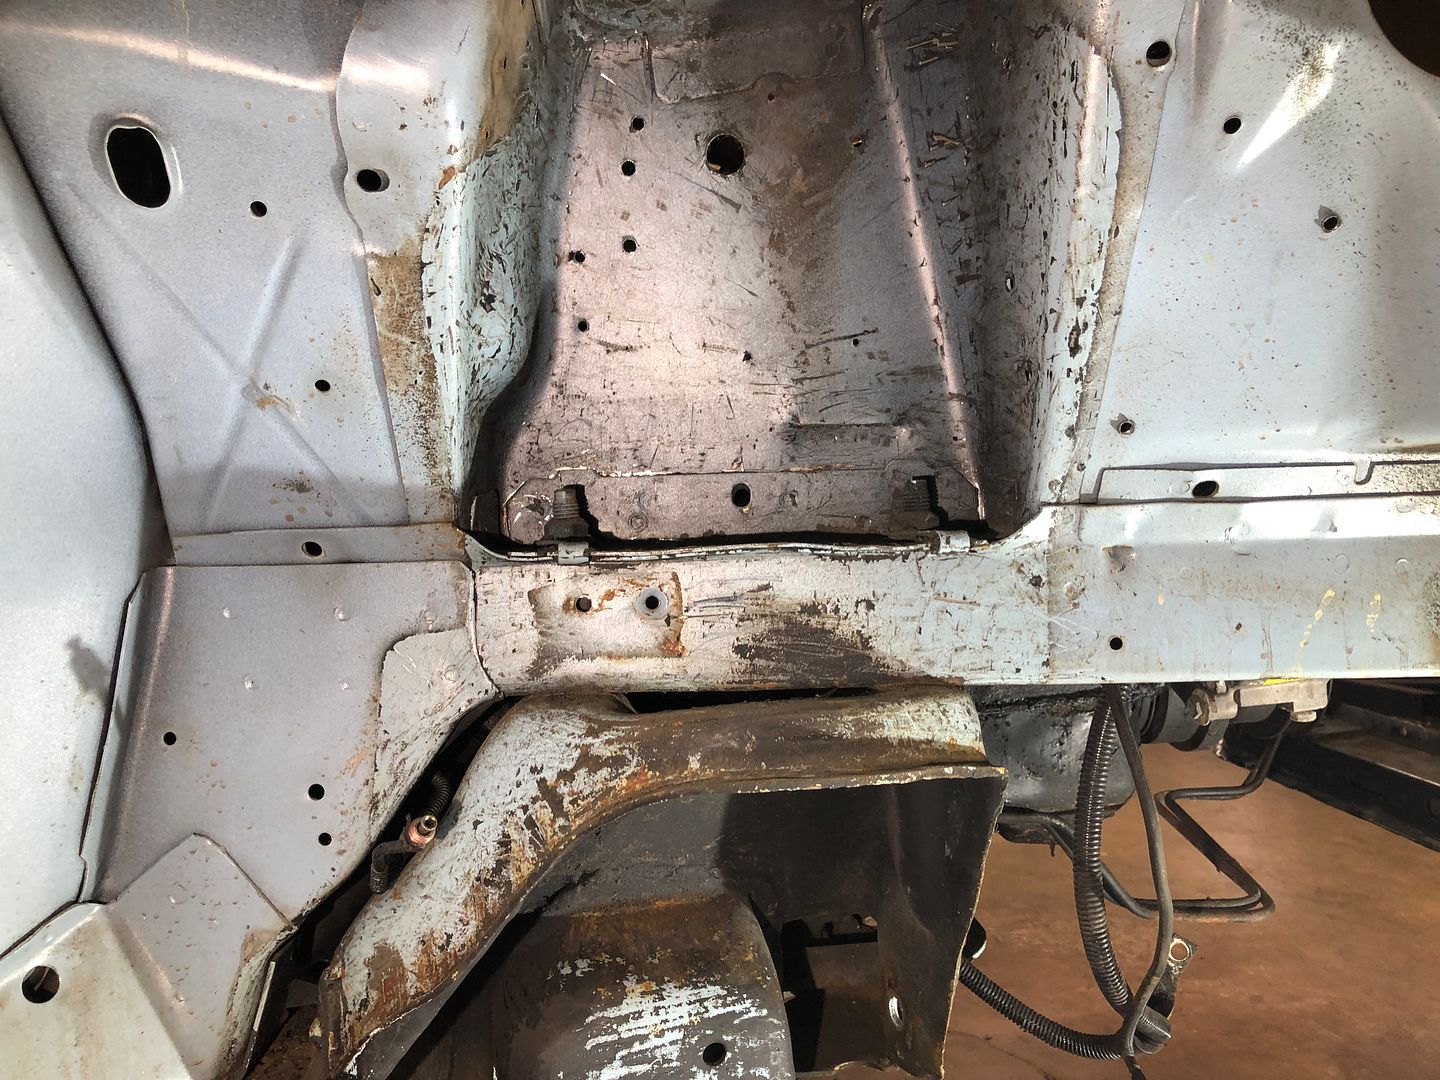
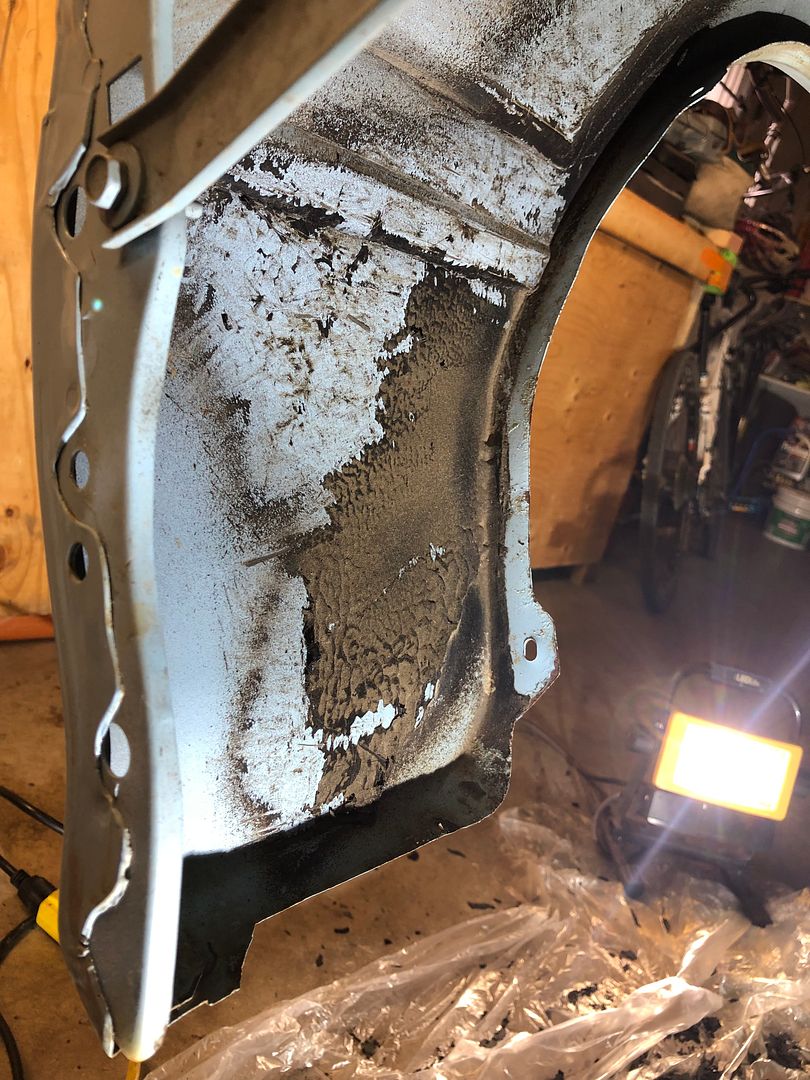
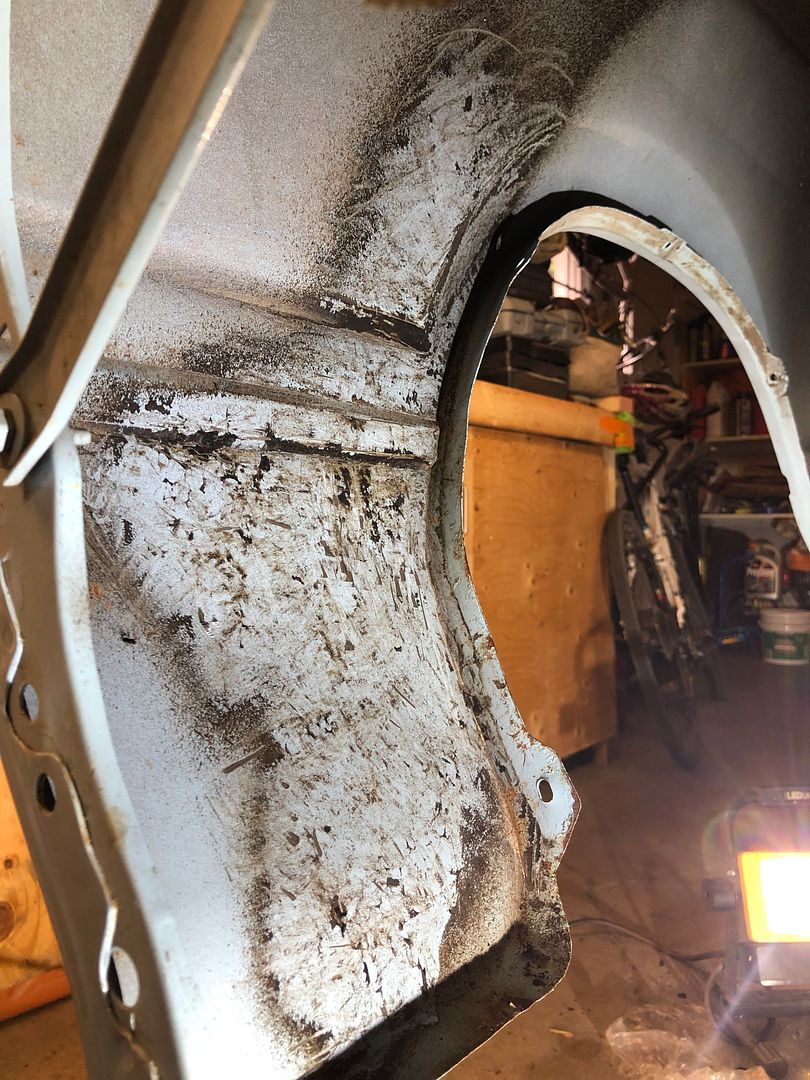
So this car was undercoated. A lot by the looks of it.
I spent a good number of hours removing what I could under the front wheel wells. The black on the lower rad support is black spray paint where someone had sprayed parts of the undercarriage to cover up some rust.
Still more wiping and work to do under here when I have better access. Yay!
http://s1337.photobucket.com/user/82...ys03v.jpg.html
http://s1337.photobucket.com/user/82...sdc9i.jpg.html
http://s1337.photobucket.com/user/82...x3whw.jpg.html
http://s1337.photobucket.com/user/82...vylah.jpg.html
http://s1337.photobucket.com/user/82...m1qia.jpg.html
http://s1337.photobucket.com/user/82...awv5n.jpg.html
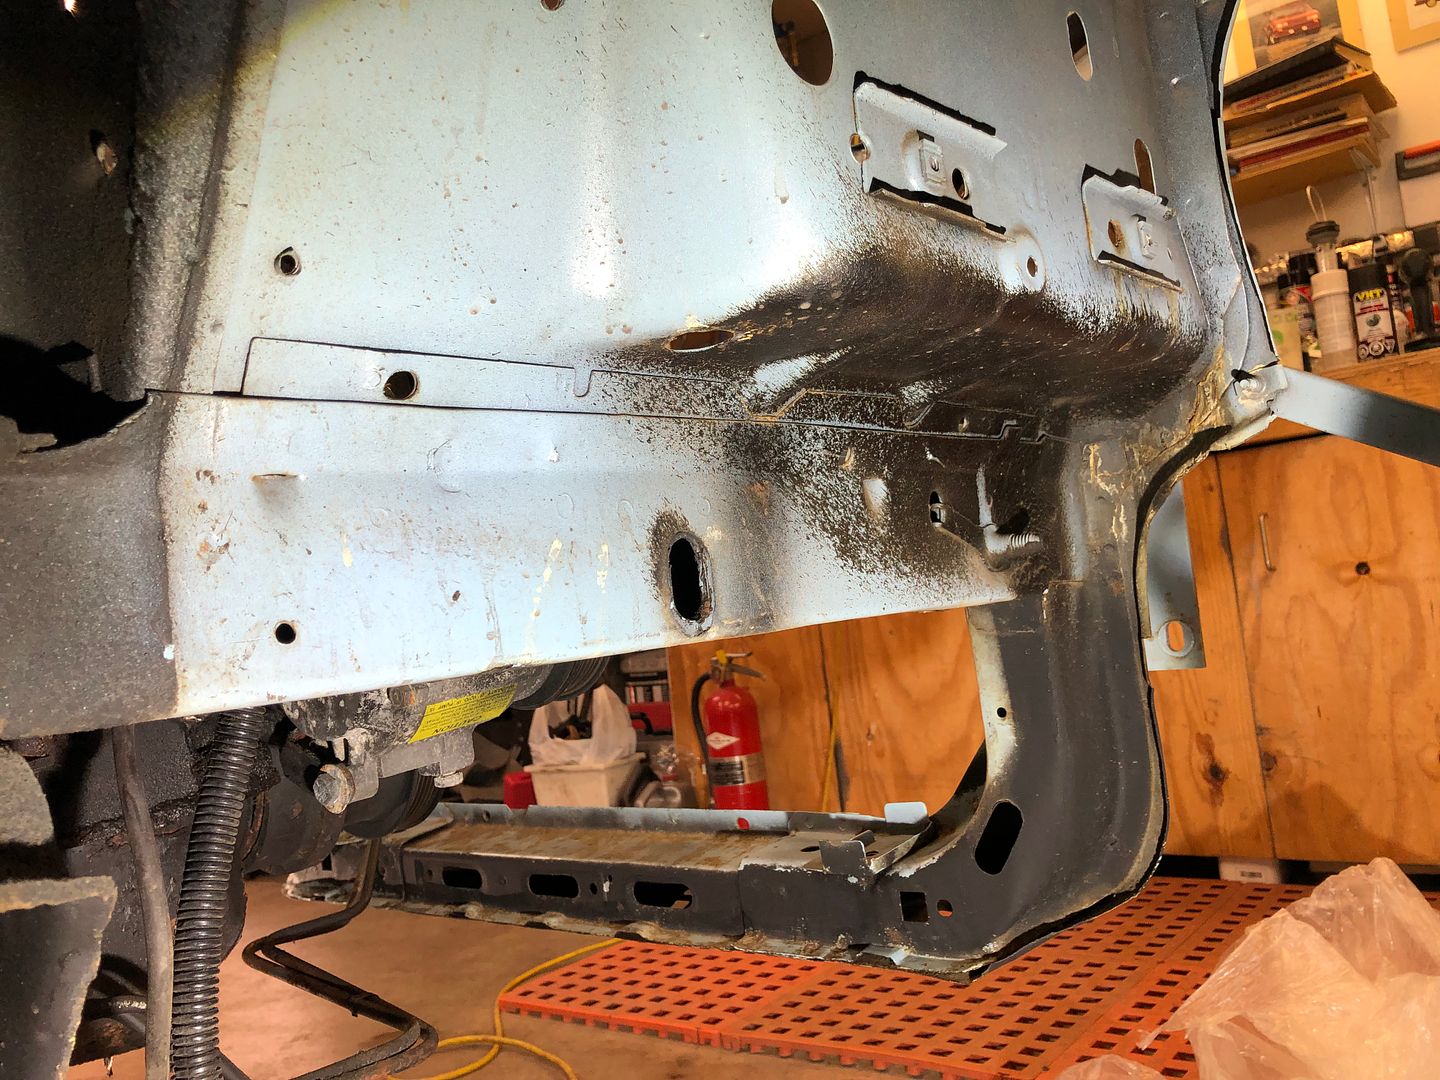
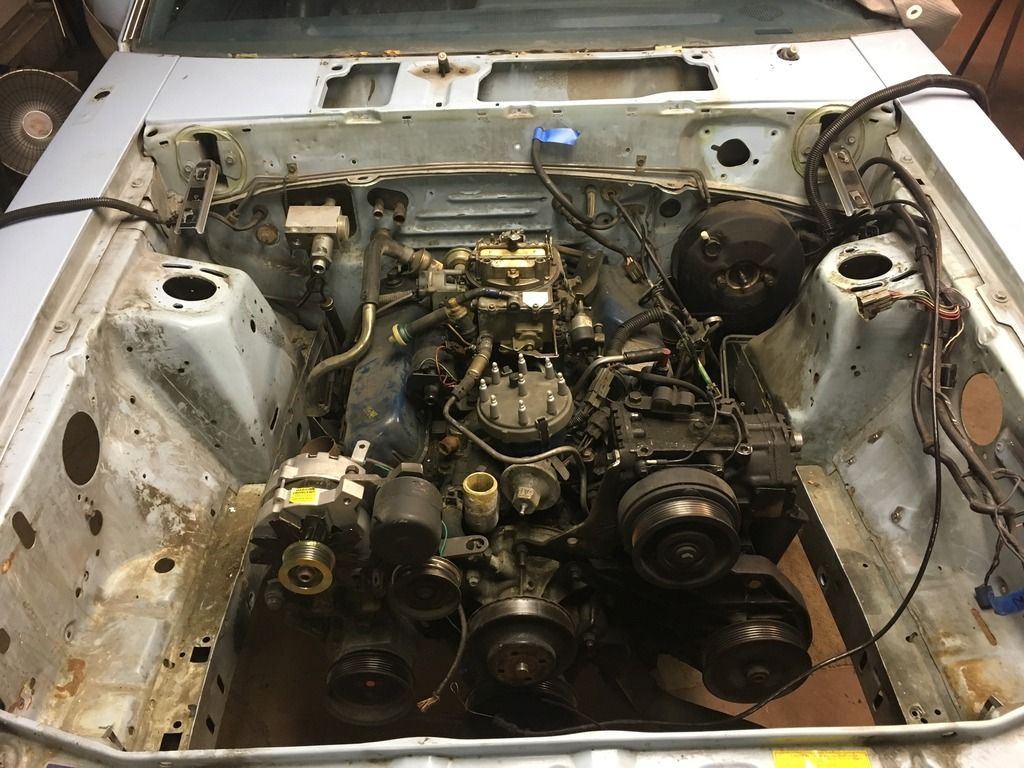
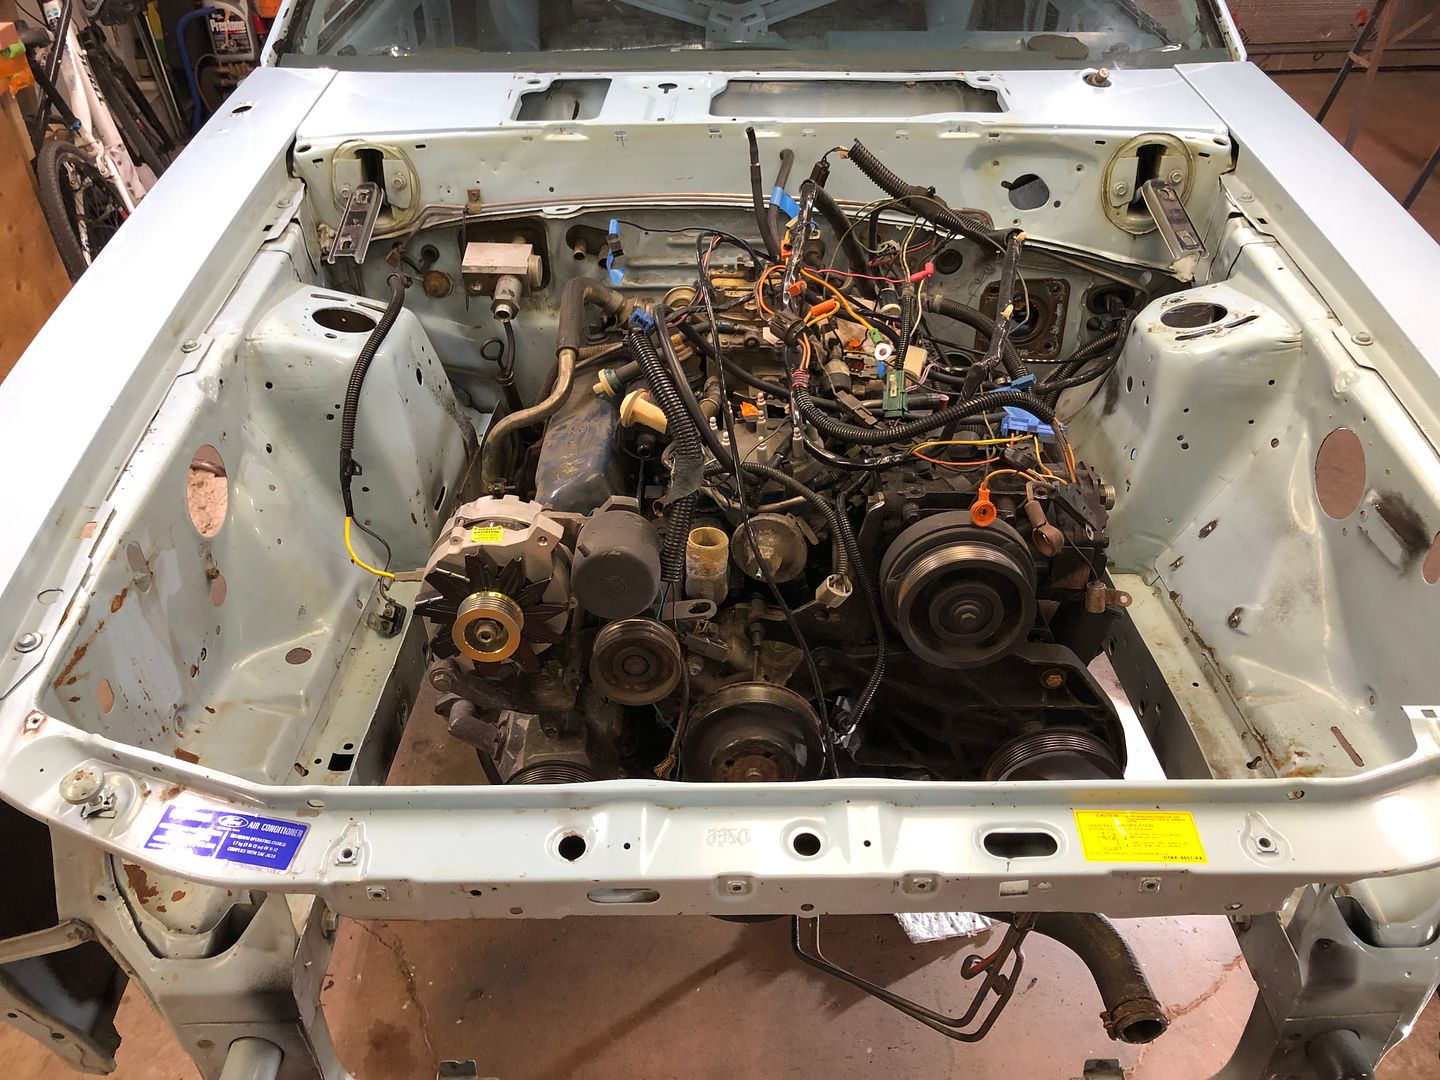
I wished I had had an opportunity to properly degrease and pressure wash the engine bay before I started on this journey. With the engine knock, I couldn't get it to a car wash to do it.
The area was pretty bad and I know that this will need to be started eventually.
As noted previously, the engine is ready to pull. For space reasons, not wanting to dive into engine ($) stuff yet and still a lot of other laborious stuff still to do, it sits in here.
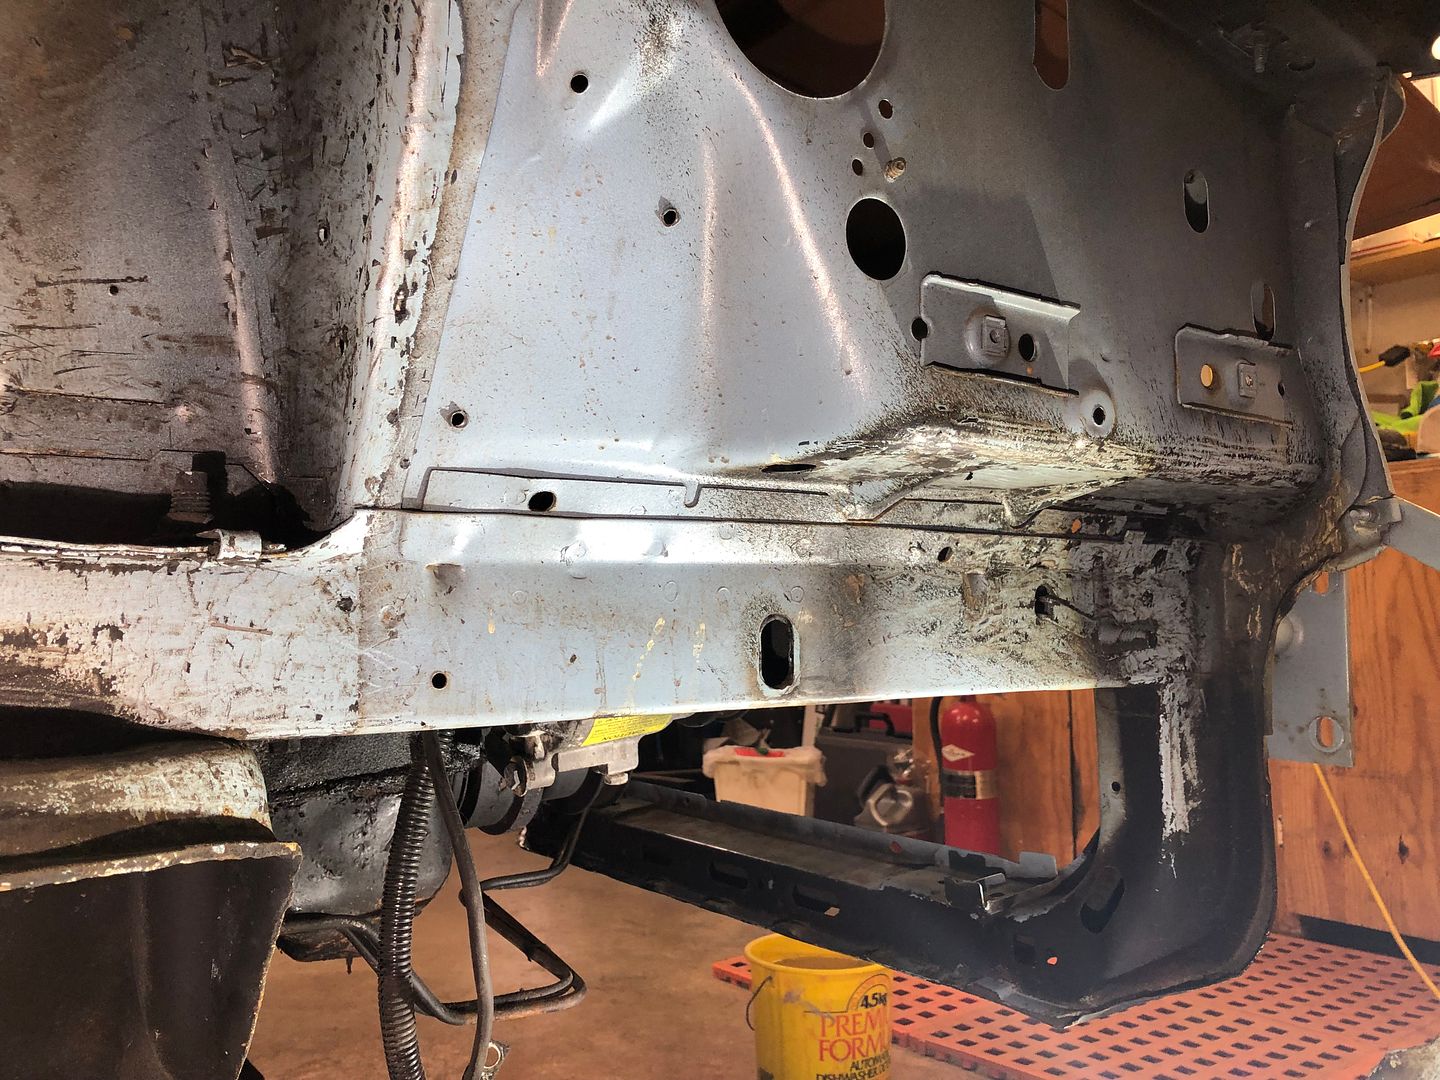
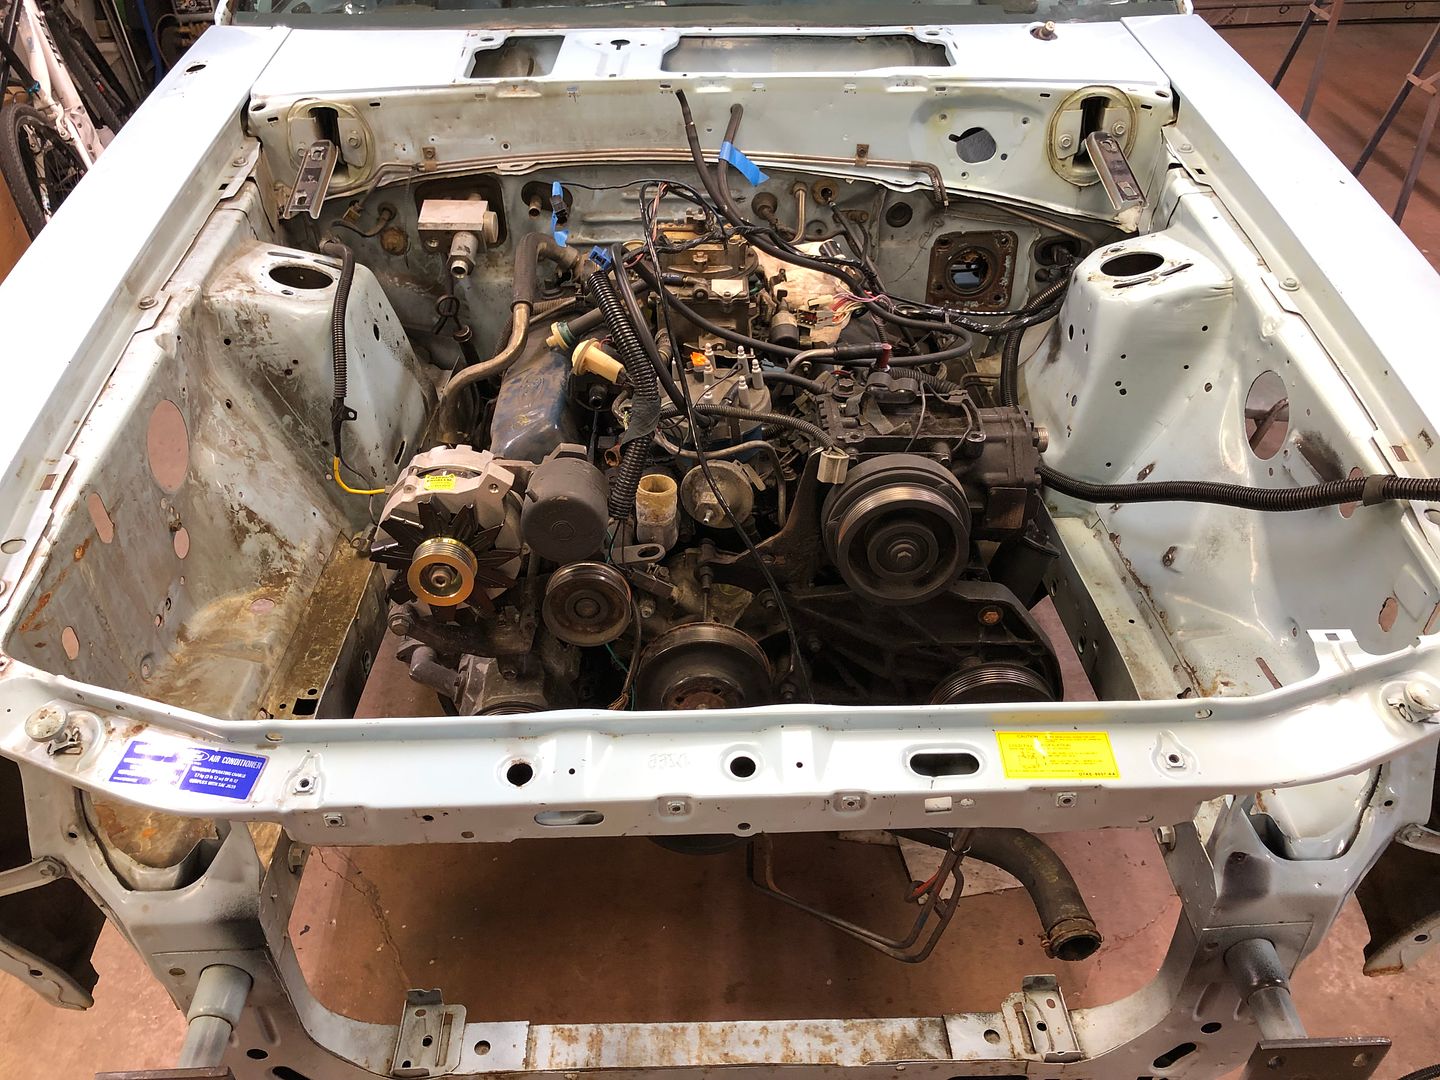
Where I left off:
Reasonable for a first scrub.
http://s1337.photobucket.com/user/82...t6i1h.jpg.html
http://s1337.photobucket.com/user/82...ikimg.jpg.html
http://s1337.photobucket.com/user/82...komfk.jpg.html
http://s1337.photobucket.com/user/82...7rnxz.jpg.html
As much as that undercoating looked bad and was a nuisance to get rid of, it looks like it did a pretty good job of protecting the metal and original finish. What are your plans for the underside, leave it original or repaint?
I'll keep those headlights for you if you decide you want them.
The body looks great. Usually it hides rust.
Ed, I'll have to see what the underside looks like. I'd love for it to be really nice under the coating and the quick black spray over some of the surface rust that it had. I honestly haven't taken too close of a look up to now. There is no "Road Abrasion" applied to the car. Not sure if I will apply it or not. Maybe it won't be needed.
I'm still trying to piece the actual mileage together with all the details I find. You are right though, the body is in pretty good shape regarless!
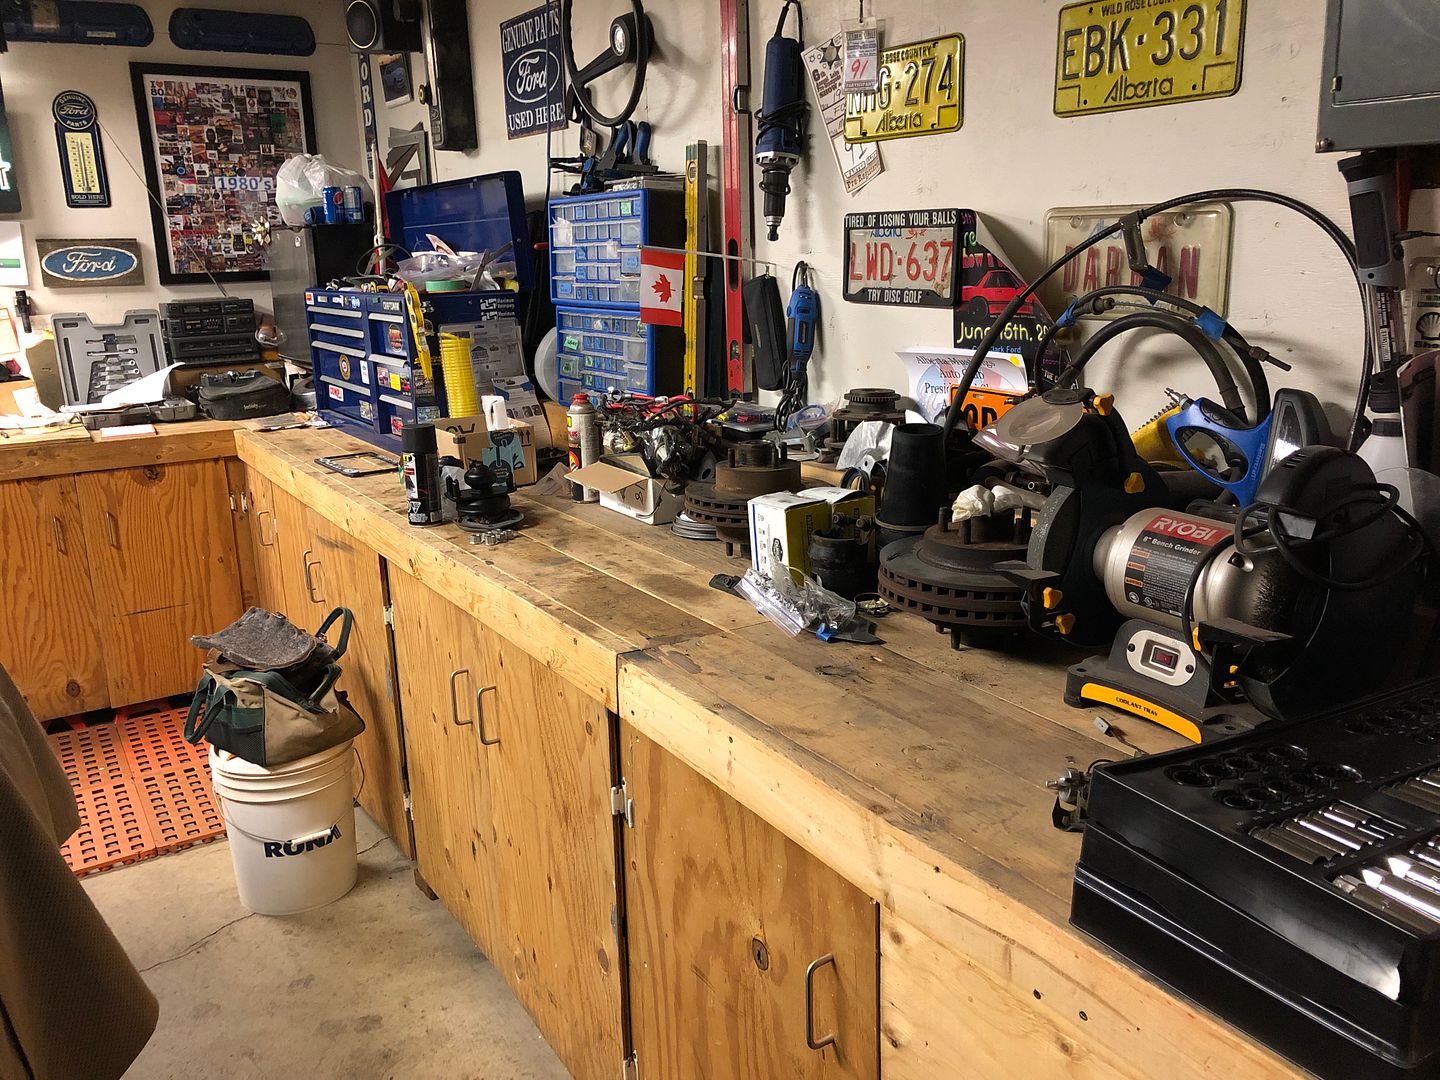
I am pretty much caught up to where I am.
I have my work bench cleaned up pretty good and ready for more action.
http://s1337.photobucket.com/user/82...m45ut.jpg.html
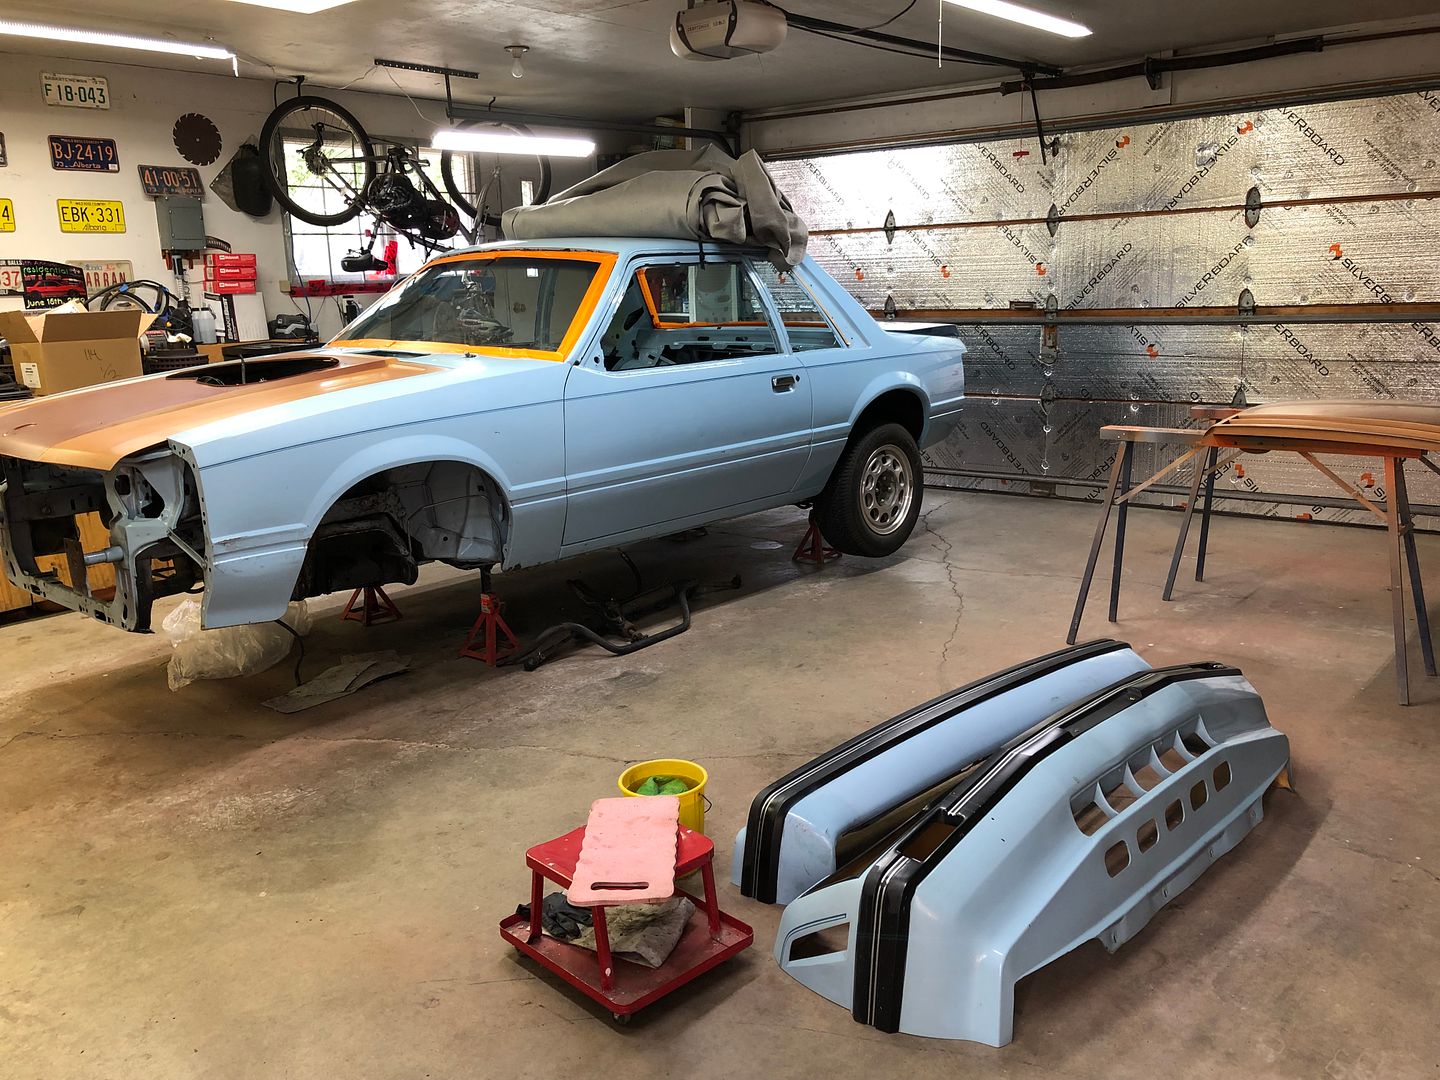
The car with the exception of the engine bay and all of the large parts now sufficiently cleaned up and degreased the body is ready for some sanding. While there is still a ton of other laborious stuff to do, I think that I need to focus on that. Now to find the time to be able to get another surge of work done.
http://s1337.photobucket.com/user/82...mesar.jpg.html
Last edited by 82GTforME; 12-21-2019 at 09:33 AM.
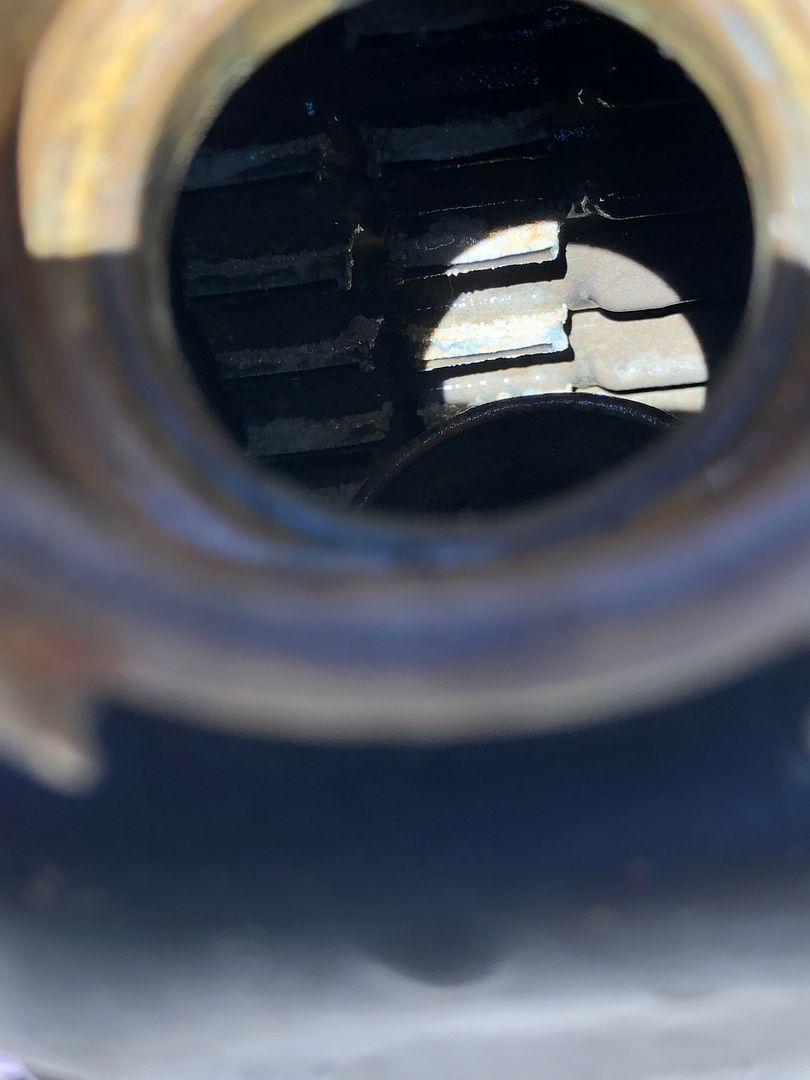
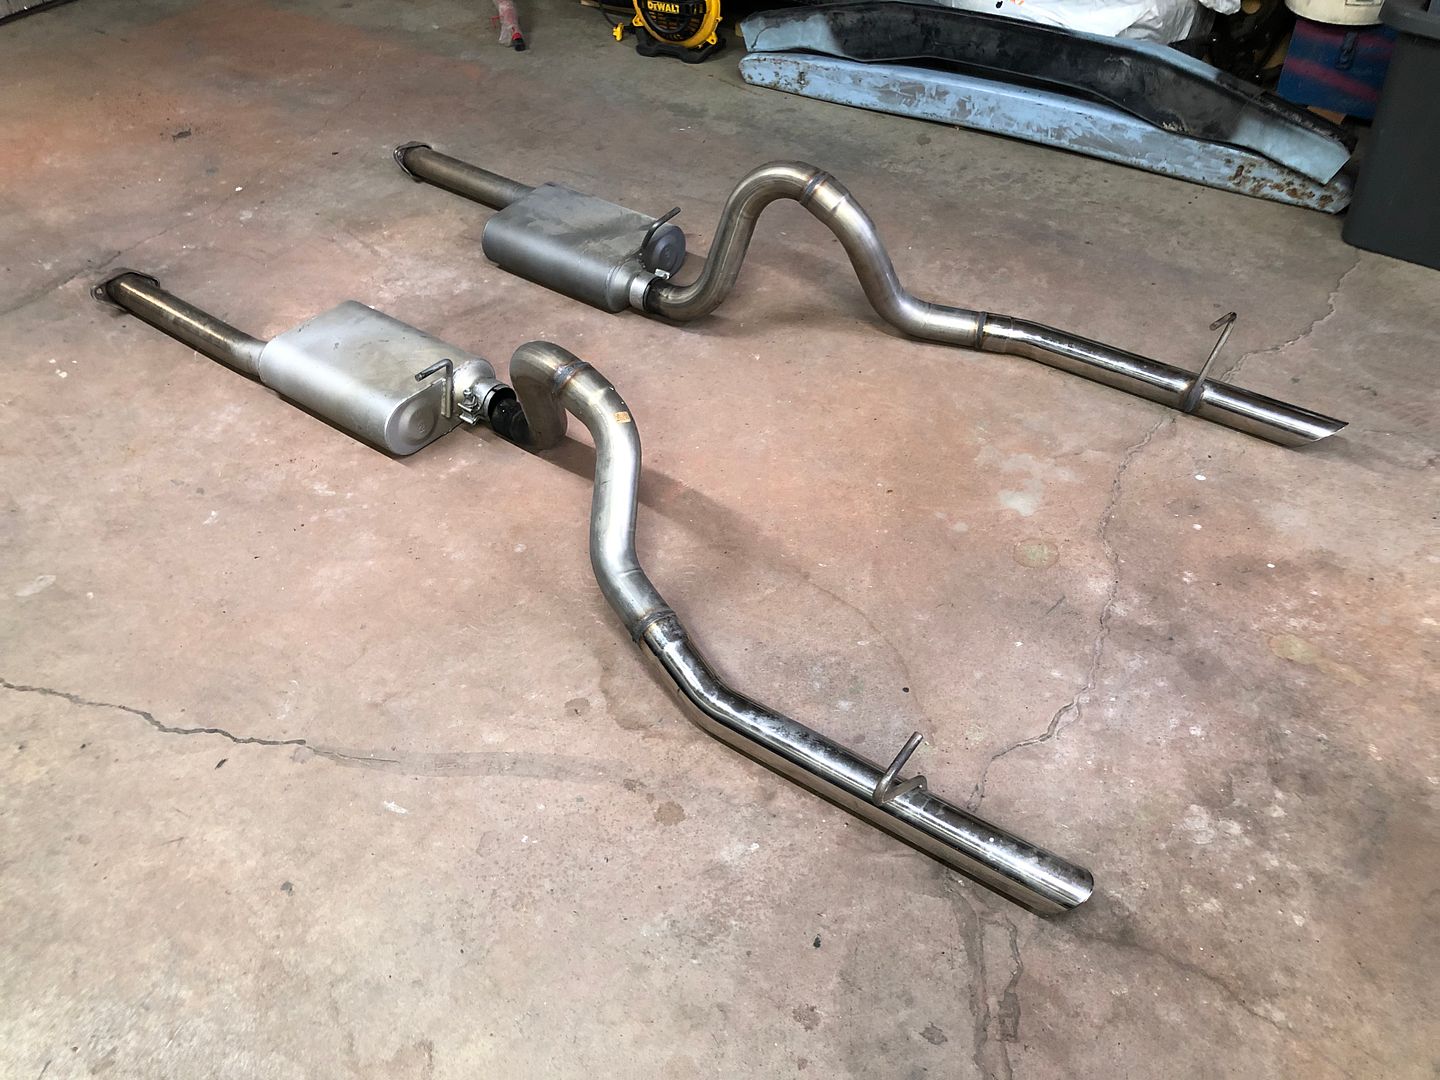
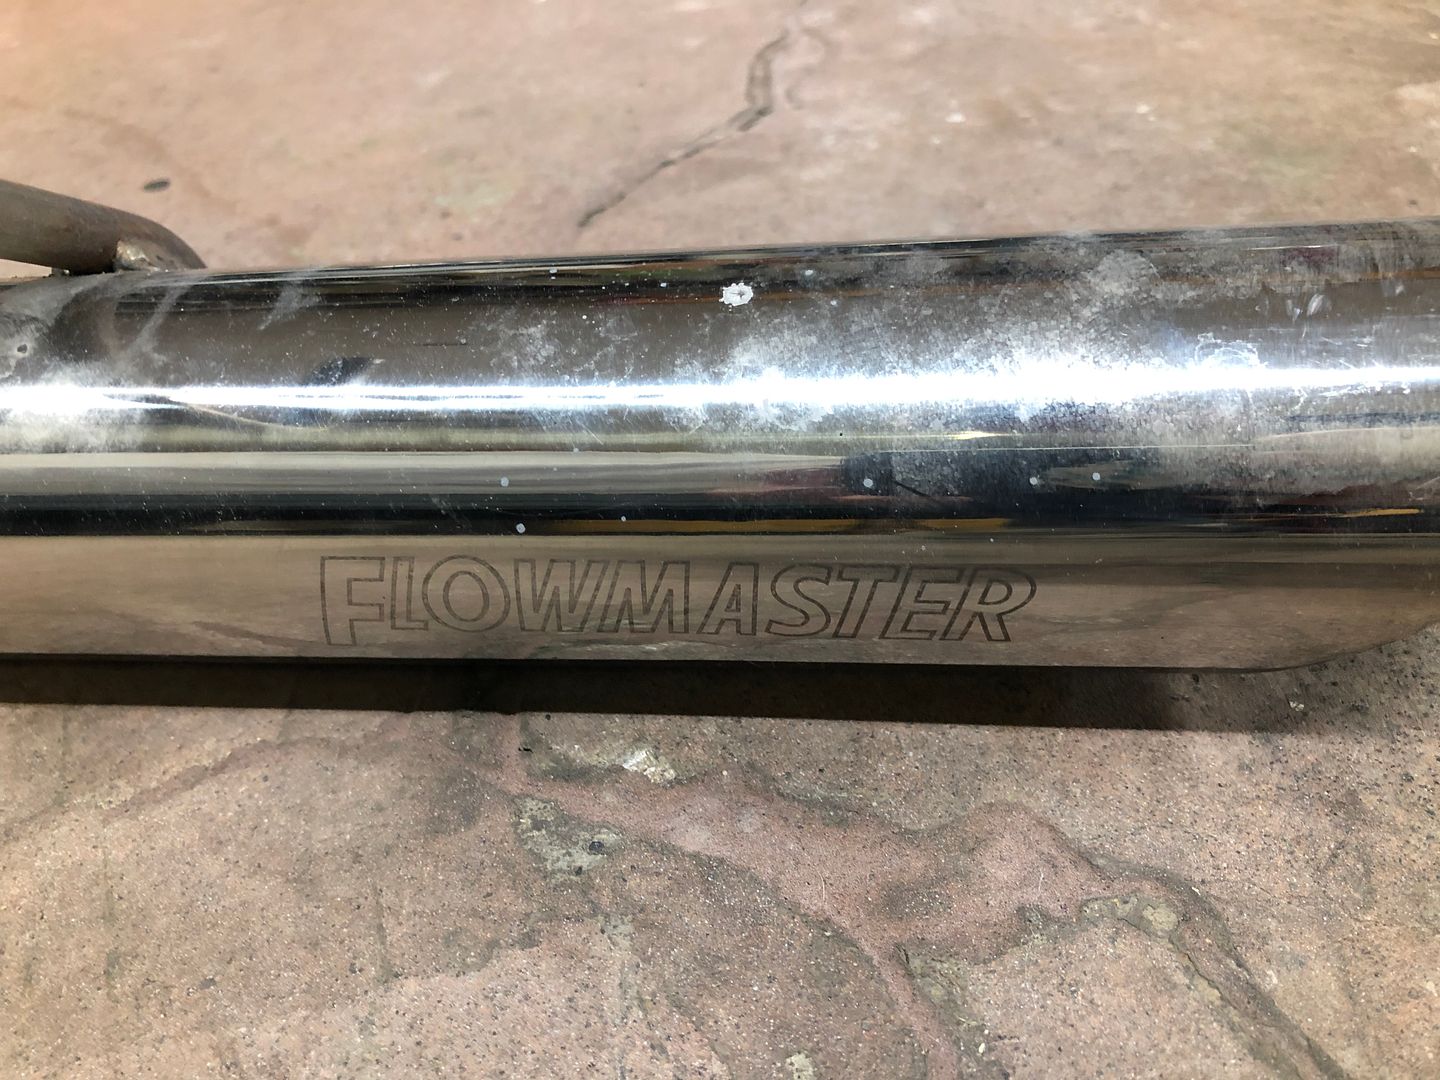
I did pick up a very lightly used set of Flowmaster mufflers and Chrome tail pipes locally for a reasonable price.
http://s1337.photobucket.com/user/82...5wuig.jpg.html
http://s1337.photobucket.com/user/82...iahks.jpg.html
These are the same on the other coupe so should look great and make a stockish 79 302 sound a little meaner.
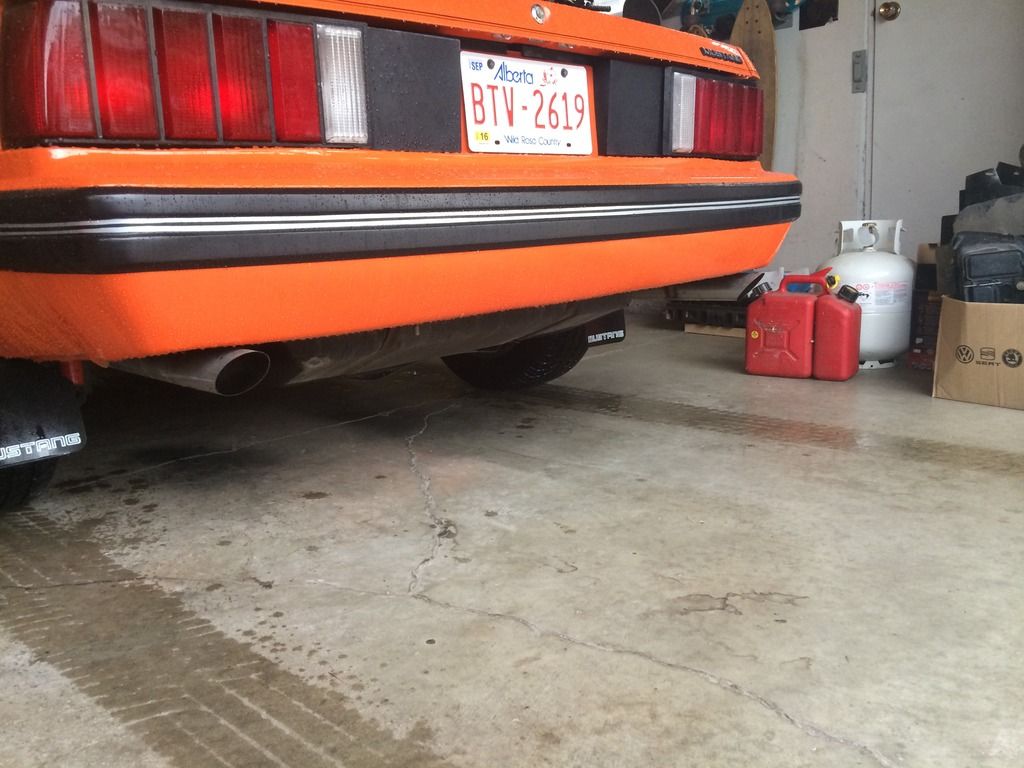
http://s1337.photobucket.com/user/82...lnsxn.jpg.html
It looks great with the dual exhaust.
I've read that it was standard on all the Canadian models, not sure if it was even offered in the US. If so then it was optional. I'd leave it off and go with a good paint protection film instead. I had that done on lower portion of mine done from the body molding down.
There's been some projects here and there but still enjoying the Capri!

 Posting Permissions


 Reply With Quote
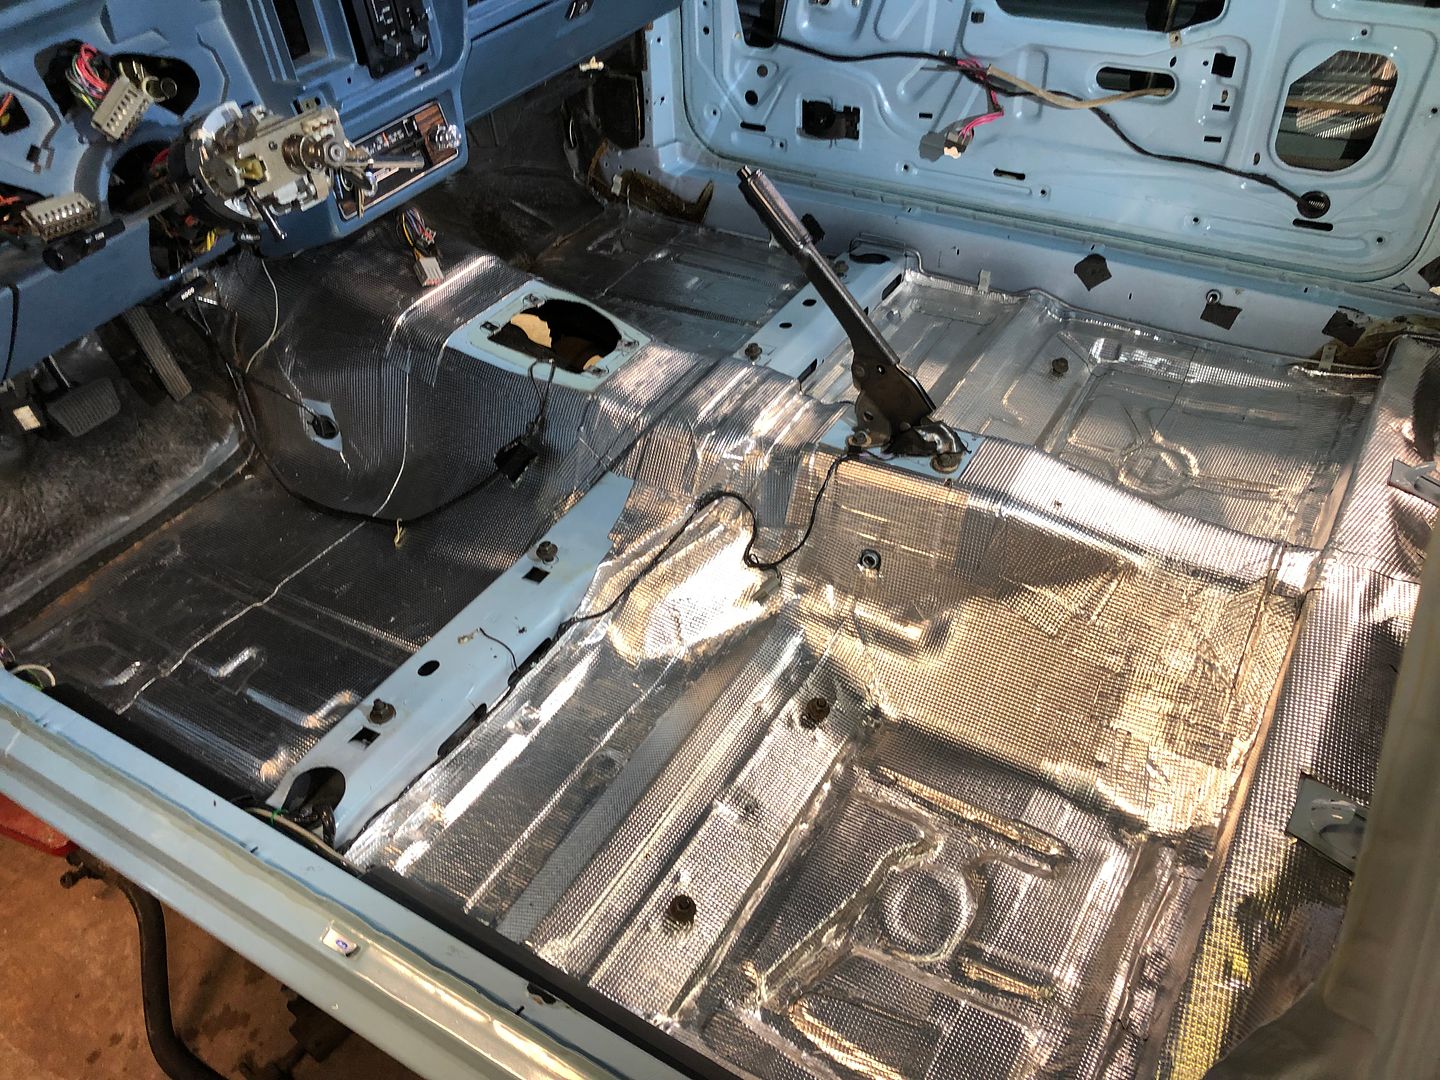


Connect With Us