
Not a bad lil' rig


Not a bad lil' rig
Last edited by Bryan Knebworth; 04-07-2020 at 12:55 PM.


My updates are lacking this go around and aren't in real time anymore it seems. Nonetheless since the last update there was work done before the current Covid situation started to unfold here in March.Originally Posted by 82GTforME

My labour is free and as my former self noted before, there is a ton of laborious stuff to do!
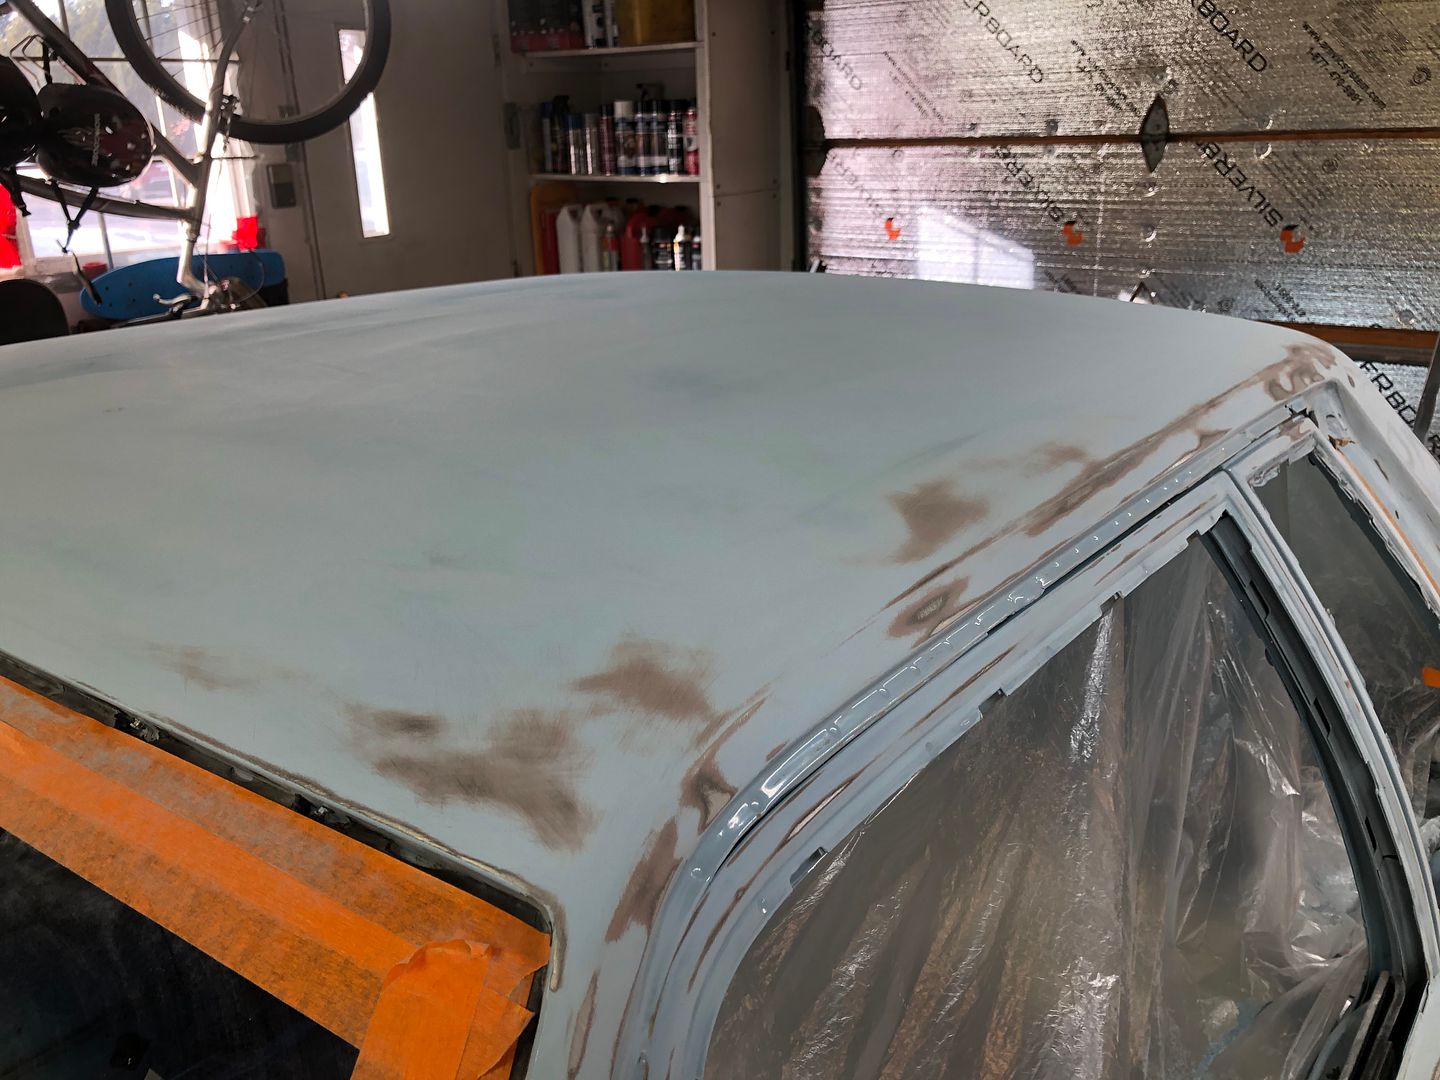
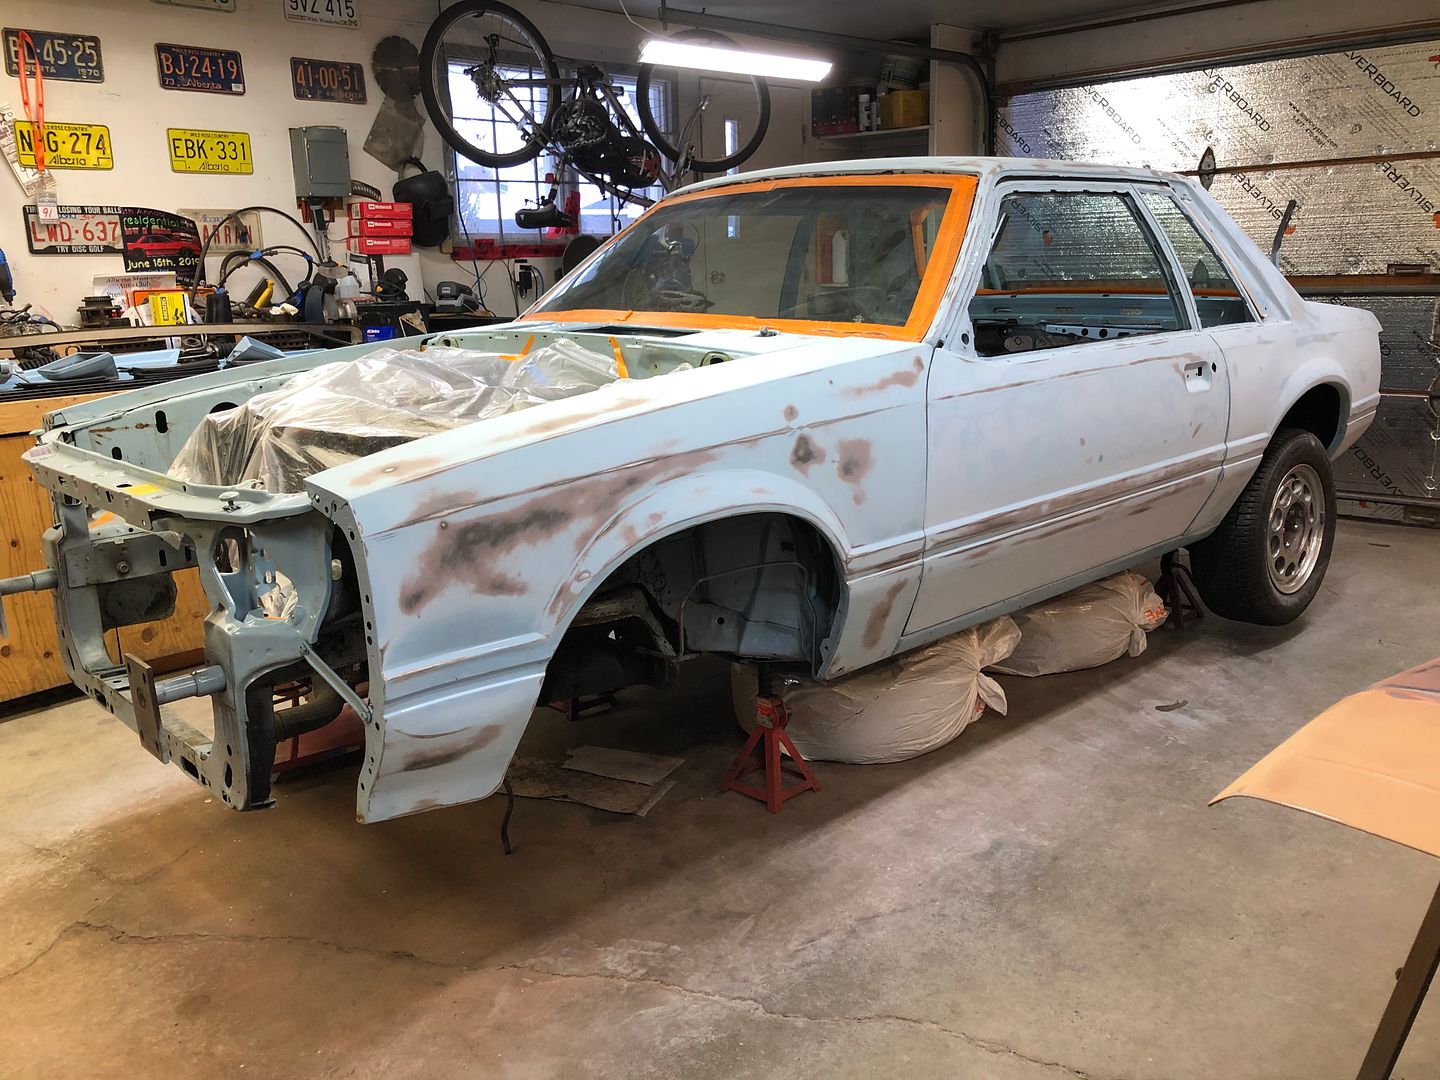
Therefore without further delay, some sanding commenced!
https://s1337.photobucket.com/user/8...0mkzt.jpg.html
https://s1337.photobucket.com/user/8...hbzka.jpg.html
https://s1337.photobucket.com/user/8...pjwcd.jpg.html
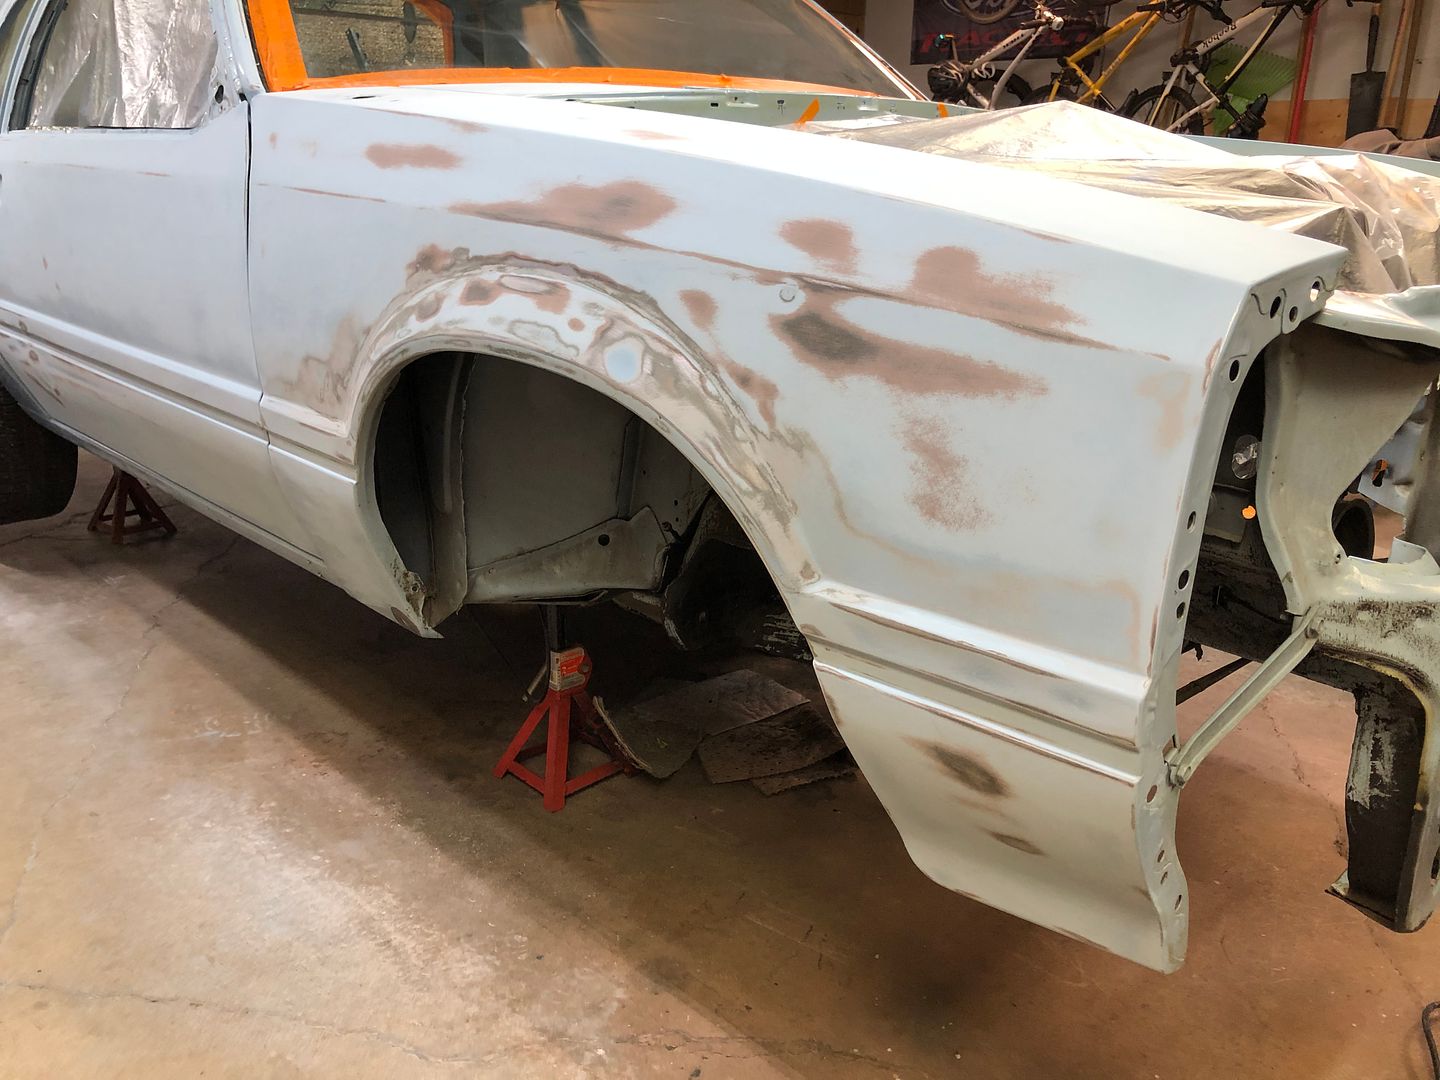
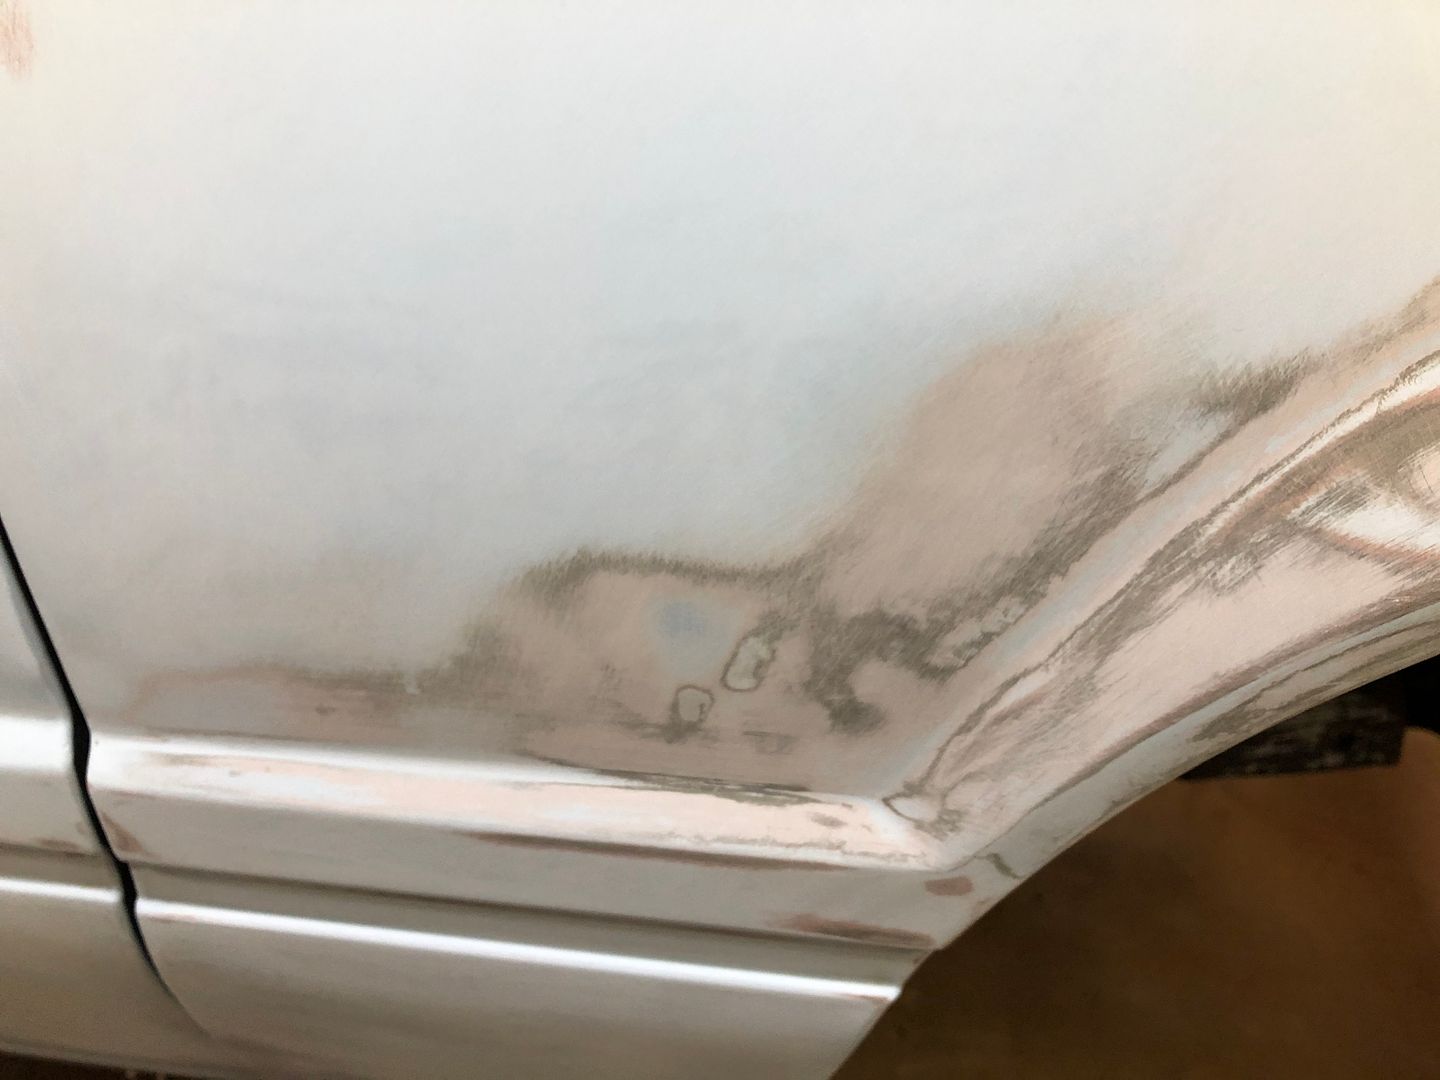
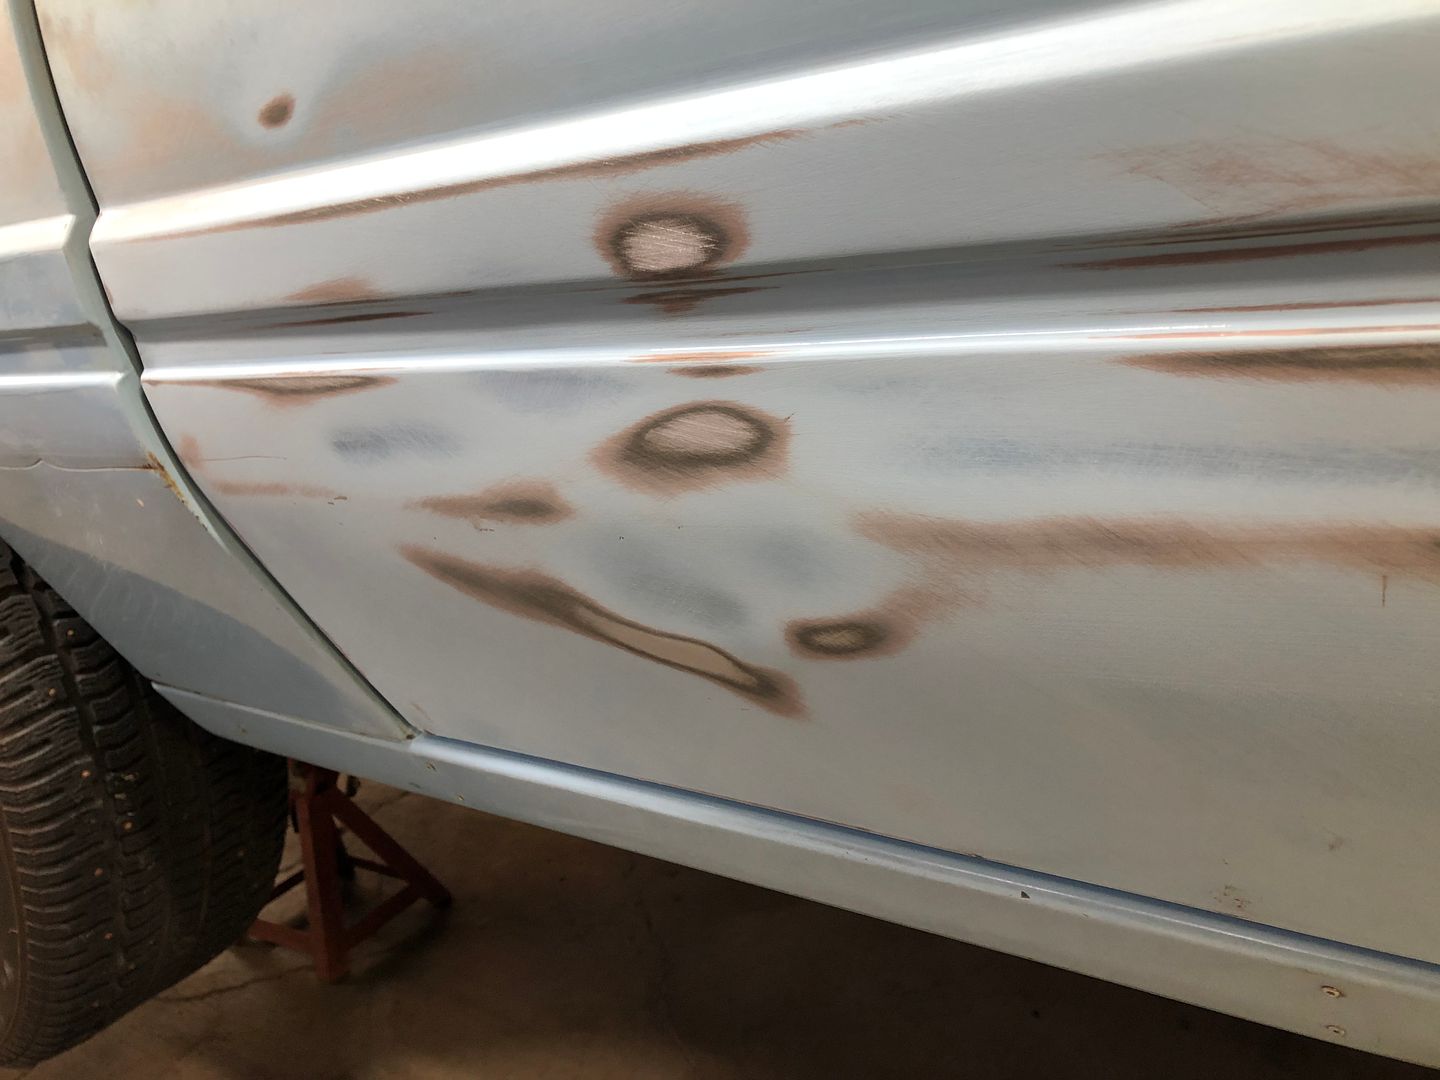
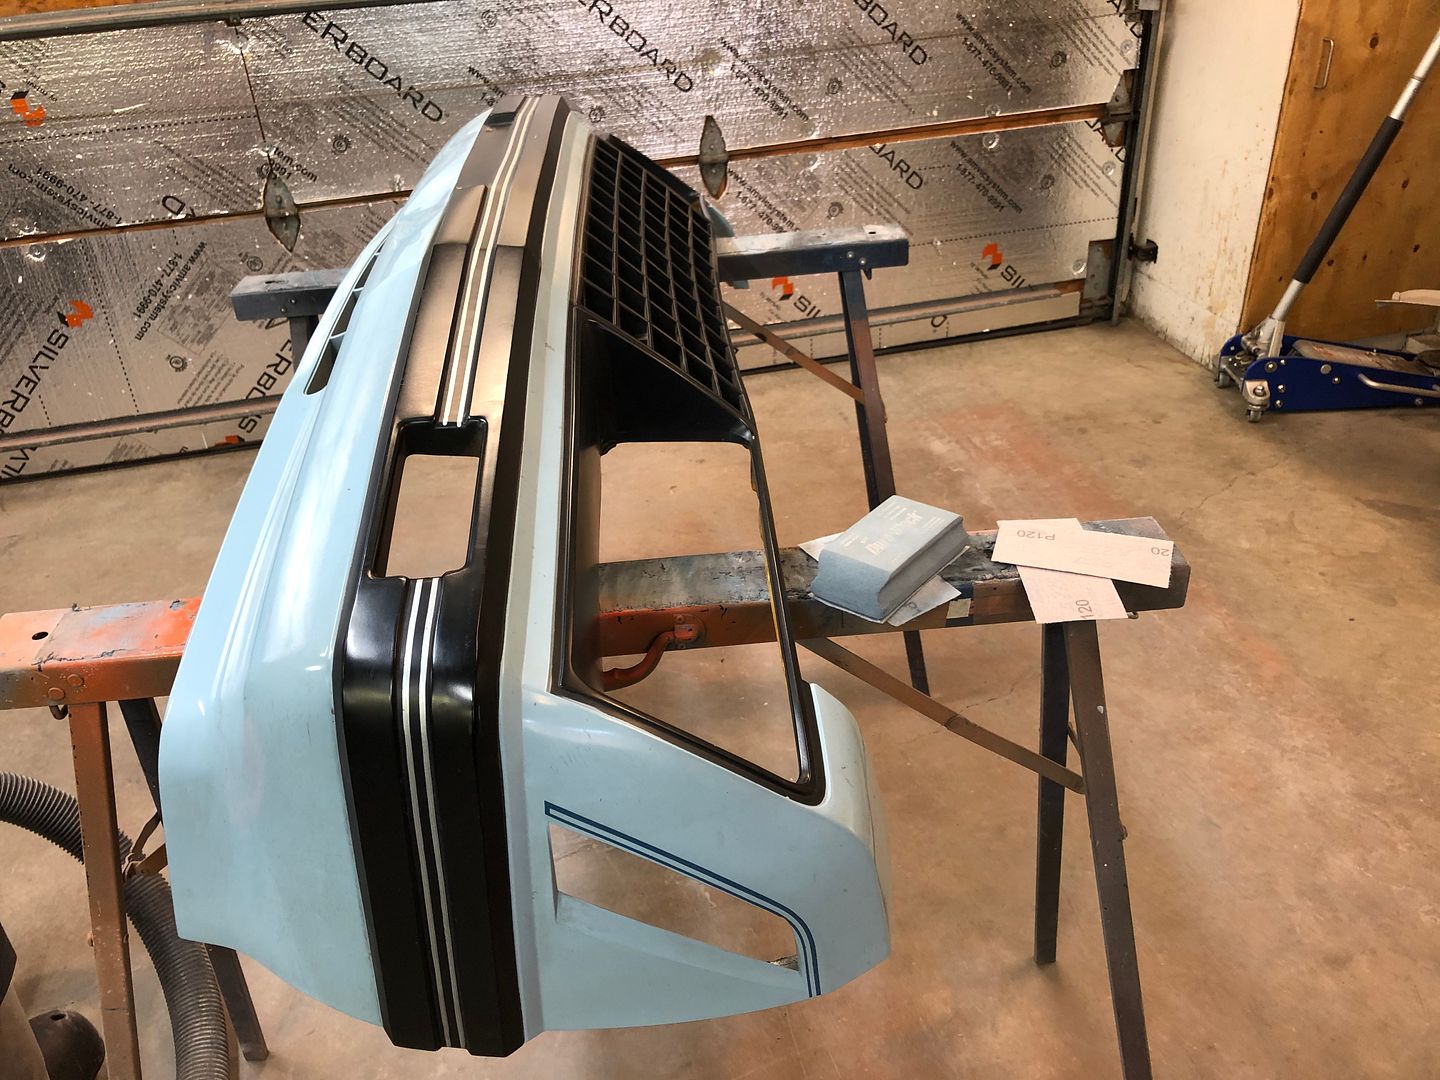
Hard to say what was going on under the quick and poor repair on the passenger side. There were a number of layers including some poor filler under that quick rattle can spray that it had under the pinstripe line. The poor filler work gave the texture seen in previous images.
https://s1337.photobucket.com/user/8...cdlu4.jpg.html
https://s1337.photobucket.com/user/8...mmauw.jpg.html
https://s1337.photobucket.com/user/8...dqy0e.jpg.html
https://s1337.photobucket.com/user/8...oupo1.jpg.html
Last edited by 82GTforME; 04-06-2020 at 09:31 PM.
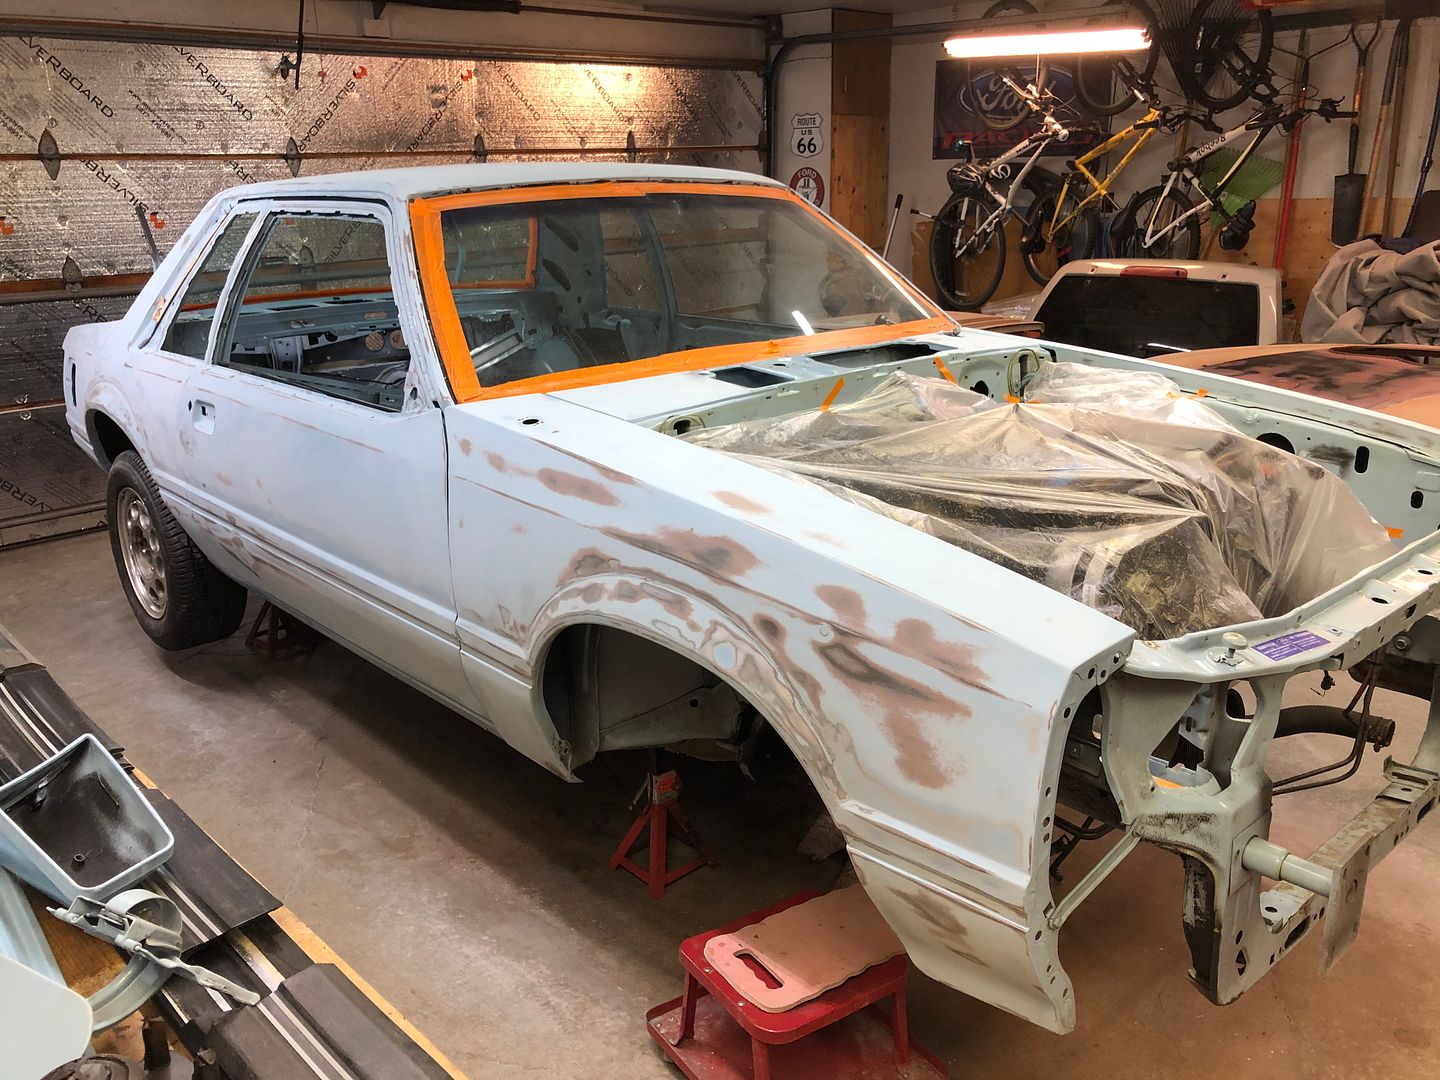
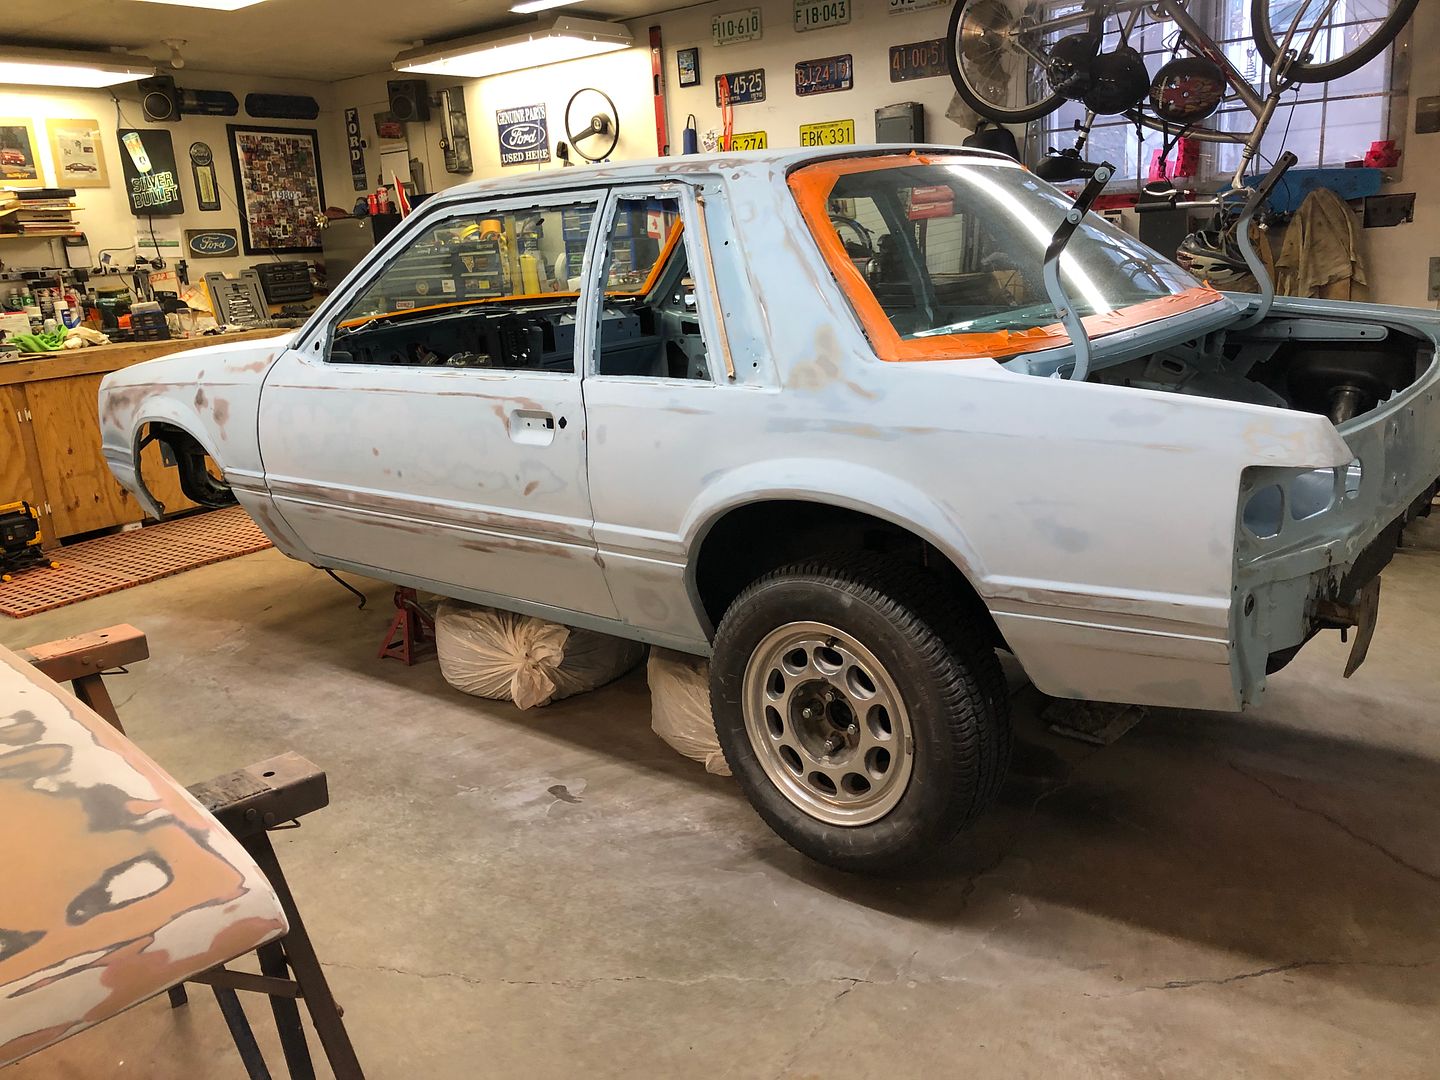
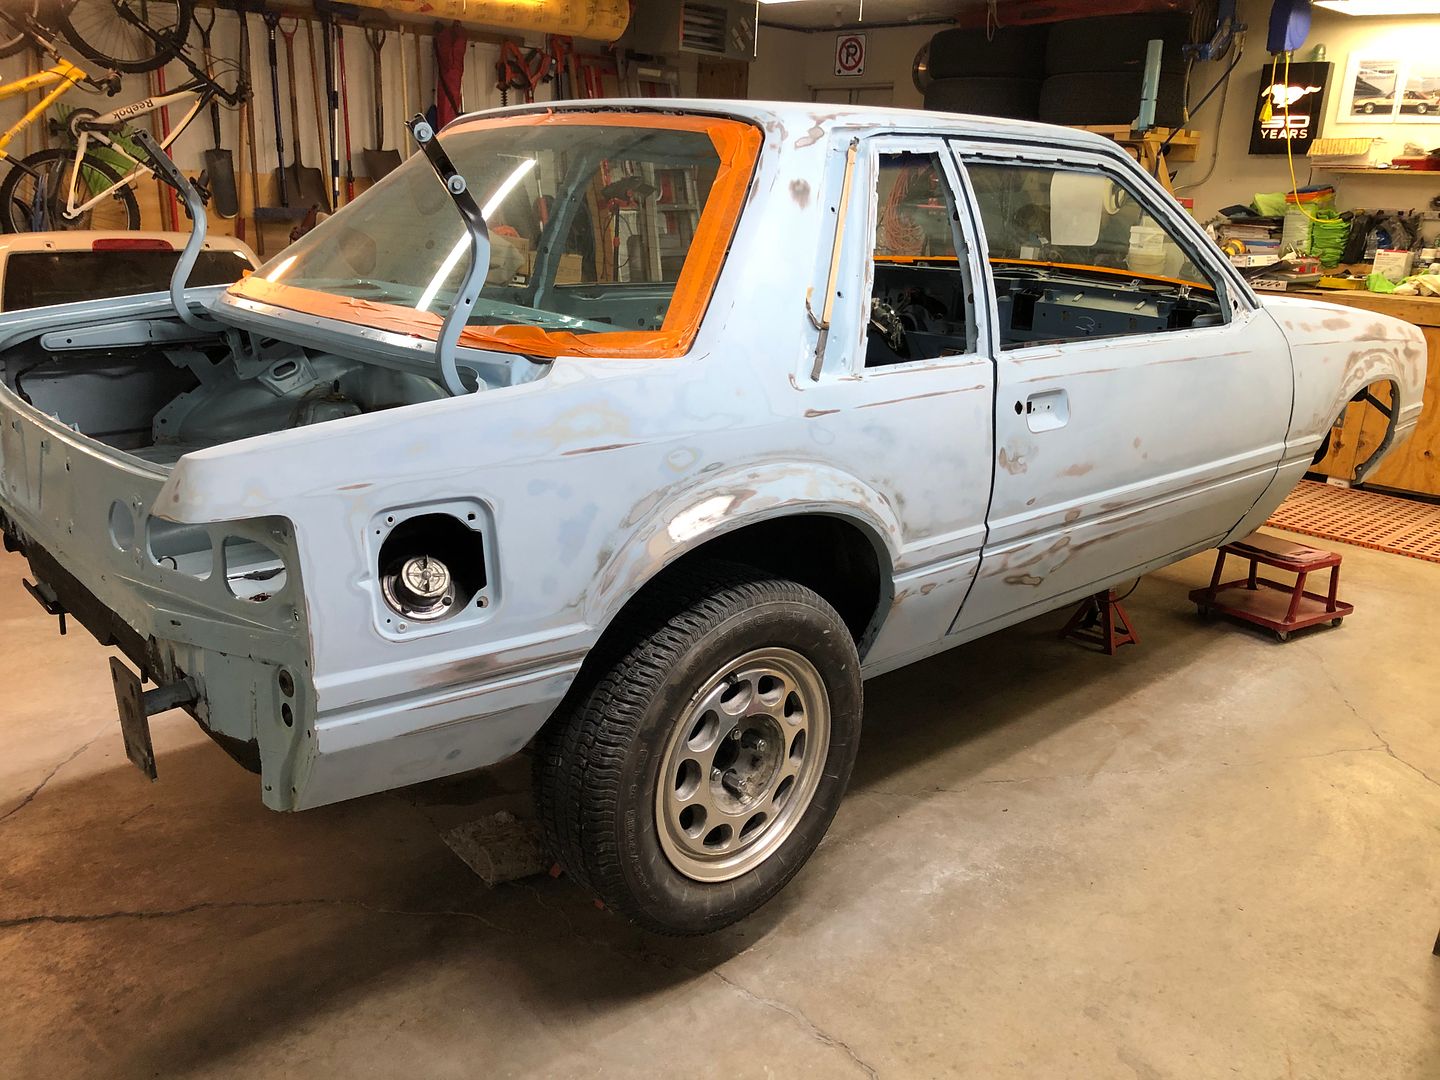
I have the main parts of the car blocked down to 180 at this time. These areas that need it are ready for some further body work now when I get to it.
I have not touched the front and rear clips, rockers, inside the door jambs or engine compartment yetThe doors will eventually come off to prep and spray the jambs ahead of the rest of the exterior.
https://s1337.photobucket.com/user/8...ll4zo.jpg.html
https://s1337.photobucket.com/user/8...oypks.jpg.html
https://s1337.photobucket.com/user/8...jqmvb.jpg.html
https://s1337.photobucket.com/user/8...sffn8.jpg.html
I hope to see it this summer on the road.
Thanks for the confidence! At my pace I'll be lucky to be ready next summer. Maybe...

A lot of small (and big) details... Looking good, also can't wait to see more..

Amazing work!
keep it up, you’re inspiring me as I work on my heap lol
thanks!
79 Zephyr, 4.6L 4v/4r70w swap, with team z front and rear suspension, 8.8 and upgraded brakes and coil overs. Running Holley Terminator X Max.
Thanks Bryan. I never took the chance to reply to your previous comment about the condition of the paint. From first glances, the car did look great and could have probably survived as it was. After finishing the Tangerine car, it had always been the intention to basically do the same work to this car. After getting deeper into the blocking and taking more parts off I am finding the car does have really good bones underneath. Even though there were a number of indications that could have been much worse underneath. With the progress so far, I am glad I decided to go with the full package again. I am making decent progress being home for an extended amount of time. This car will be a beauty when it's done. Funny the body shop I went to a while ago to inquire about the colour commented about it being a "plain" blue (no flecks, metallic etc. in the mix). Not thinking I am going to spice it up but hoping going with the base/clear will really make it pop!
Thanks! Hours and hours of sanding and the lack of substantial changes in pictures don't make it feel like things are progressing that fast. Stay tuned though, lots more to come!
Glad I can inspire. It can be hard to self-inspire at times but once I find time and can get on a roll it makes a big difference. If I could only find one afternoon a week or so to do this, I would retire with this project still not complete!
So after going around the car for the initial few rounds, there are a few spots that will need attention. Other than the below, I have a minor spot on one fender lip and maybe one or two small spots on the hood.
I had pushed a majority of the above door dent out from the inside but of course that would not entirely fix this. After blocking the area out, this is what I have left. There is still part of the original indent as well as a few obvious low spots to fix.
https://s1337.photobucket.com/user/8...saxqf.jpg.html
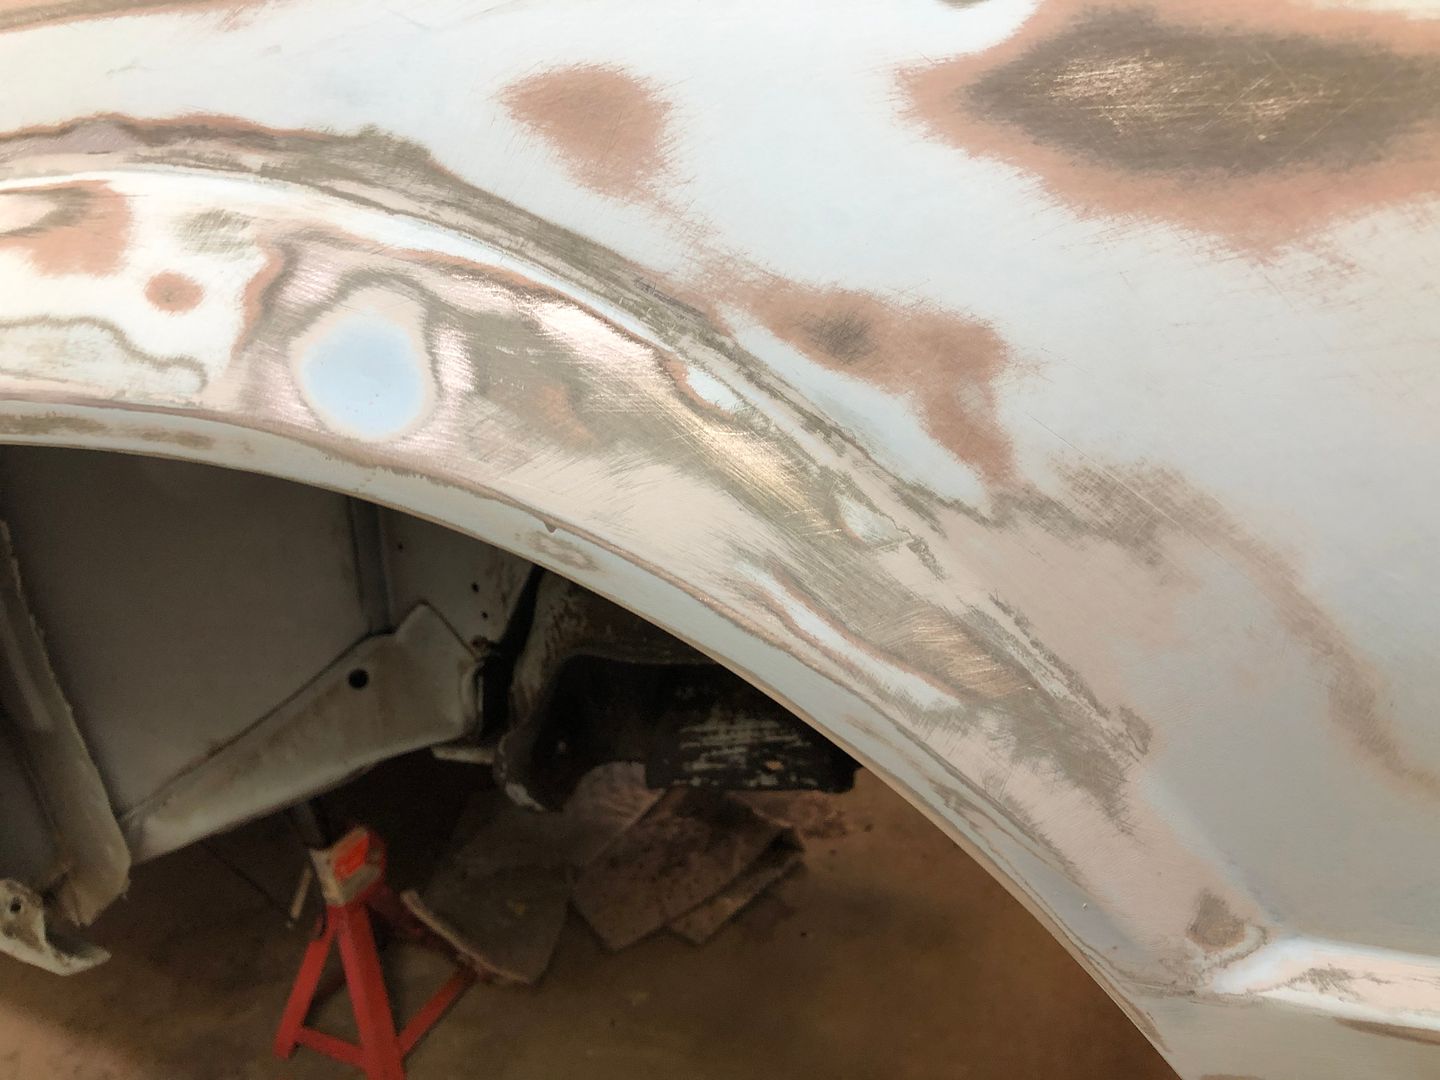
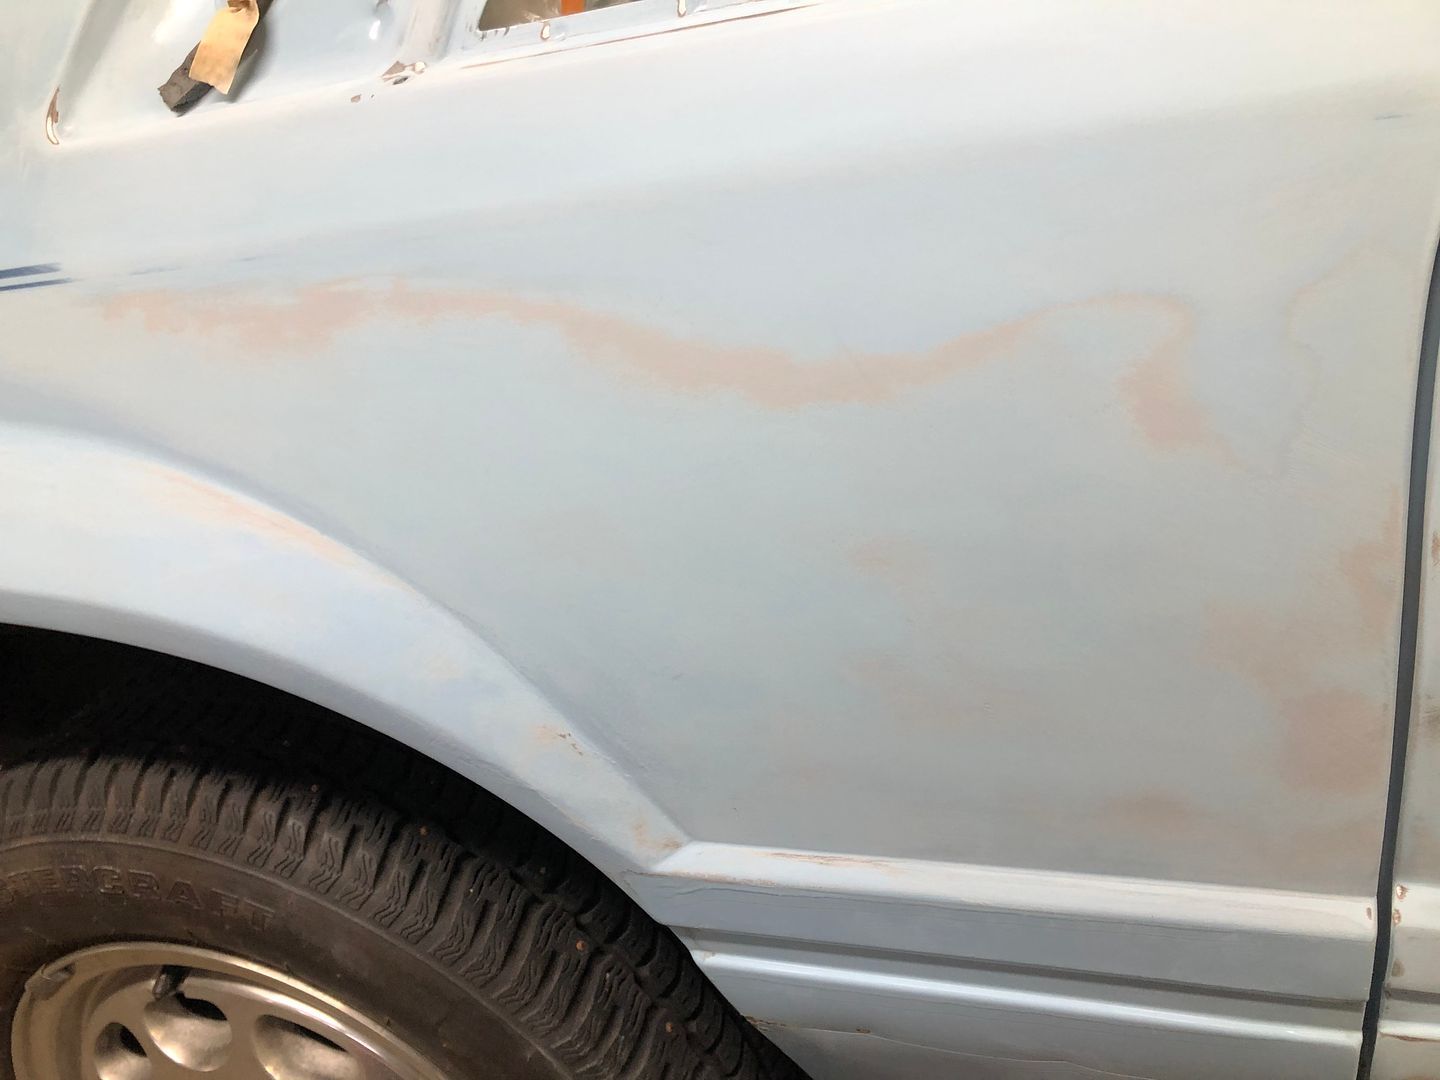
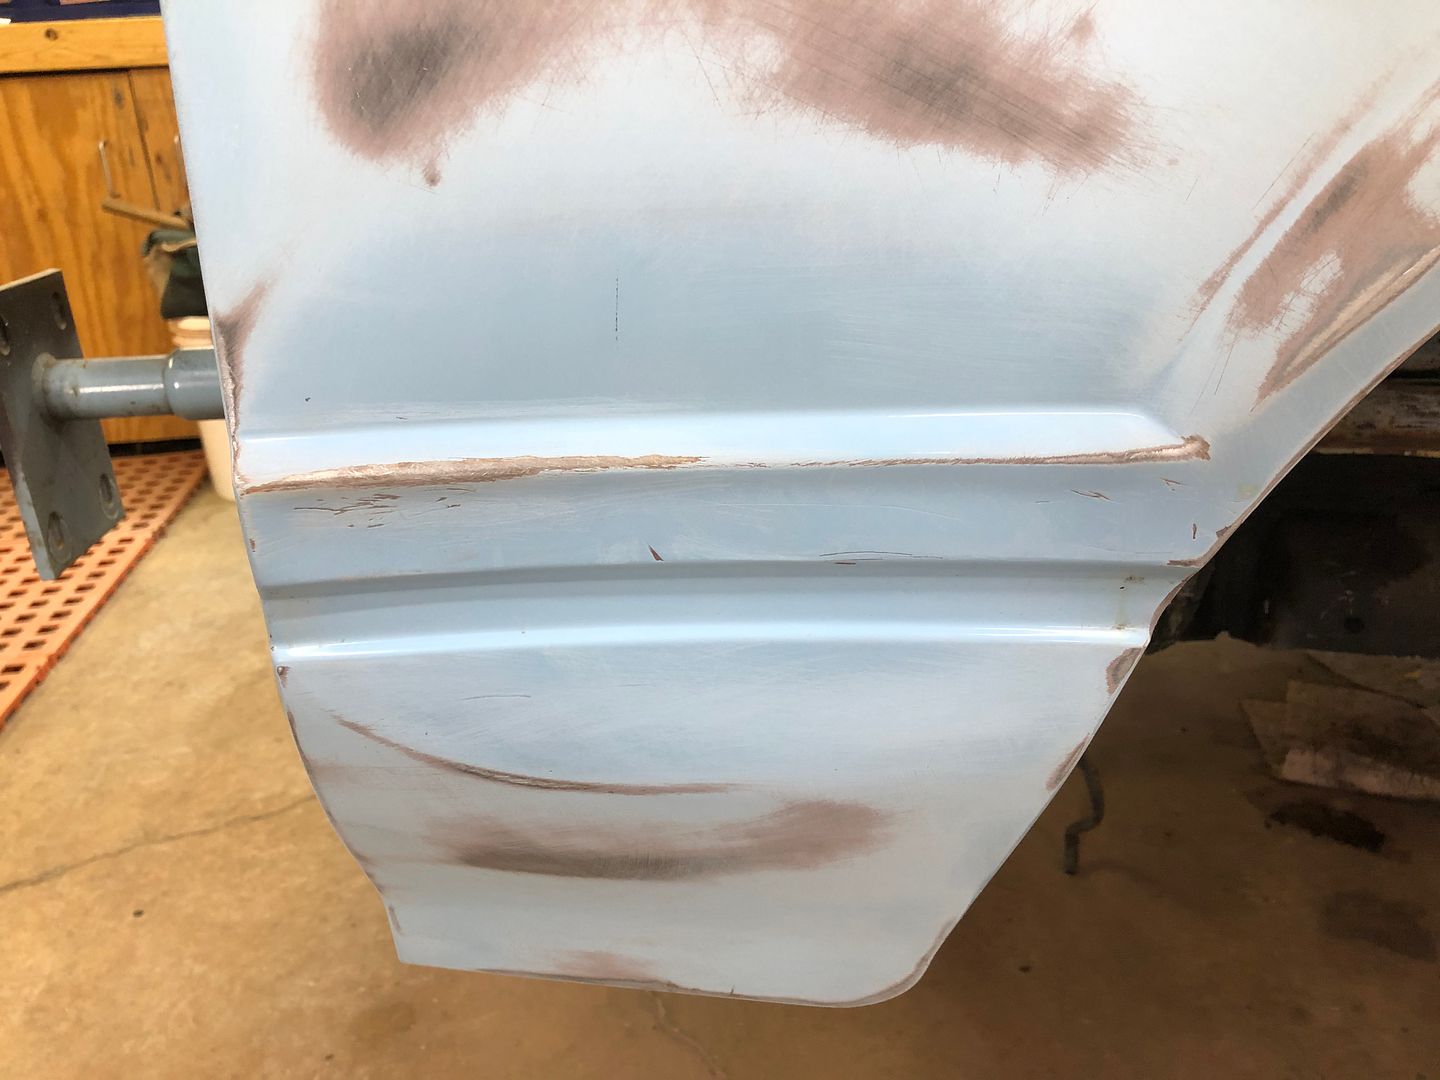
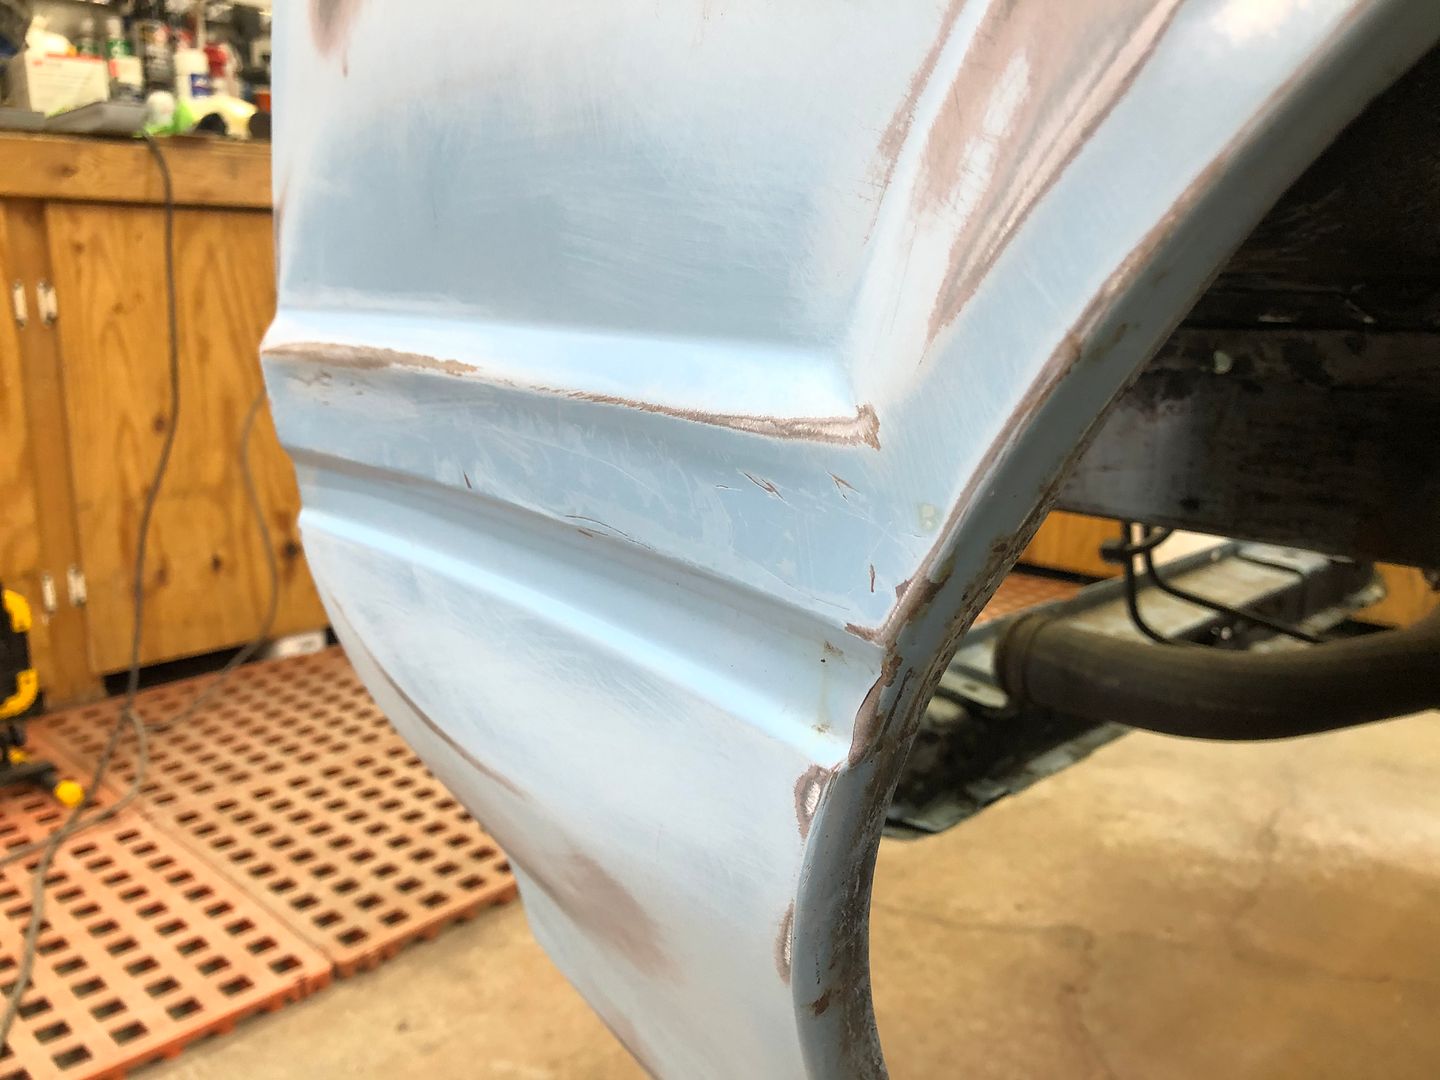
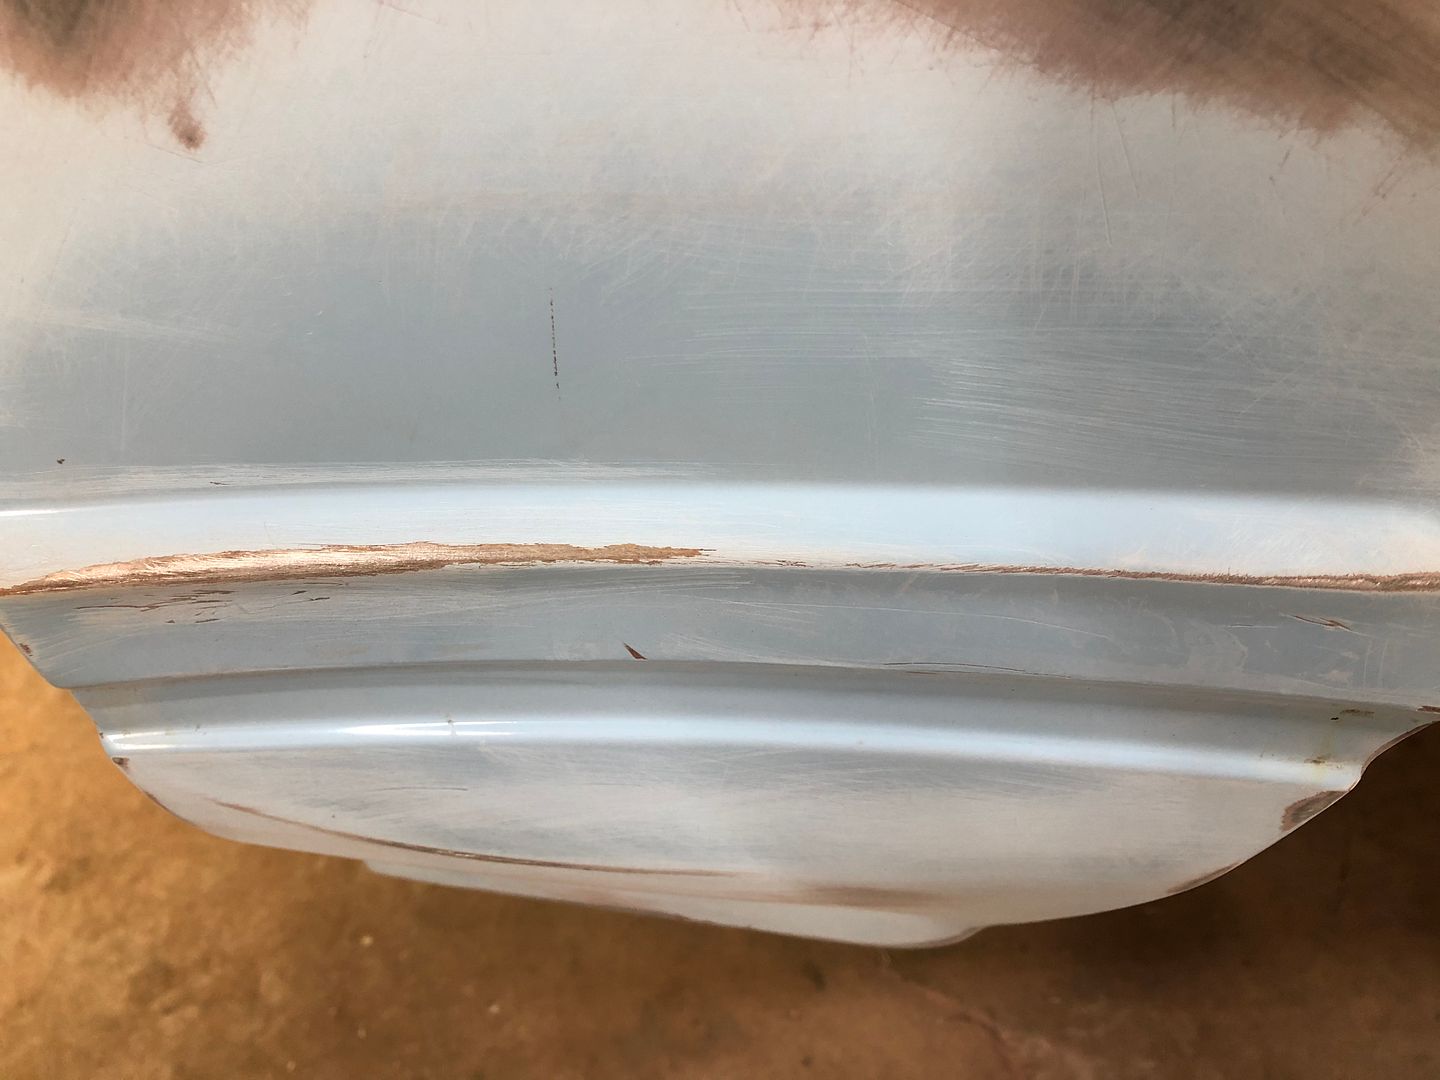
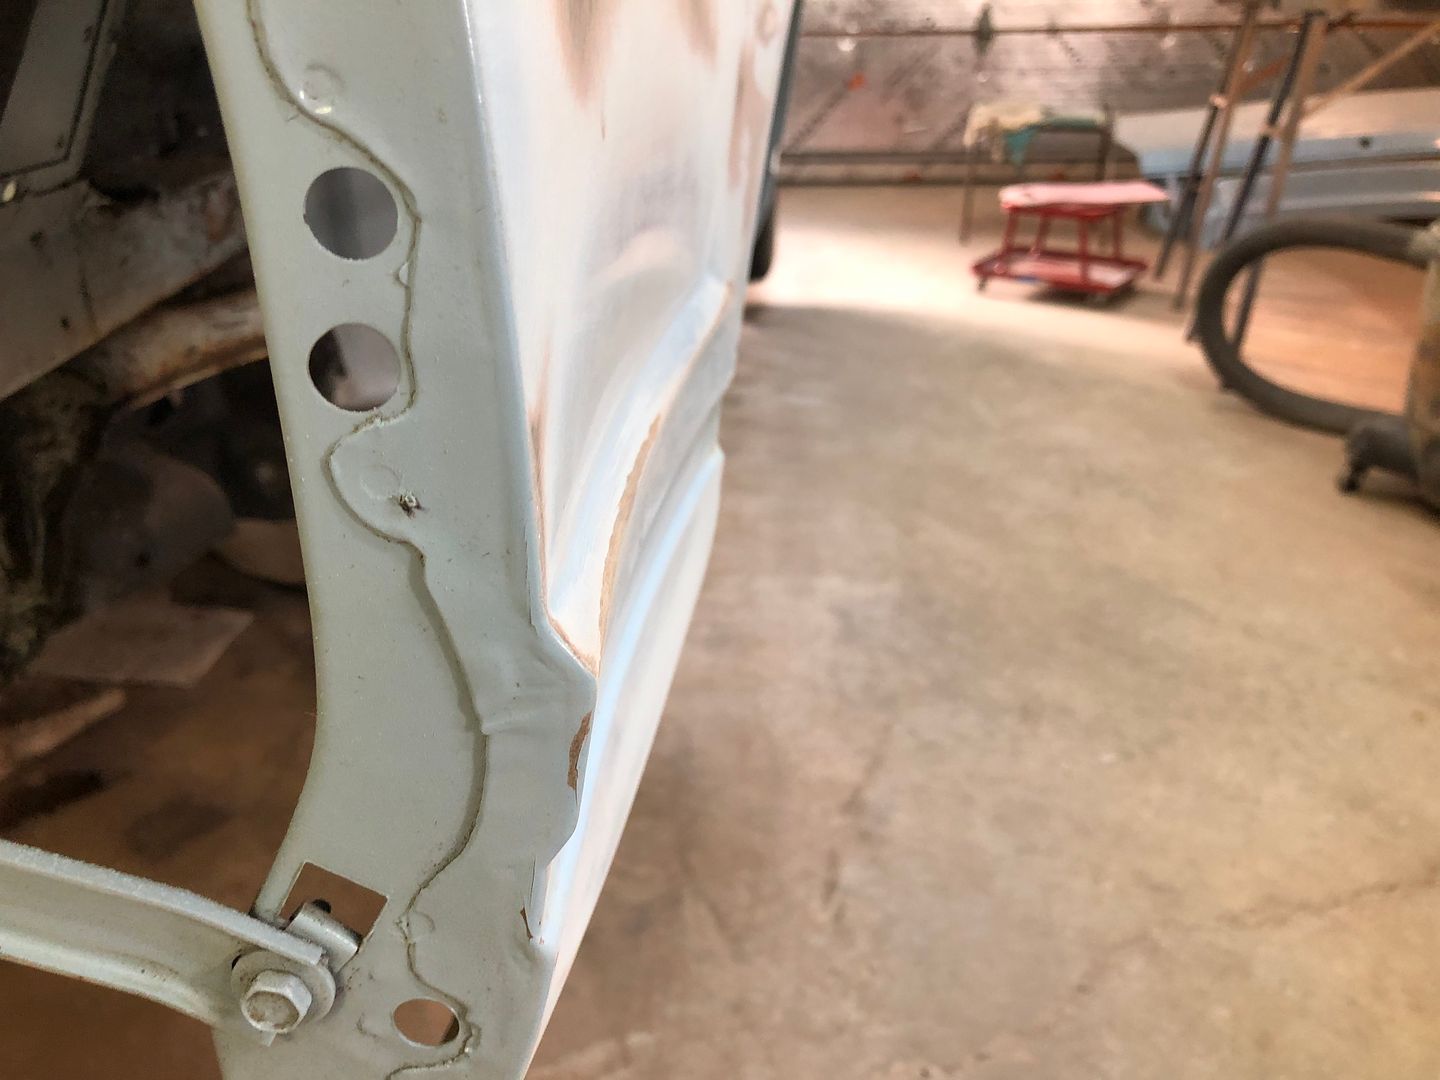
There is also this larger impact area on the driver's side front corner. I guess it could have been worse.
https://s1337.photobucket.com/user/8...hagbm.jpg.html
https://s1337.photobucket.com/user/8...juh28.jpg.html
https://s1337.photobucket.com/user/8...dx9jw.jpg.html
https://s1337.photobucket.com/user/8...o99ux.jpg.html
https://s1337.photobucket.com/user/8...pd0oy.jpg.html
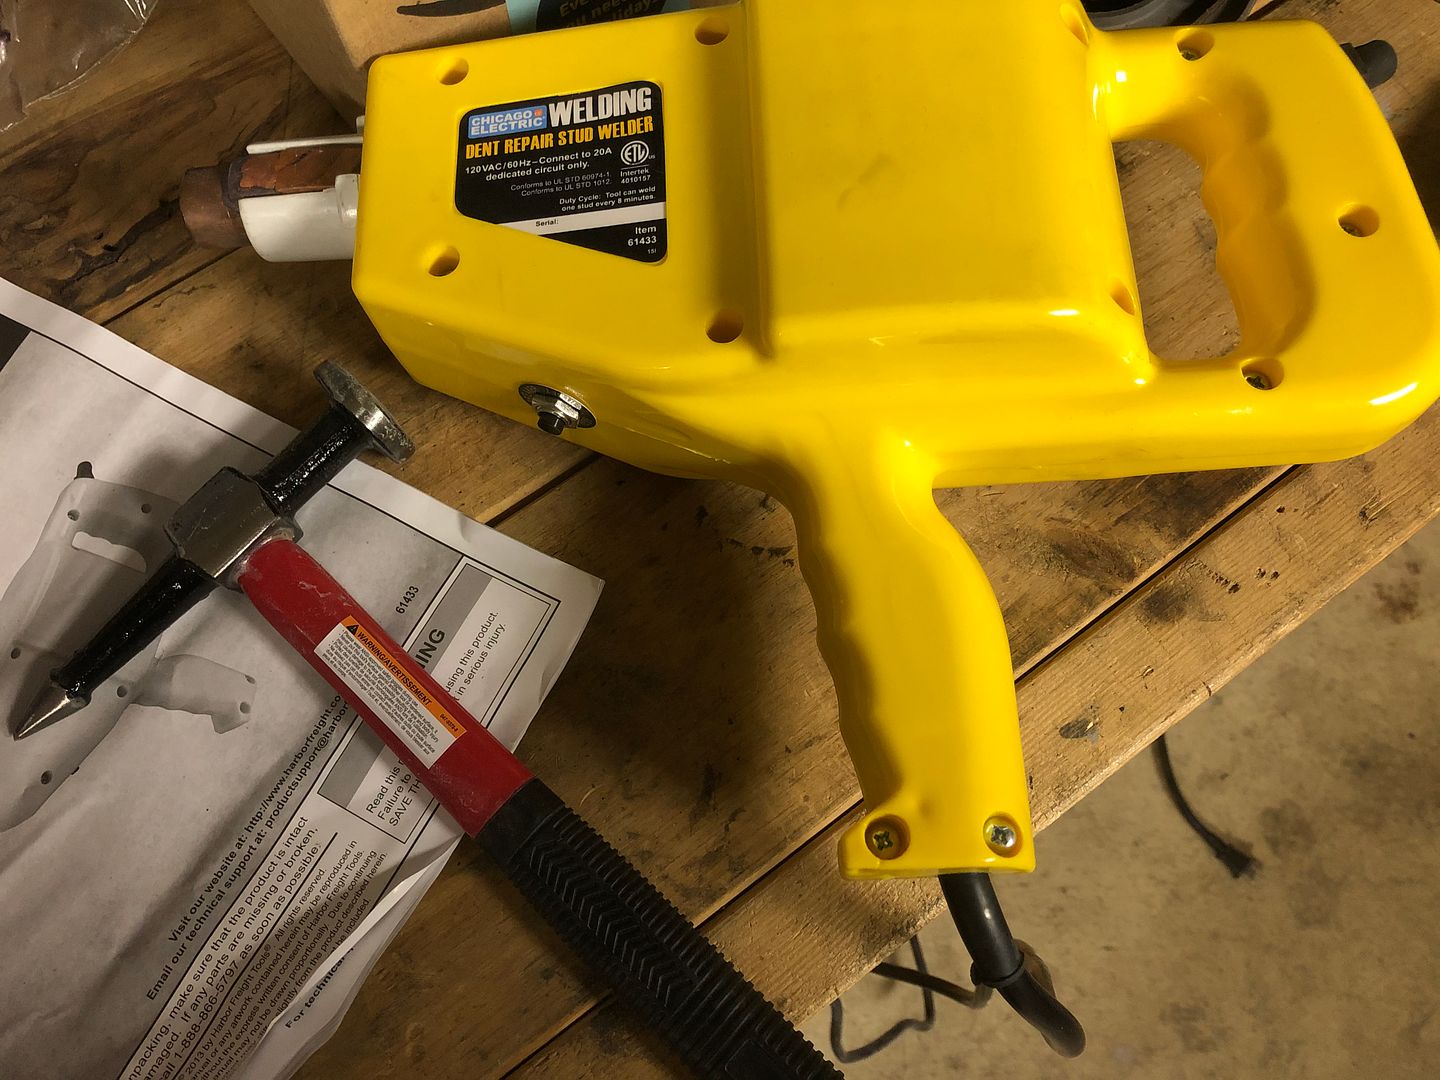
With this sage advice and knowing ahead of time I needed some specialty tools, I had taken a look around locally for a cheap stud gun. Not having a Harbor Freight in Canada had the cheapest alternative pushing $400 Canadian. I had been on a 3 to 4 week and one off rotation for work in northern West Virginia over the last eight months or so and found a Harbor Freight there. I brought one of theirs home in my suitcase before ChristmasMy bag was still just under 50 pounds too!
https://s1337.photobucket.com/user/8...tsur7.jpg.html
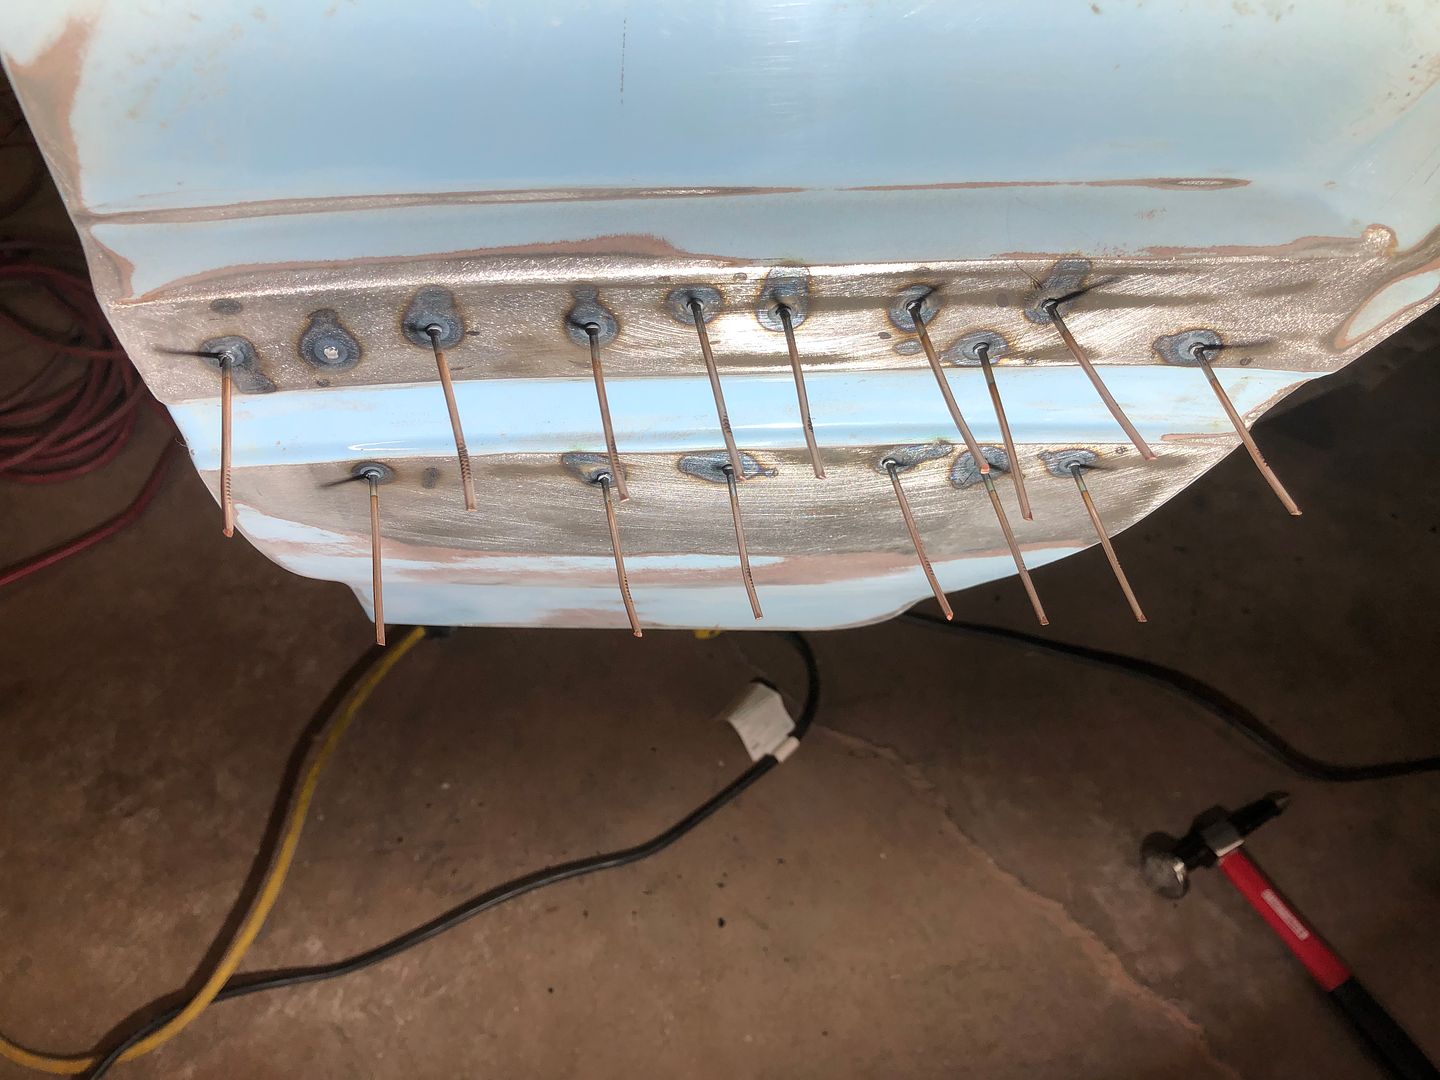
I watched a bunch of videos on YouTube showing dent repairs. Many slightly different methods and for myself never having done this still got the gist of what needed to be done.
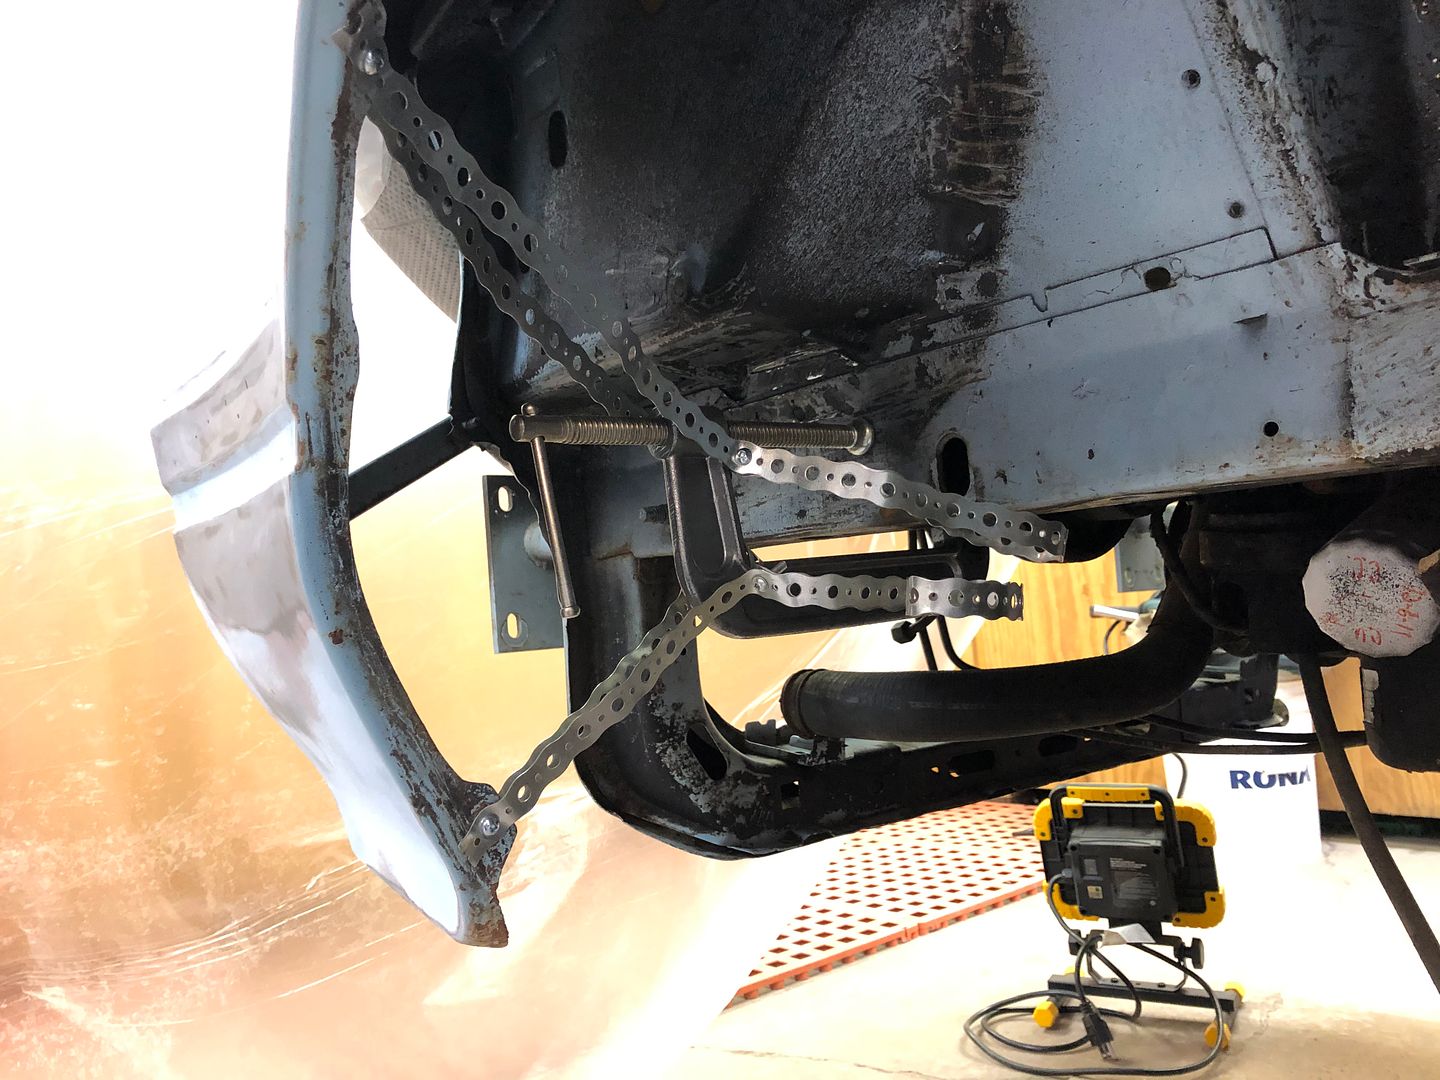
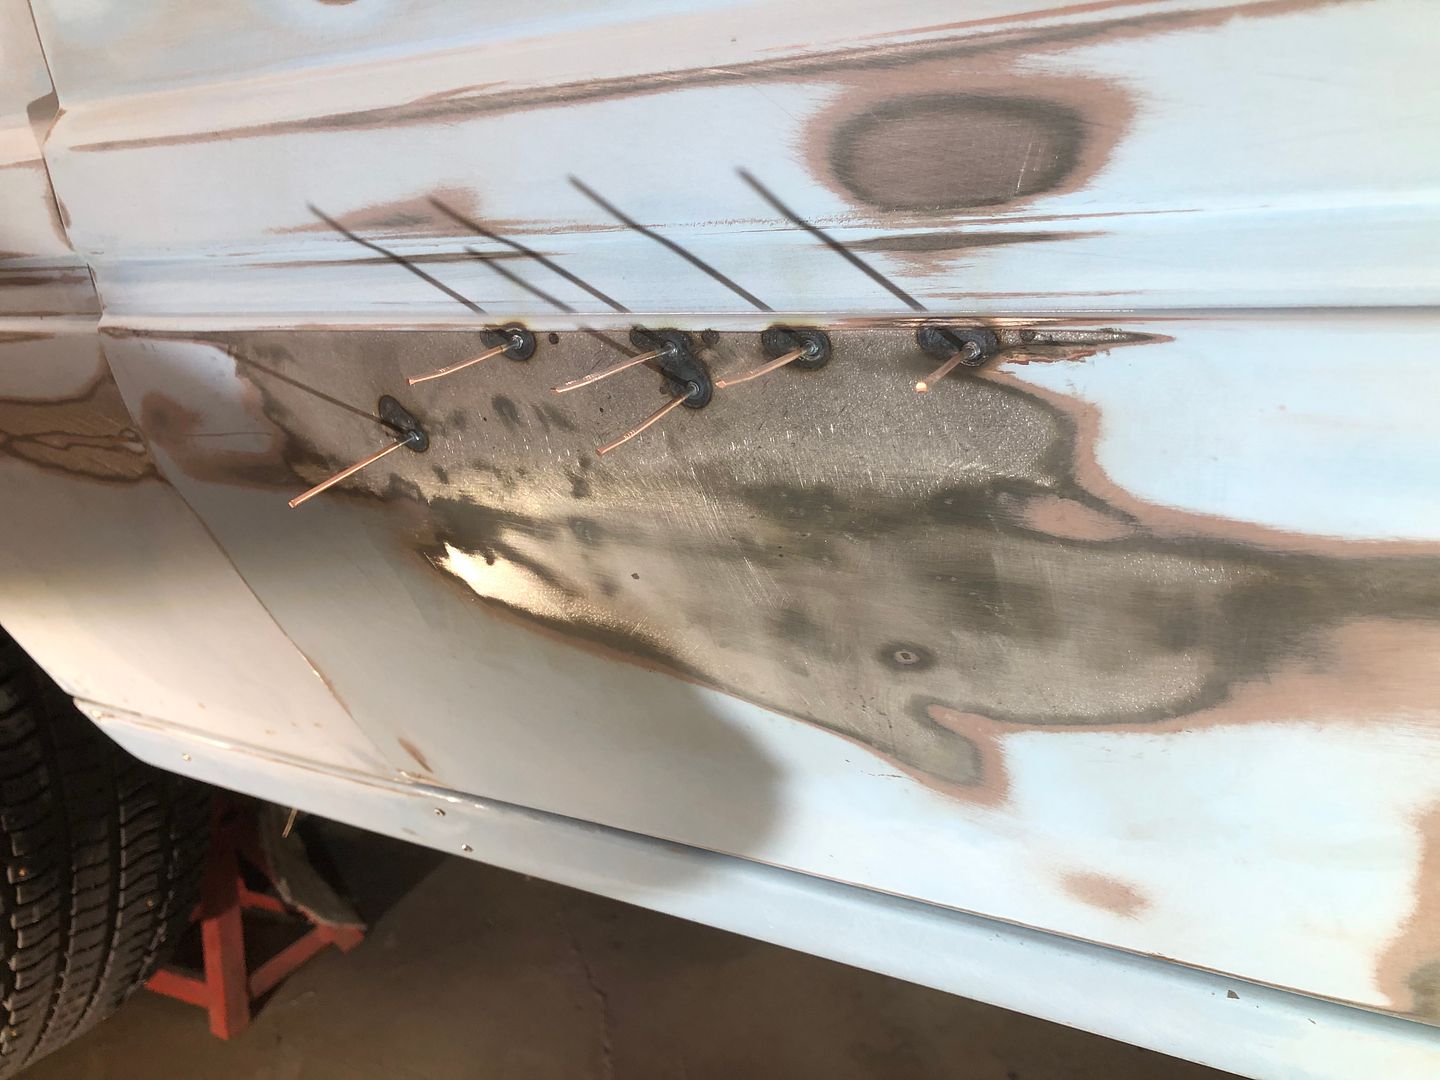
I started with the dent on the front corner. I planned to leave the panel installed to do this one easier but this location didn't have much strength.
I put on a C clamp and used some metal strapping to hold it firm during pulling. It work reasonably well.
https://s1337.photobucket.com/user/8...0eci5.jpg.html
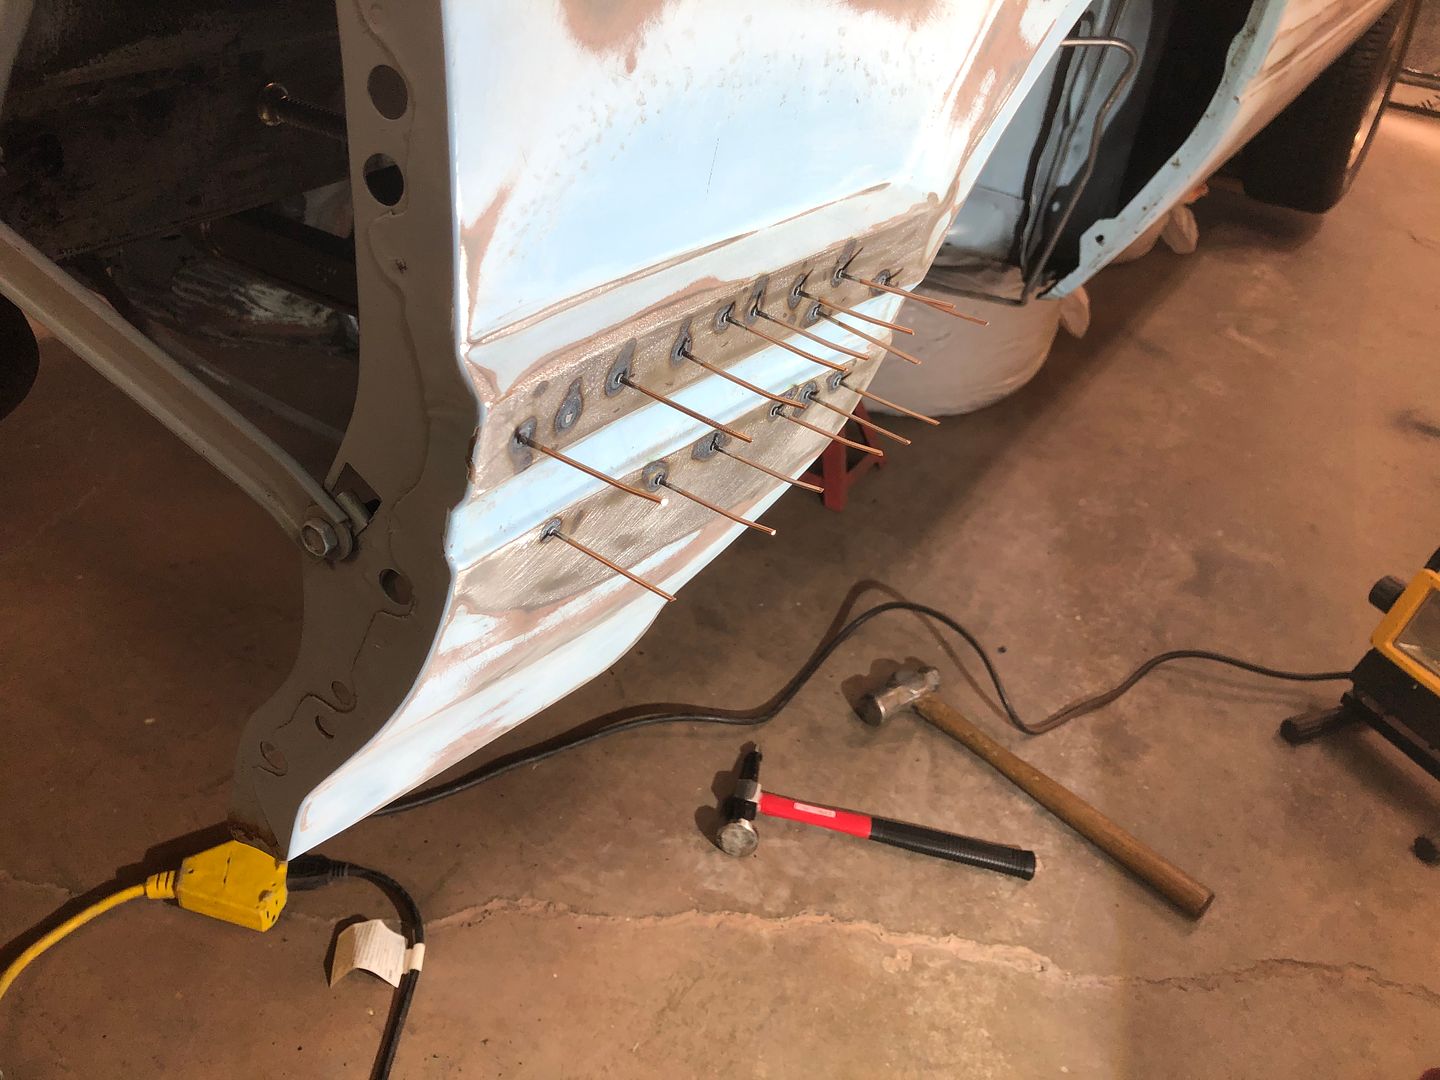
I did this pulling in two rounds. For a first time, I think this was a fairly complex dent to work. Especially with the curled in molding lip.
Round one:
https://s1337.photobucket.com/user/8...cxnxy.jpg.html
https://s1337.photobucket.com/user/8...bt8ys.jpg.html
https://s1337.photobucket.com/user/8...4jvk2.jpg.html
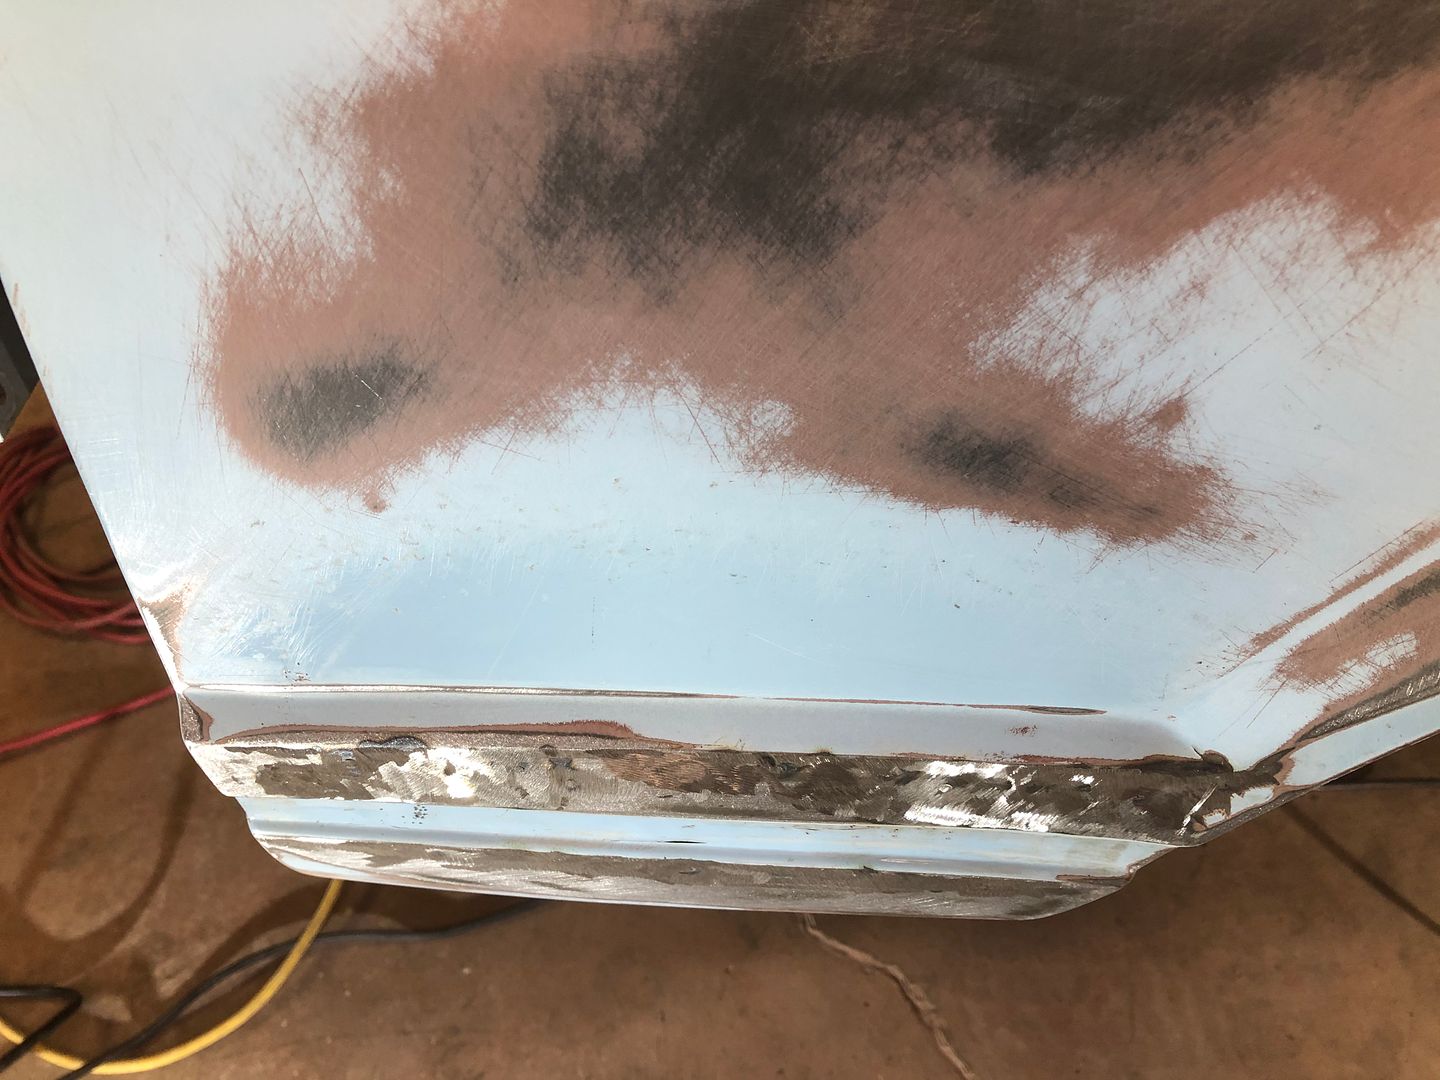
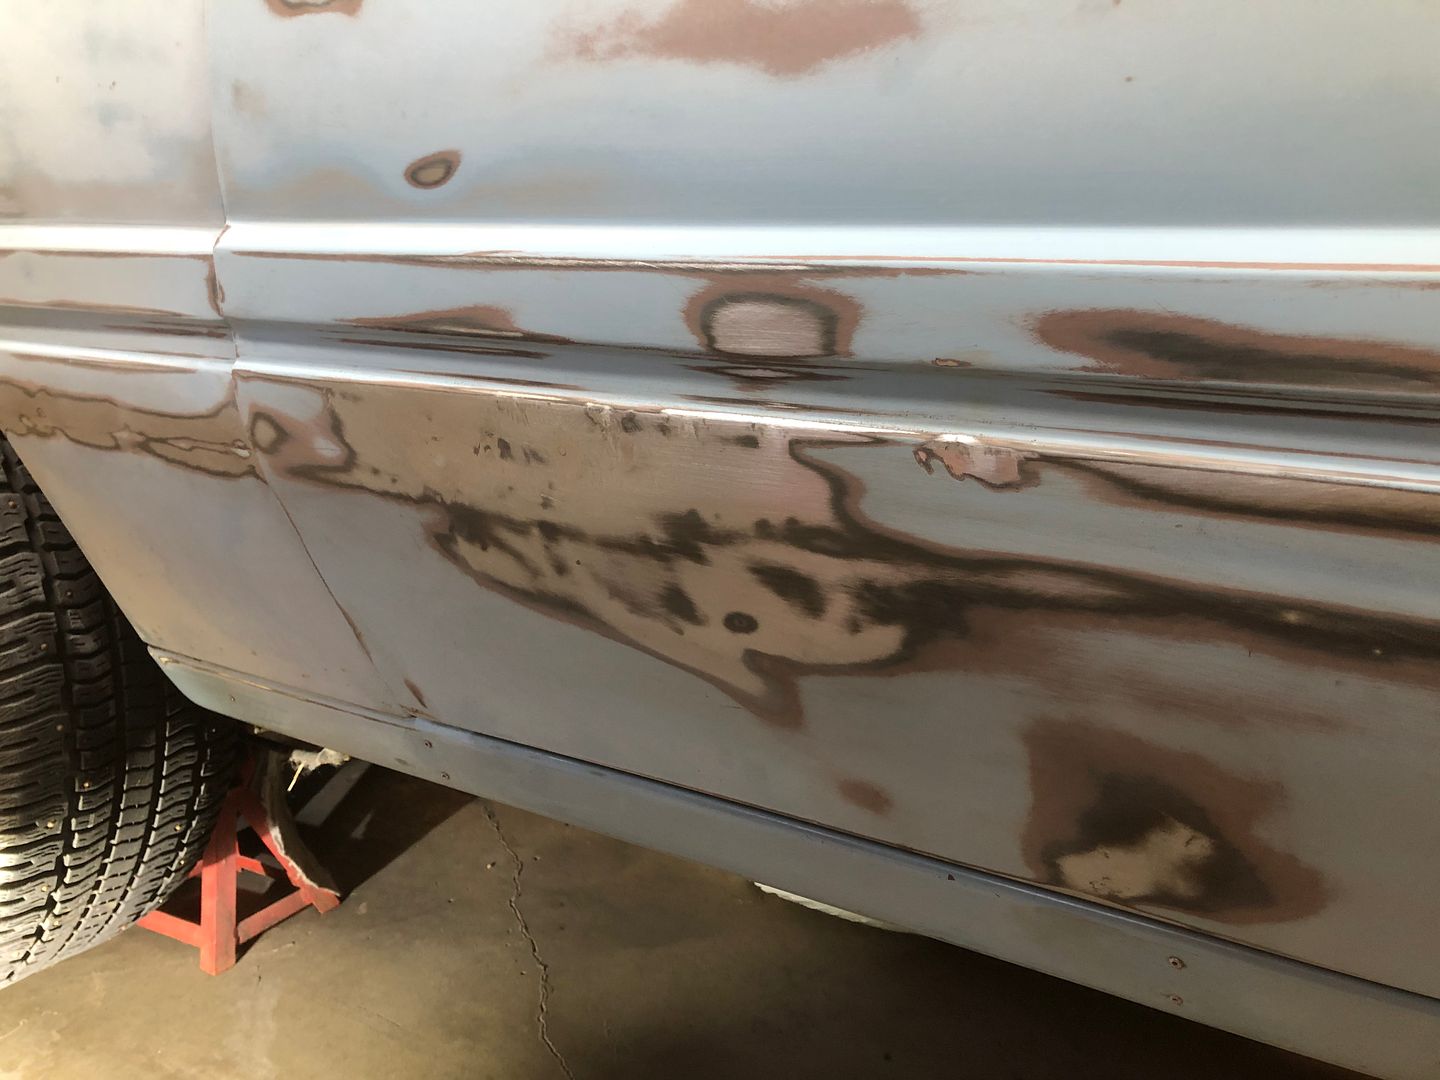
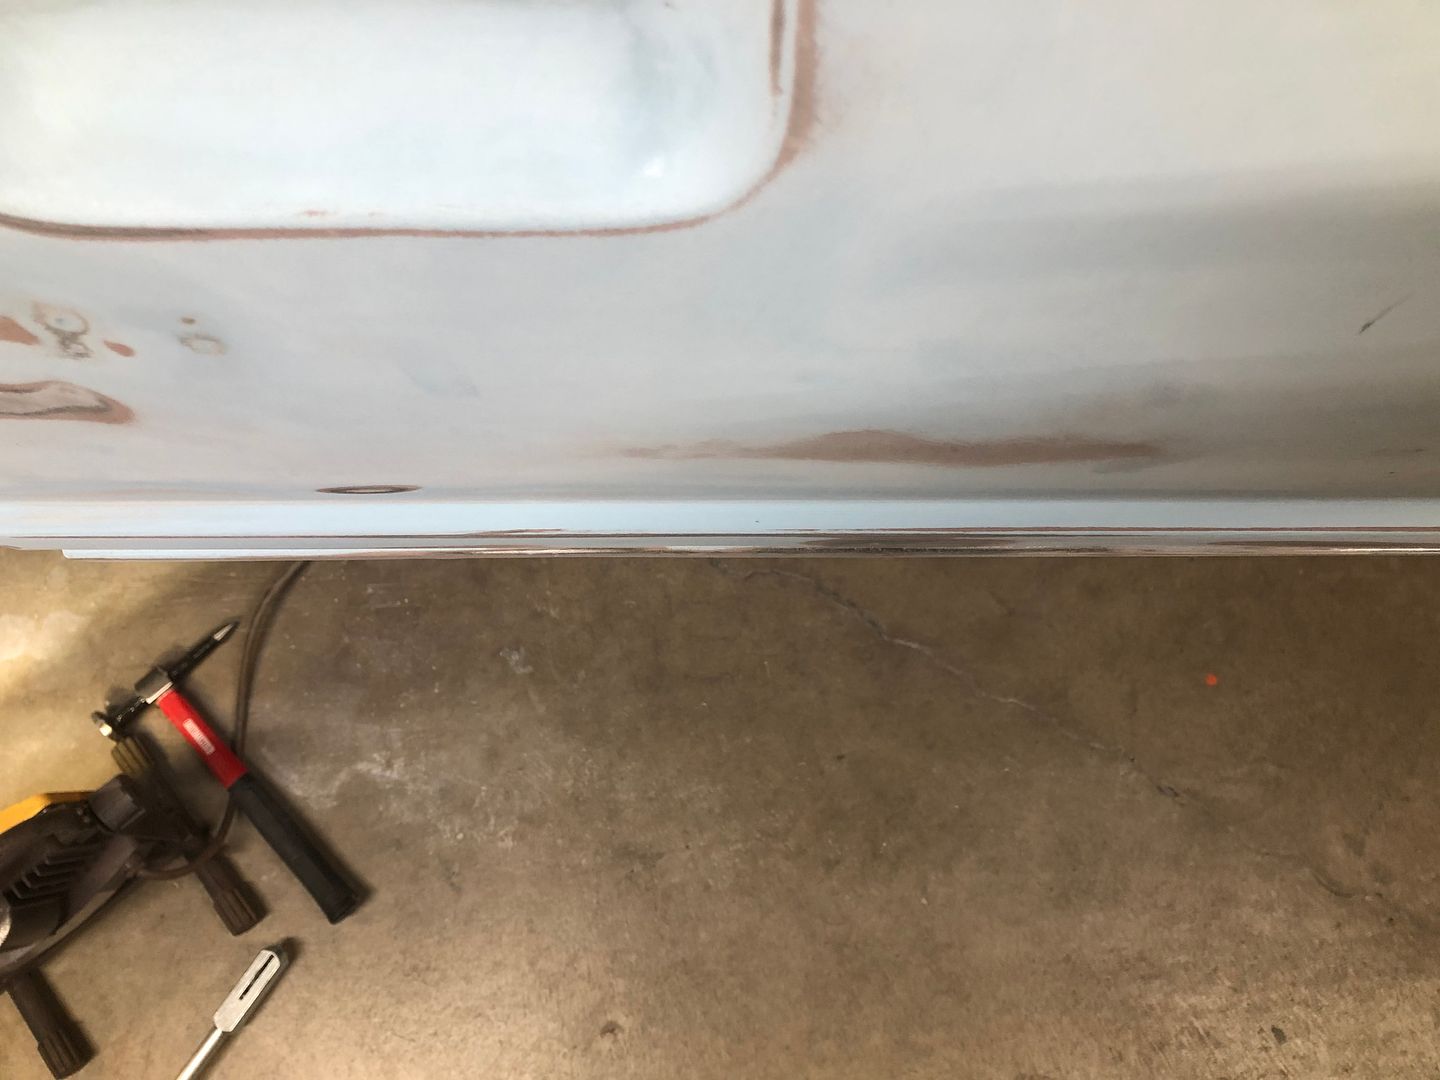
Round two. Had to change up some pull locations and angles but it was coming out reasonably well.
https://s1337.photobucket.com/user/8...krjor.jpg.html
I know there is a little more work to do but I will do that manually with the fender off the car.
https://s1337.photobucket.com/user/8...cyuvg.jpg.html
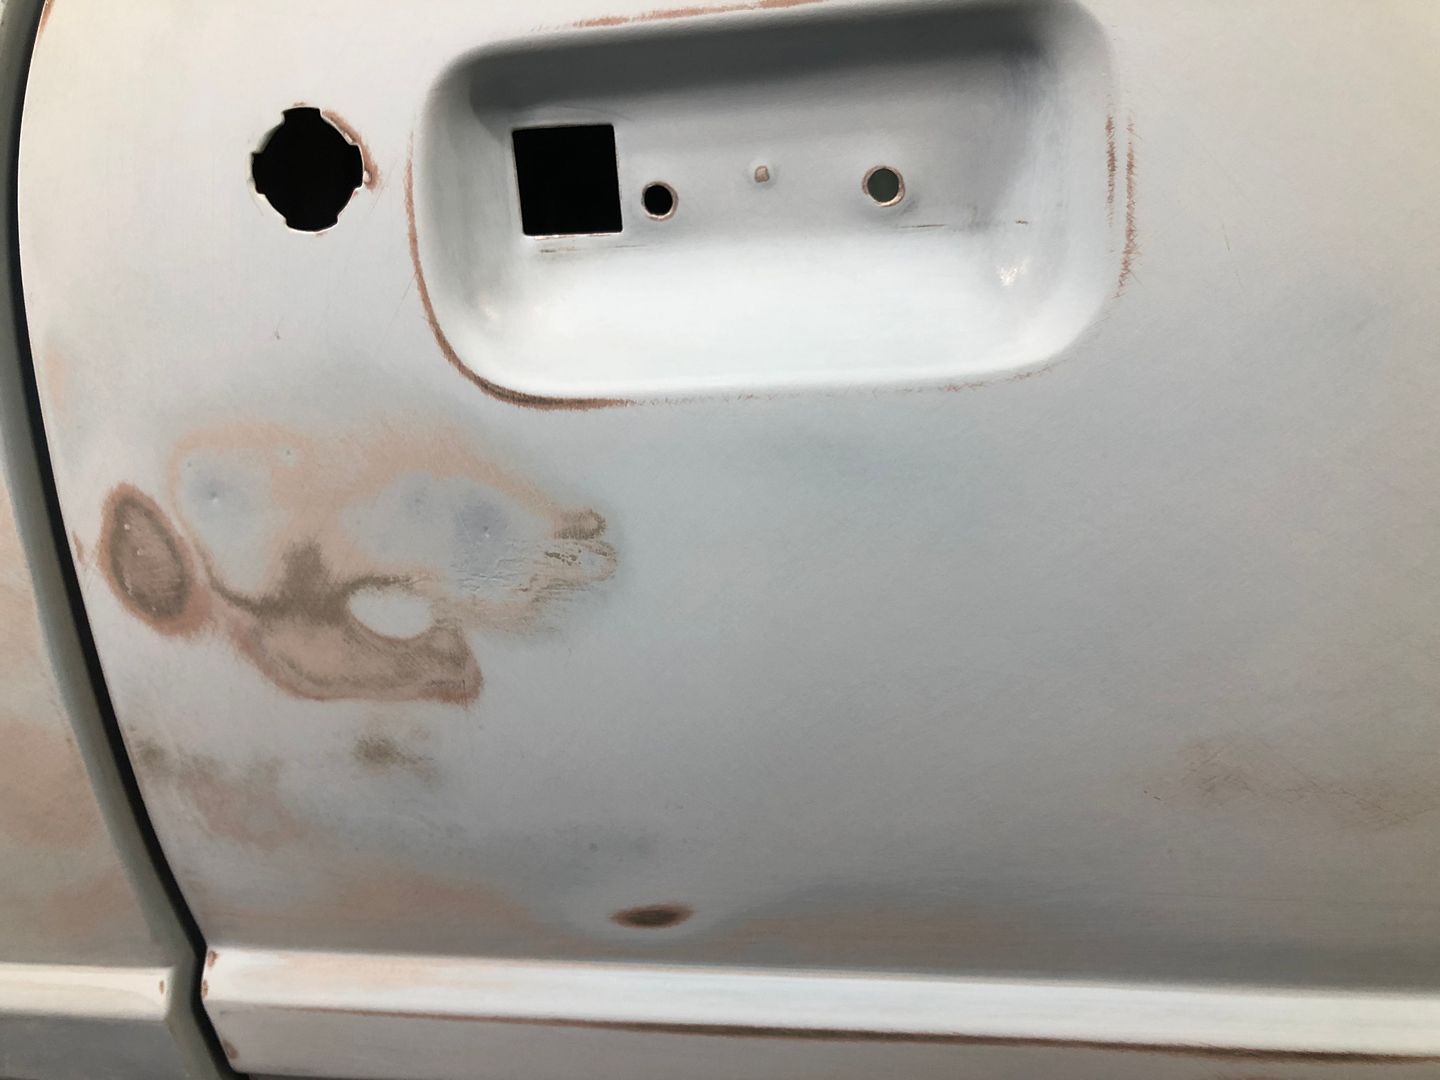
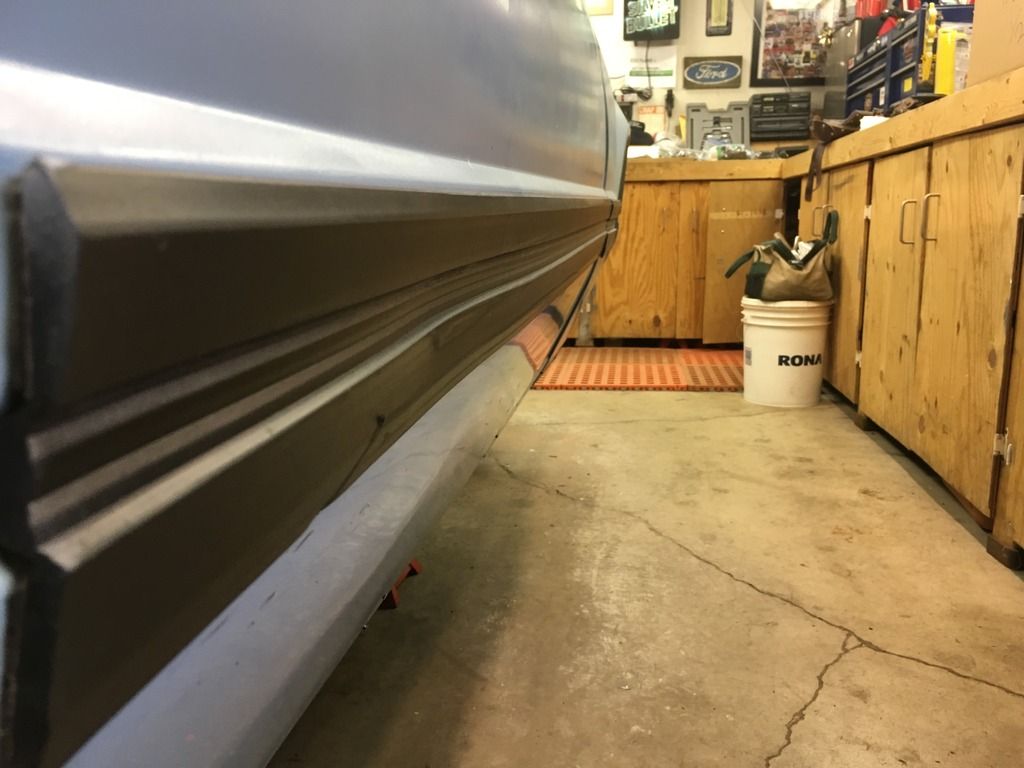
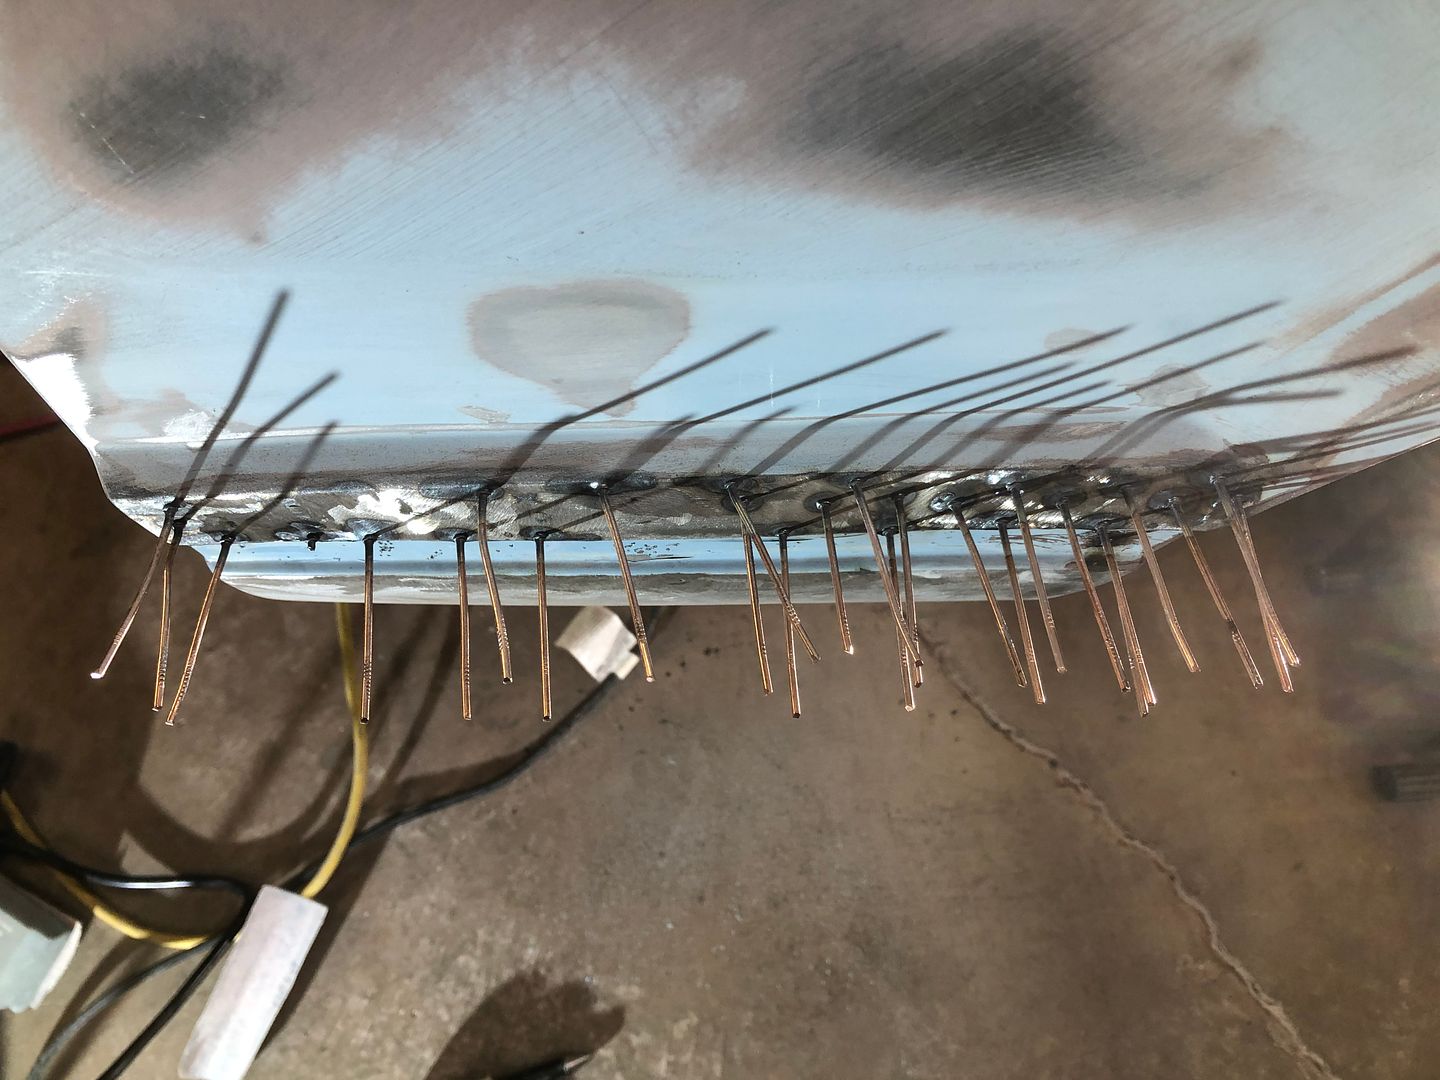
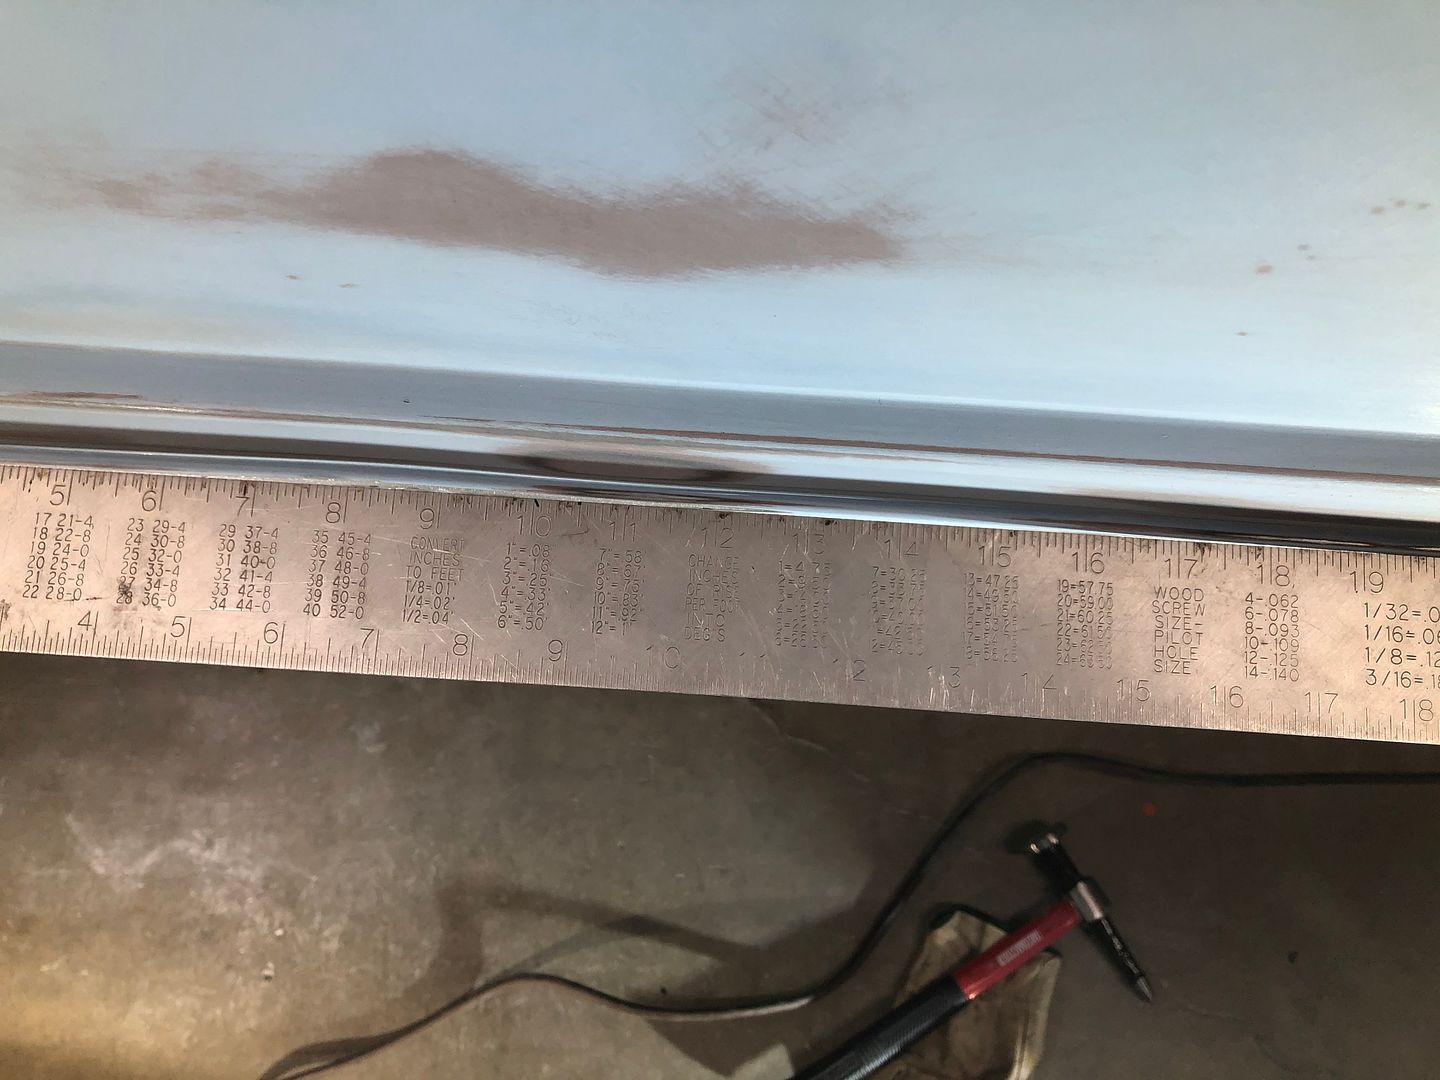
For the passenger door, you can see with a straight edge there was still an indent along the molding line after pushing out what I could from the inside. This dent was much easier to work than the other one. The door will be coming off in the future and the final bodywork will probably be done then before being final sprayed on the car.
https://s1337.photobucket.com/user/8...7wt8u.jpg.html
https://s1337.photobucket.com/user/8...zknie.jpg.html
https://s1337.photobucket.com/user/8...joupq.jpg.html
https://s1337.photobucket.com/user/8...8304i.jpg.html
For a quick review on the "cheap" Chicago Electric stud gun from Harbor Freight, I was a little worried about it's performance based on some reviews.
I did have the recommended 20 A breaker in my garage to use (not dedicated) so not sure if it work as well with just a 15 A. The instructions also said the duty cycle was one stud every eight minutes!Crazy! I was blasting up to 6 or 8 a minute here and there with rests in between. It kept up and performed well.
I only used the 2 mm studs and for me they fused and held well. The slide hammer was okay. I found to release the cam on the stud holder, I had to pound in almost as hard so somewhat counterproductive. The odd one jammed and broke off and needed to use the vice to get the stud out.
Overall, worked well for my needs and I still have it for future needs
Over the last four months or so I had done decent in my week at home to get some stuff done. Since my US work rotation was cut short and now on indefinite hold due to COVID19 since March 17, I have been "working" from home. Not really enough to keep me fully busy so I have continued putting a reasonably sustained effort and a good amount of time over the last handful of weeks in the garage.
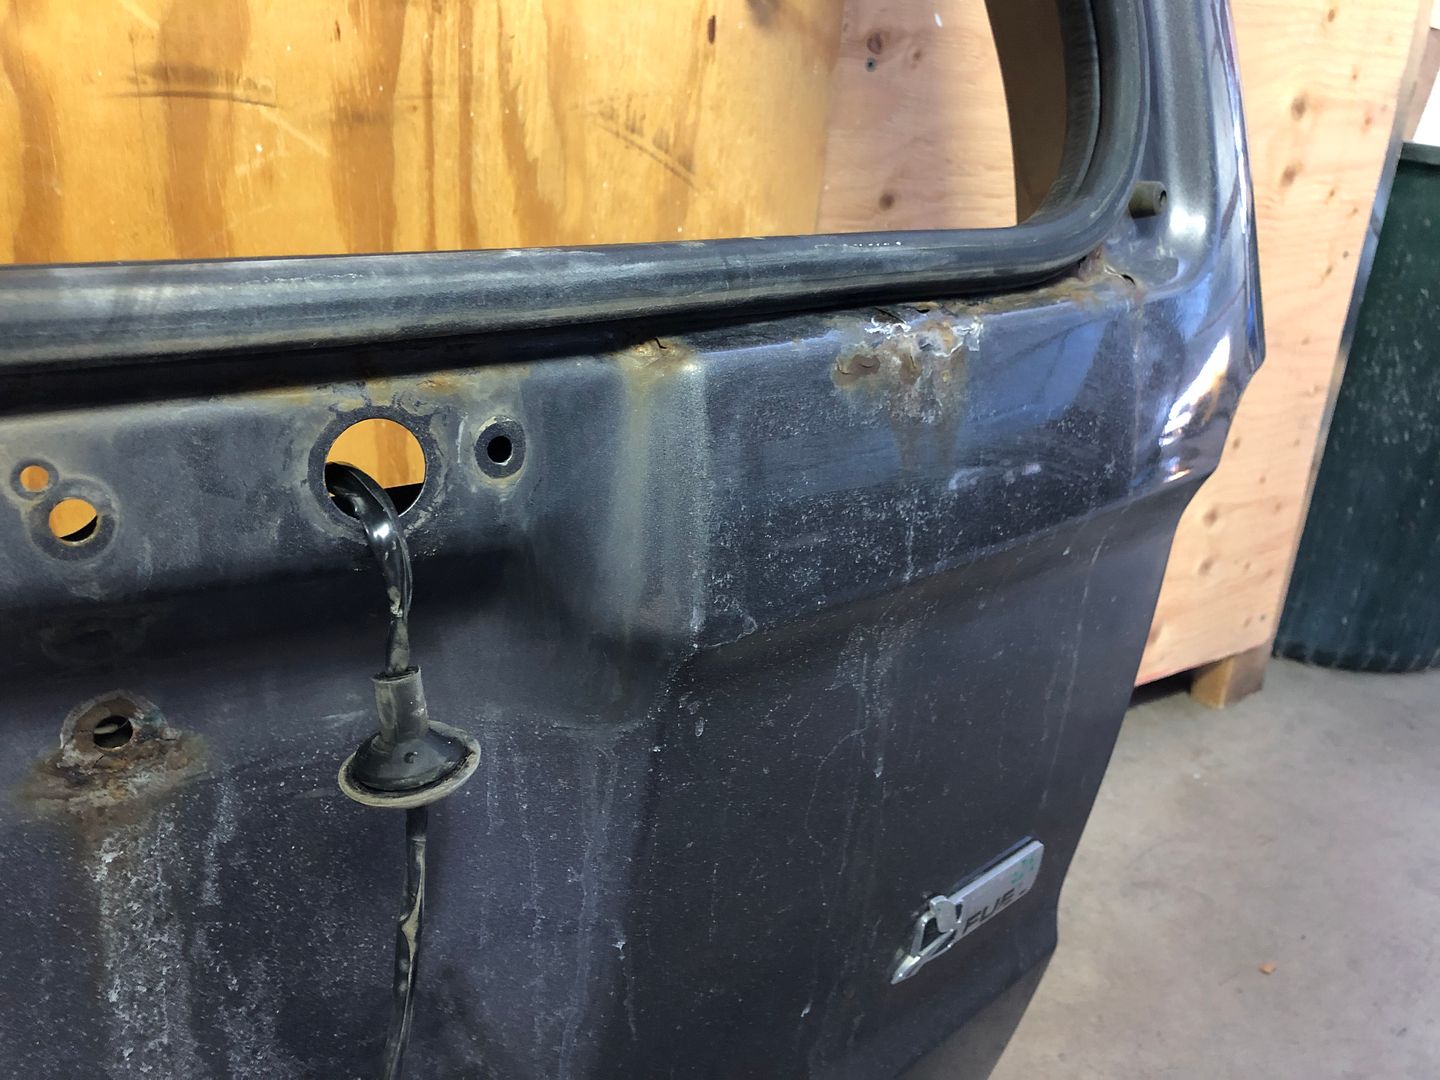
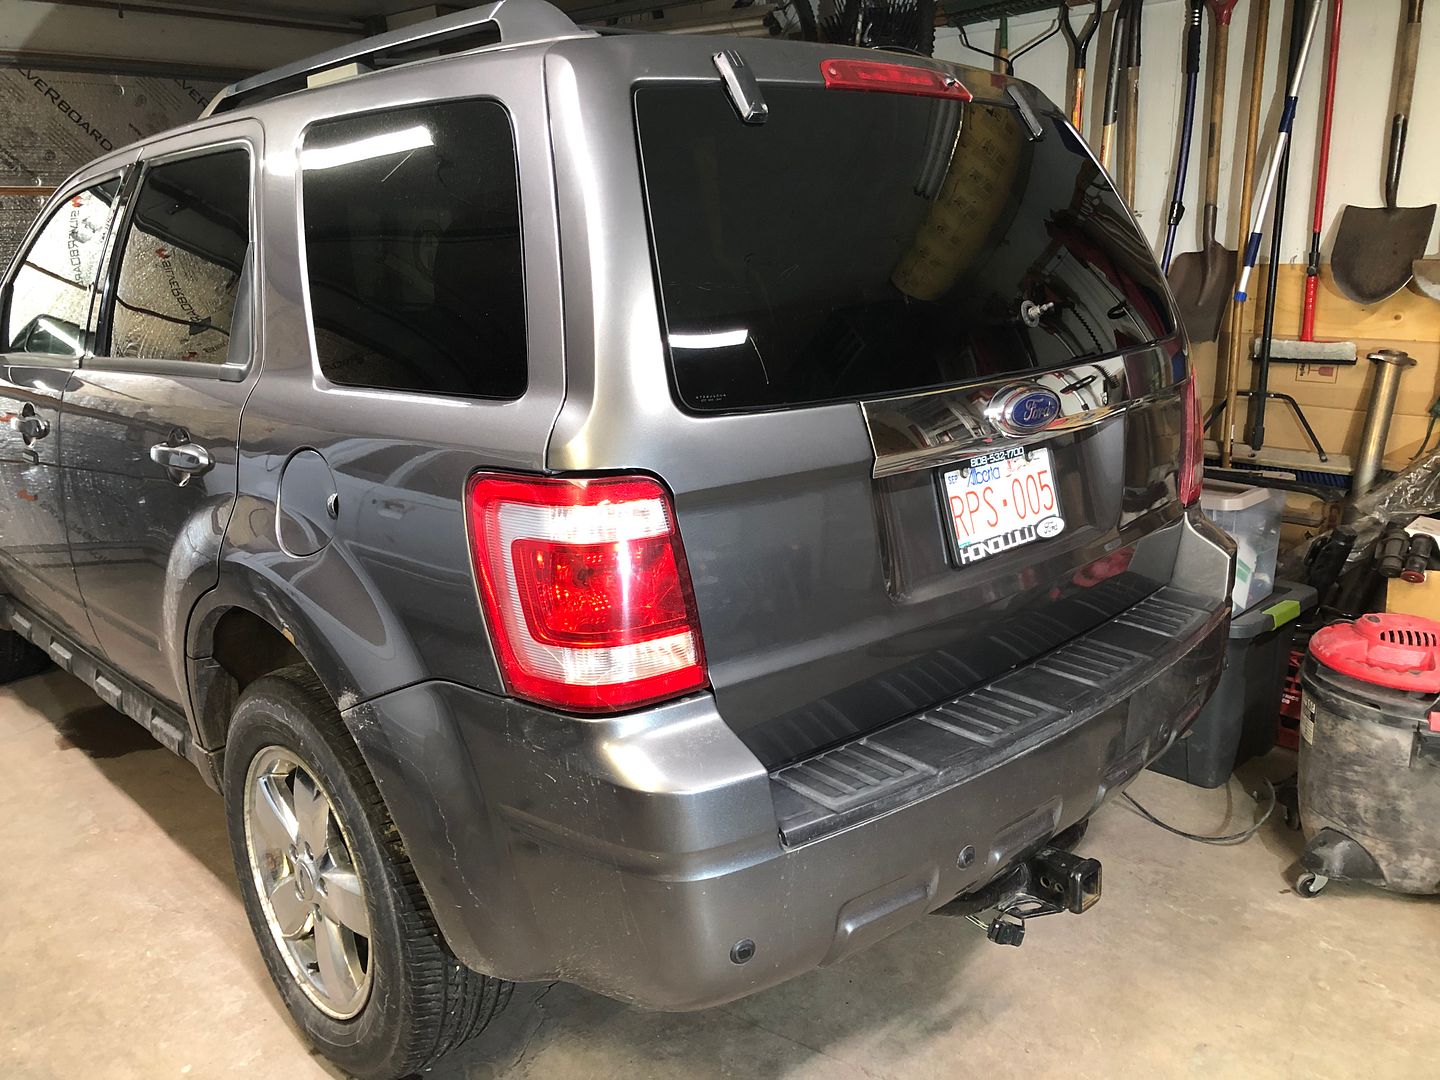
My wife's 2011 Escape has rusting on the rear hatch. She wants a new vehicle. I found an almost perfect donor at the junk yard in February while getting parts off a Fox for her instead. Since I was home, my aim was to get that prepped, primed, painted and then switched over to make wife happier.
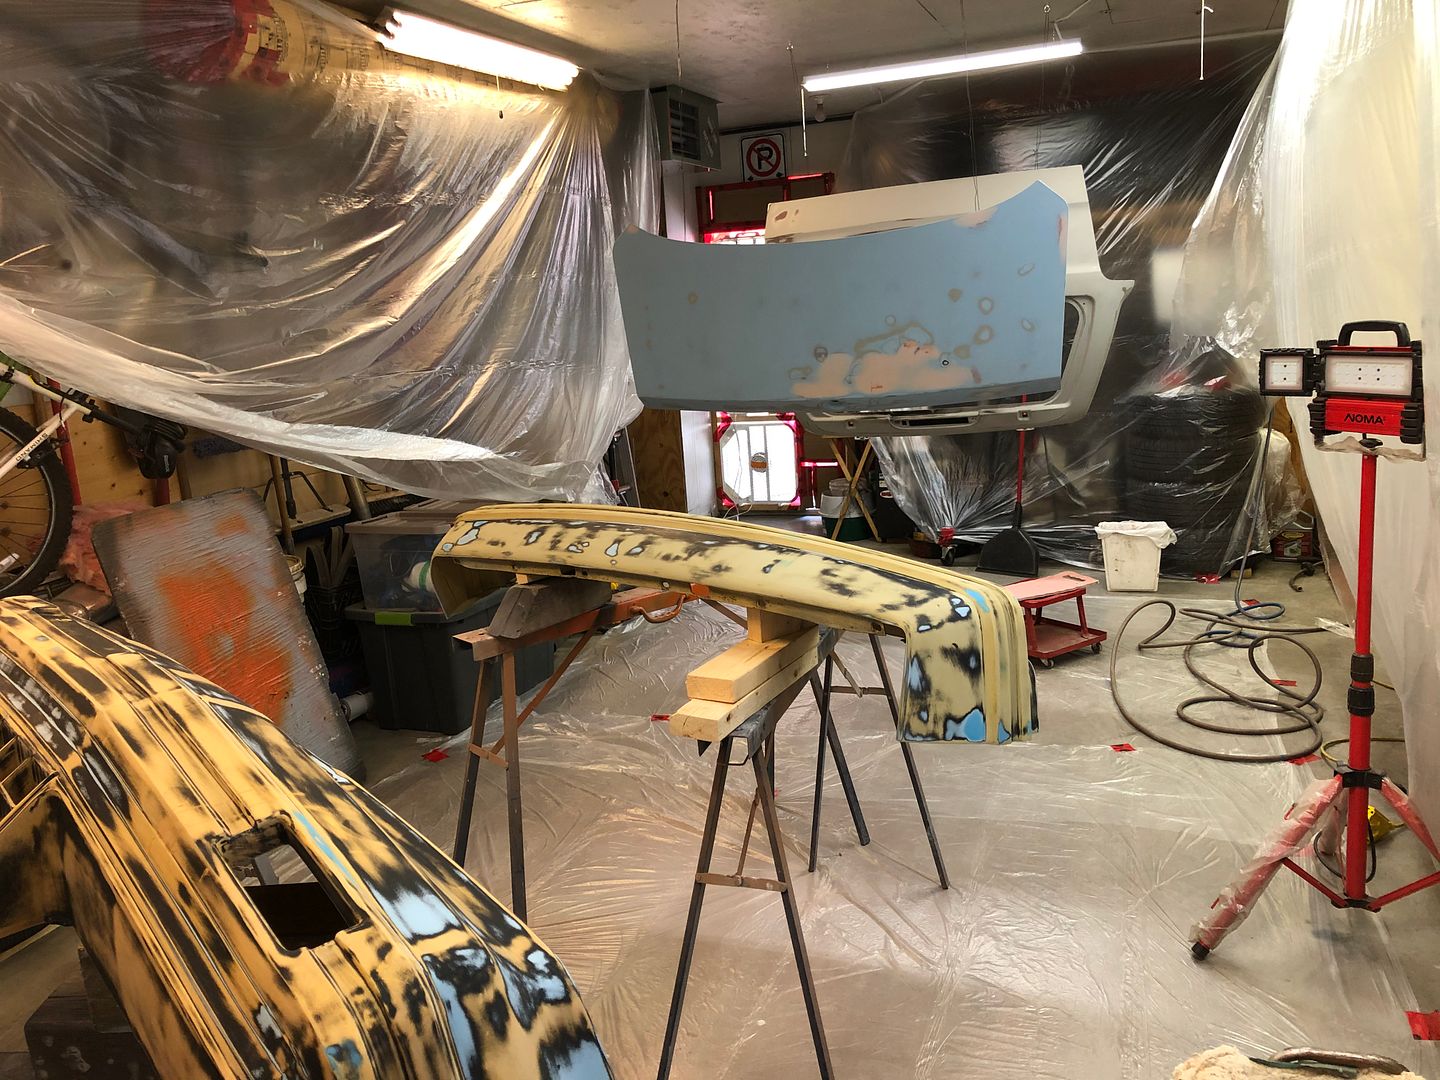
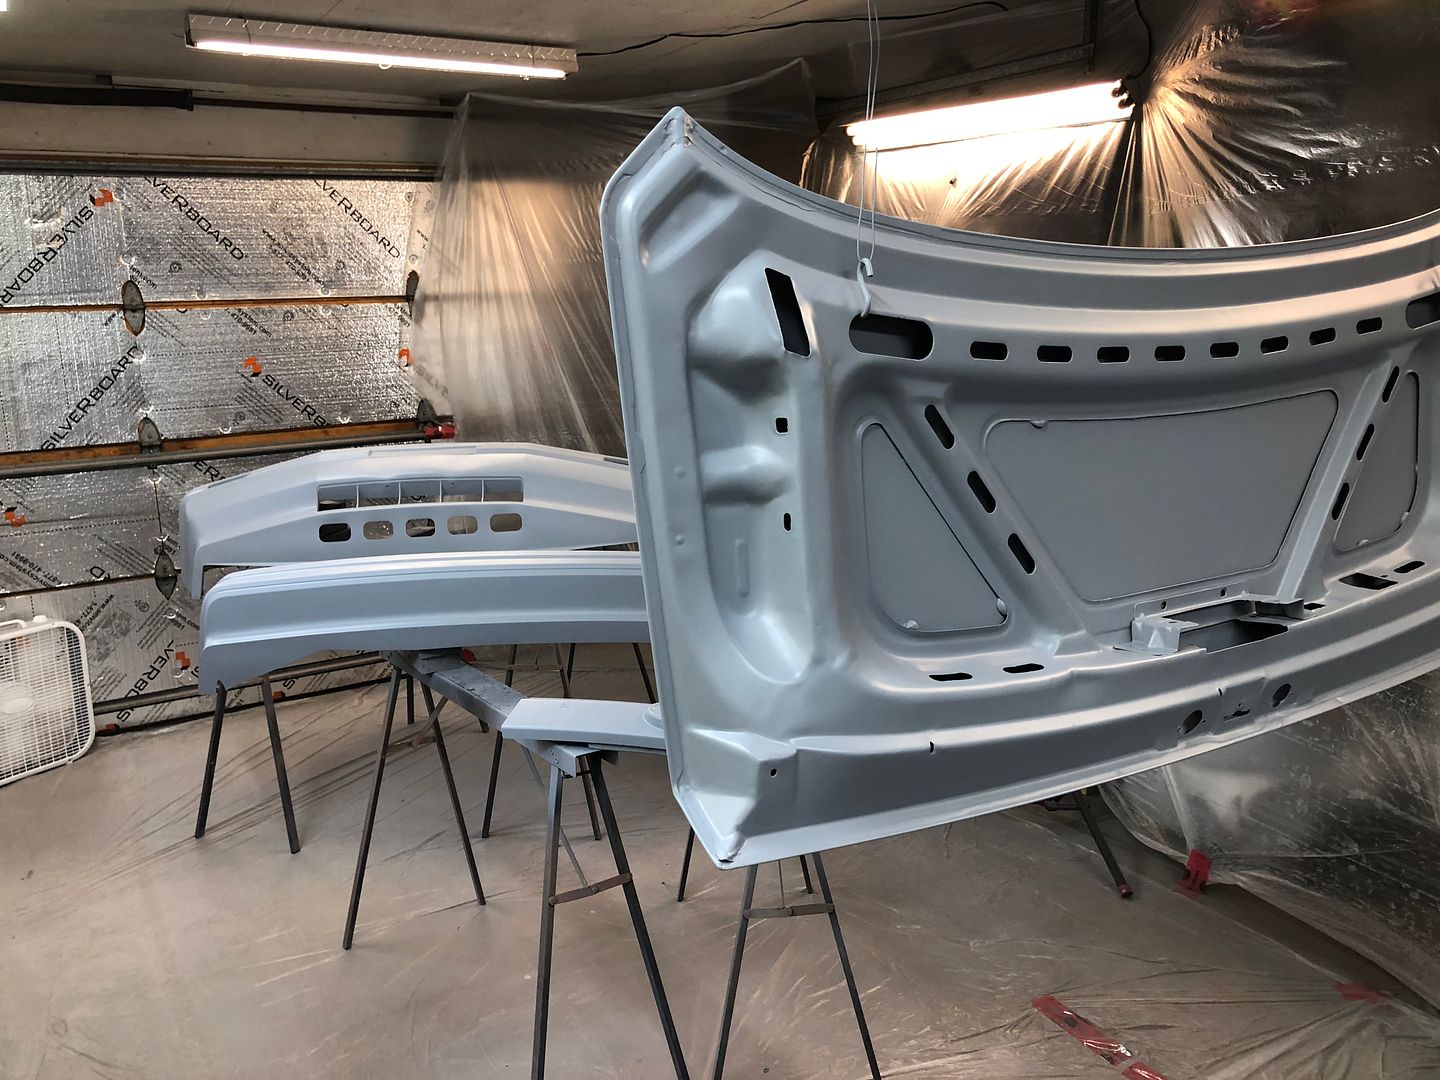
I wasn't wanting to only set up to spray that so I pushed to clean and prep up some of the taken off parts!
Trunk lid. It needed a little body work but not too bad.
https://s1337.photobucket.com/user/8...6dkiq.jpg.html
https://s1337.photobucket.com/user/8...ovxgf.jpg.html
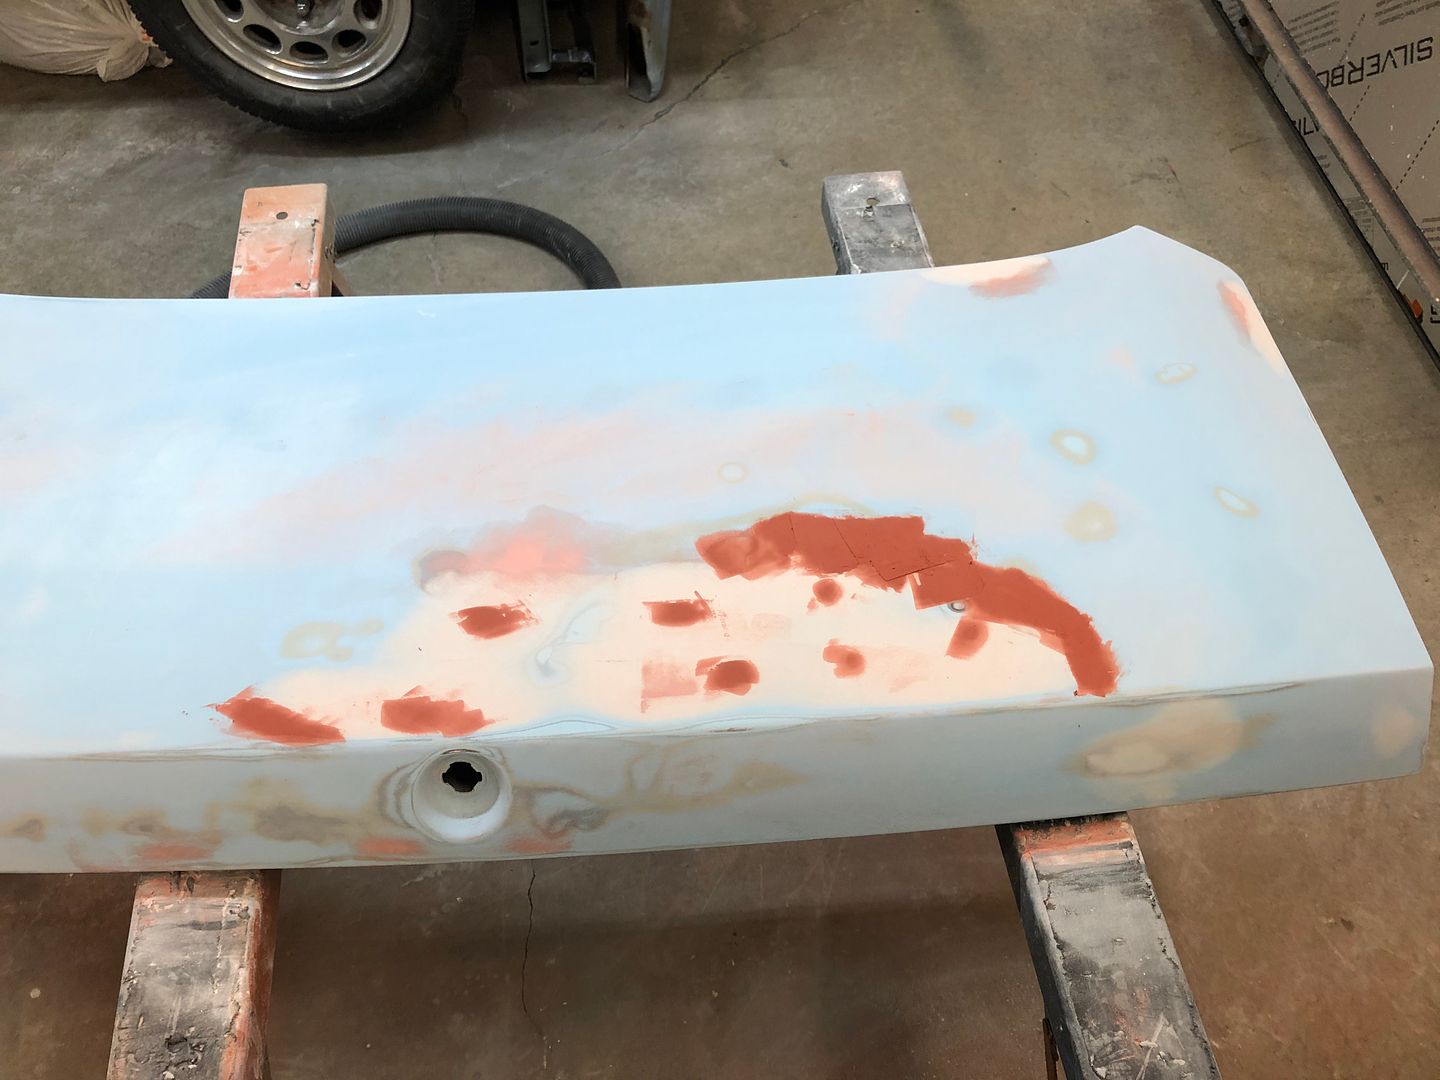
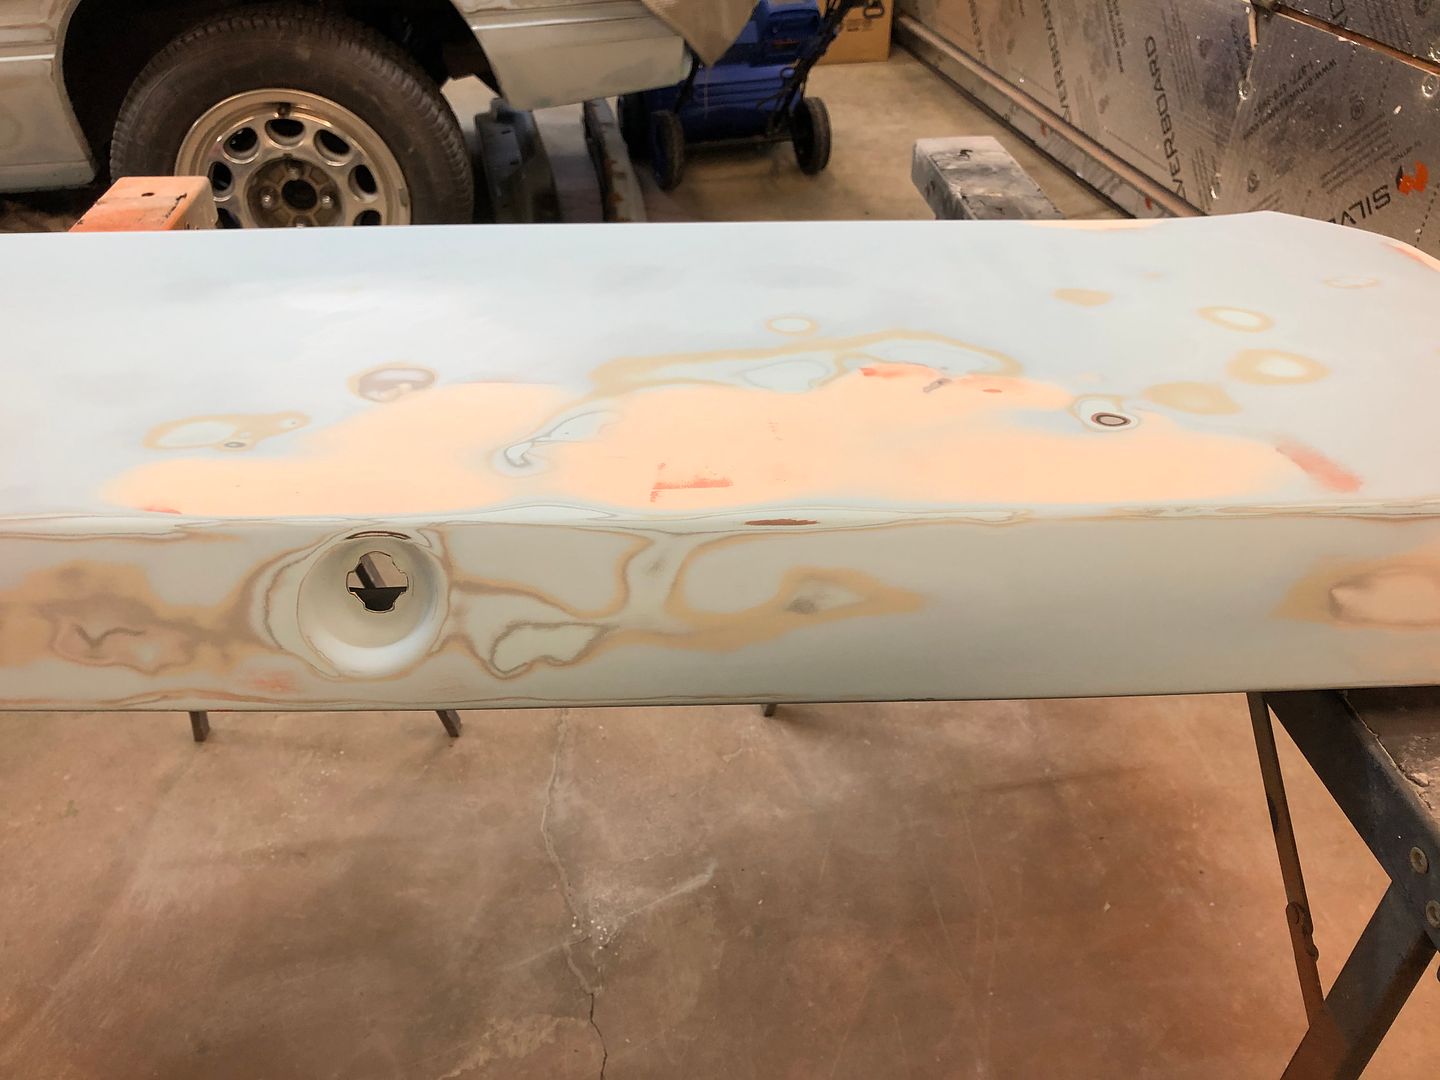
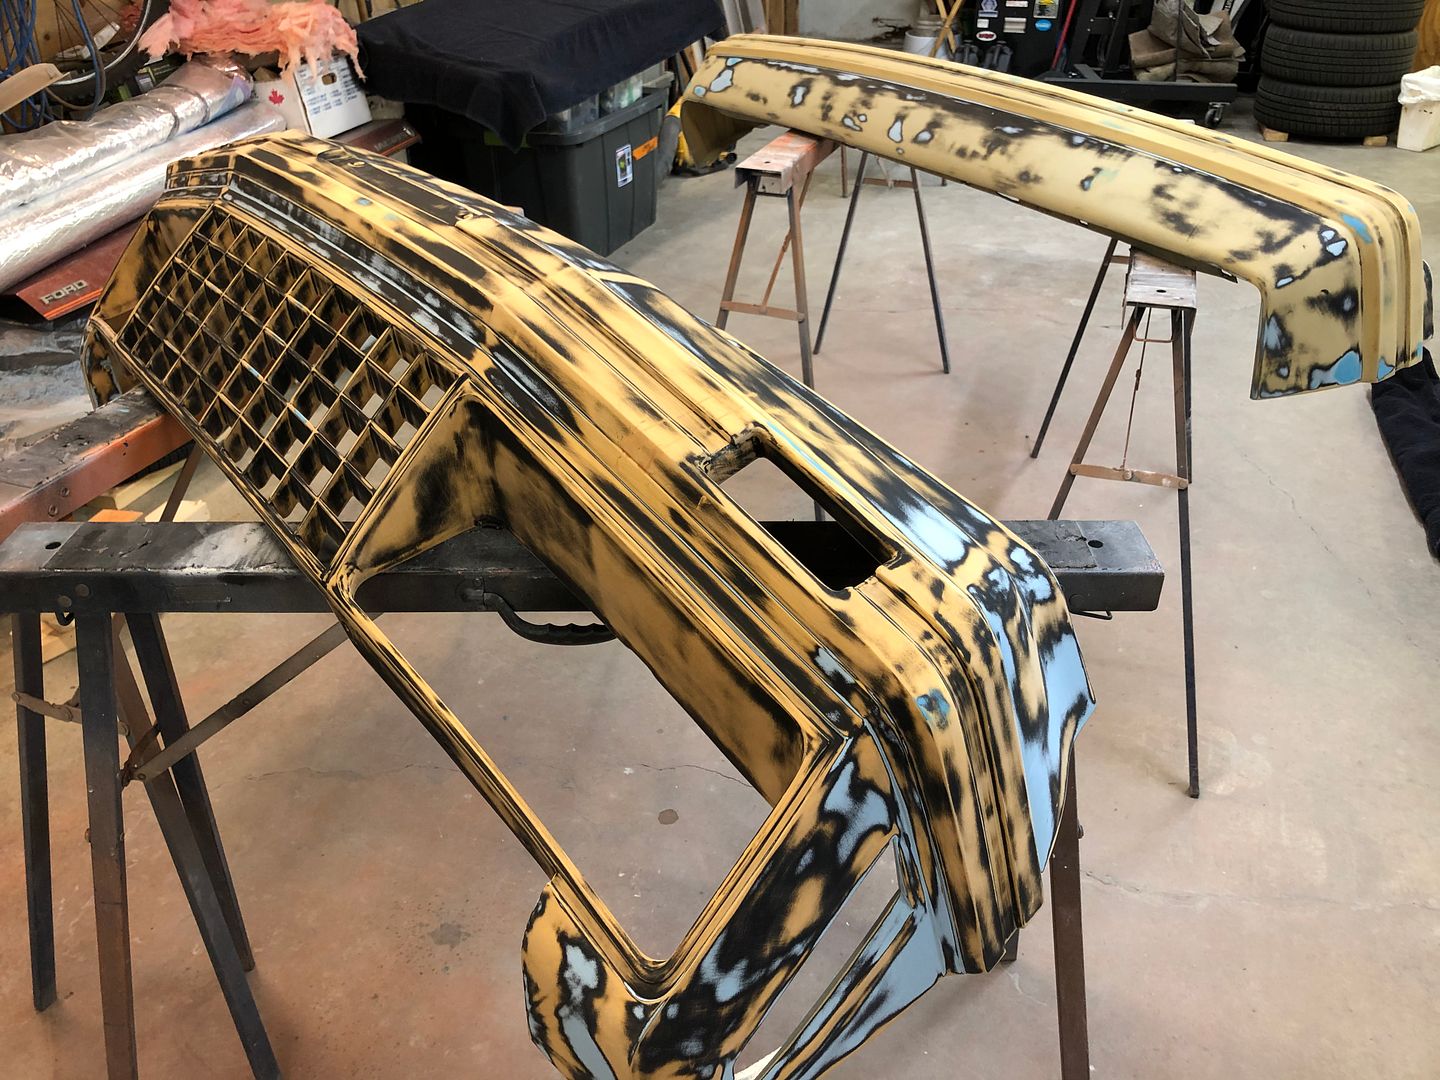
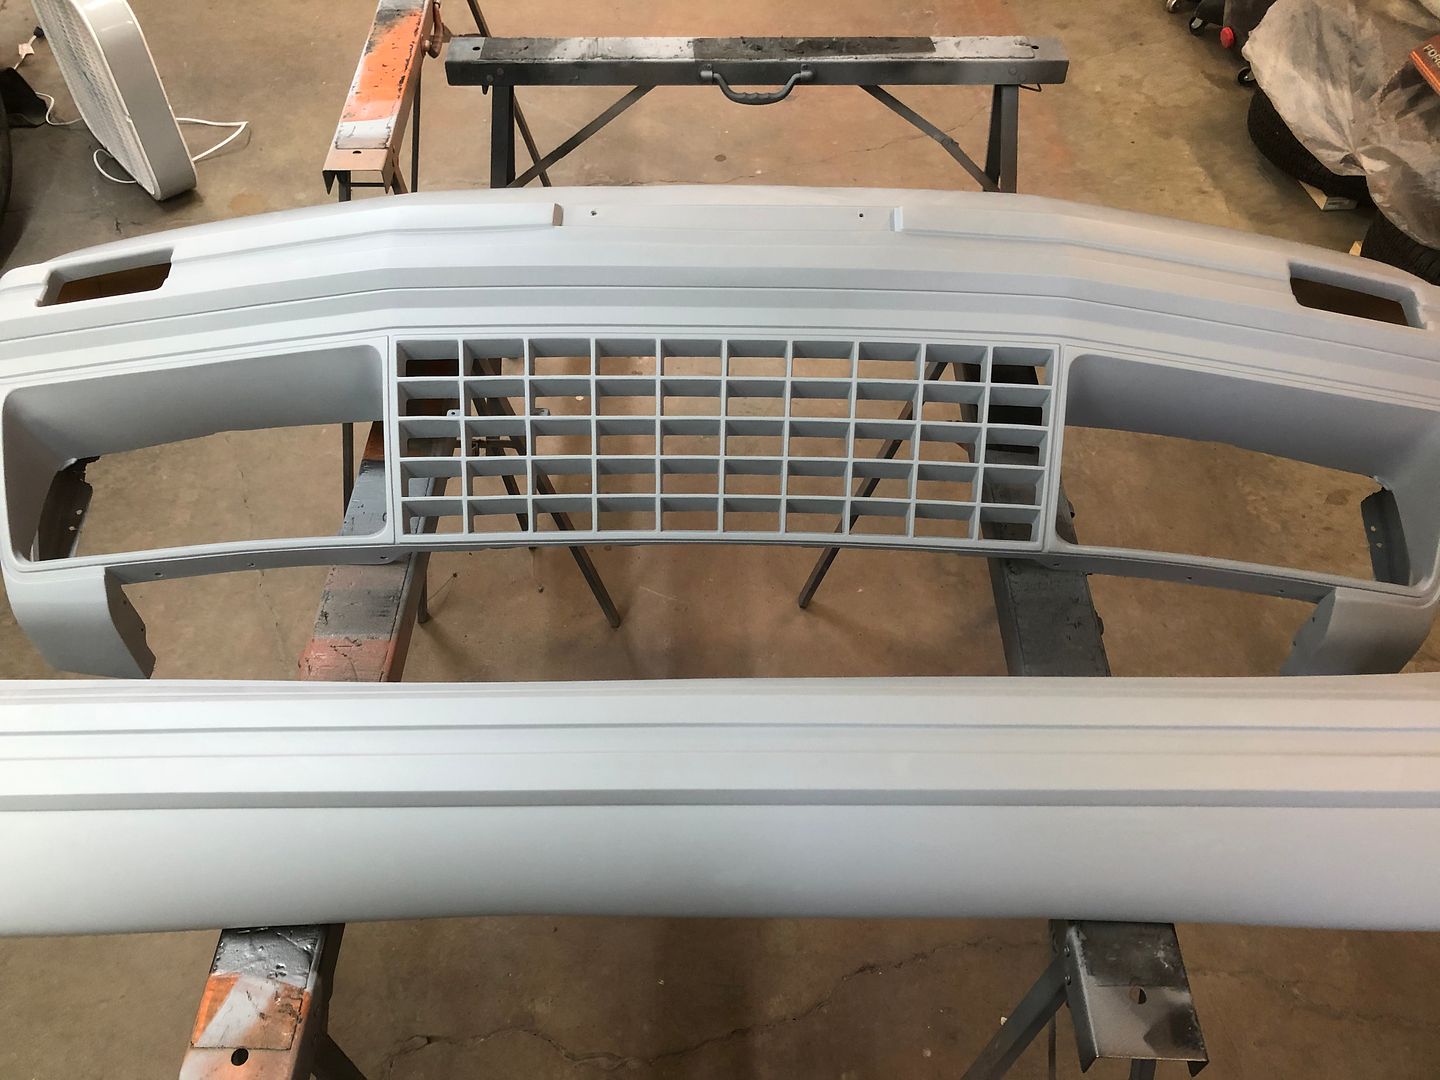
Rear cover. Once I started blocking, I found that it wasn't in as bad of shape as some of the paint and rubs were indicating. I used a flexible filler for the minor spots needing attention.
https://s1337.photobucket.com/user/8...tlhrb.jpg.html
https://s1337.photobucket.com/user/8...t7uae.jpg.html
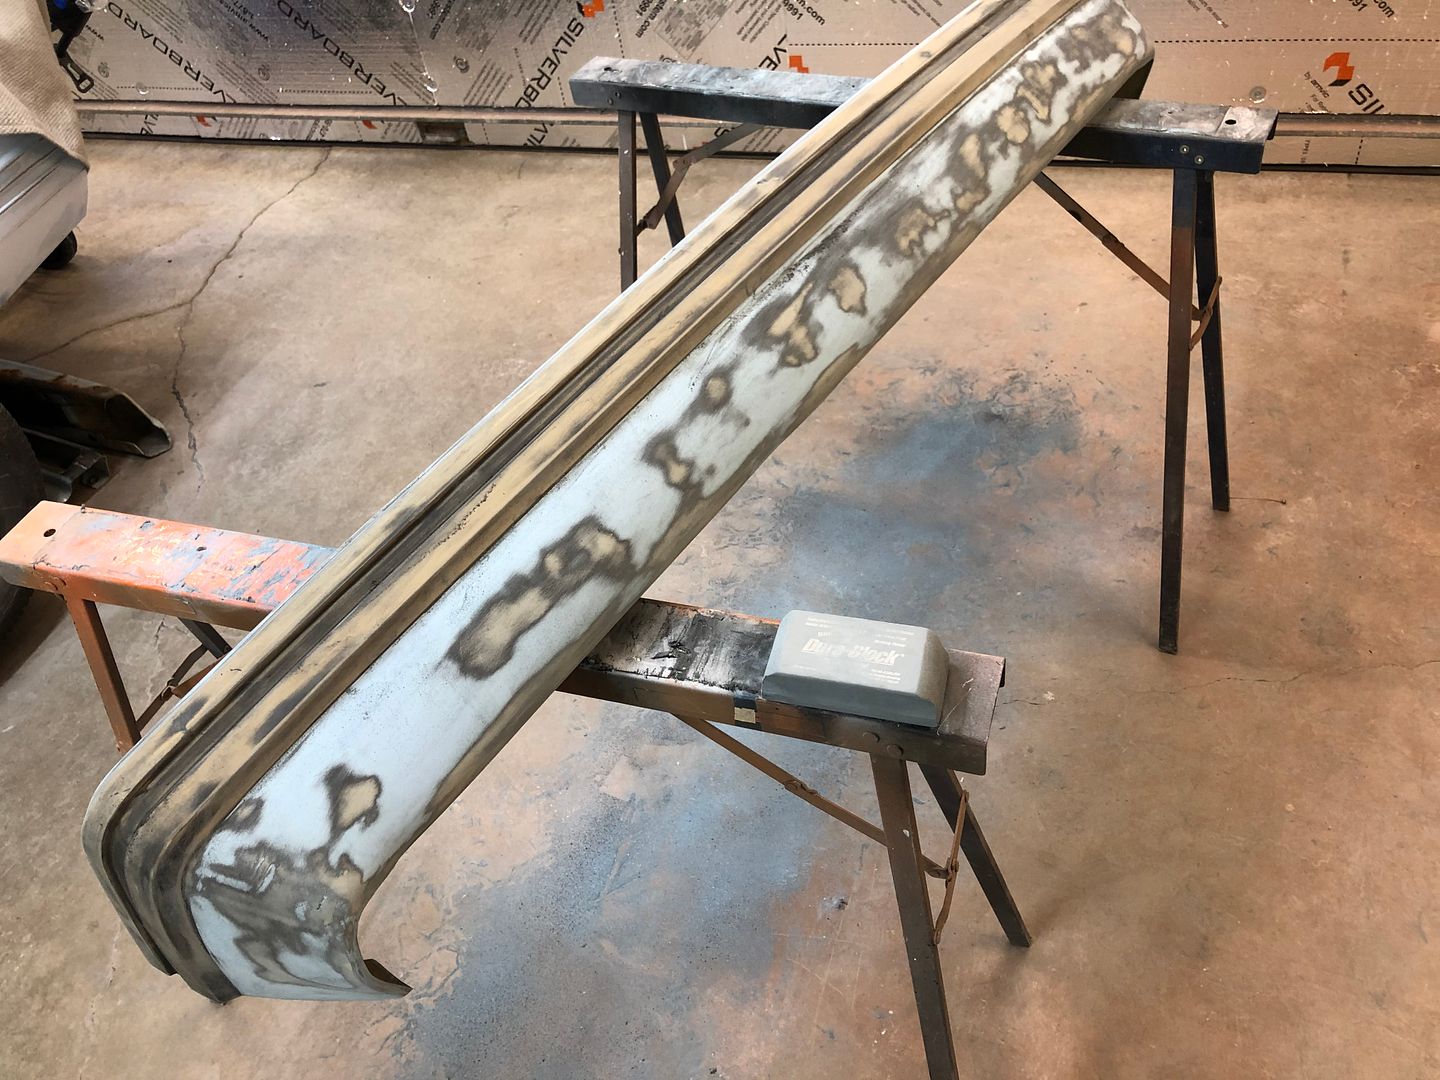
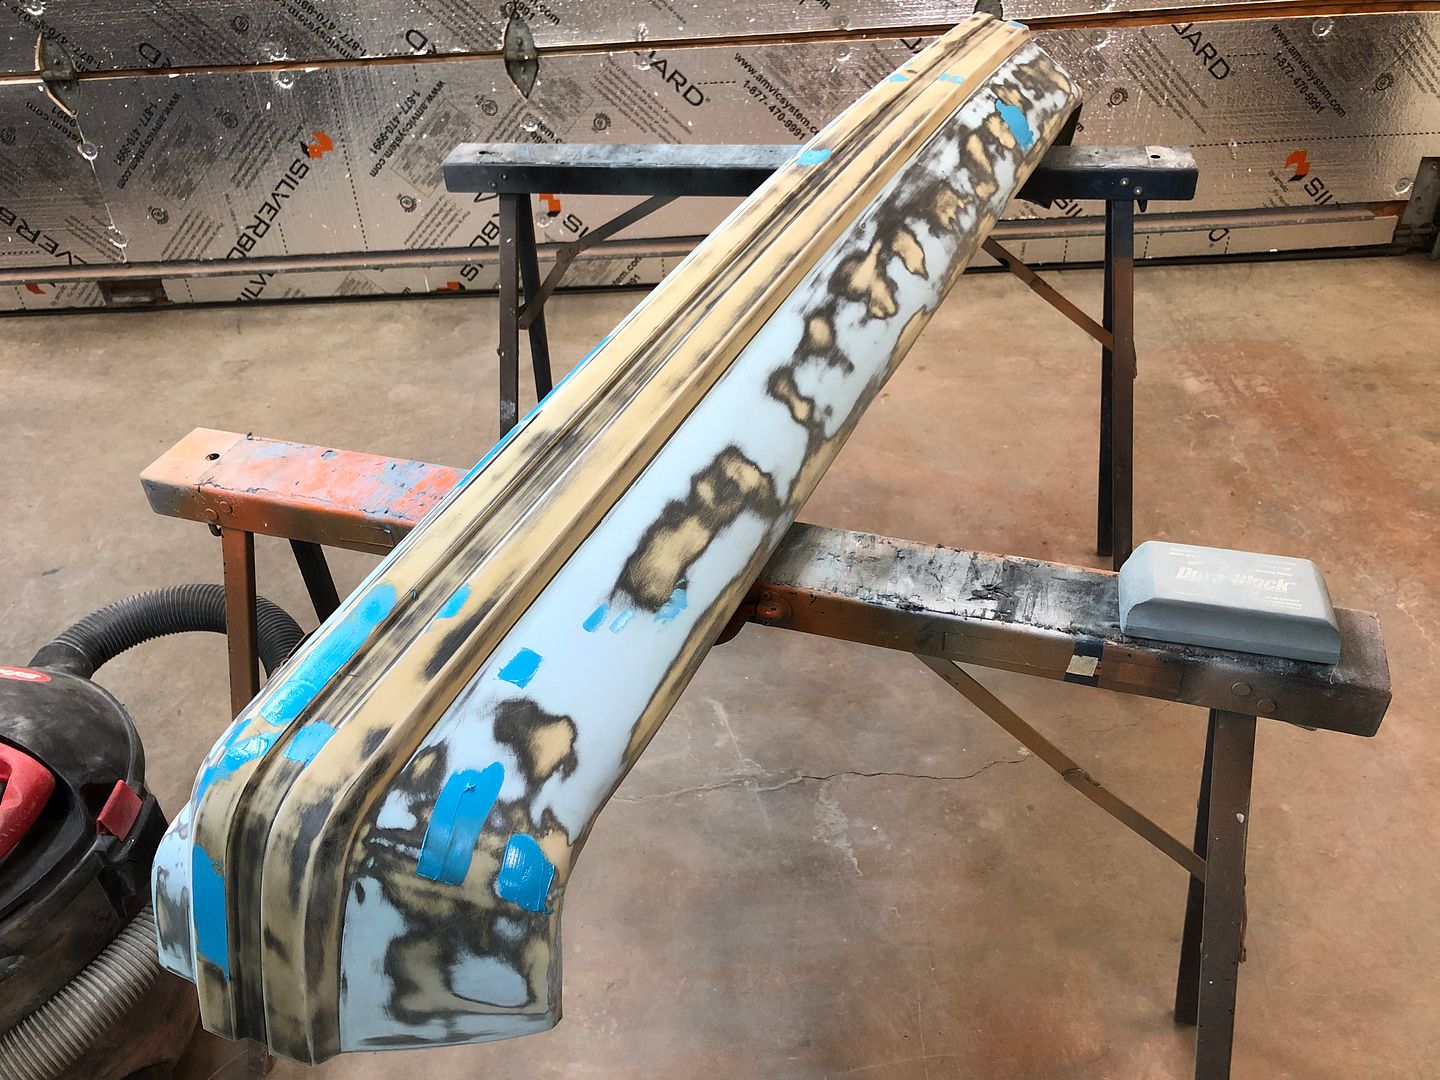
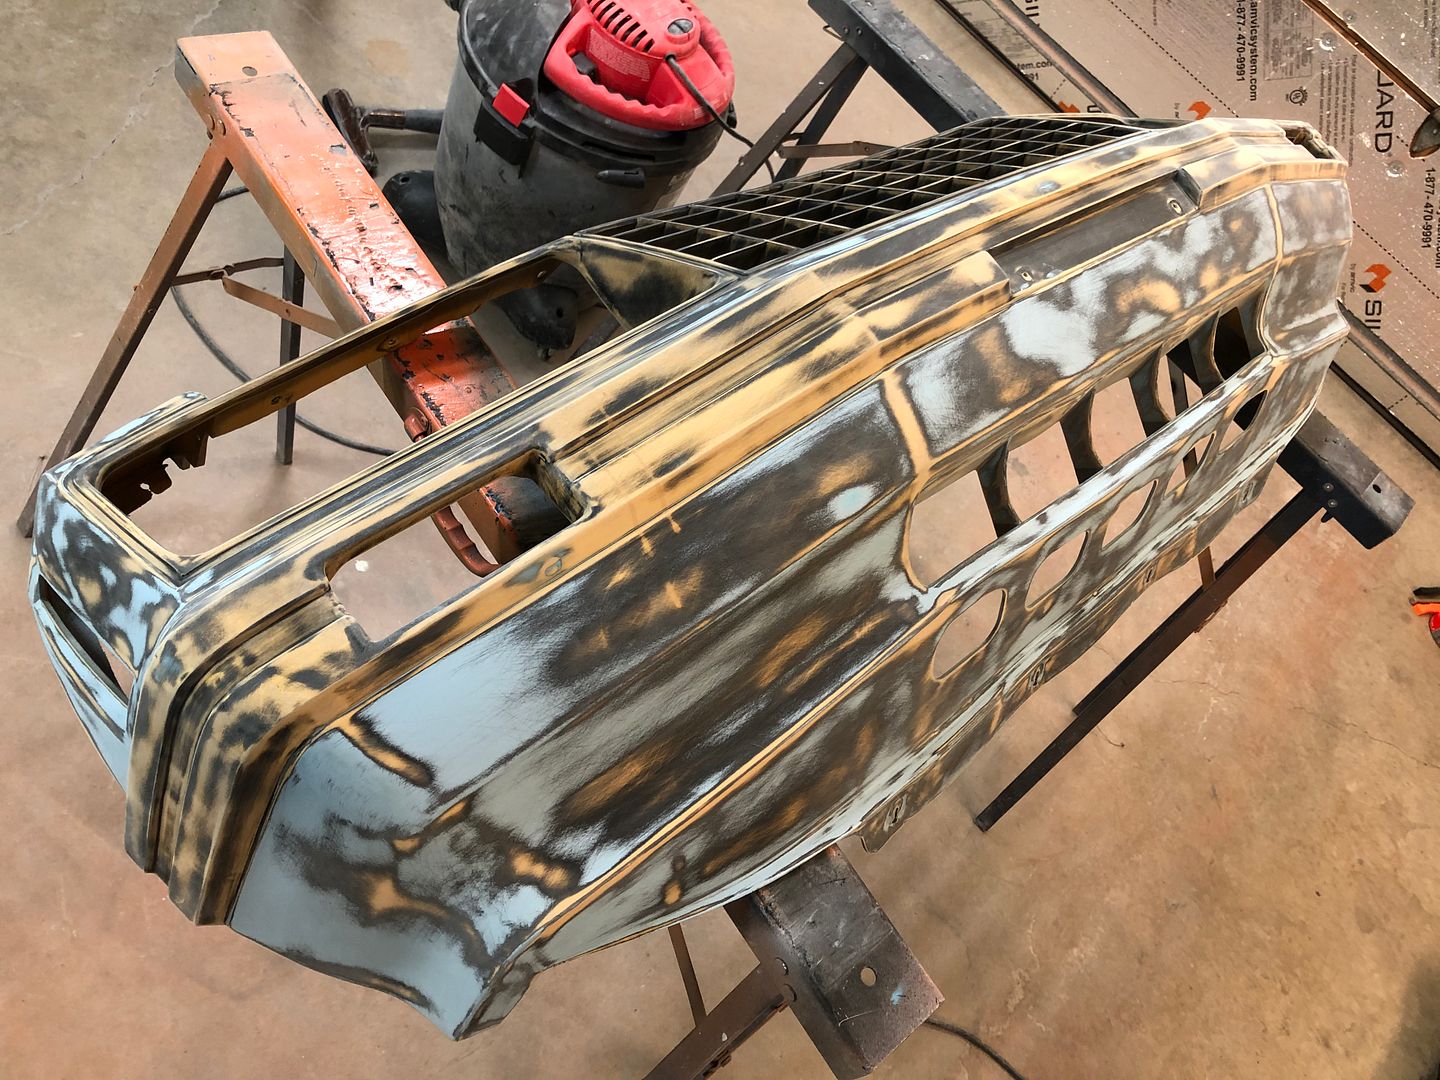
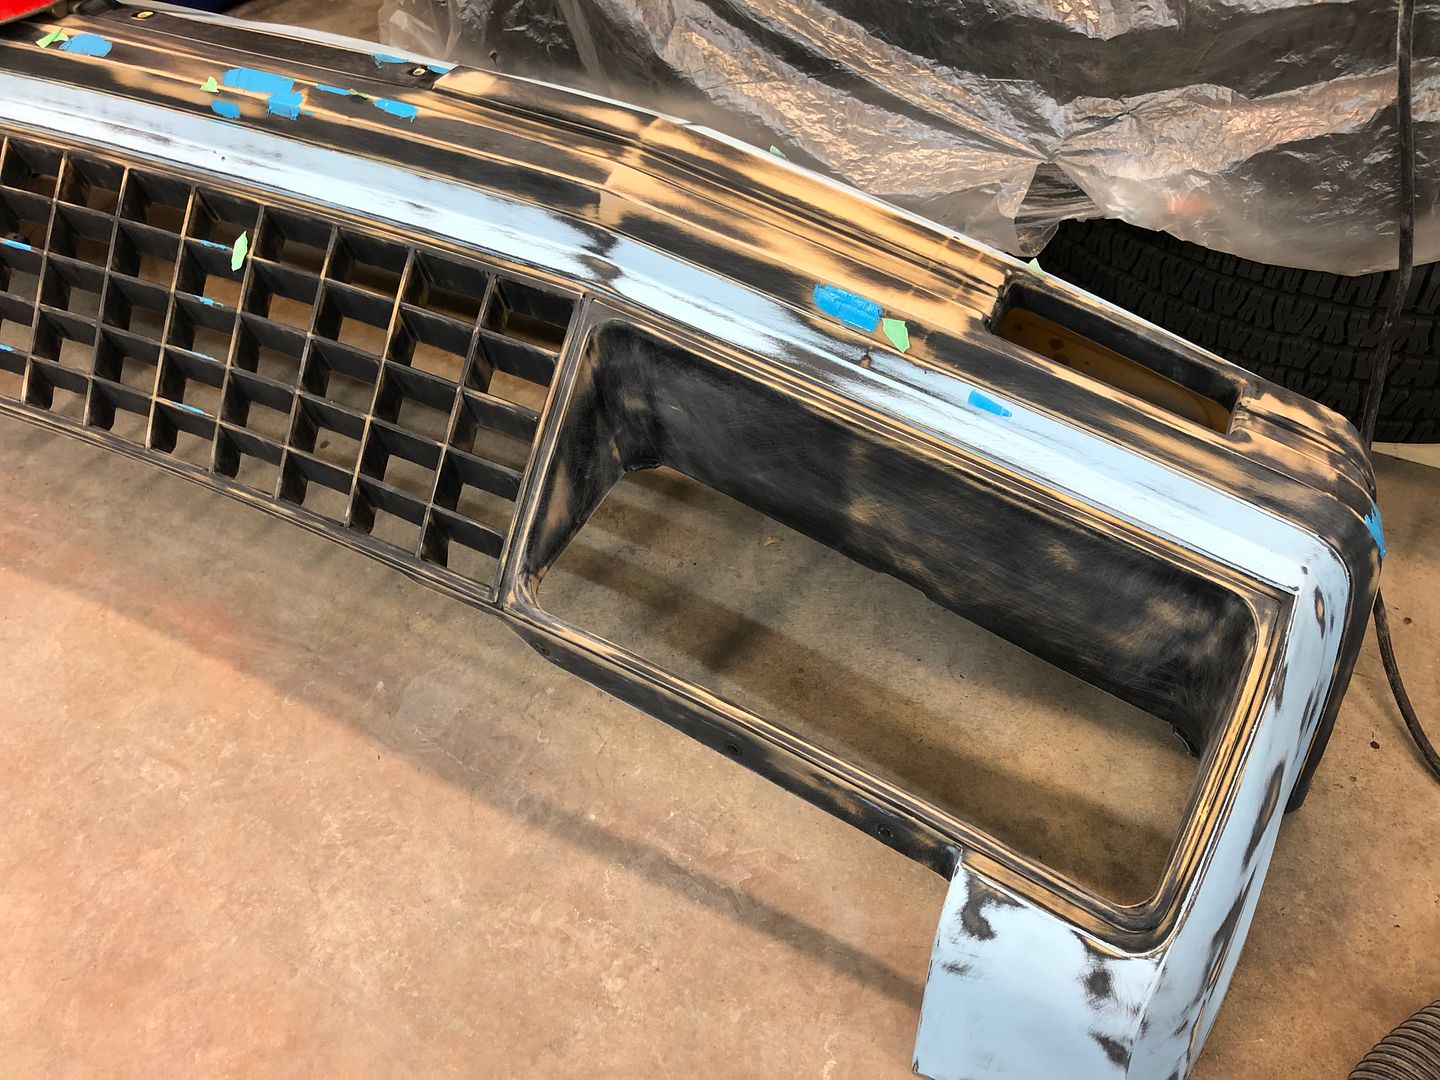
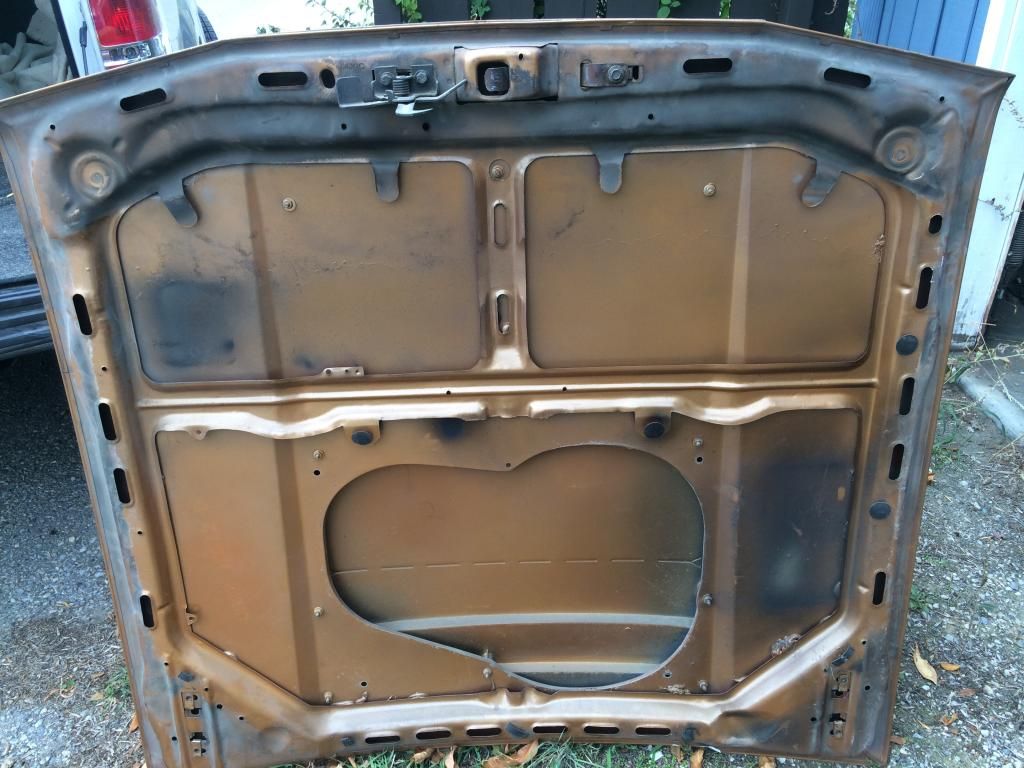
And the time consuming front cover. Man there are a lot of surfaces to cover! Again, very reasonable condition as the inside of it showed previously.
https://s1337.photobucket.com/user/8...fkkxc.jpg.html
https://s1337.photobucket.com/user/8...63bwk.jpg.html
https://s1337.photobucket.com/user/8...xnn8d.jpg.html
https://s1337.photobucket.com/user/8...obcw5.jpg.html
Last edited by 82GTforME; 04-21-2020 at 09:53 PM.
On my first project (the Tangerine Machine), even though it worked really well, I went pretty extravagant on my paint booth and it took a lot of time and effort. When I had to redo the front end after the fender bender, I simplified what I did and it worked well.
For this, I am following a similar simplistic path.
My garage has two man doors and the big door. The side door is west facing an the back is south. I find that I get a very nice natural draft as our prevailing wind is westerly. With that I set up by using plastic sheeting and creating a flow through type booth in the open bay.
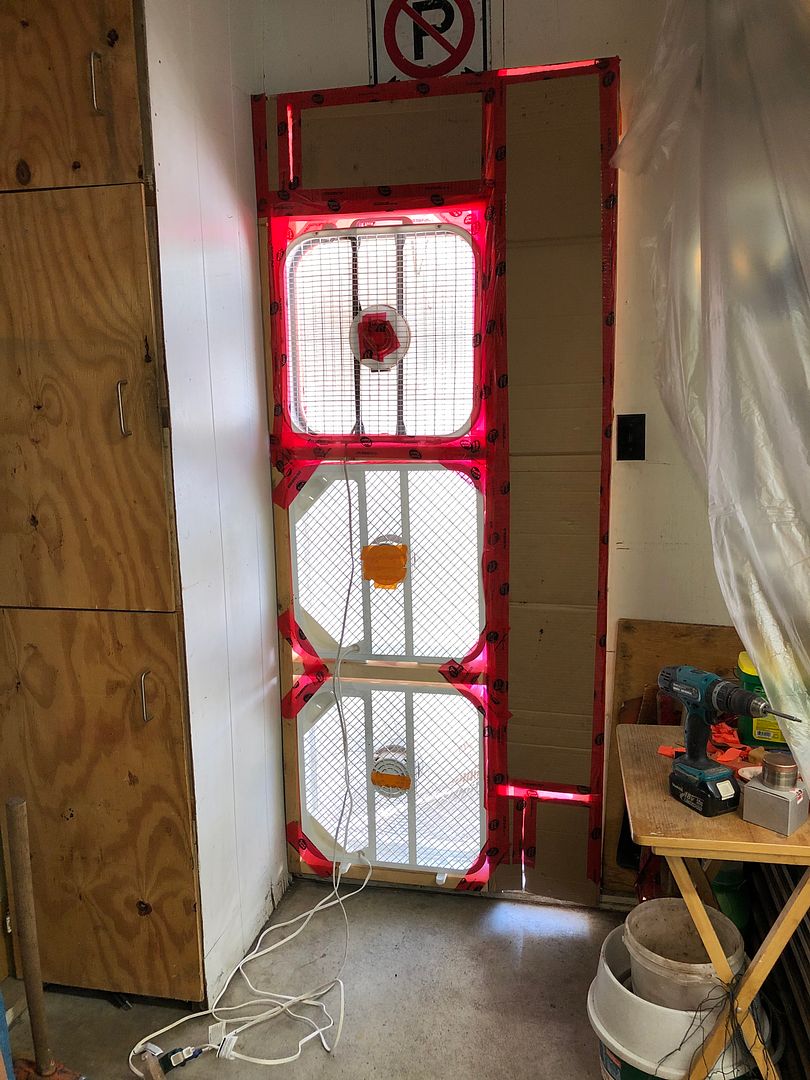
The inlet door still needed my homemade filter housing put over the opening. For the outlet door I still had my homemade box fan set up.
https://s1337.photobucket.com/user/8...1uz8f.jpg.html
https://s1337.photobucket.com/user/8...mwhow.jpg.html
The sheeting was fixed at top and bottom although I did not fully seal it.
https://s1337.photobucket.com/user/8...cfa7a.jpg.html
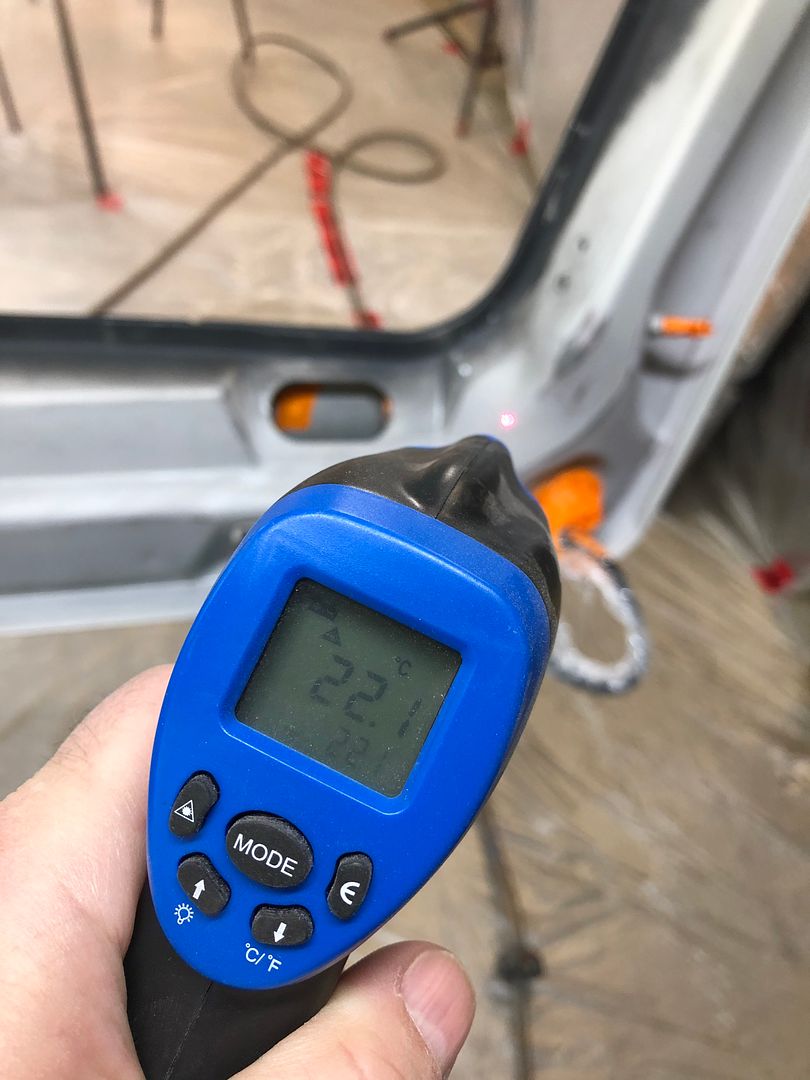
The challenge with this set up is using ambient air to flow through. While spring was here, the weather was only a handful of degrees above freezing. Knowing this and not being able to have the heater on while spraying I warmed things up good before starting. This worked reasonably well but as it cooled down over the coats, the flash times slowed a bit too. By the time I applied the clear on the Escape hatch, it was below 10°C in there.
https://s1337.photobucket.com/user/8...nprba.jpg.html
https://s1337.photobucket.com/user/8...1q9nq.jpg.html
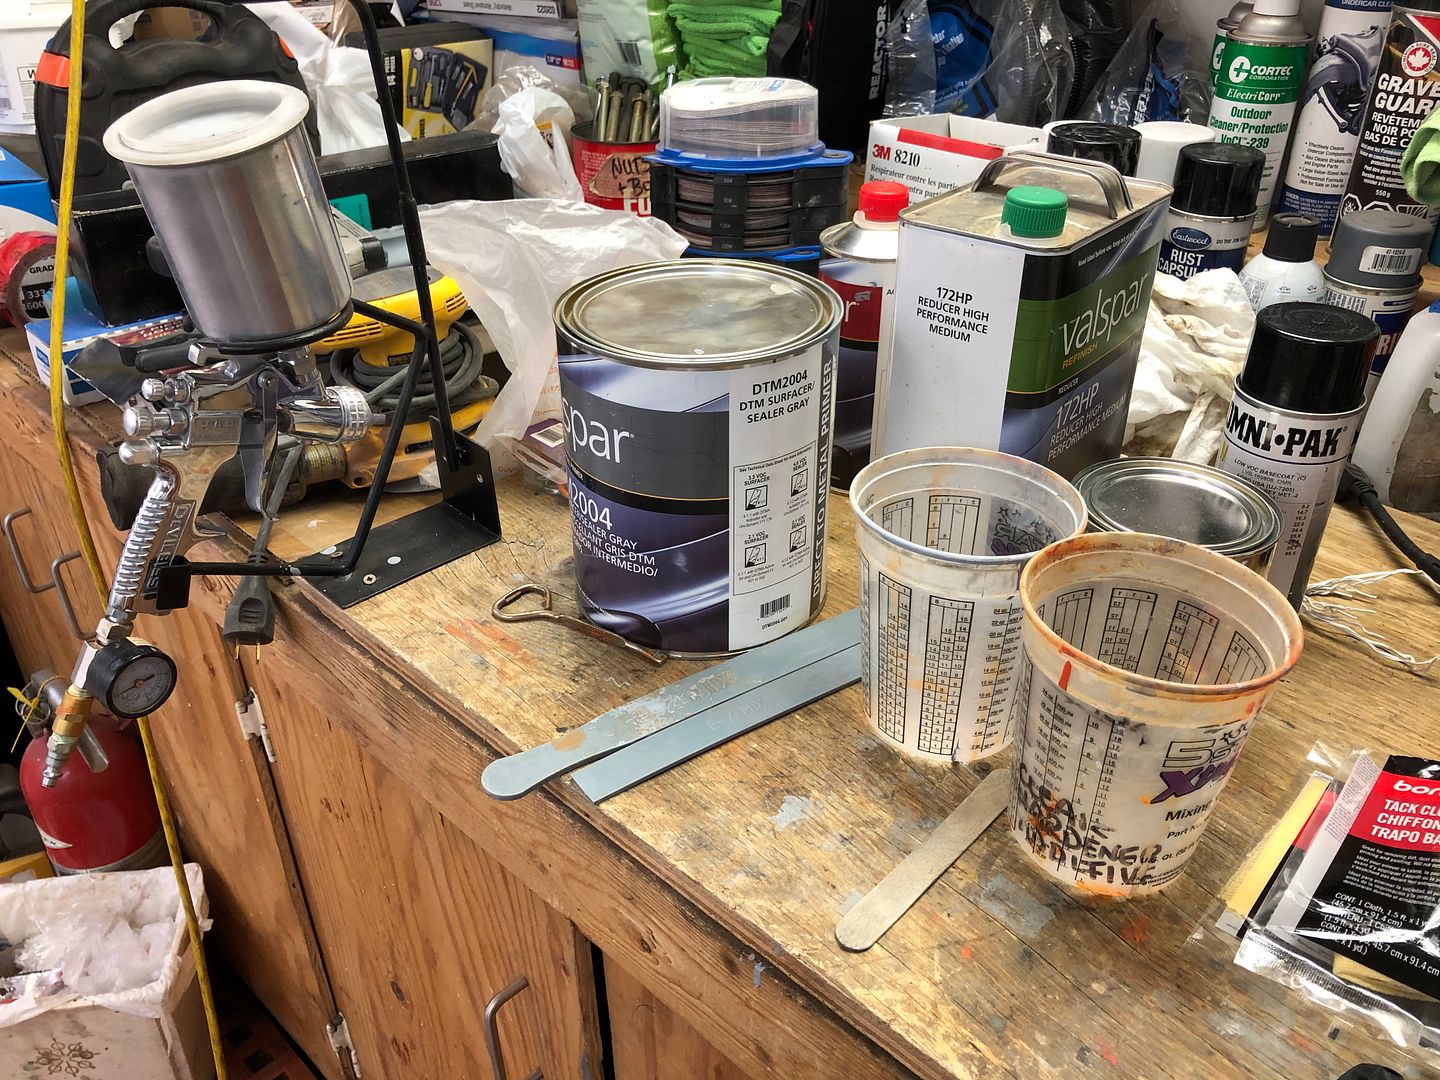
I used adhesion promoter before priming the covers too. Bottom line is some parts are ready for further blocking in the future. These are now set aside for when I get other parts readied for the next phase!
https://s1337.photobucket.com/user/8...u6pk1.jpg.html
https://s1337.photobucket.com/user/8...j6veq.jpg.html
For my wife's vehicle, I'd say I did pretty good. In the bright sun, there is a minute difference in the sparkle from the original UJ paint. The OEM seems to have had larger micron fleck IMO. Overall
The experience I have gained over the last number of years is invaluable. Many thanks to this site among others that have aided.
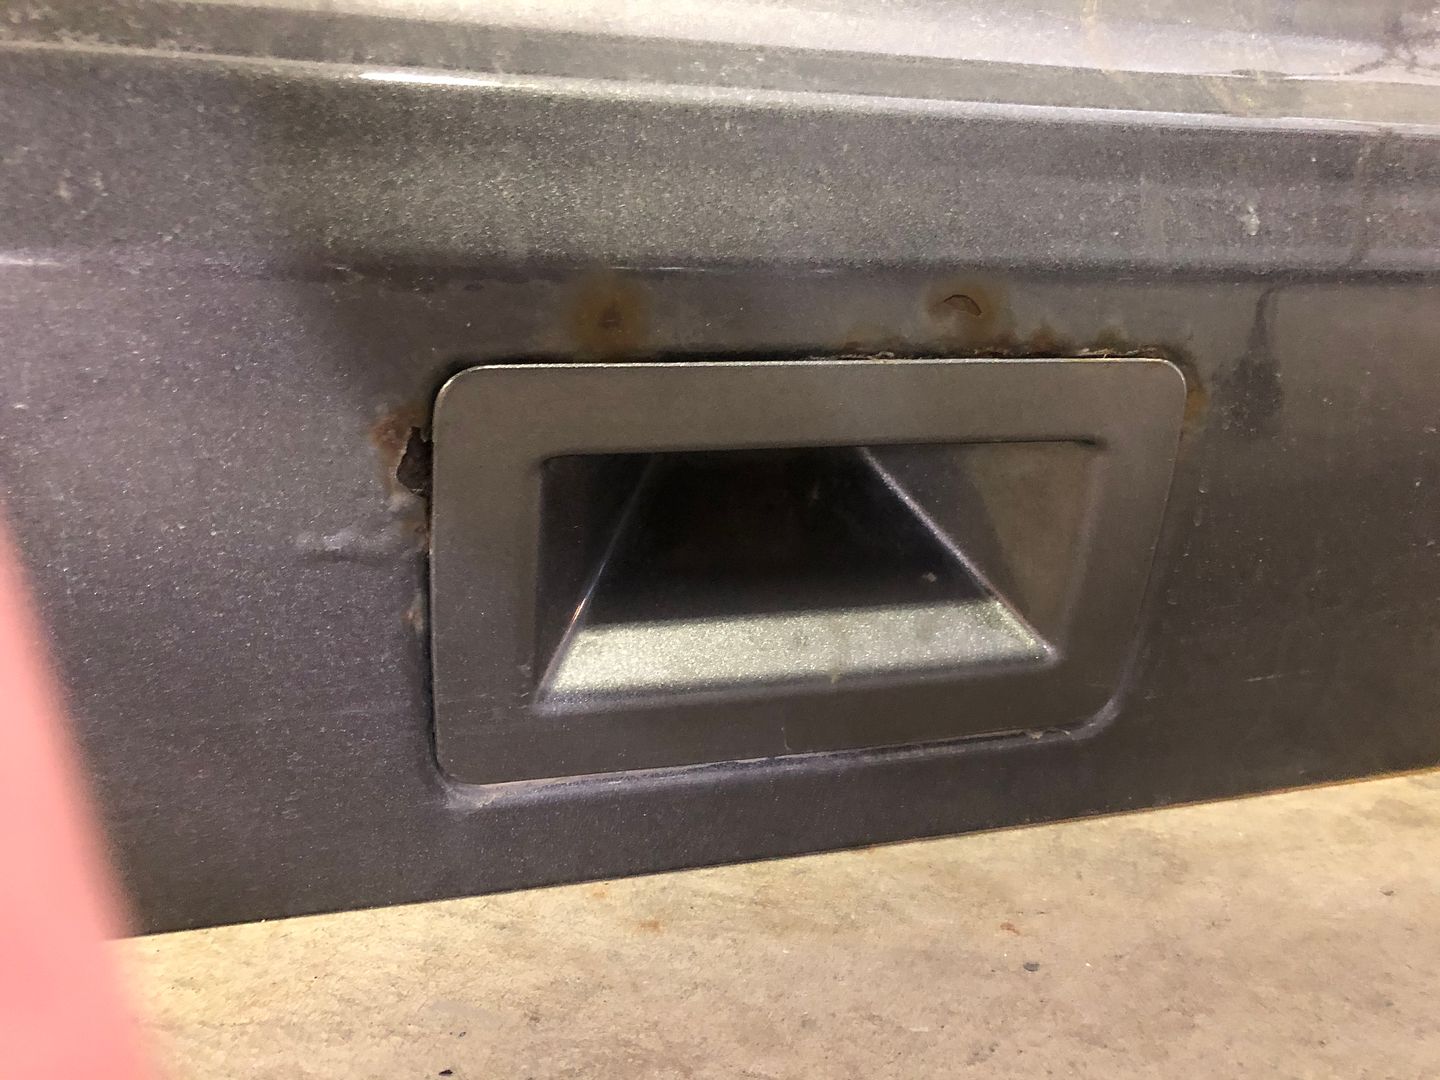
These seemed prone to rusting.
https://s1337.photobucket.com/user/8...jyo8y.jpg.html
https://s1337.photobucket.com/user/8...t5r7c.jpg.html
The replacement didn't have the same lower handle and I had to make a couple minor adjustments to the wiring and use the old hatch to body harness segments to make it work. The glass was even in better shape.
Overall costs: $80 for complete hatch, $100 for 1.5 liters of base. I had all of the rest of what I needed including time
https://s1337.photobucket.com/user/8...0htse.jpg.html
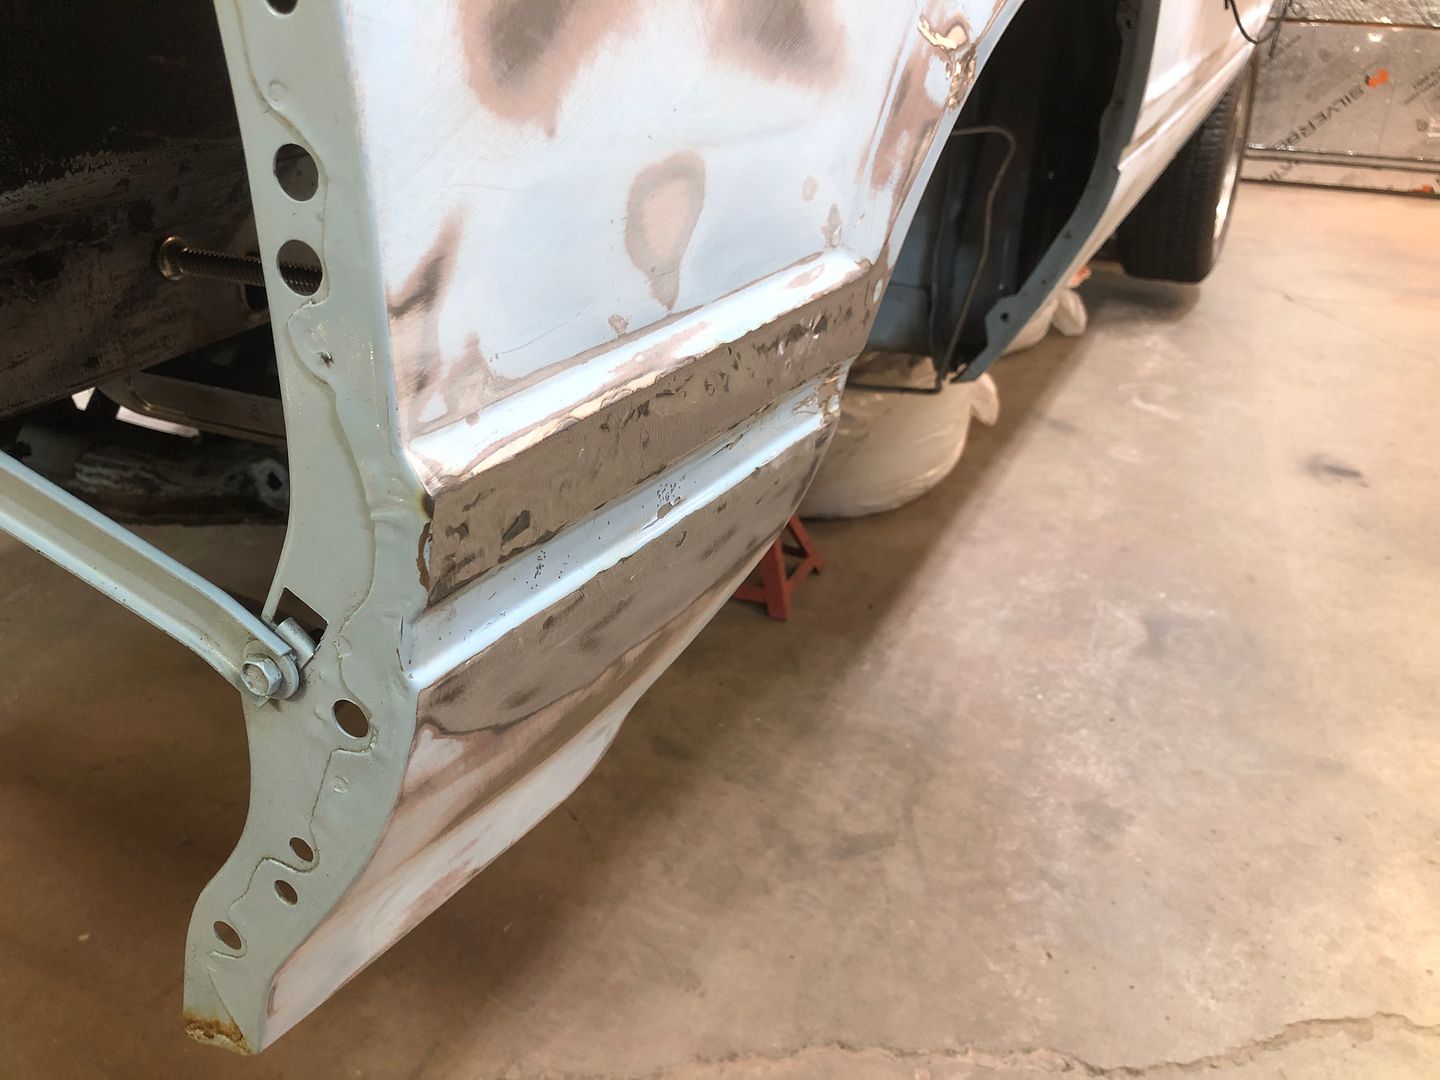
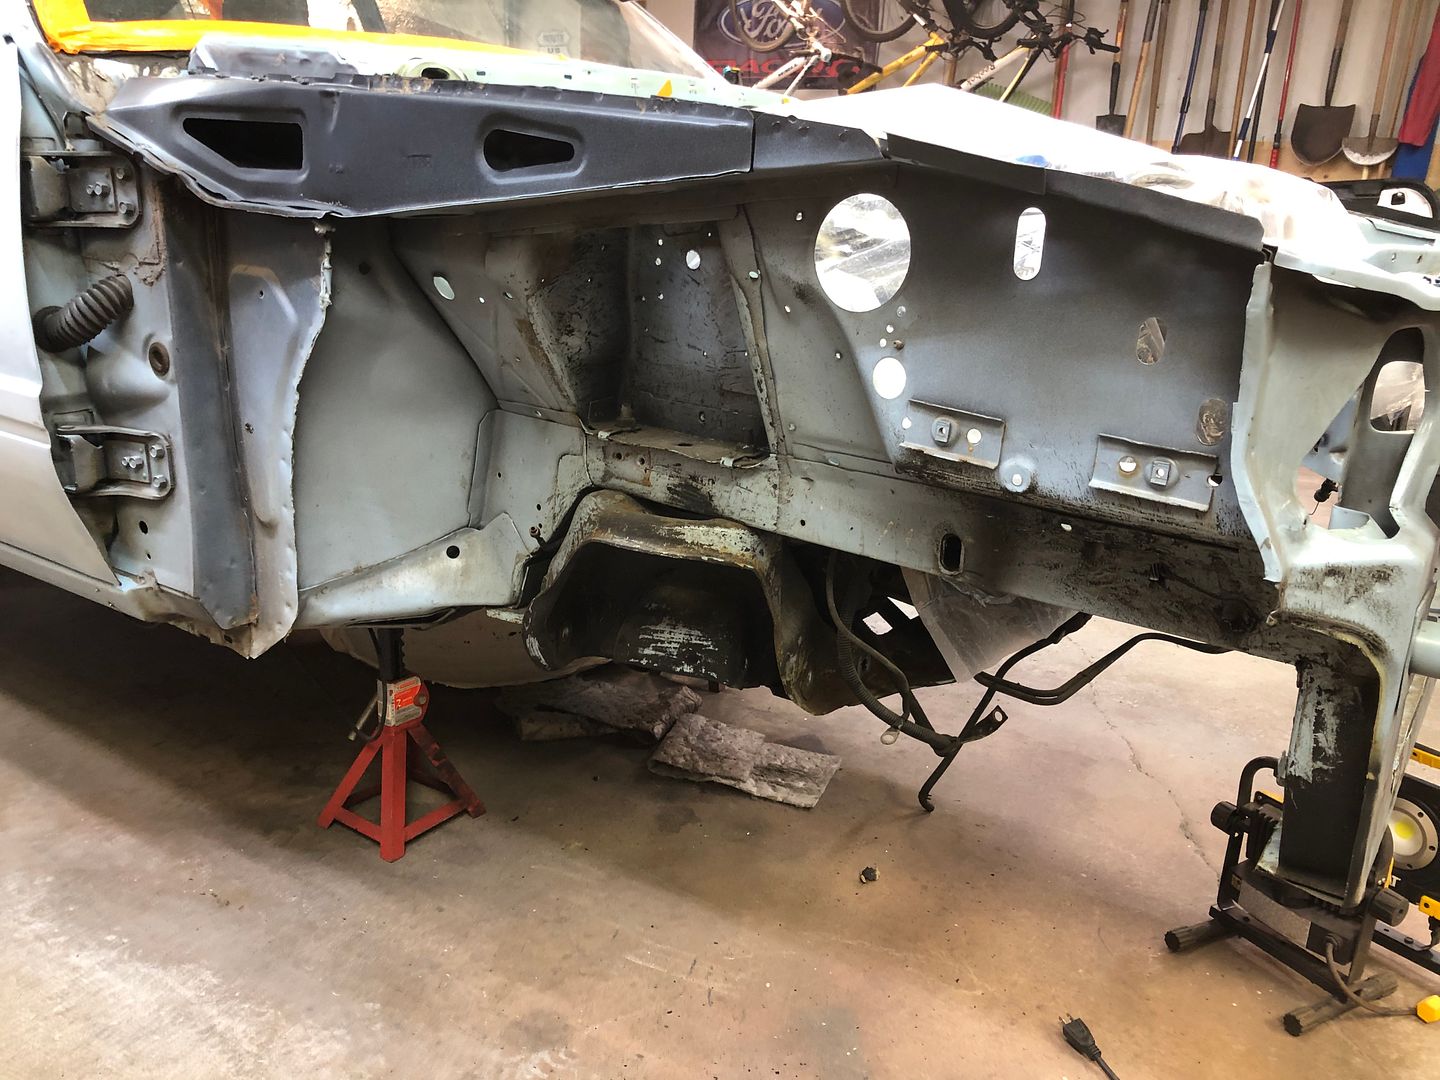
With that driver's quarter dent pulled I could pull the fenders to finish them off in an easier working position.
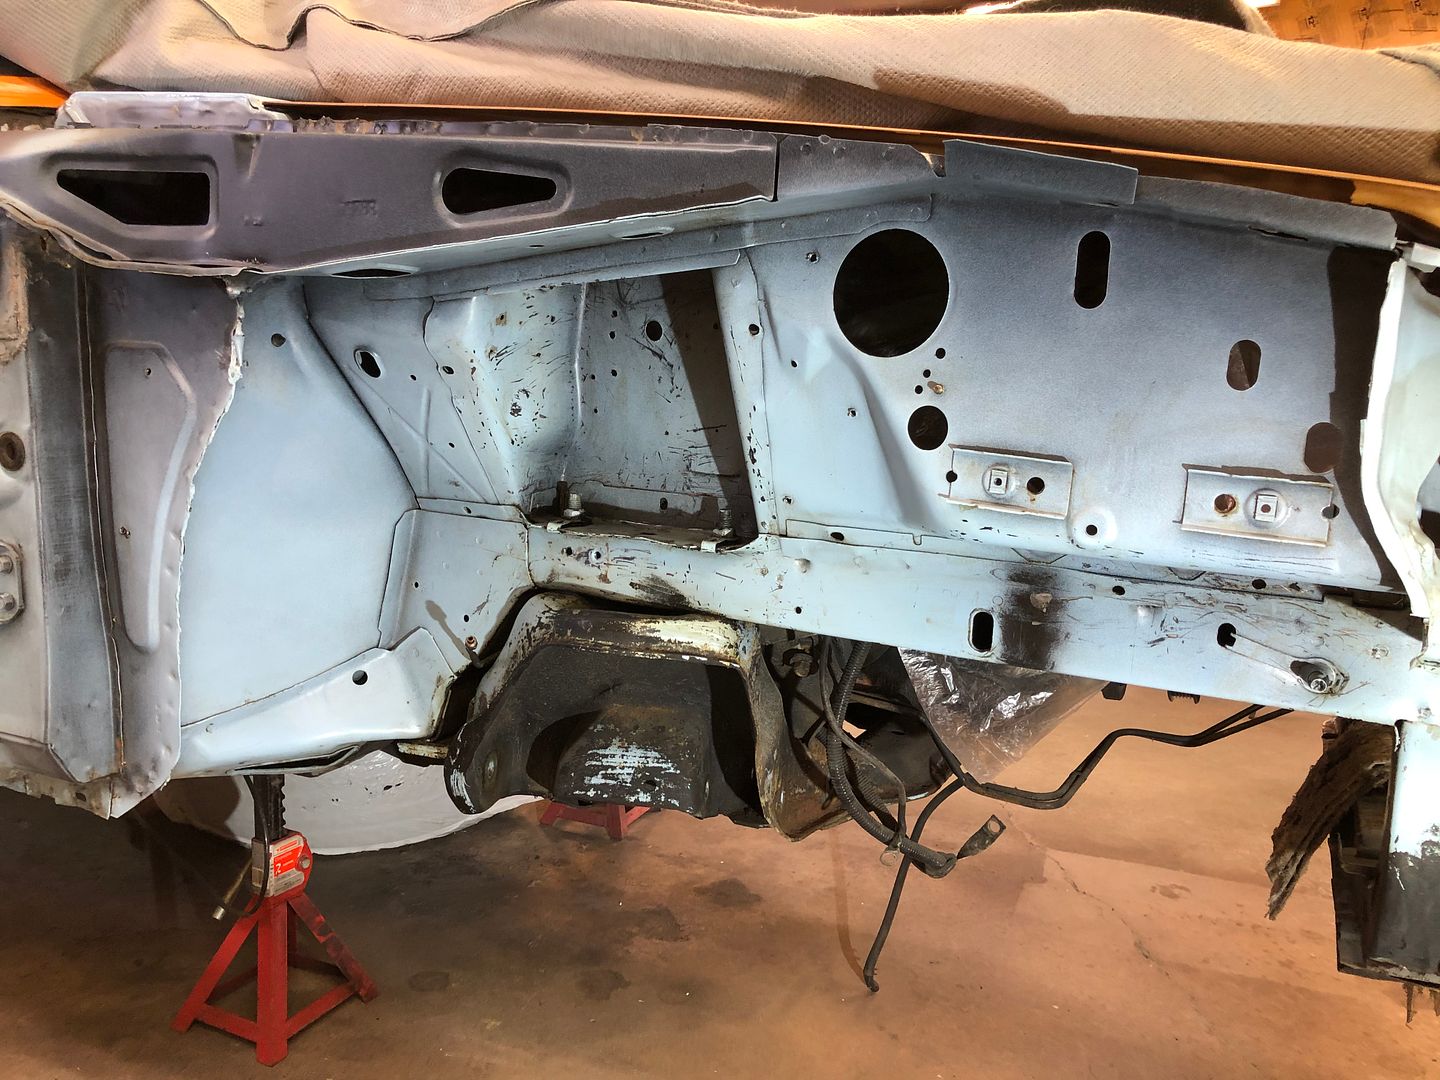
Still trying to piece any story together for the car. With the surface rust on the front suspension and other typical parts that were quickly rattle canned black at some time to try to hide it, I'd have thought the car had seen salty winter roads for a time in it's life (17k or 117k milesstill trying to deduce).
I found some debris under the fender lip way back near the cowl
https://s1337.photobucket.com/user/8...wdgw1.jpg.html
I actually did a pretty good job a while back getting some of the undercoating.
https://s1337.photobucket.com/user/8...tkdhq.jpg.html
https://s1337.photobucket.com/user/8...pdlw0.jpg.html
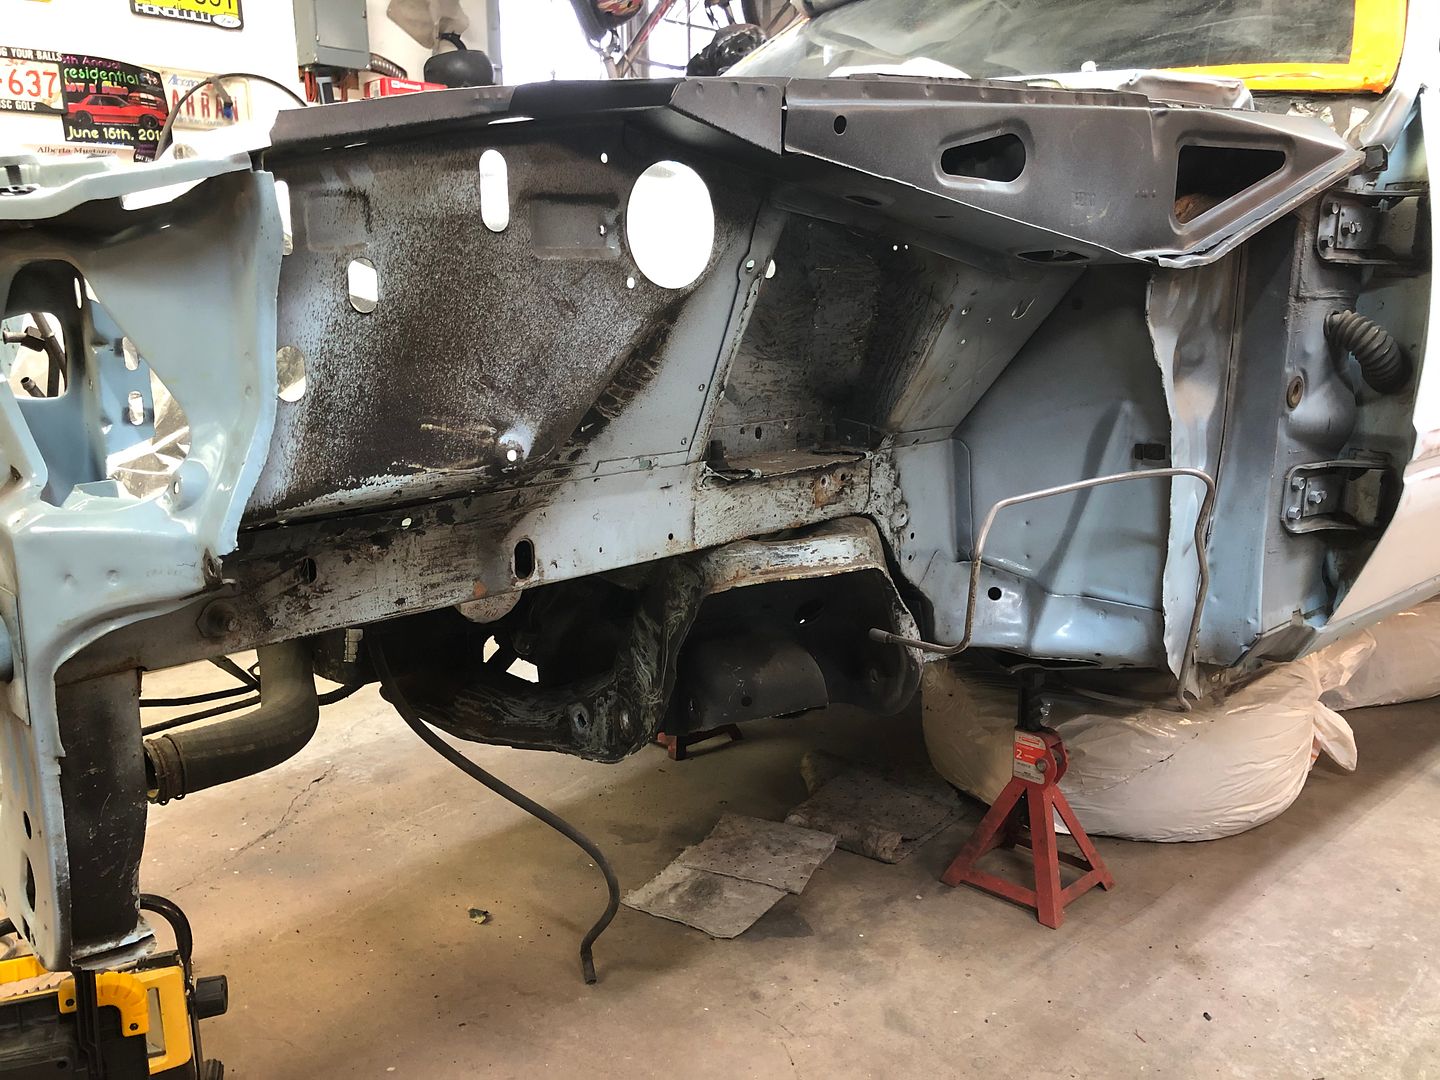
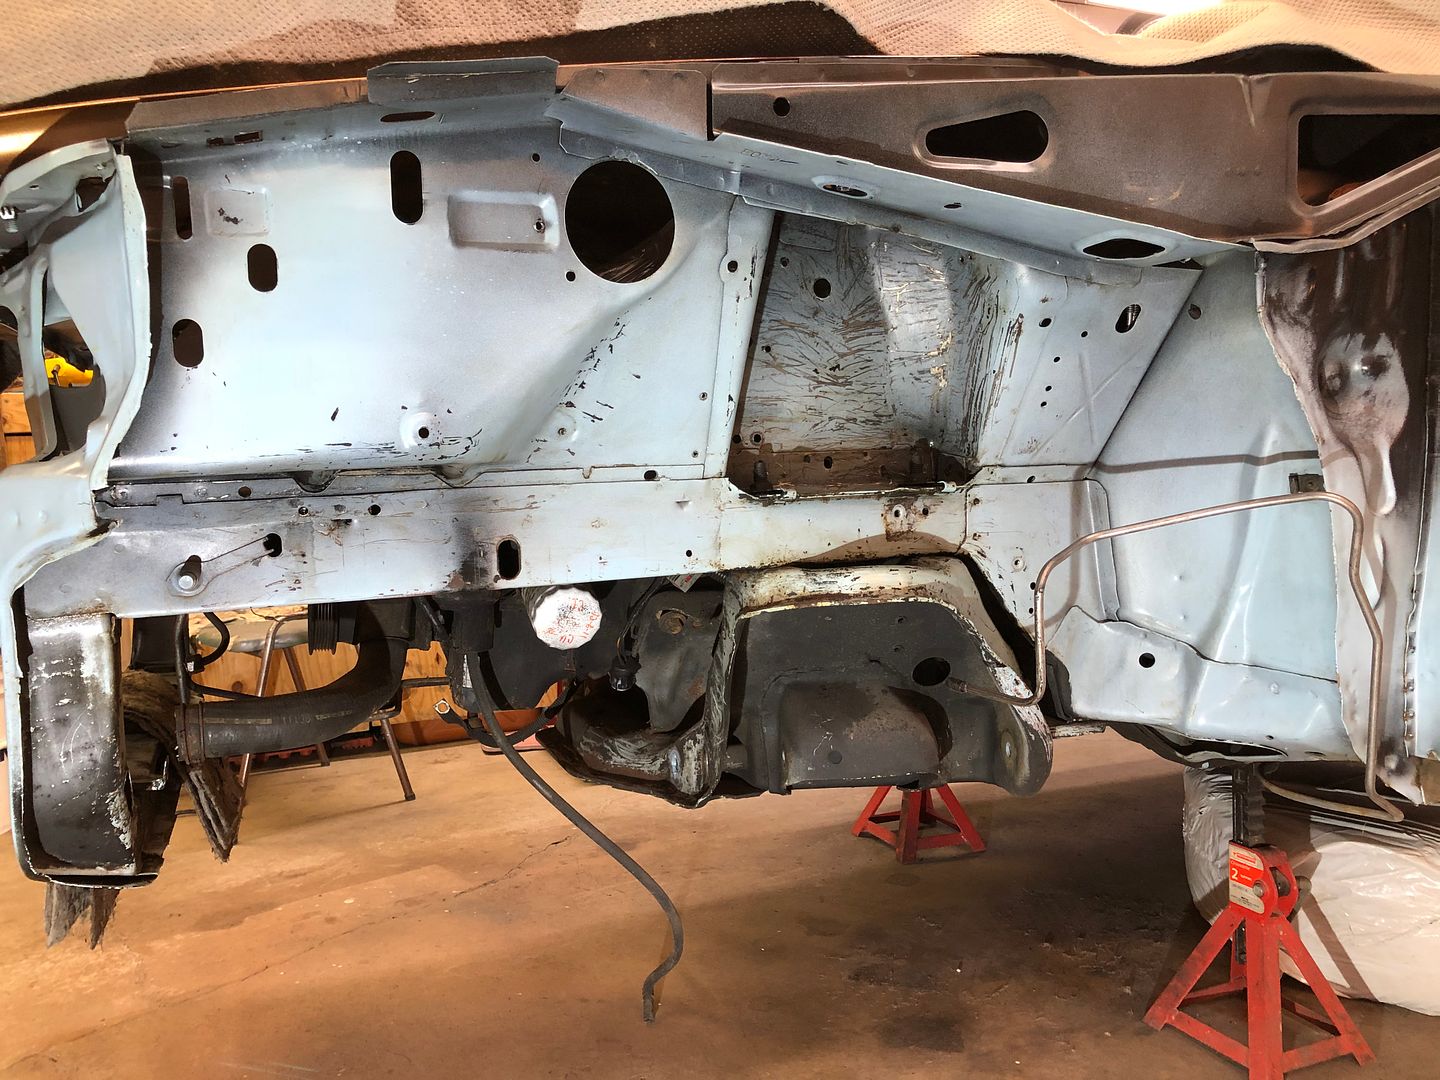
I cleaned up the upper part and closer to the door mainly. The K member will be coming out eventually to be degreased and blasted I think.
Looks like I marred more than I wanted on the initial clean up so I'll have some extra sanding later but so far so good. Now more area ready for sanding. Yay
https://s1337.photobucket.com/user/8...488fv.jpg.html
https://s1337.photobucket.com/user/8...8ukve.jpg.html
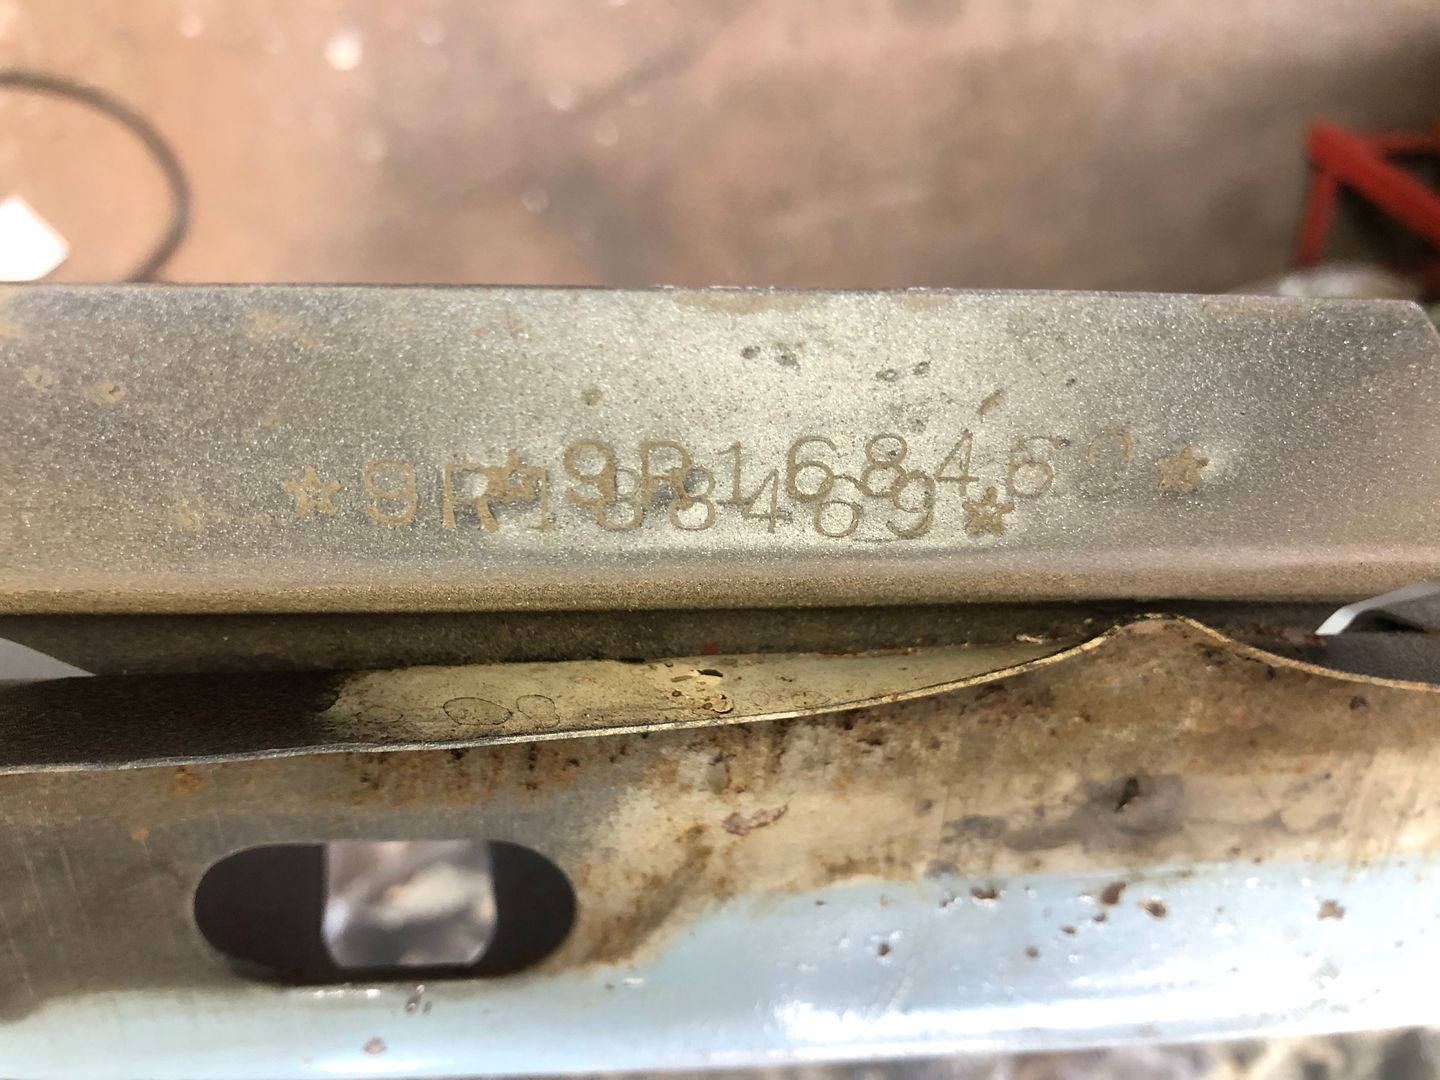
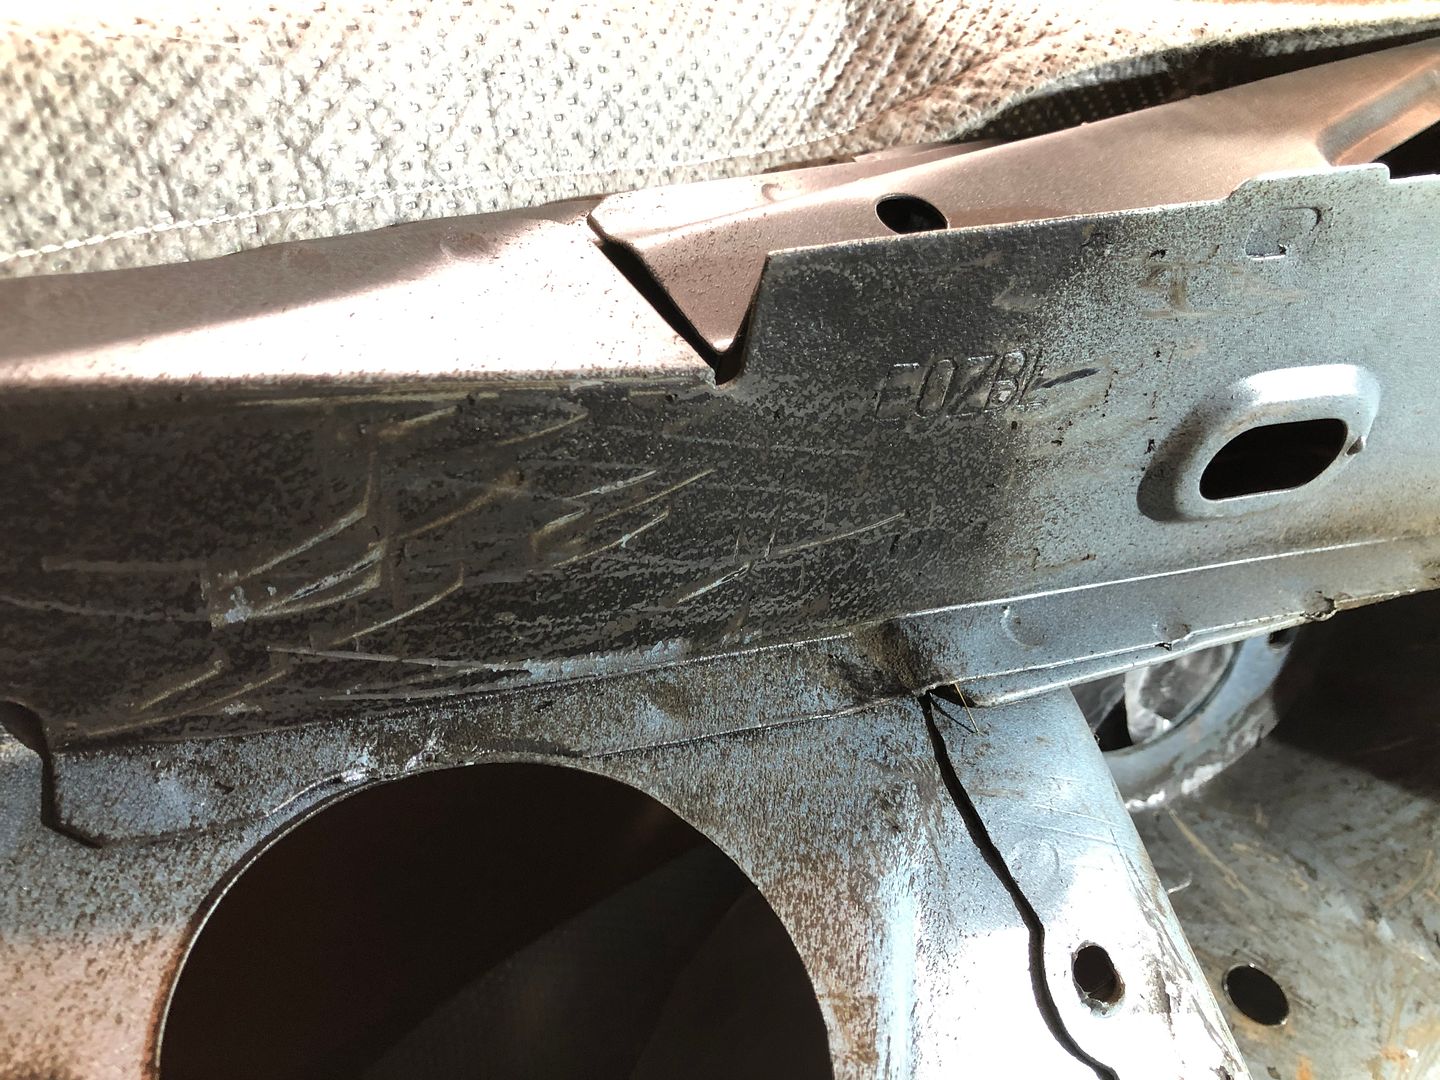
With the fenders off, the front tabs are visible for the serial number.
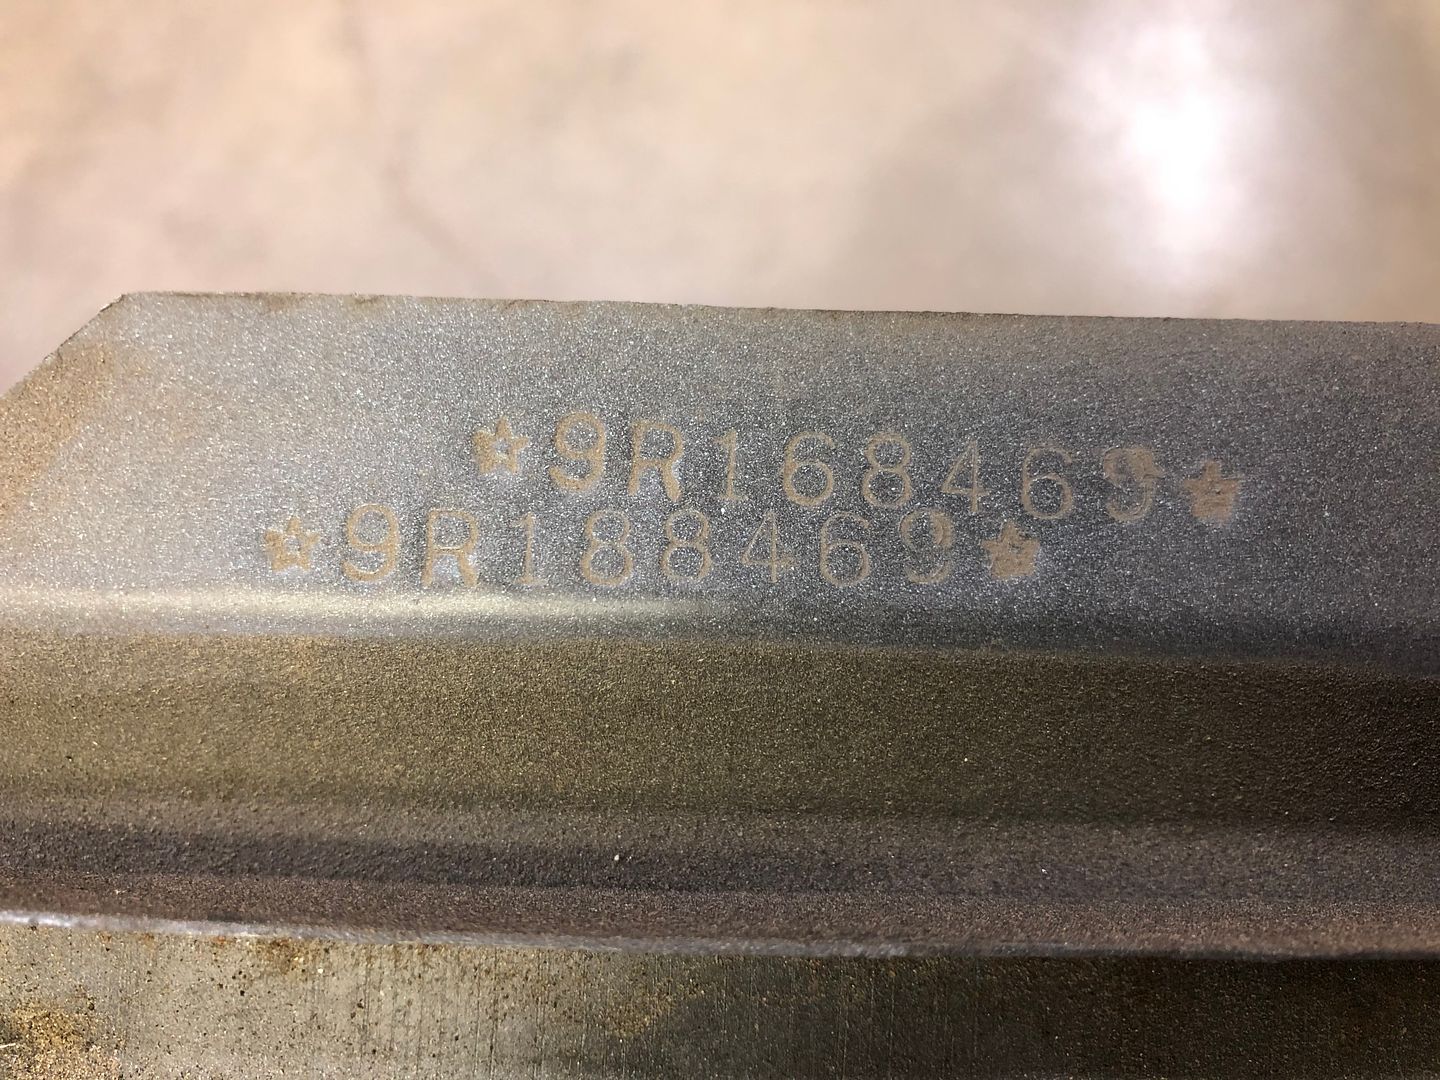
Take a look at these ones. The six digit number in the VIN for our car is 168469 in all my documentation.
Look at the stamps for both sides. Someone must have stamped it incorrectly and they caught it? Then changed it? Wonder what 188469 was? I have not seen this before.
https://s1337.photobucket.com/user/8...q63n2.jpg.html
https://s1337.photobucket.com/user/8...hsn2q.jpg.html
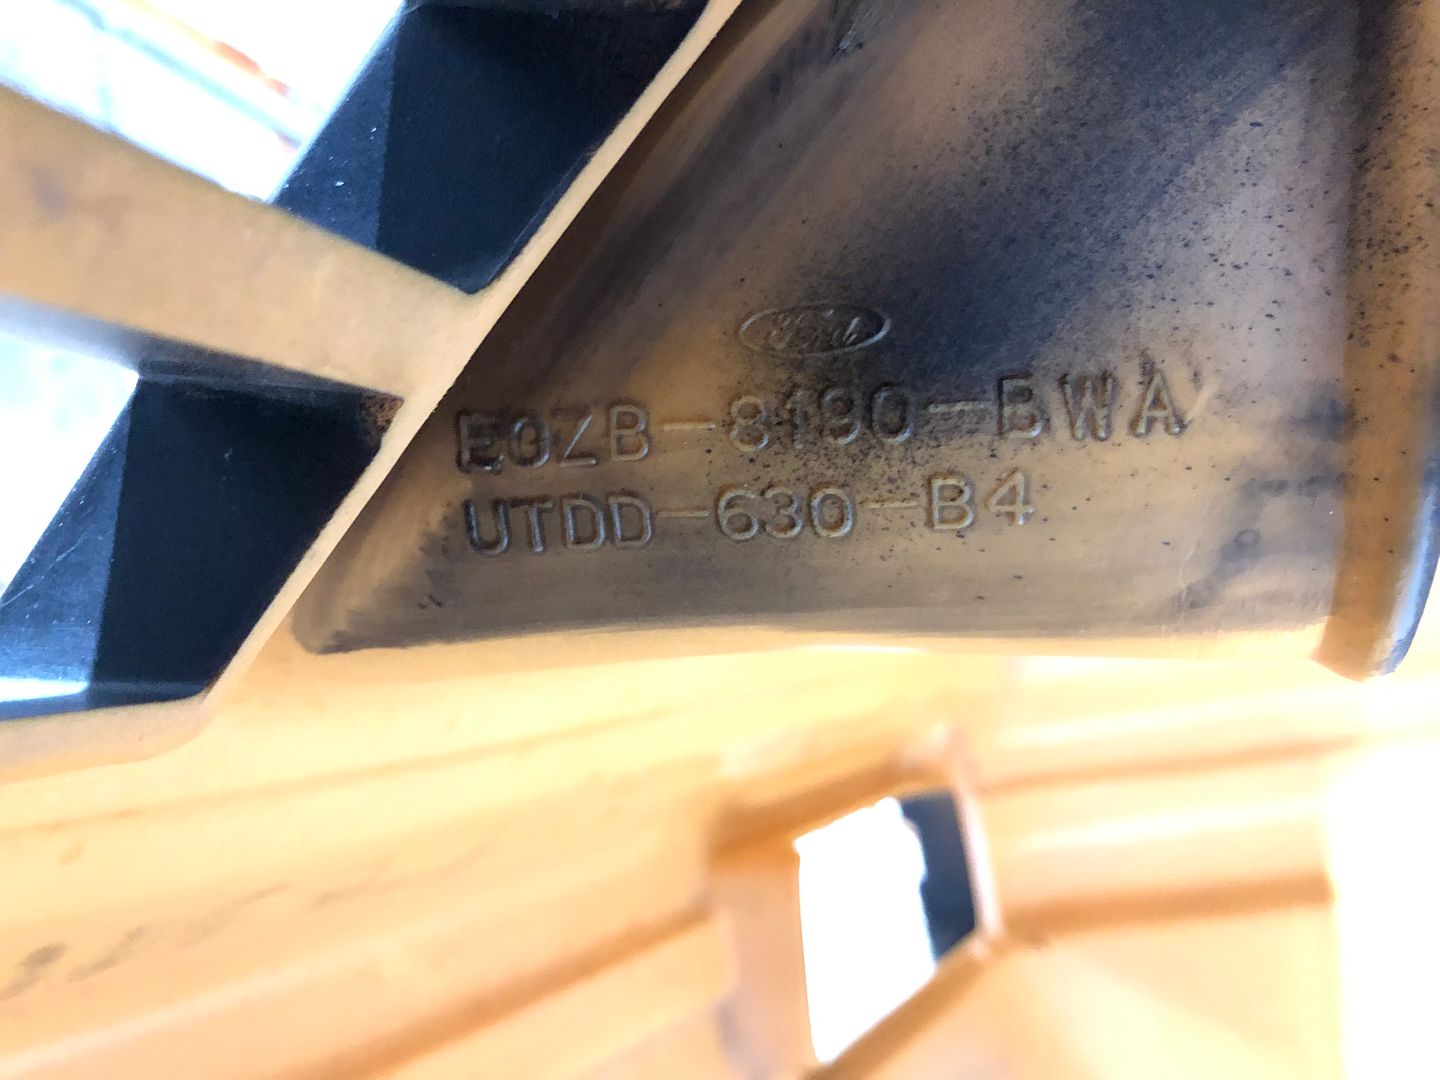
I also had shown the front cover engineering number in a previous post as an EOXX thinking 1980 versus the typical D9XX for 1979. With the very nice shape I thought it had been replaced early in the car's life.
Looking at the upper rail number body stamp on the under side and I see the same thing. That makes me unsure now if the front cover has been replaced. This car is a late (July) 1979 build and should have had the better, upgraded urethane cover from mid-ish 1979 per the parts book. There are some other body stamps elsewhere noted that are still D9XX (not keeping serious track just noted). Curious
https://s1337.photobucket.com/user/8...whiy6.jpg.html


Well Darran it looks like you are on you way to having another sweet ride! Attention to detail is everything I would expect from you and then some! Looking forward to upcoming updates. This build is Blainer approved!
-Currently Searching for "The One"

Yea ..... every now and then I get put over on a "I don't really want to work on THAT" assignment ...... always best to knock them out and move on. I left a cabinet my wife wanted stained and finished go one time. She spent WAY more time complaining to me about it than it ever would have taken to do a passible to 1/2 decent job on it. Then the stupid thing is still there "waiting" for me to get to it. ARG.
I had a 1967 cougar with a serial number that was similar to yours. Our local ford dealer said it wasn’t as uncommon as you would think.

Great progress on the Blue Coupe!
1979 Indy Pace Car Mustang 302 / 5spd
1982 Mustang GT T-Top 302 / 4spd
1986 SVO Mustang - 1C
Thanks Blaine. It means a lot to have you and your keen eye approving things
I agree James. Some days when time is available it is hard to motivate yourself to go out and fill and sand for another day or to do any other mundane type of task (car or not car related). I am glad that I took the opportunity to do this hatch for my wife. The vehicle also has the starts of rusting on the rear fender lips. Not so easy of a repair and a lot more work to redo both whole rear panels. Plus the vehicle would be out of commission for the duration.
I have been getting quotes to have an old basement bathroom completely redone including framing due to some leaking here and there over 30-40 years plus normal degradation and deterioration. This has turned into also doing the upstairs bathroom as we would have to use that fully while the basement is out of commission.
With everything going on, work slowdowns and uncertainty (I work in the manufacturing side packaging larger HP natural gas compression equipment), I am probably going to disappoint my wife and only do the basement one. Plus do it mainly myself with hopefully my two son's help. I have enough knowledge to be dangerous but also know enough people to hire and get the specialty stuff done.
I have vacation time to take and work was even talking about a possible shutdown for part of the summer because of how slow we became in the last few months. I am not wanting to overstretch cashflow and any added credit until things become more sure. Plus I am cheap and myself; honestly could also live with the condition of the bathroom for a while yet.
Hmm. Here I thought it was odd.
Thanks Joe. Keep an eye out for more updates. I am getting caught up to my progress soon but there is still a lot of manual stuff to do coming up without spending a fortune.
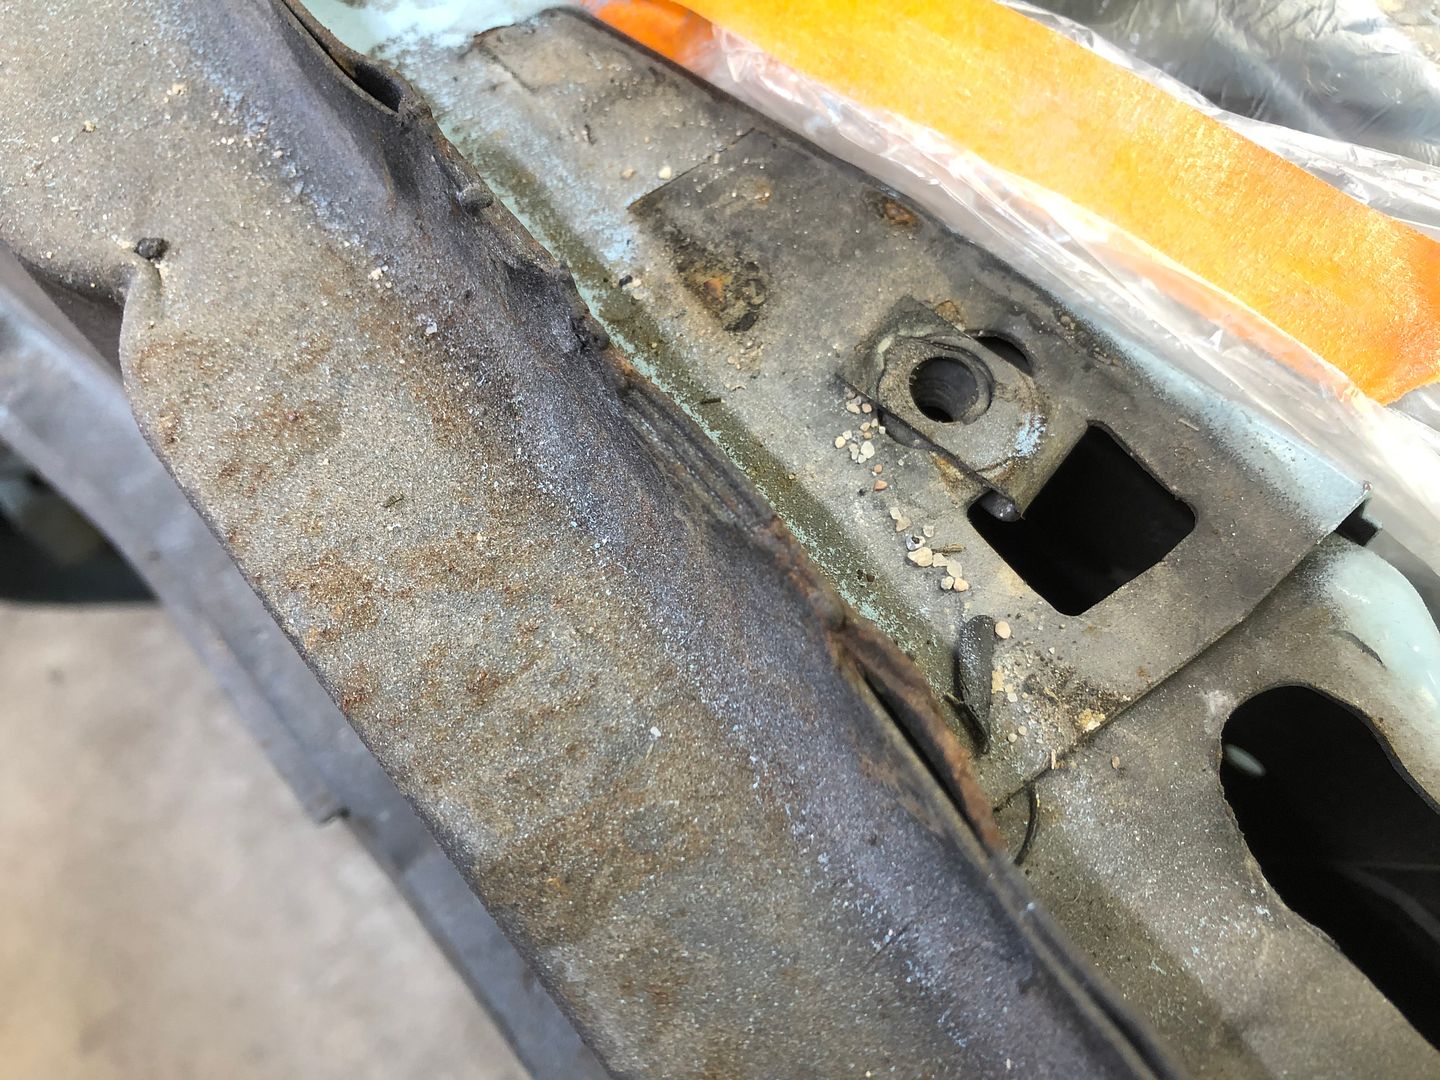
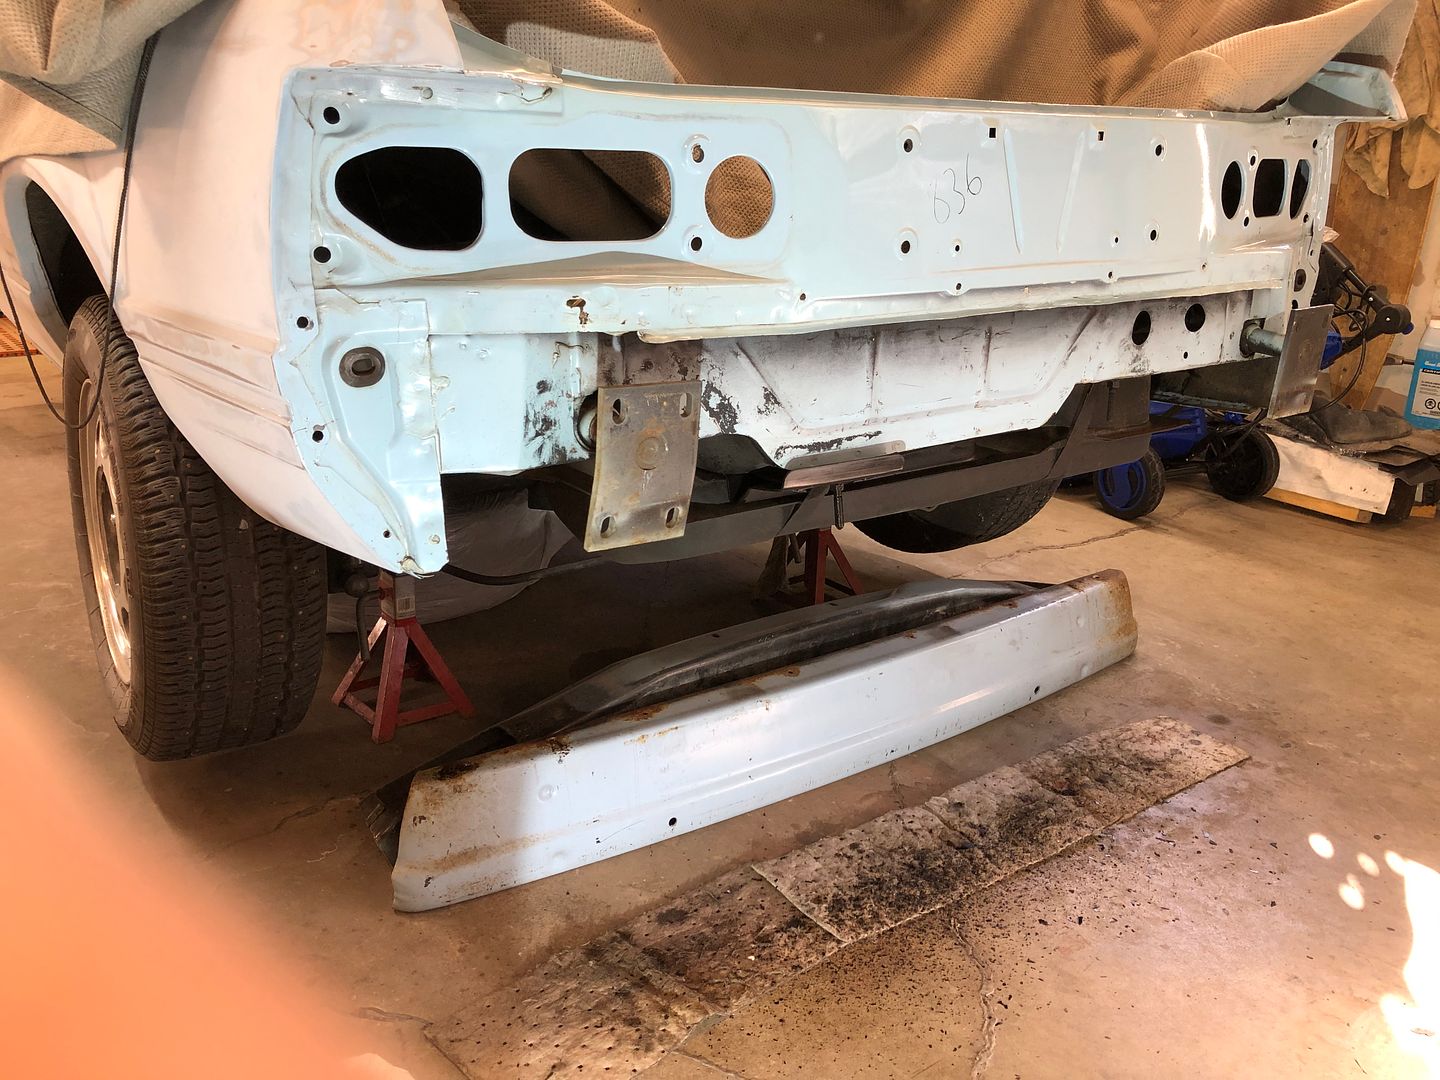
I cleaned up all of the rear end of the car. The undercoating had made it's way up to the lower tail light body line.
https://s1337.photobucket.com/user/8...nb5yd.jpg.html
I still need to remove the four bumper mounts including the damaged driver's rear one that had the impact evidence.
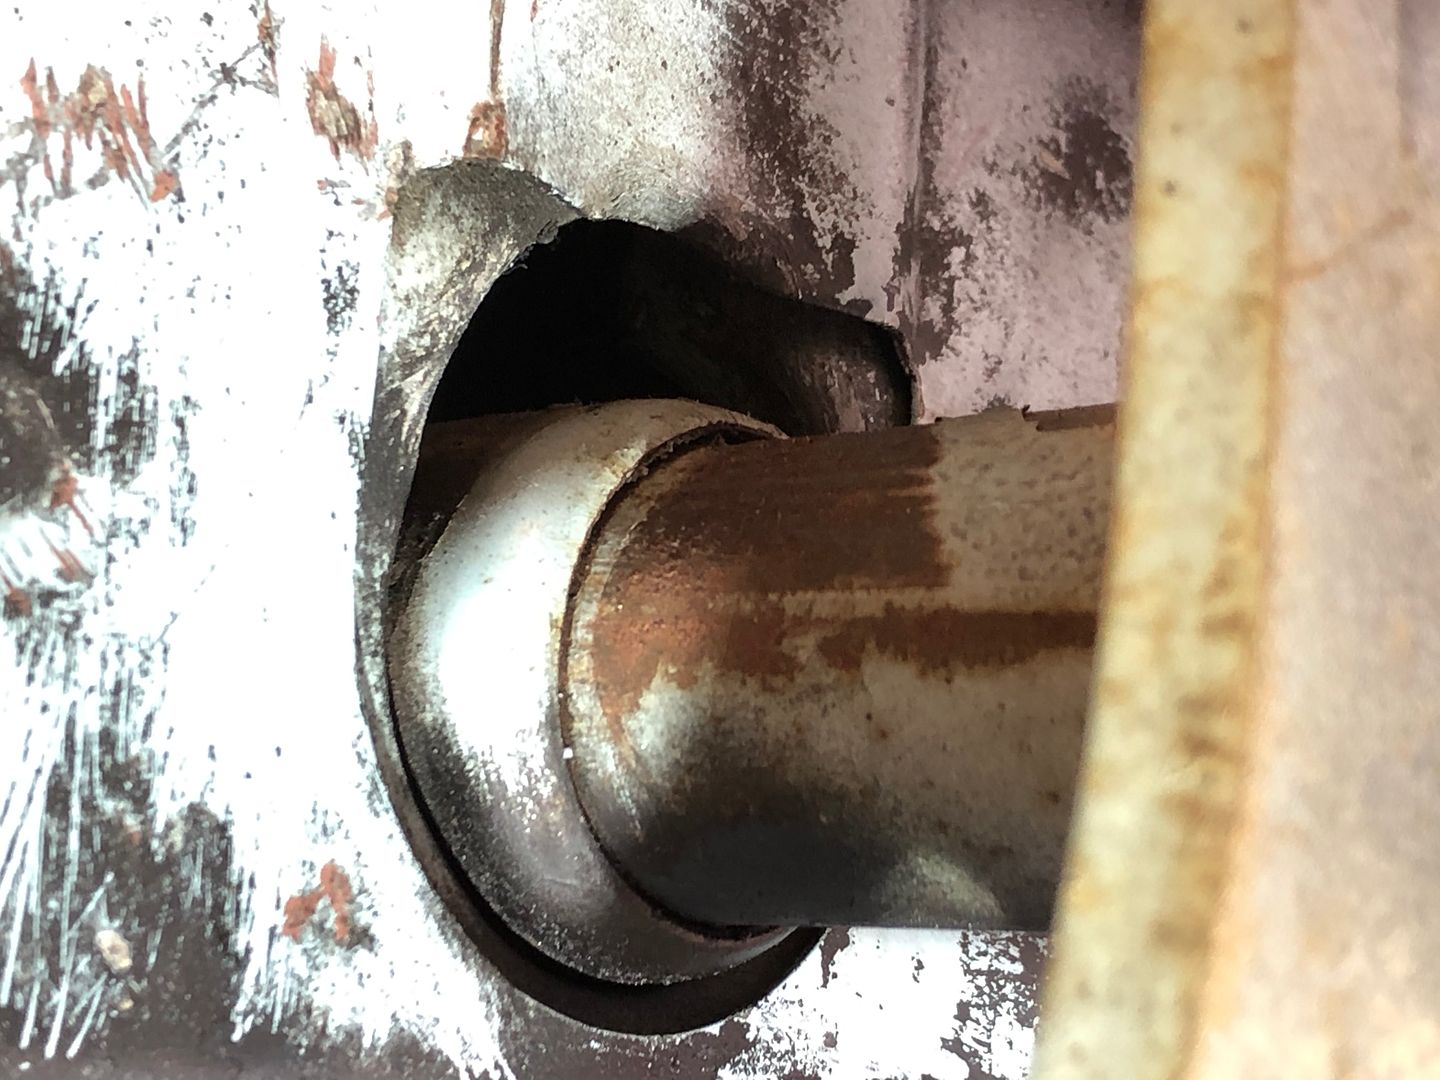
I need some guidance on this. The impact pushed the mount in as well as up. The up movement caused the mounting hole to elongate upward. Maybe 1/4" or so. You can also see the mount went in around an inch at the time.
Can it be corrected easily? I assume I could make a metal shim to fit and have it welded in? You cannot access this from the trunk side either.
I could also leave it. I am worried there could be some travel and clunking noise from the rear during normal driving and over bumps.
https://s1337.photobucket.com/user/8...u3gam.jpg.html

I just read this whole thread again. I LOVE seeing this type of build thread as opposed to the "mad mods" kind. I like those too, but this kind is really enjoyable. First, great find. Second, love the attention to originality and detail. It really is motivational.
84 Capri RS Turbo
Vinemont, AL (formerly El Mirage, AZ)
USAF 1986-2007 (Ret)
Thanks Bill! I find I go over my posts again also. I need to do that to remember and retain some of the older info! When working by yourself pretty much the whole time, a project like this sure seems to drag on into the years! I really do not want this one to do that.
The redo of the front end of the Tangerine coupe right after it was finished after the incident my son had set me back 1.5-2 years in my planning. That took a bunch of this car's time away. My youngest son graduated high school two years ago already! I hope he is still keen on the car by the time it is done!
For the originality part, I am not sure why the affinity with the stockish look and the aim to retain as much of that as I can. I can guess I suppose:
One; both of our 79's miraculously look like really nice condition examples to work on and to maintain that originality. The effort is being rewarded by the results from all the TLC.
Two; I can be pretty OCD, pretty organized and overly meticulous. Not good sometimes for the time I tend put into my efforts. Being a rookie for most of this, I am slow for many of the tasks getting done (compared to a professional as least). The good thing is, my time is free right? I am getting better at some things after having done some things before now.
Three; I was pretty good at providing a lot of detail in my last project. I was excited to dive into the project. This one seemed to start slow and I was less motivated to do so. The site is slowing down and wonder the value others are getting out of the effort. I am getting more involved and seem to have found more inspiration to keep up to date on the work. Also comments like your make me feel the effort is worth the time. Many are on Facebook these days but doing something like documenting a project on there does not work for me or have the same impact.
Thanks for the comments and for checking in and following along!
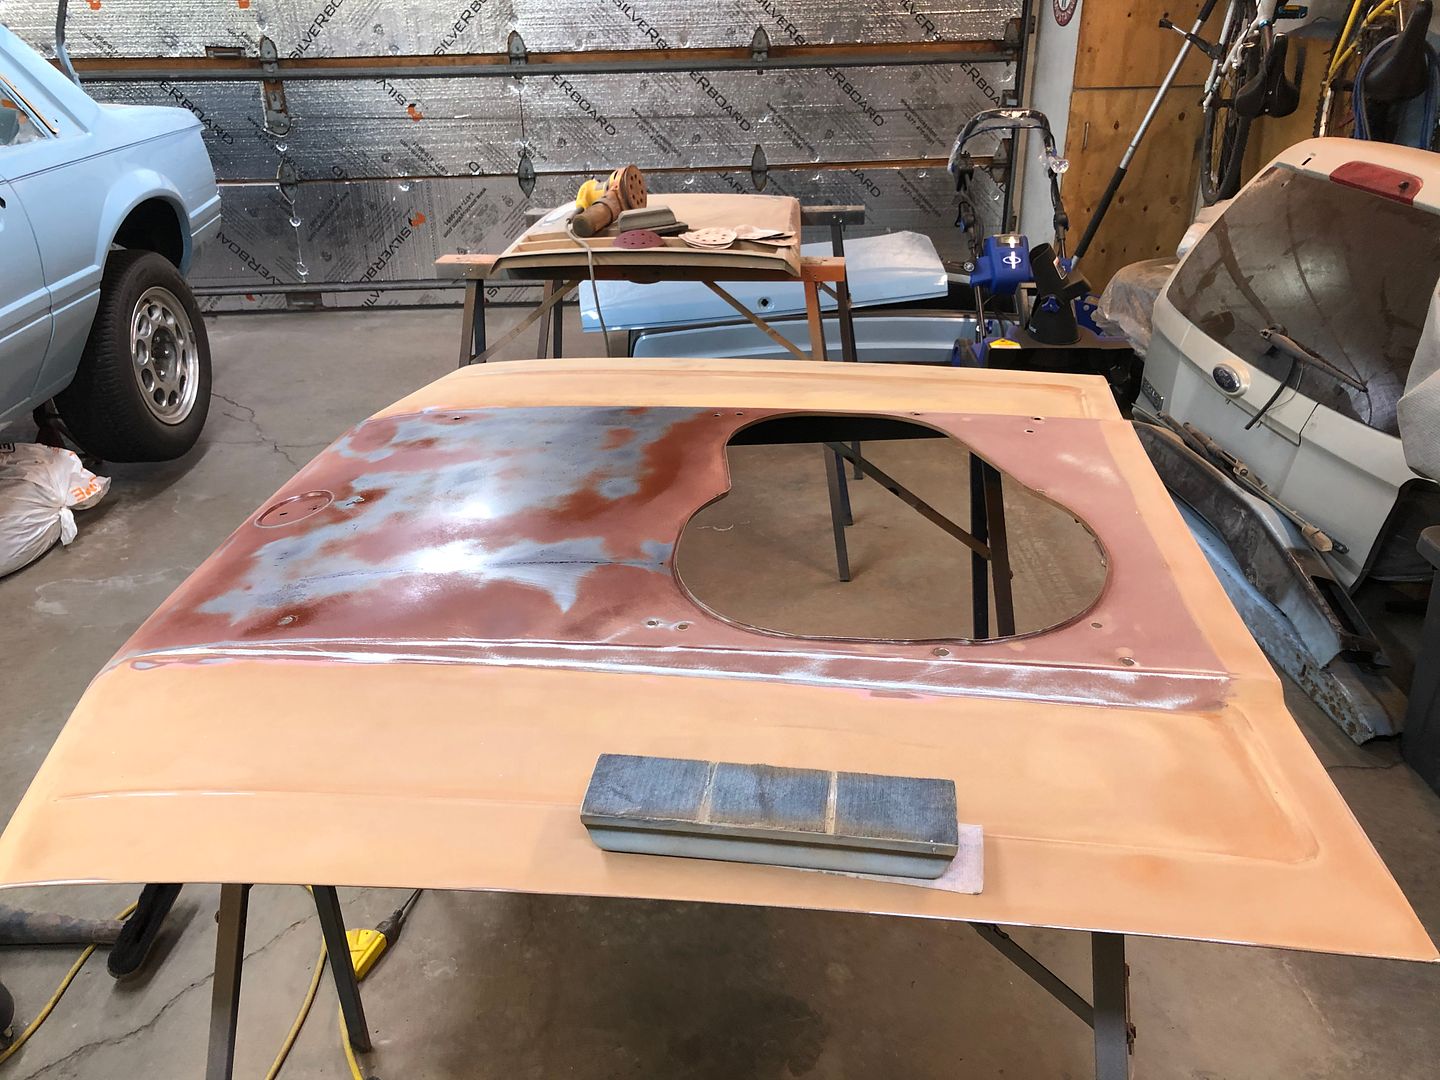
A while ago, while some of the other body sanding was ongoing, I had done a first pass on the outer side of the hood.
Someone had thought that that this may have been a service replacement hood. If you look closely you can see what looks like a part number showing through the light top coat on the underside.
https://s1337.photobucket.com/user/8...0f2db.jpg.html
Not sure but to bolt on this cowl it looks to have had new holes added to the hood to allow it to fit.
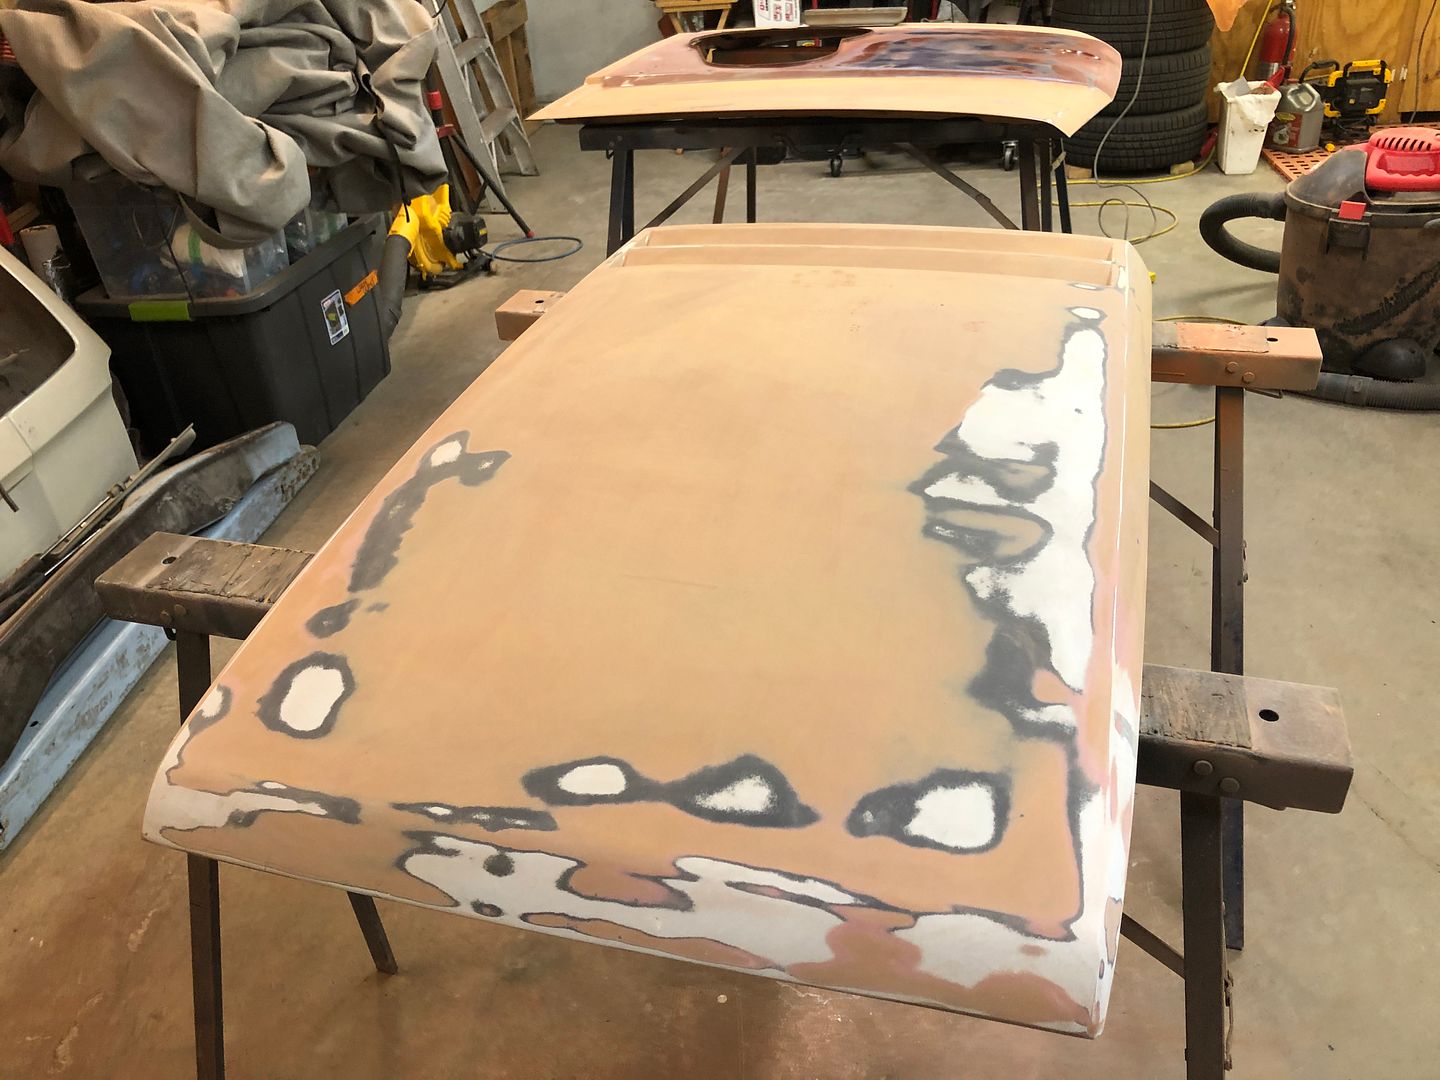
Under the cowl, there was no paint and maybe factory primer. That had some minor surface rusting under to address. I have blocked the exterior and used some Eastwood Rust Convertor. There are some minor dents to look at from where the front of a forward scoop would sit. Not sure but more effort required upcoming and then on the underside also.
https://s1337.photobucket.com/user/8...duava.jpg.html
https://s1337.photobucket.com/user/8...yixqv.jpg.html
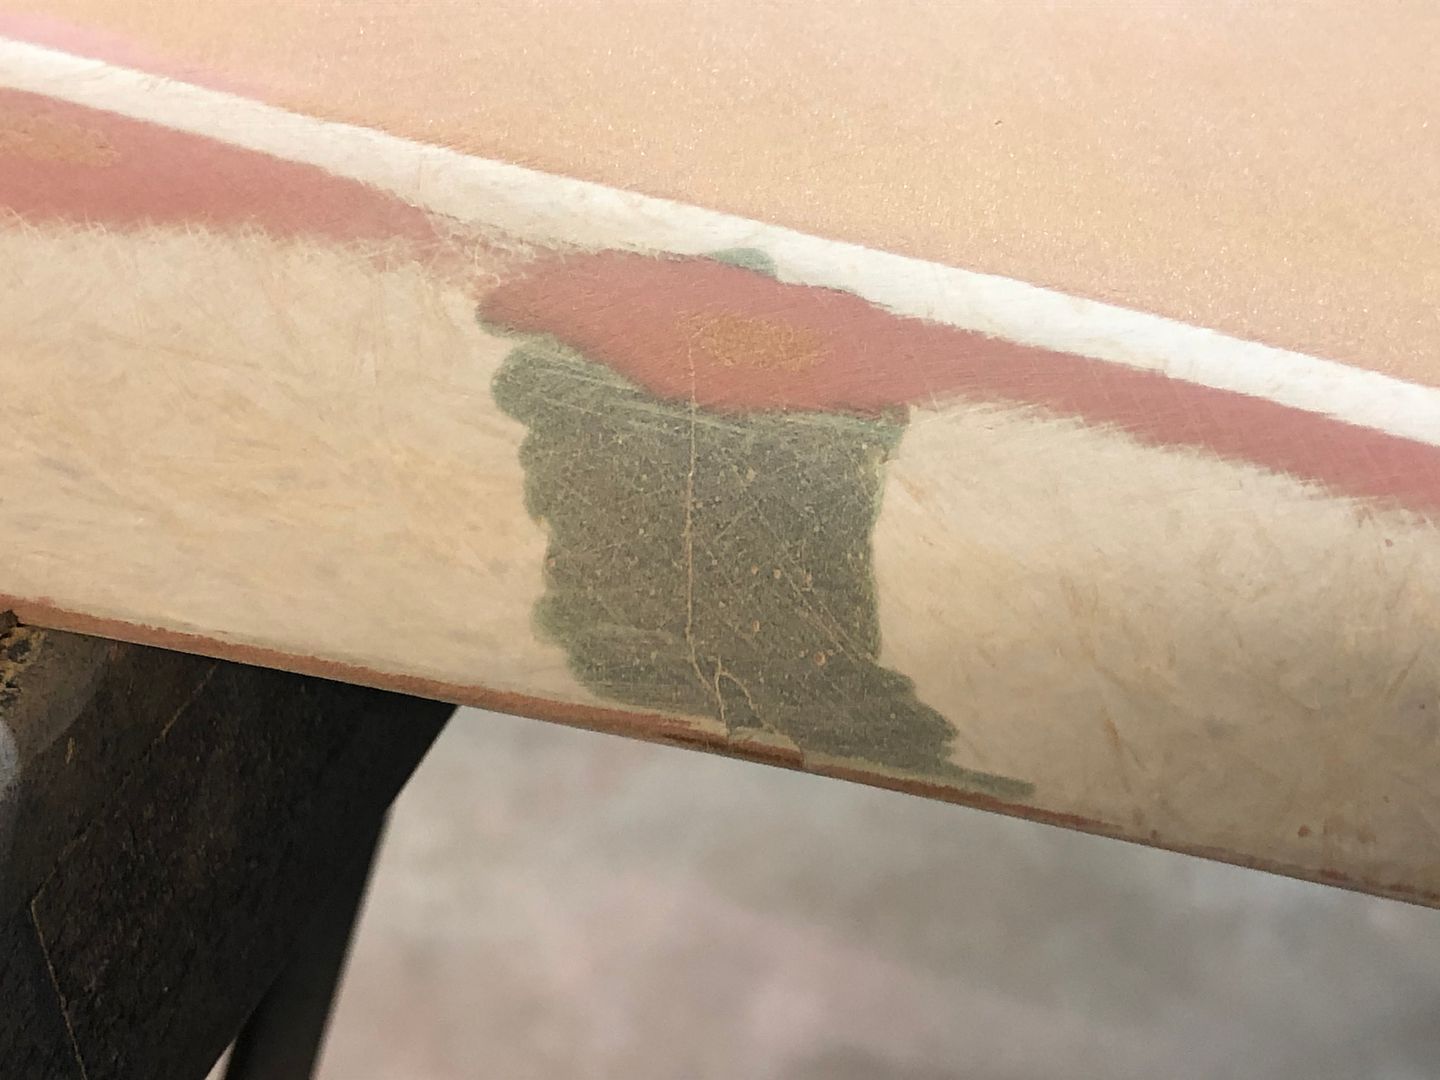
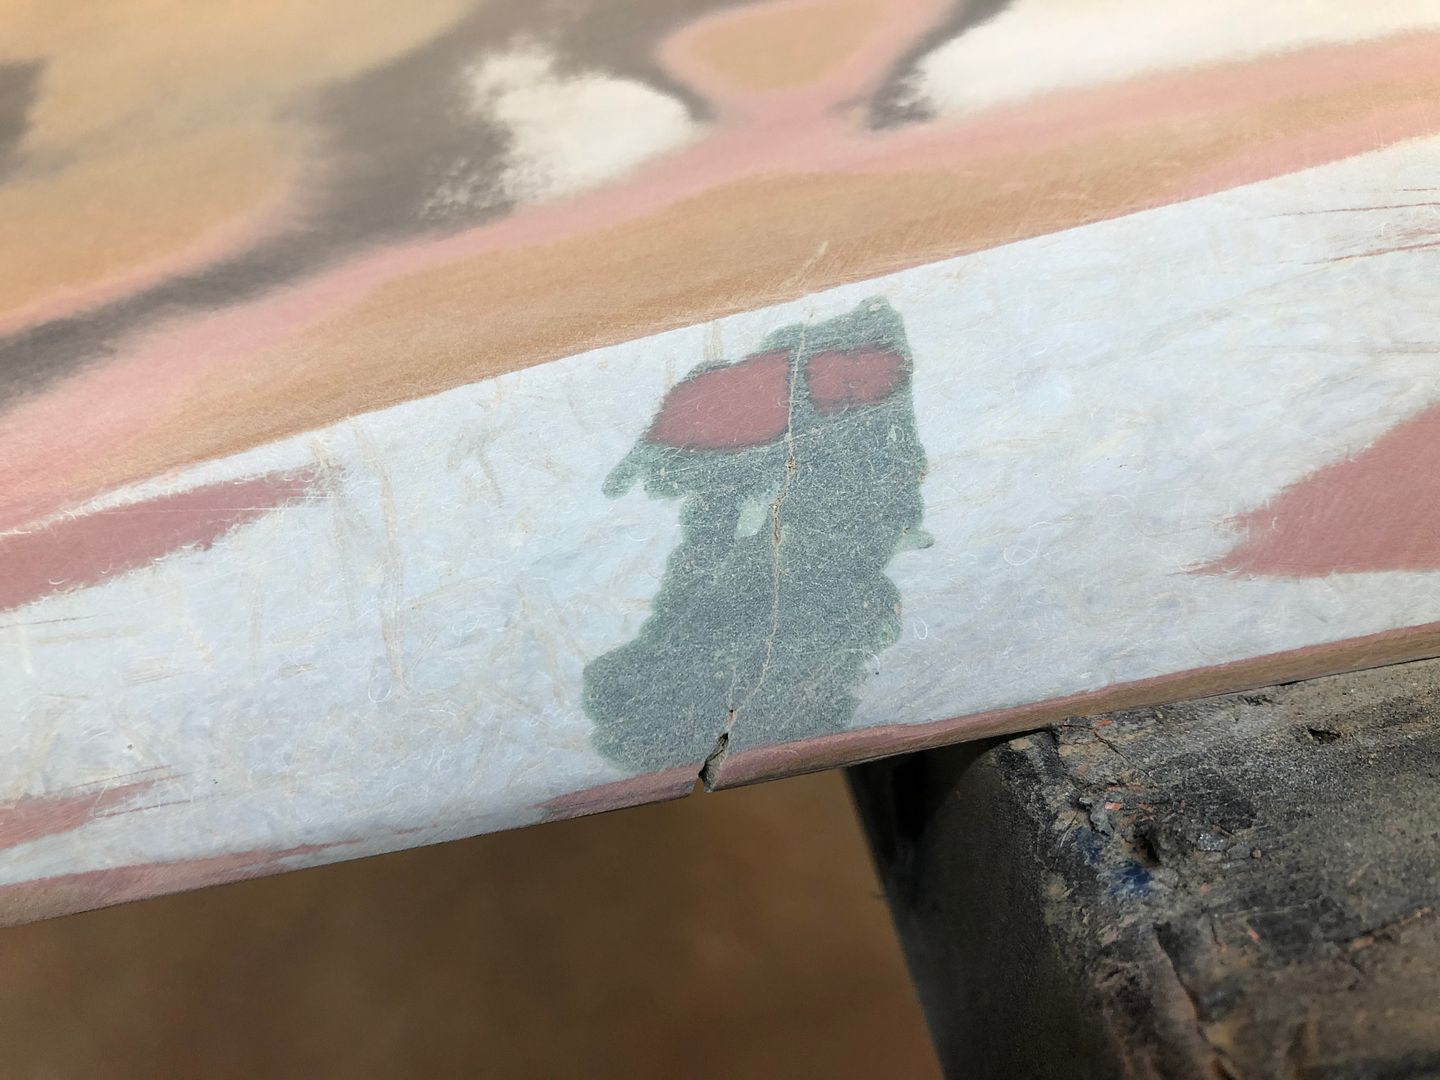
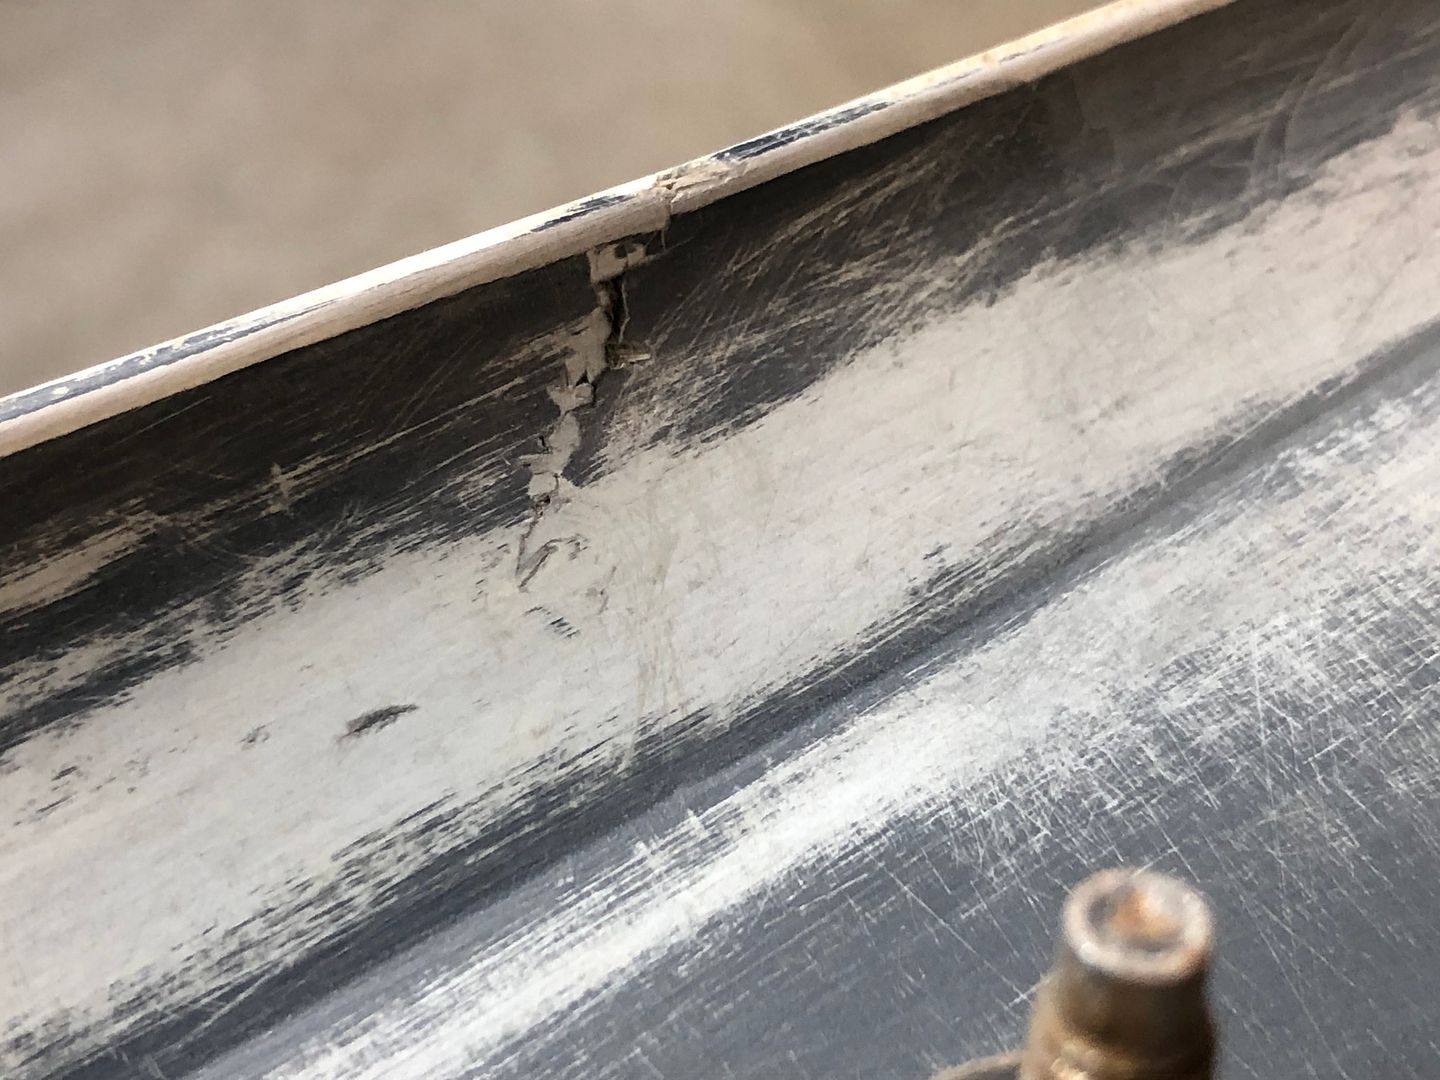
After blocking down the reverse cowl, I noted a small crack in the fibreglass on both sides. Not devastating but something that needs to be corrected before painting.
What would be the easiest way to fix this? Does this required a full-on fibreglass repair? Can I use any other kind of filler? It does not really look like I need glass fibre or barely any resin.
Thoughts?
Outside:
https://s1337.photobucket.com/user/8...1lhhh.jpg.html
https://s1337.photobucket.com/user/8...rhecv.jpg.html
Inside:
https://s1337.photobucket.com/user/8...pxwnv.jpg.html
https://s1337.photobucket.com/user/8...ka8ik.jpg.html
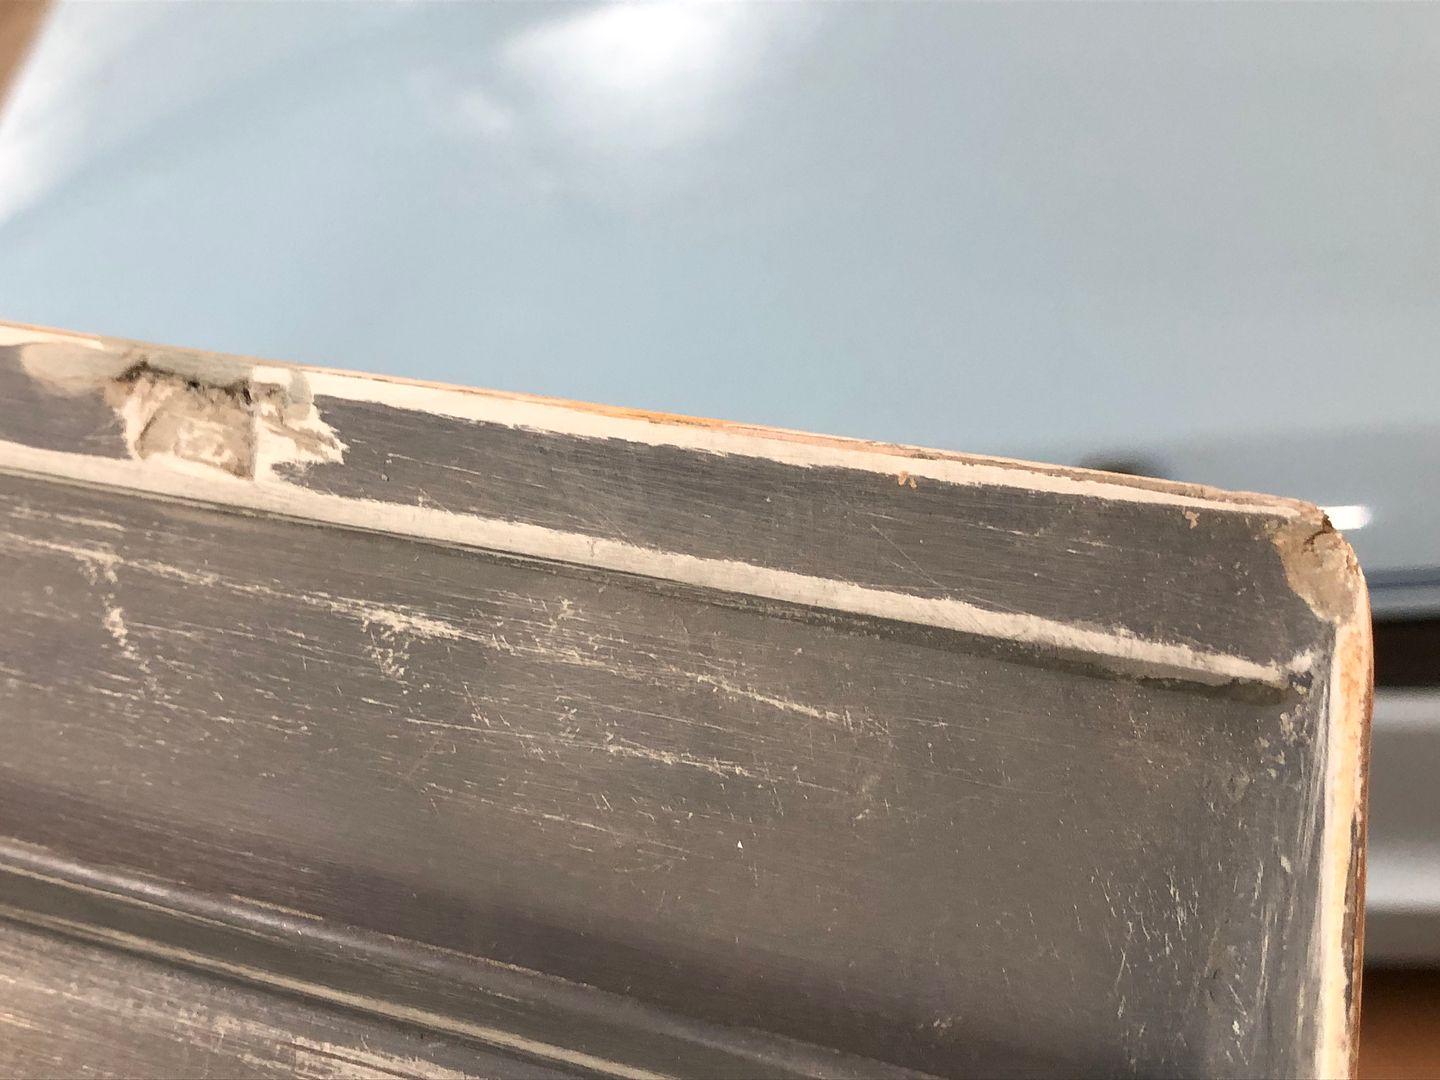
There is also minor damage or ships on the under side of the front lip. Not visible from the outside but may fill the voids if I can find an easy way to fix the other cracks.
https://s1337.photobucket.com/user/8...omjoz.jpg.html
I wonder if I should go so far as to prepping and painting the original hood this time. I shouldn't ever need it but when in Rome...
 Posting Permissions

 Reply With Quote
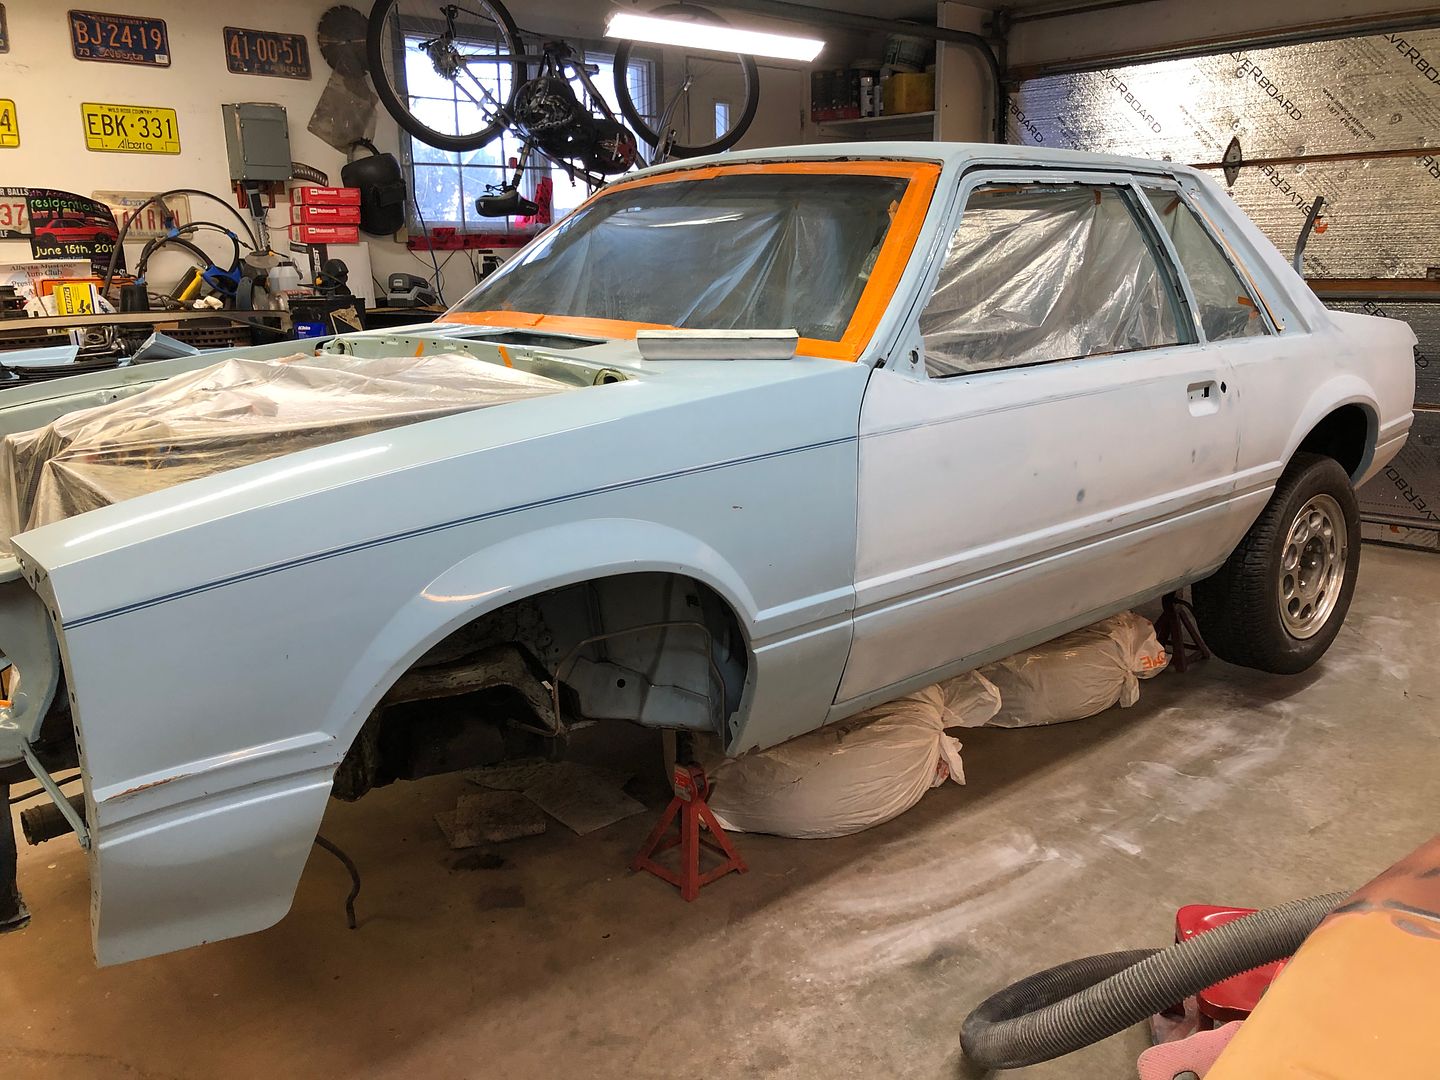


Connect With Us