
Can you provide more info. on the fiberglass bumper please


Can you provide more info. on the fiberglass bumper please

There are a couple of different F/Z groups on Facebook ("FORD~Fairmont and Zephyrs 78-83 Classifieds", for instance). If you join one of those groups and look for a guy named Robert Samuel Walker, he's the one making/selling them. I don't know that he has any presence (website or whatever) off of FB. He's charging $375 shipped.Originally Posted by Boxtop78

Patrick Olsen, Thank You
I should have my fiberglass front bumper / valance this week. It'll be a while before I permanently mount it on the car, but I'll at least do a mock-up in the near future and post up some pics. I've been thinking of my paint options. What I've kind of been leaning towards is painting the upper "bumper" portion of the fiberglass part with "chrome" rattle can paint, then the lower "valance" portion with flat black. That way it would kind of retain the stock look, plus that's something I can do myself pretty easily (since it would just be rattle can). Or, rather than doing "chrome" paint, I could just go with "aluminum", and either spray the rear bumper to match, or just hit it with a Scotchbrite pad to dull the polished aluminum.
Anyway, that's all something I'll worry about later...
For now, in anticipation of the fiberglass part arriving, I pulled the front bumper off so I could weigh it. Total weight on my postal scale was 39lb 6oz. That's a stock bumper with the bumperettes + the shock absorbers + all the mounting bolts. I think the fiberglass piece is supposed to ~10#, plus whatever I end up coming up with to mount it - should be a nice weight savings, all the way on the nose on the car, so a very good place to lose weight.
I did have to fight with the bumper shock absorbers a bit to remove them. On the rear, you remove the bolts that hold the shock absorbers in the frame rail (1 bolt on each side), and the whole assembly (bumper + shock absorbers) slides straight out. I assumed the front was the same, so I removed the two bolts that hold the shock absorbers into the frame rails and tried to pull the bumper off. No joy. I could move it a little bit on each side, but it wouldn't come off. Hmmm...I removed the 3 bolts on each side that hold the bumper to the shock absorbers and removed the bumper, leaving just the shock absorbers sticking out of the frame rails. As I was wiggling them and pulling on them and twisting them to try to get them out, I discovered that they have to twist 90deg, and then they slide right out. Aha!

'89 GT convertible - not a four-eye
'82 Zephyr Z7 - future track car
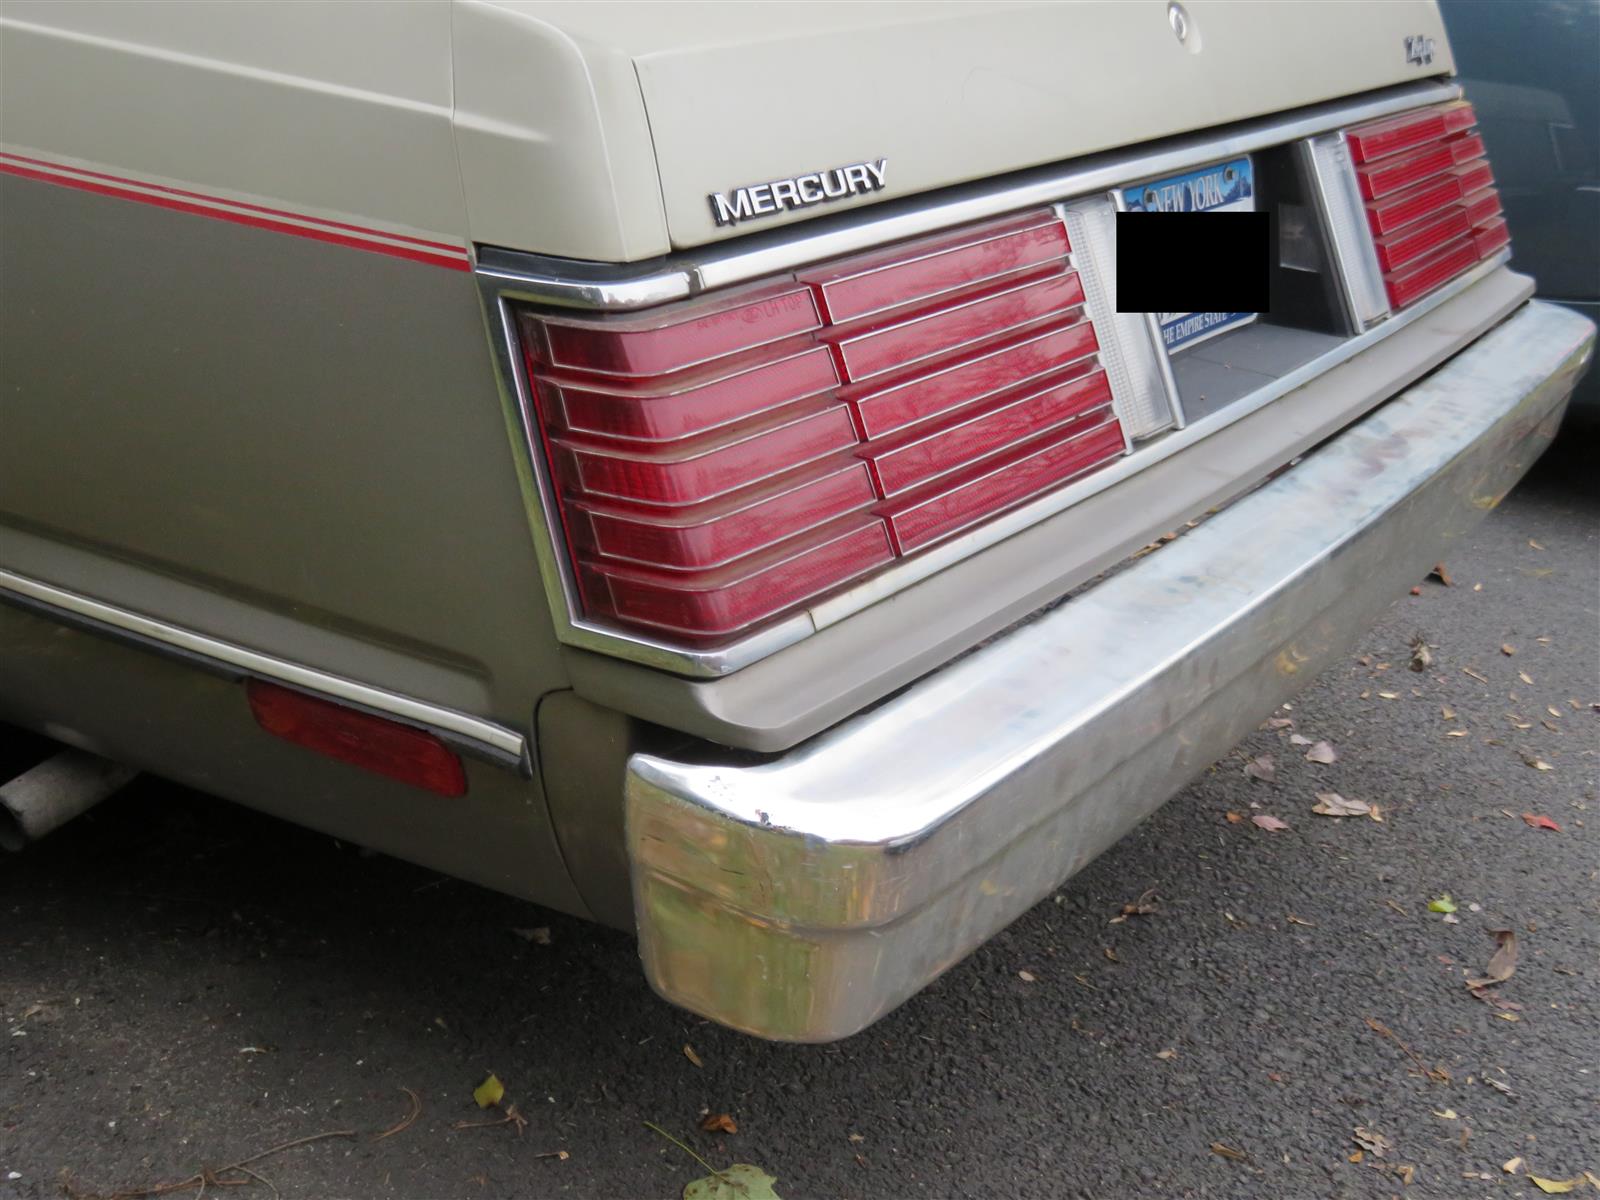
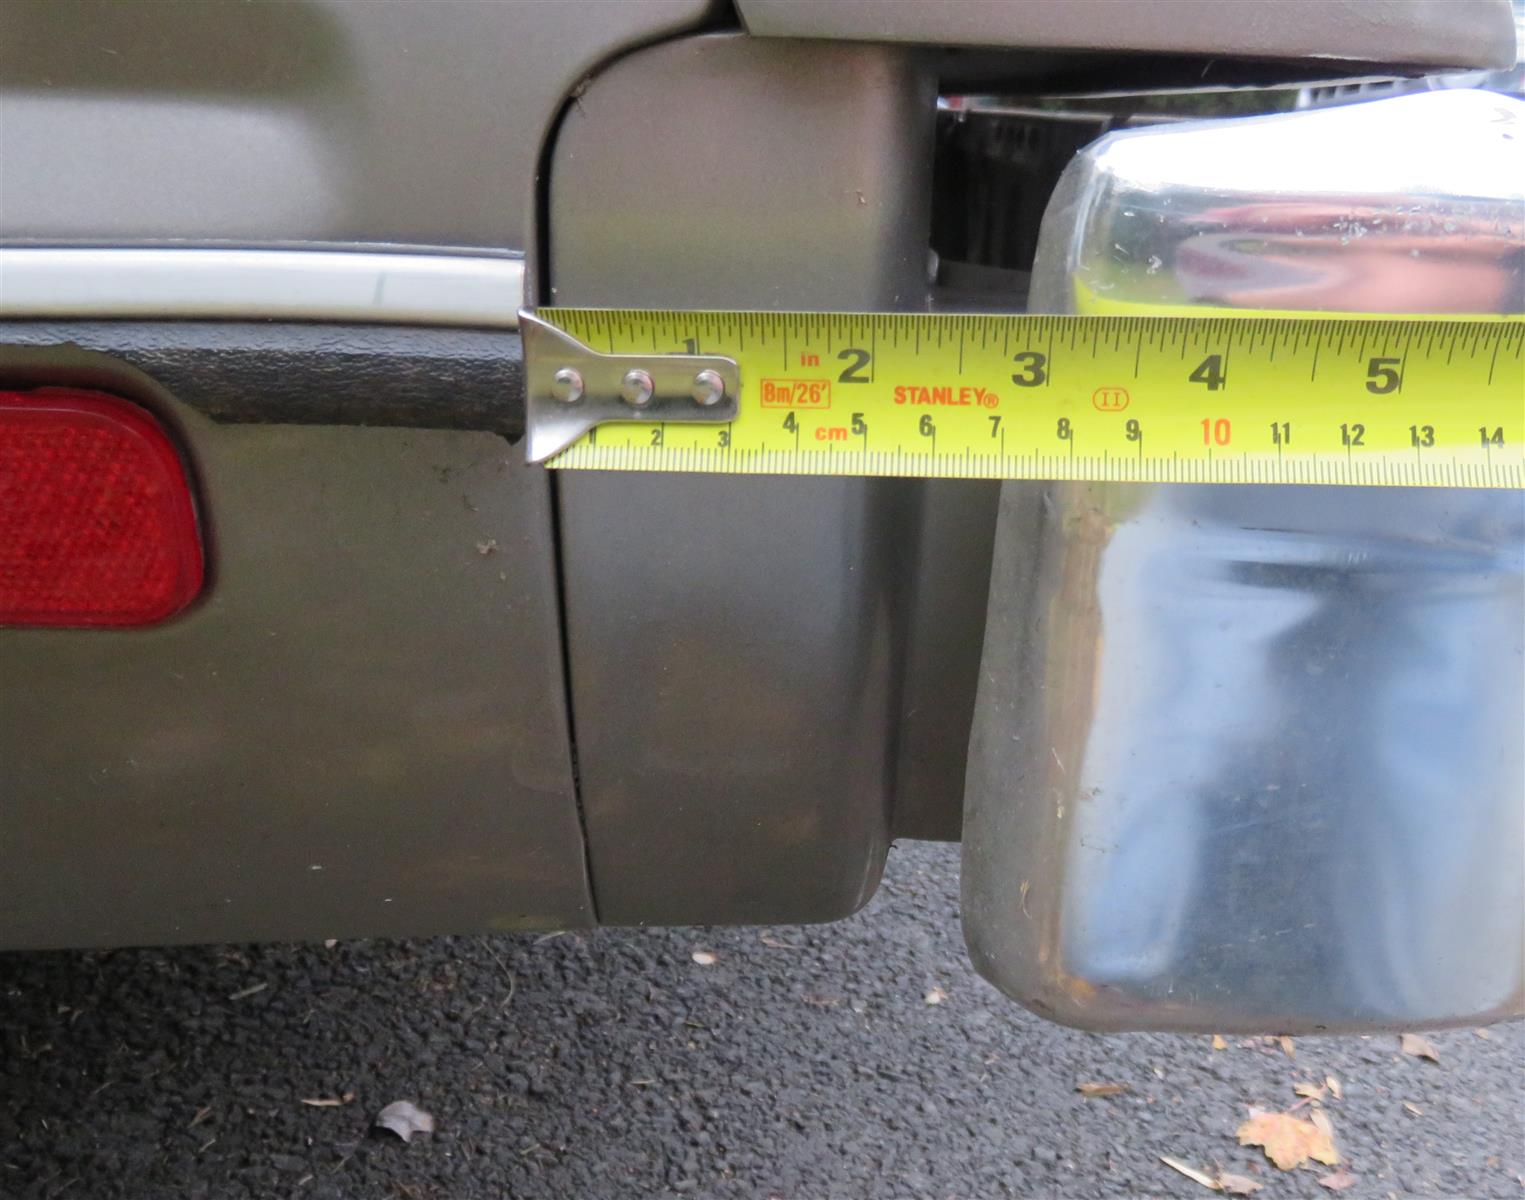
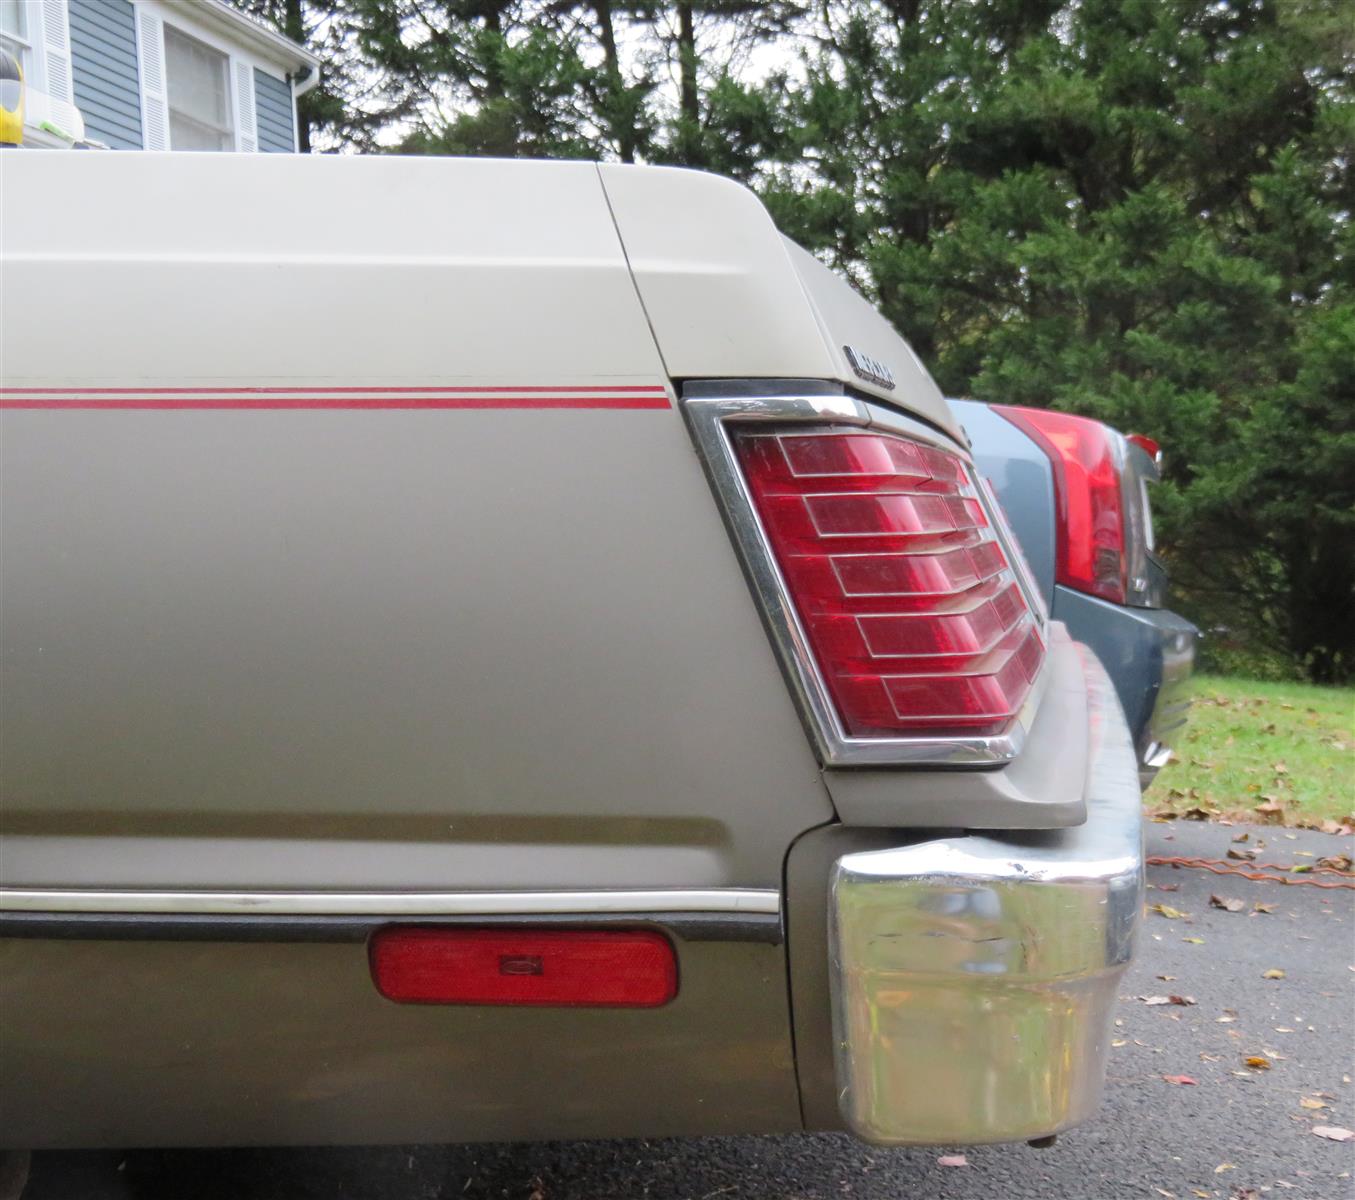
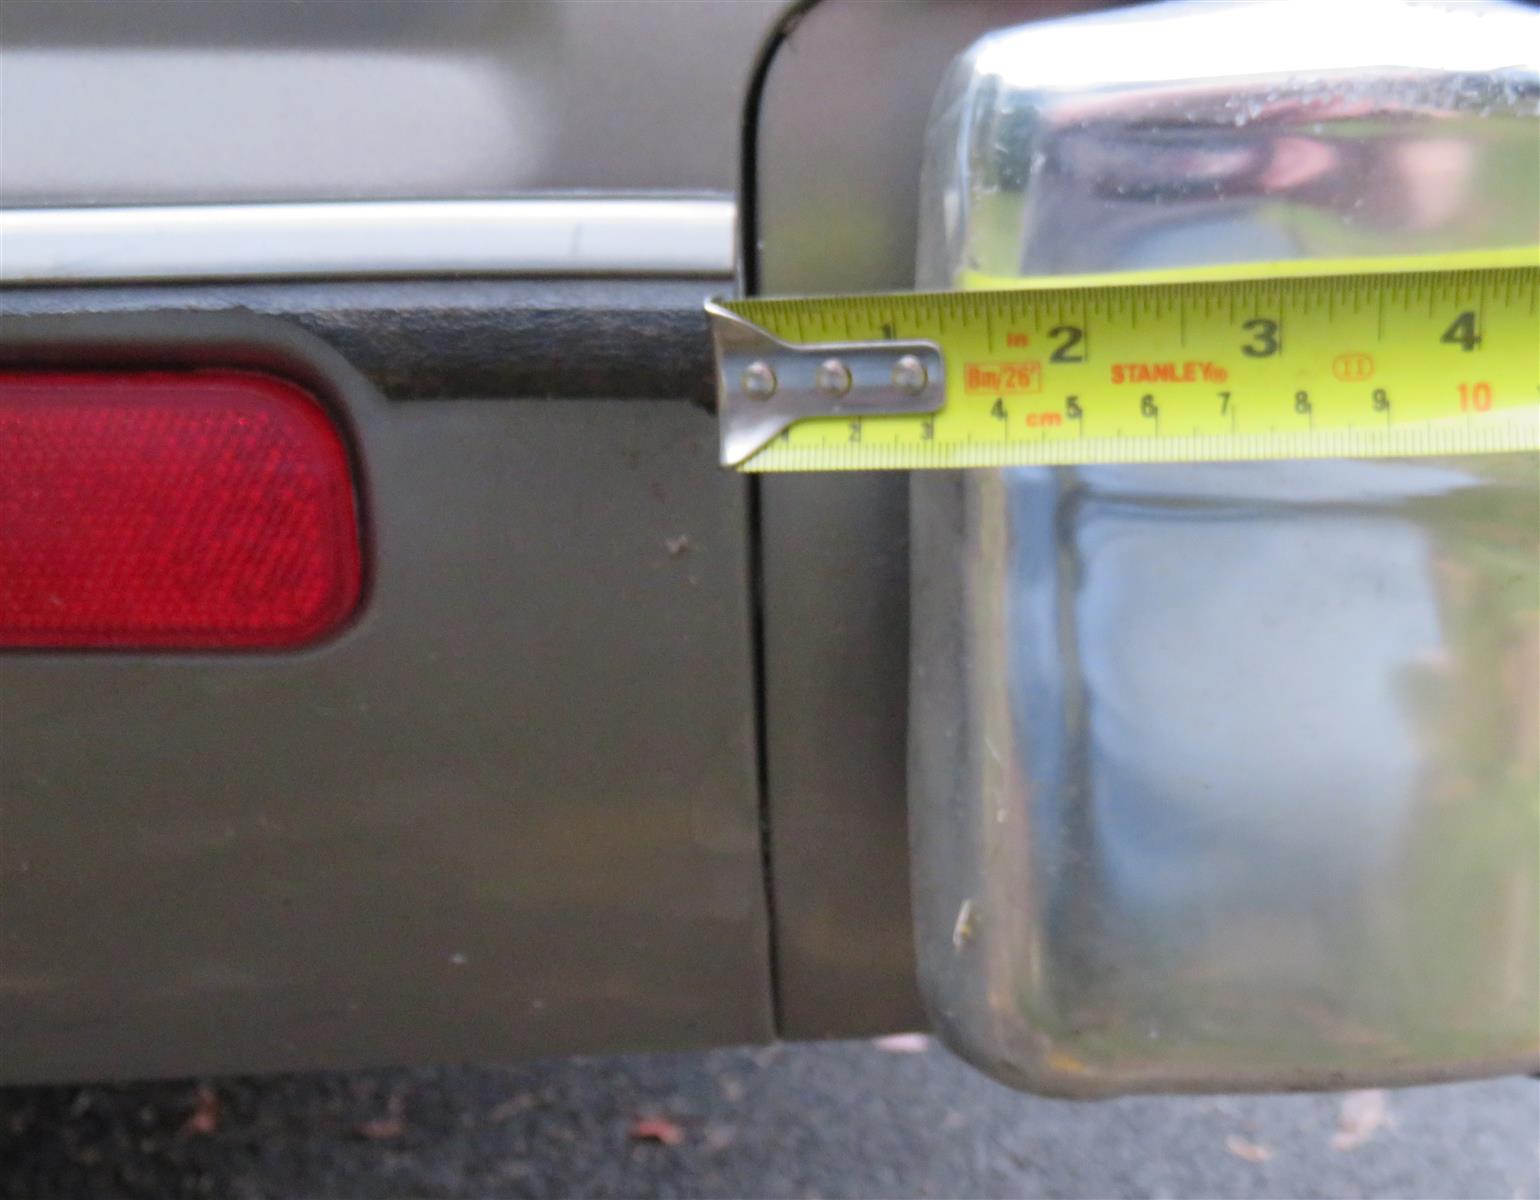
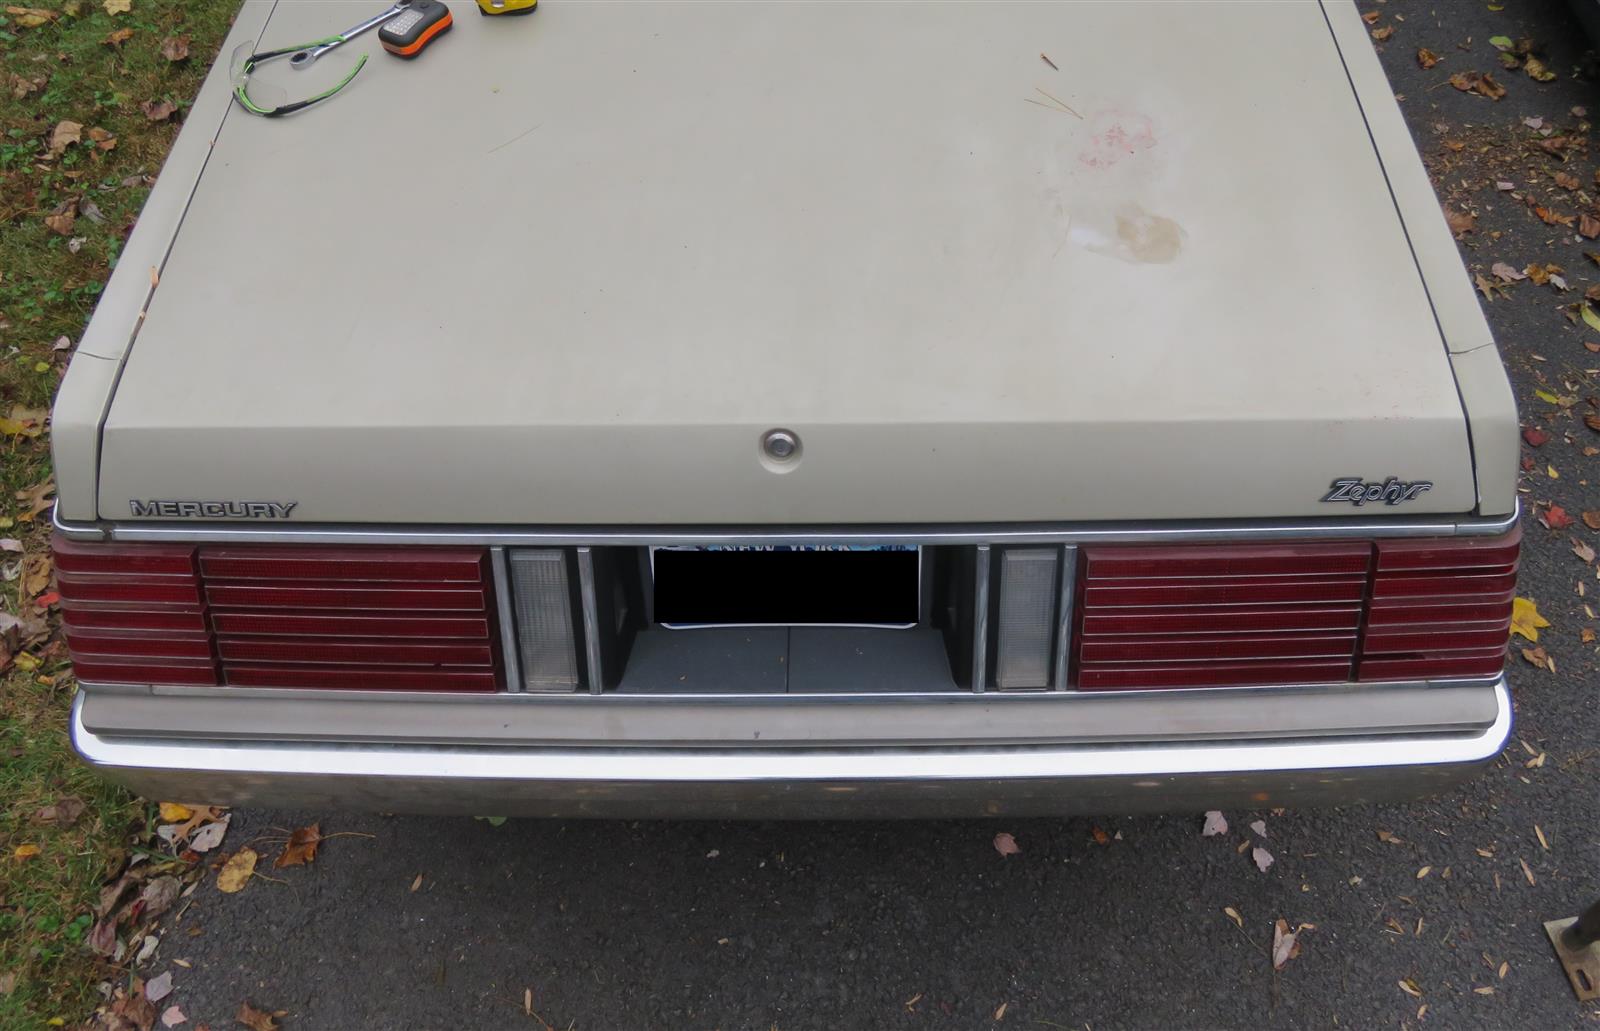
I installed the rear bumper with the stock shocks to get some "before" pics, then took it off, put the shorter front shock absorbers on there, and then reinstalled it for some "after" pics. I gotta say, the 2" tuck looks pretty damn good - I'm not sure I'll bother trying to tuck it another inch (I had originally thought it needed to be tucked in 3-3.5" or so).
Before:
After:
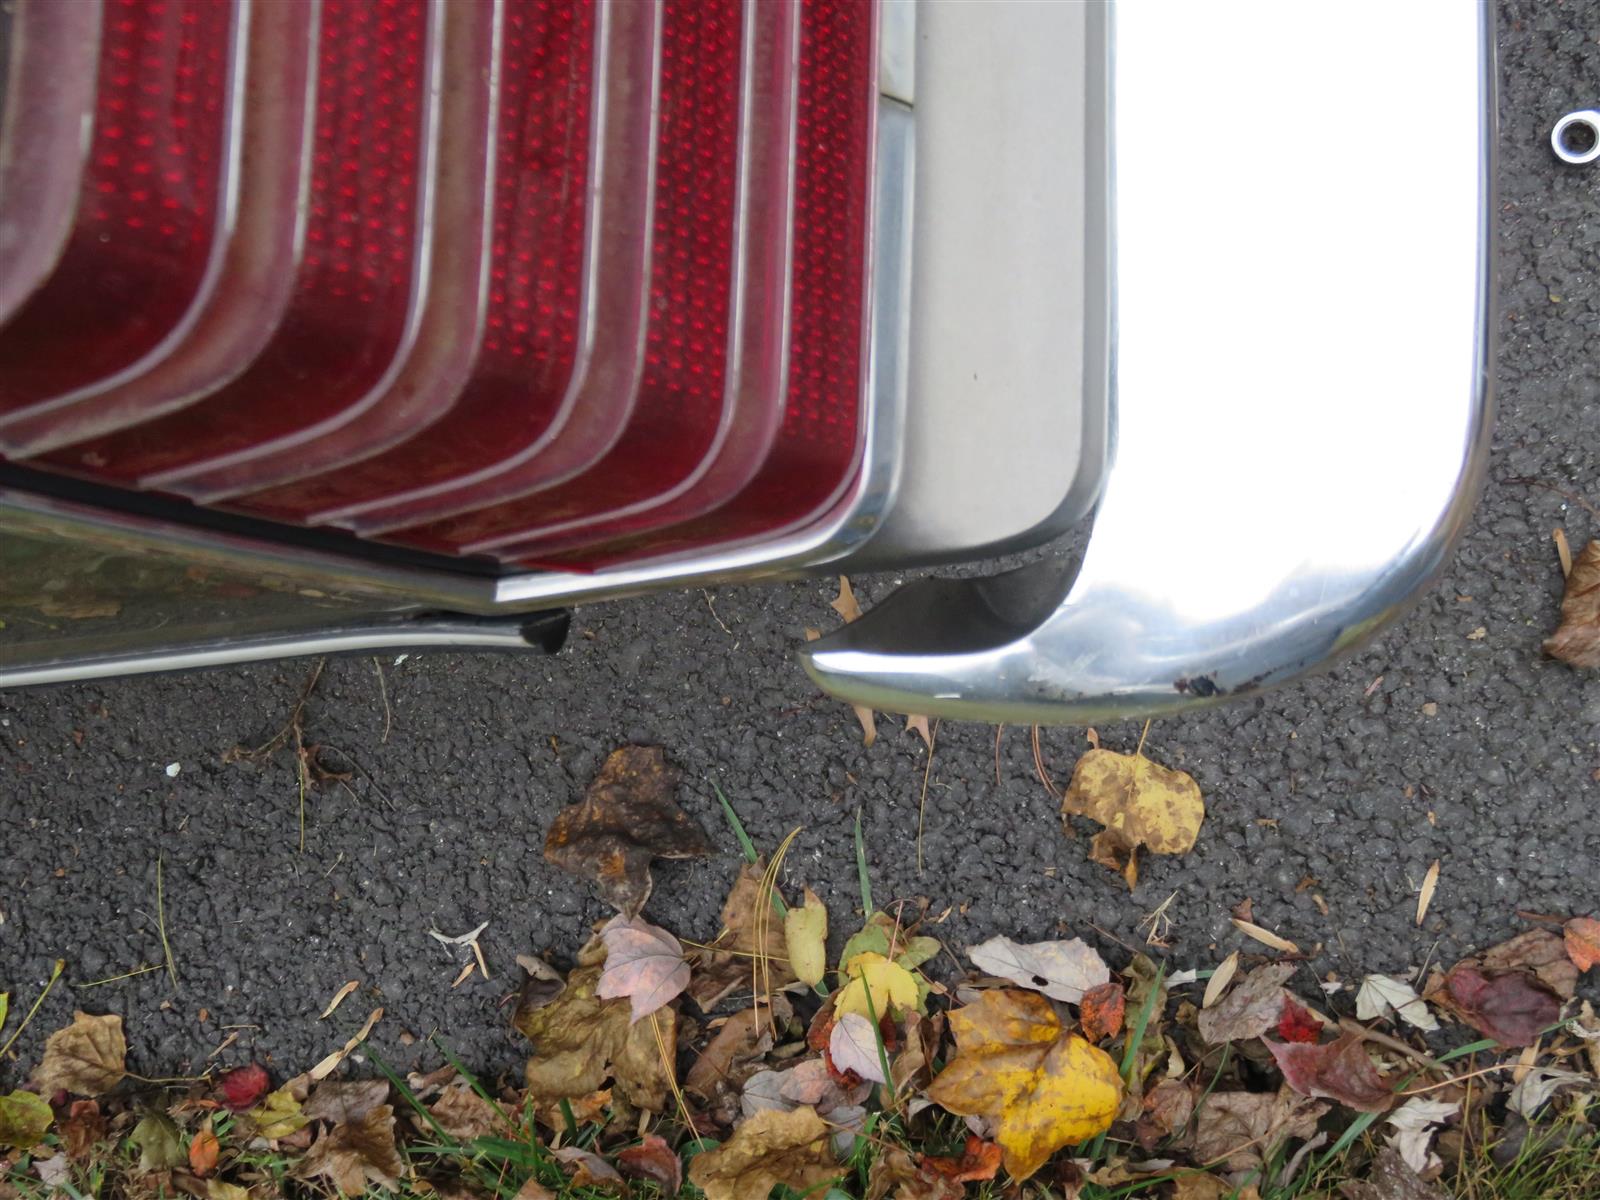
I think I'll call it good for now. I'll have to take the bumper back off at some point to remove the steel reinforcements, and maybe some day I'll see about narrowing the bumper a little bit, but that's not likely to happen any time soon.
'89 GT convertible - not a four-eye
'82 Zephyr Z7 - future track car


Id say thats just about perfect
Sent from my iPhone using Tapatalk

Lookin' good!
Mike
My '78 Fairmont build - http://vb.foureyedpride.com/showthre...539-78-Big-Red
Love the "after" pic.
After seeing people here and on FB post about finding their build sheets under the passenger front seat, this evening after doing some leaf raking I real quick unbolted my passenger seat to see what I'd find. Sho'nuff, there was the build sheet. Some of the pics I've seen showed sheets that were fully tucked under the springs and thus were in bad shape after all the years. Mine was just slipped partially under 1 row of springs, so it's actually in good shape.
Anyone know where to find a "decoder"? I saw that FEP has a "Production Info and Decoding" page for Mustangs & Capris, but that doesn't include build sheets, and doesn't include F/Zs.
'89 GT convertible - not a four-eye
'82 Zephyr Z7 - future track car
Met up with BBCFORD today to transfer ownership of the front seats from my Zephyr so he can use them in his boxy 'Bird. Look forward to seeing what he's able to do with them.
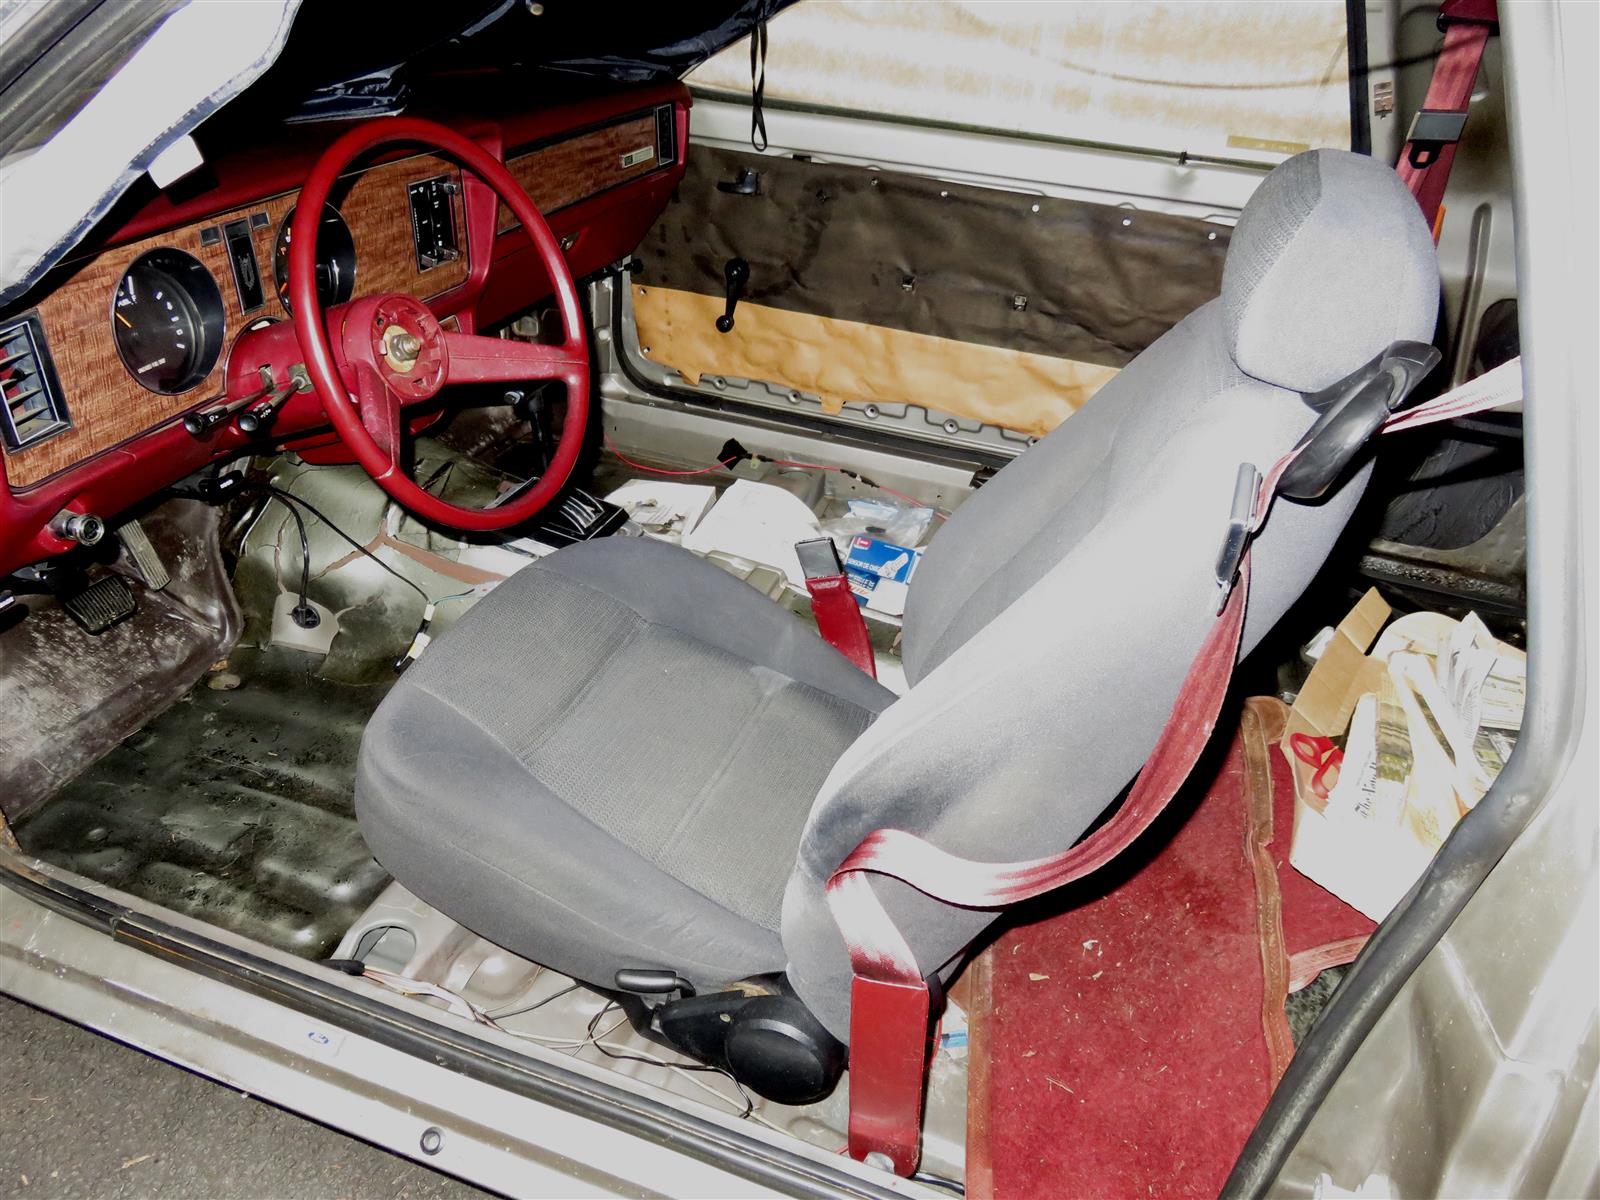
We met at a junkyard, so I could kill 2 birds with 1 stone - hand over the seats to him, and then go grab a temporary replacement in the junkyard. I pulled a front seat out of a early '00s Mustang - conveniently, someone had already unbolted the thing, so it was ready to go! I discovered that (apparently) all the SN95s had a power driver seat. There were 8 SN95s in the yard, covering the full span ('94-04), all V6s, and all had a power driver seat. So, I'll have to hook up some power to the seat so I can move it into position - as it is now, it's basically all the way forward, which ain't gonna work.
Eventually (hopefully at some point this year) the car will be getting racing seats, but in the meantime, I need something in the car so I can move it around.
It was great to meet up and grab those seats off you yesterday... even the correct color and all. Defenitly in nice condition for their age. I can't wait to get these swapped in. Definitely by spring.
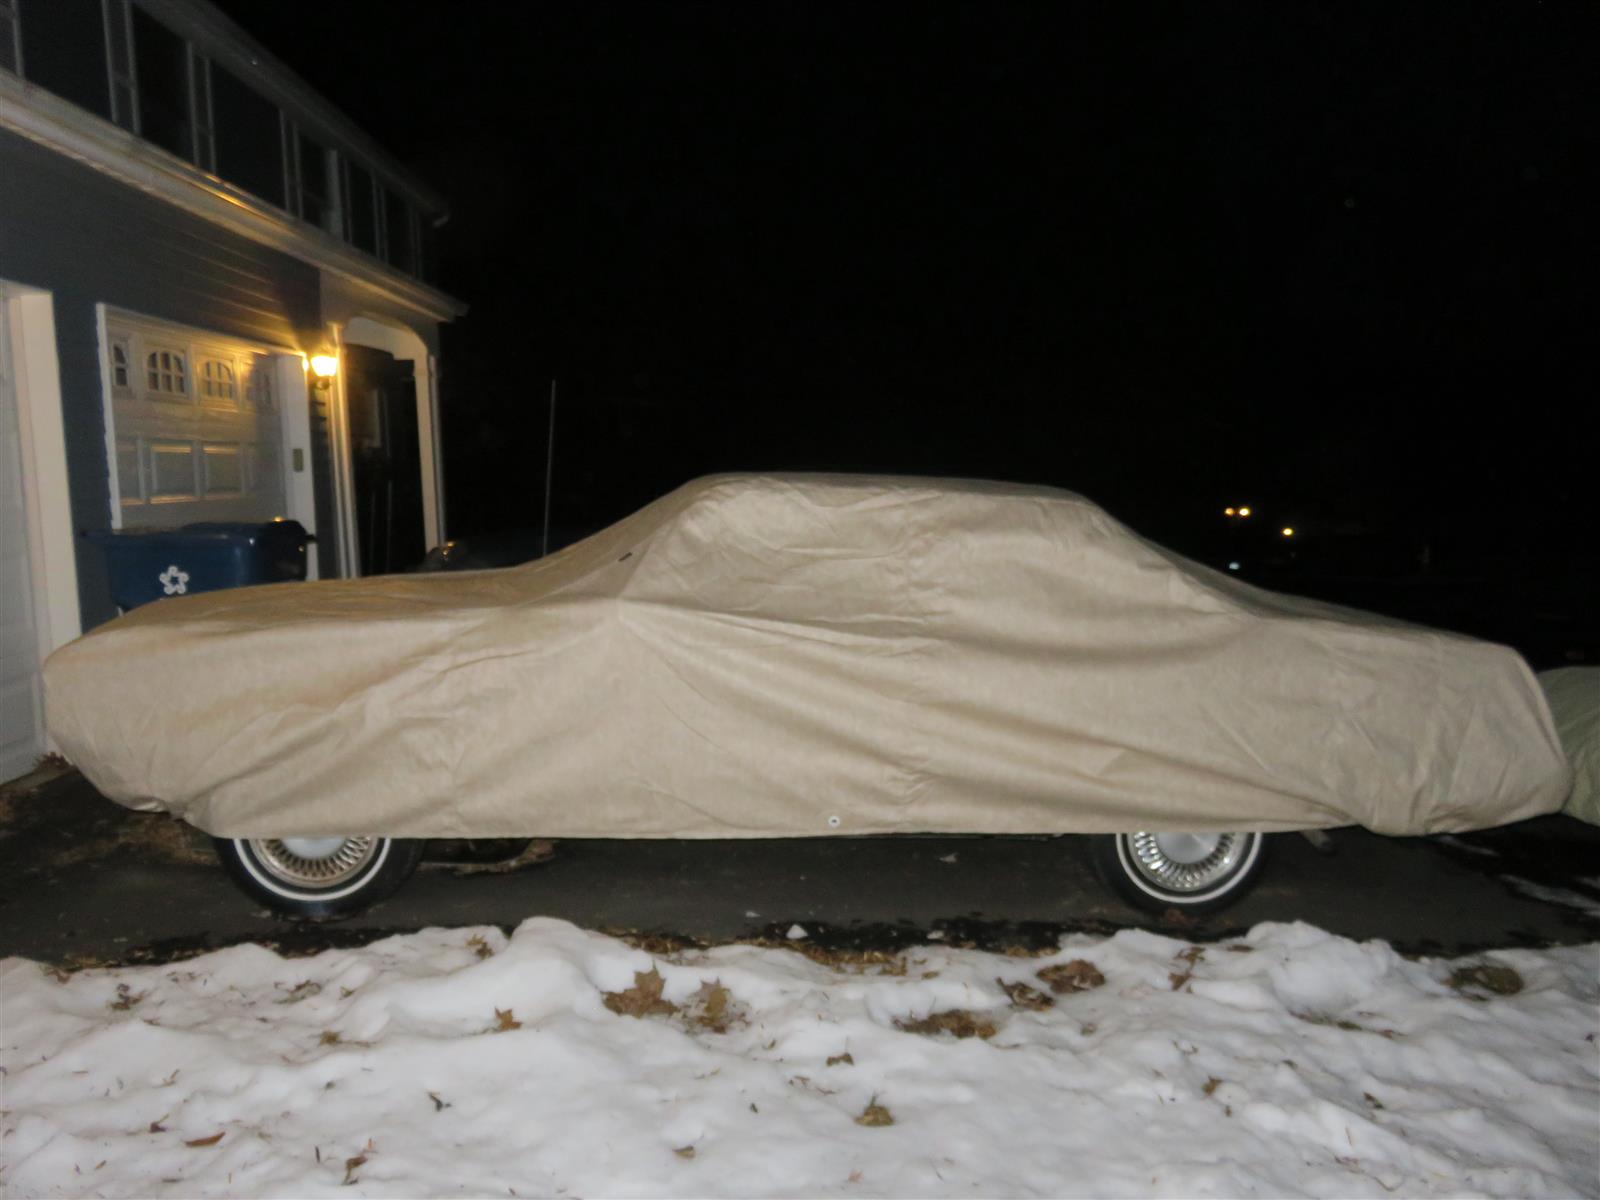
Got a new cover to put on the car, since it sits outside in the driveway all the time. (Well, at least until it becomes the primary project car.) I had ordered one from Seal Skin Covers back before the holidays, but was not impressed by what I got - heavy, didn't look like the same fabric pattern & color from their website, didn't come with the free lock & cable kit that was supposed to be included, and was a "generic" rather than a "fitted" cover that turned out to be way too loose for my liking.
So, back that went.
I ended up with a Covercraft, just the basic / low end Block-It fabric. I initially priced it out on Covercraft's own website, but then found I could get it through Autogeek.com cheaper, plus they had a 15% off deal for 1st time customers. Score! I was also ordering a new cover for my '89 GT convertible; between the two, I saved almost 30% by ordering from Autogeek rather than direct from Covercraft. Initial estimated ship date was Feb 9th - almost a month from the order date - but it ended up only taking a couple weeks to my door. Covercraft's pattern for the Z7/Futura does not have mirror pockets, which is the only complaint (but I knew that when I ordered it). Fitment is great, no worries about it blowing away. No front bumper on the car right now, we'll see how the fitment is once I have the fiberglass bumper/valance installed.
Put some new (cheap) tires on the 14" steel wheels, pretty much just for peace of mind. While I don't intend to drive on the 14" wheels much at all, I didn't feel comfortable on tires that were 17 or 18 years old. For a couple hundred bucks, I put some Hankook tires on there, 185/75-14s. They even have the whitewall stripes still, which isn't particularly common these days.
'89 GT convertible - not a four-eye
'82 Zephyr Z7 - future track car
Had the day off today, and after some rain in the morning it turned into a pretty nice day. So, after rotating the tires on the beater Subie, I decided to work on the Zephyr a bit. The main goal was to get power wired up to the Mustang seat I had grabbed at the junkyard last month; it was basically all the way forward on the rails, so I wouldn't have access to the front mounting bolts if I tried to install it, not to mention I wouldn't be able to fit in it!
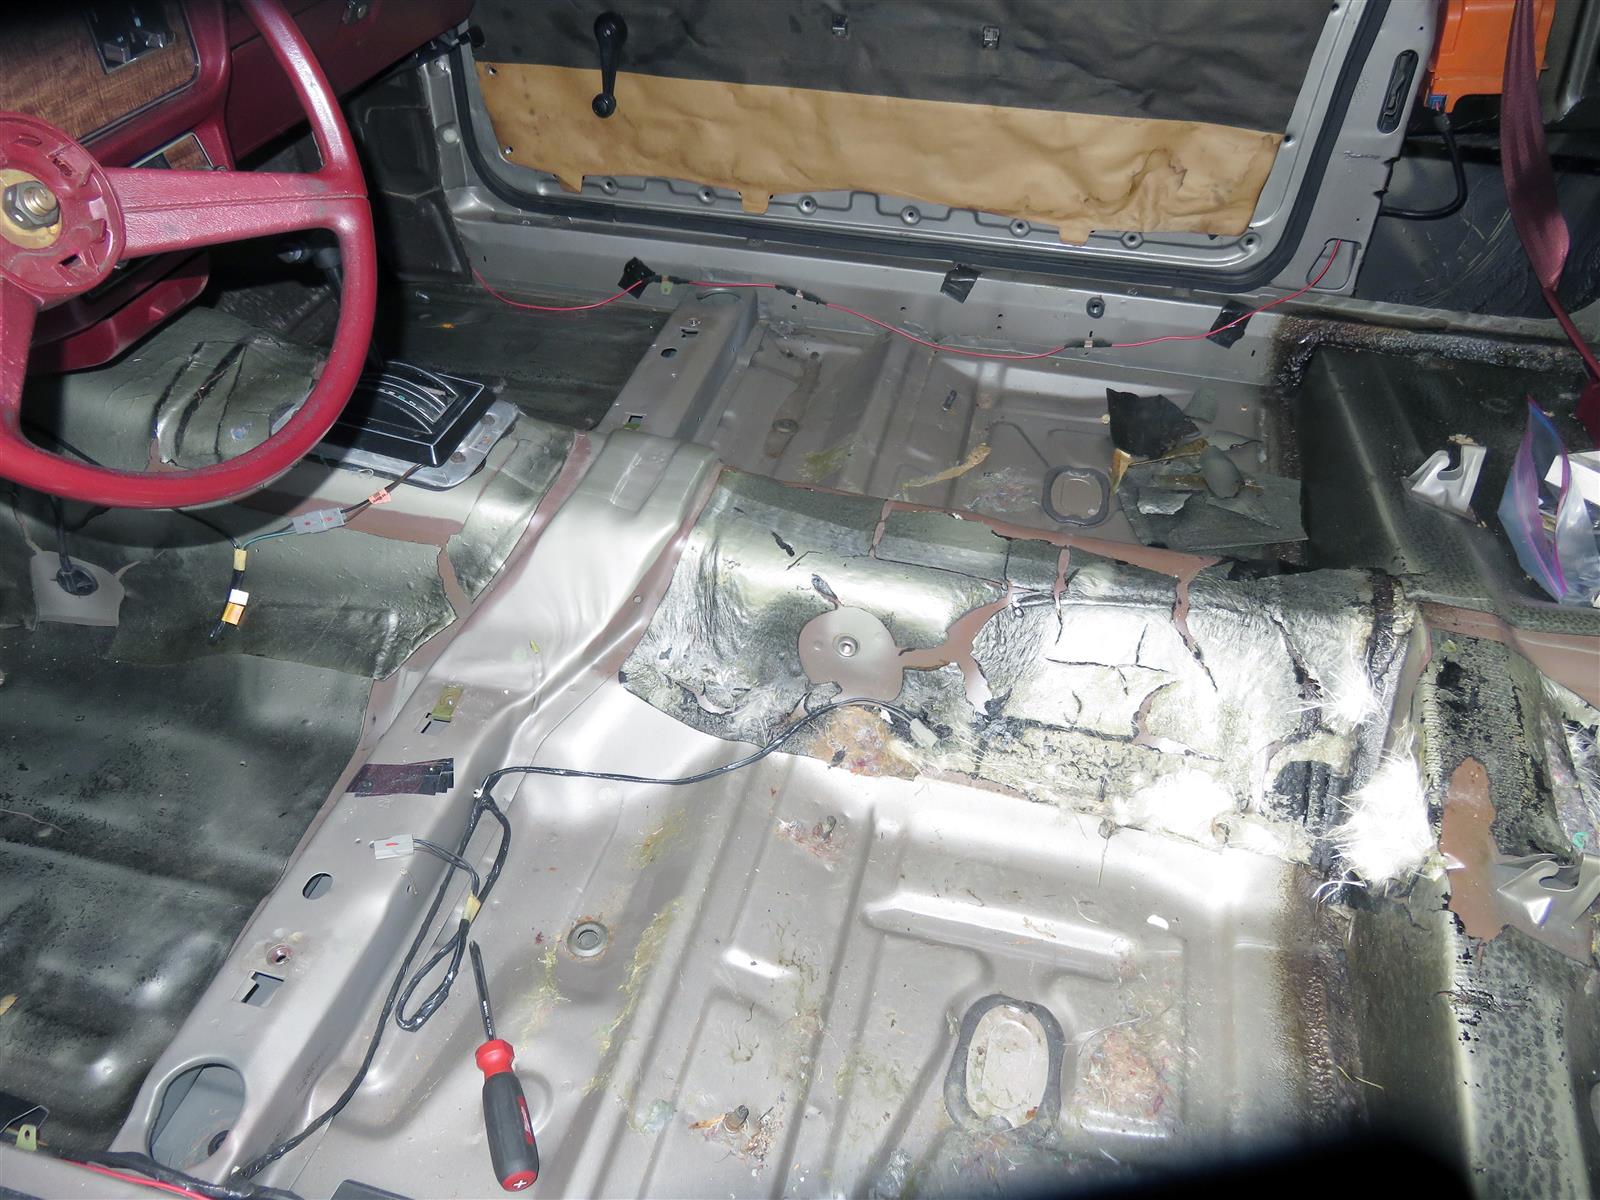
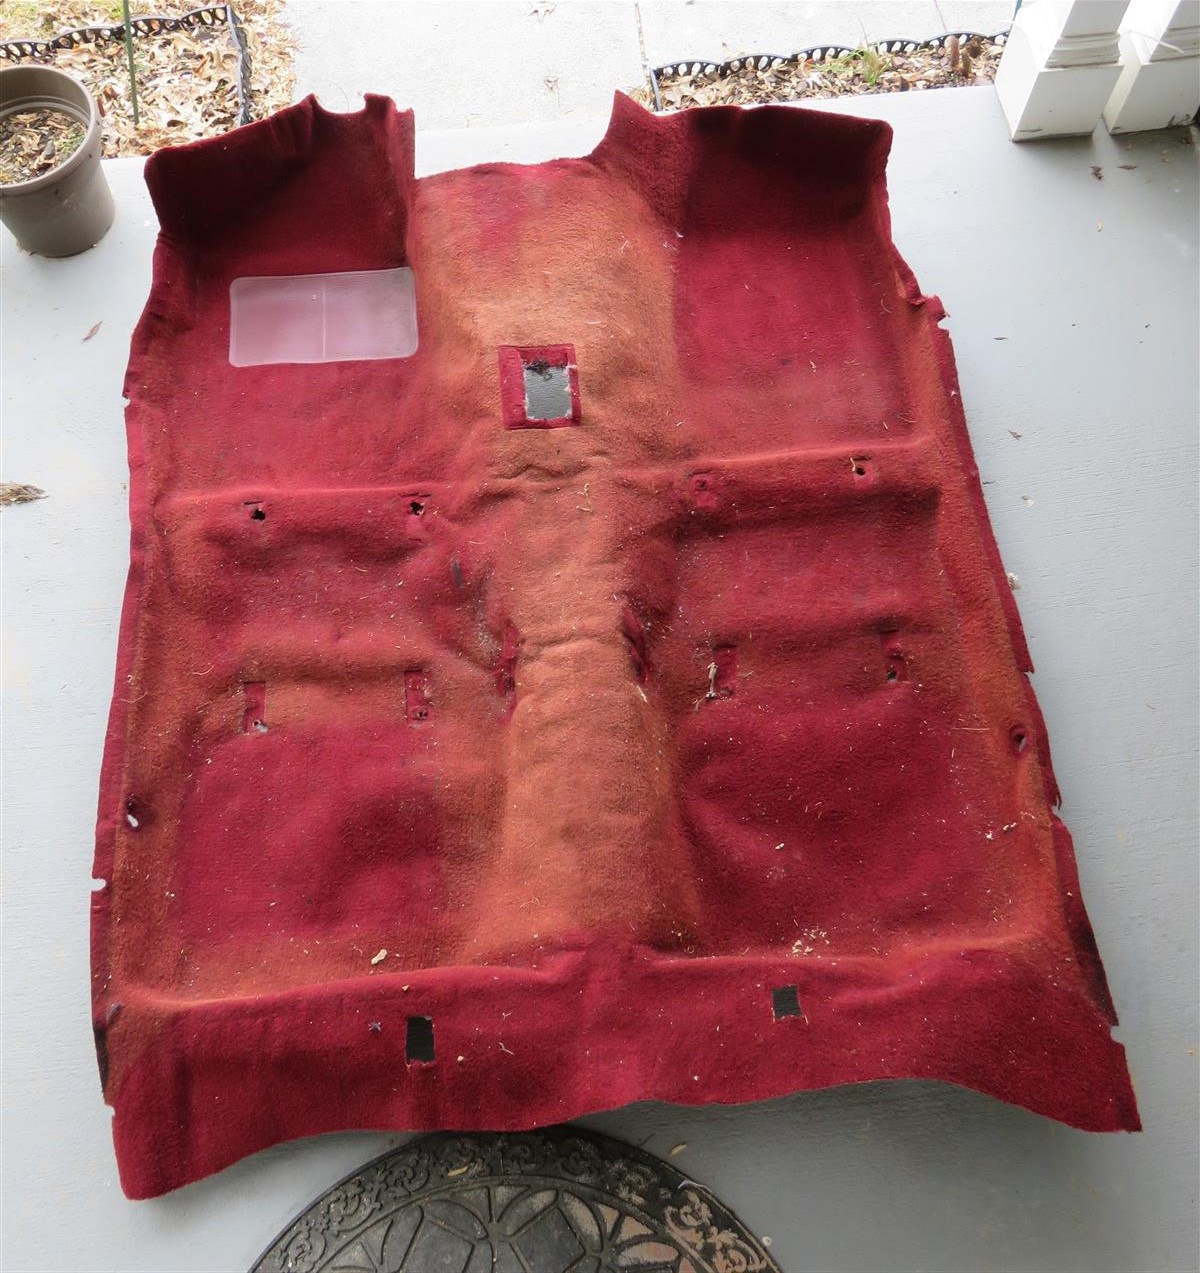
In support of doing that, I figured I'd go ahead and pull the carpet out, which would allow me to get power and ground from whatever wiring was hiding under there. Since all the seats were already out, pulling the carpet was pretty easy - just had to unbolt the seat belts and remove the 4 screws holding the shifter trim in place on the tranny tunnel. Once that was done I commenced to yanking the carpet up. I was surprised / amused to discover that the carpet was actually stapled to the rocker sills at the front and rear of the doors.
With that done, I found a wire with 12V on it (goes to the driver shoulder belt reel), and used the ground for the driver seat belt sensor. The junkyard seat had the wiring harness pigtail attached, so I spliced to that and was good to go. Ran the seat back so that I could get access to the front mounting holes, dropped it into position and bolted it down.
Oh, and while I was doing all of this I also started the car up and let it idle for a bit. Hasn't been started in months. It cranked for about 15 or 20sec before it fired, but I was pretty impressed that it came to life that easily.

Pat,
You really lucked out that your car has the rear brake line running down the bottom of the car. This will make it easy to install an adjustable proportioning valve in the brake line union.
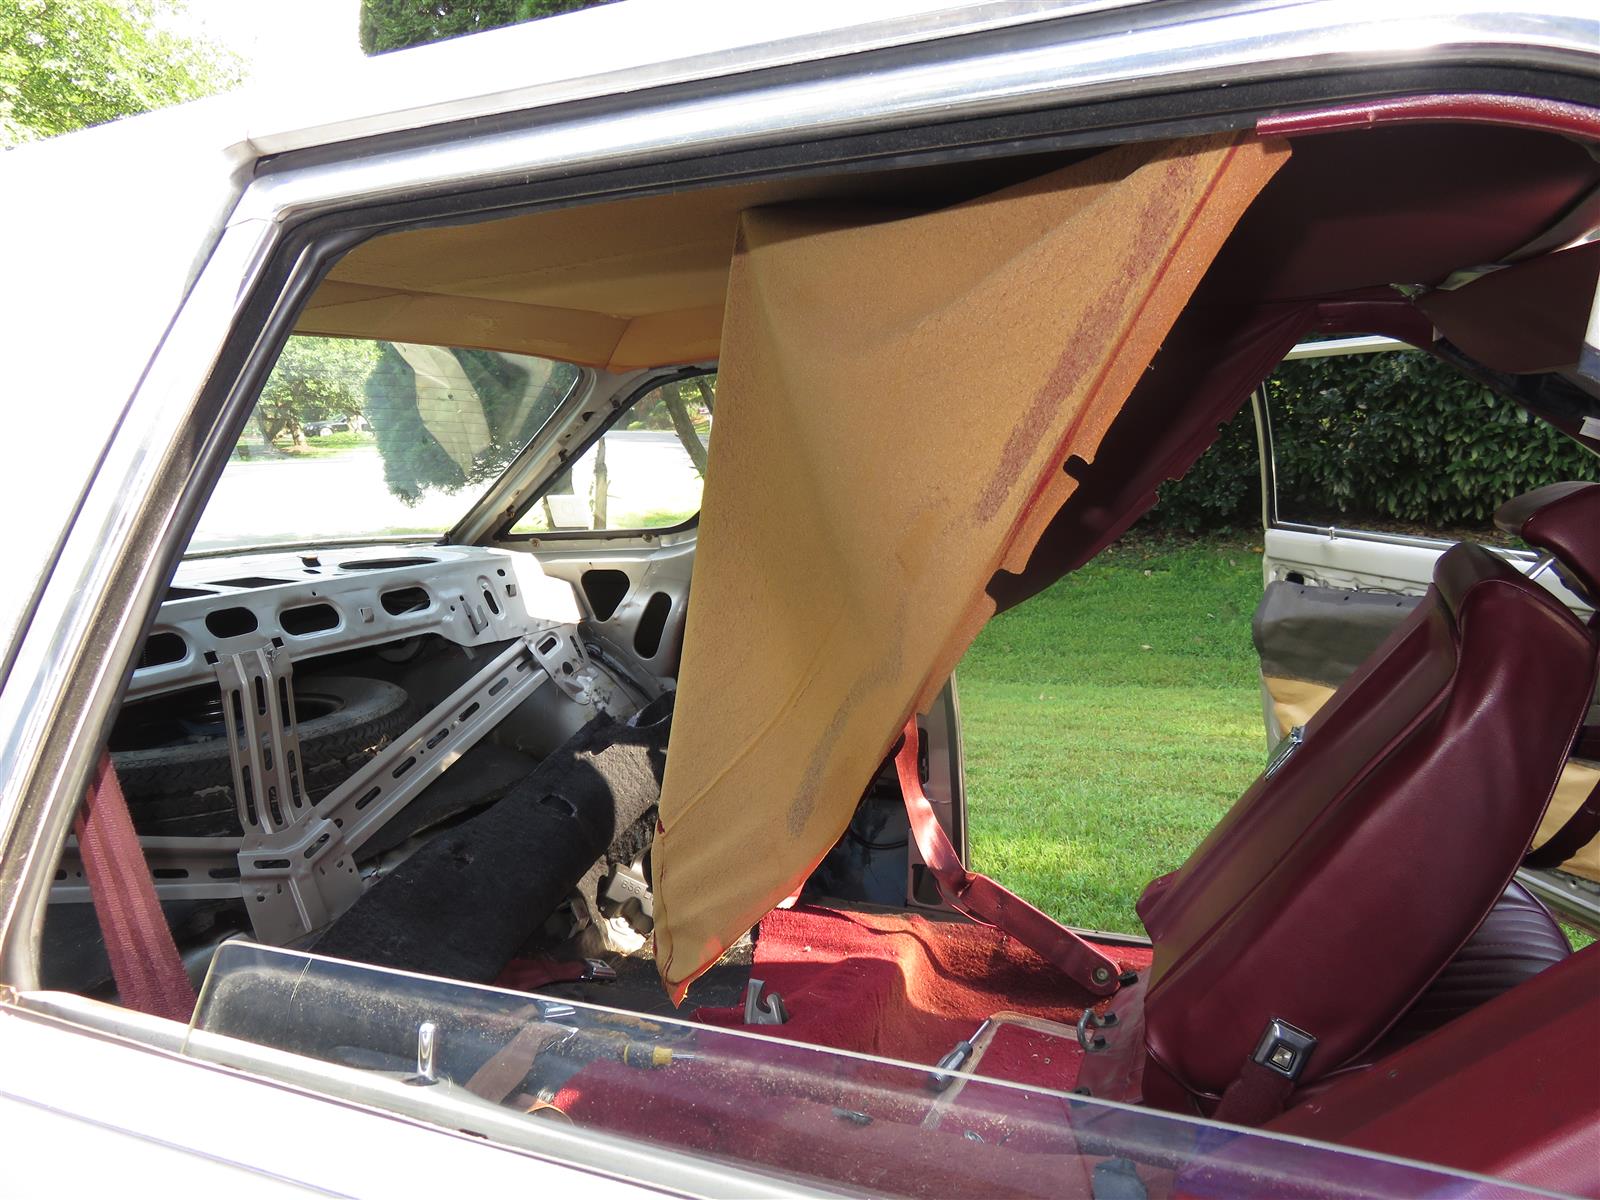
The braces which are spot welded in the plane of the rear seat cushion, all tend to break. The spot welds tear. I would add rivets or bolts to clamp them in better. Once you get around to it, this is a very good place to install a flat bulkhead to stiffen up the chassis. Attach the bulkhead to all of the areas around its perimeter.
Jack Hidley
Maximum Motorsports Tech Support


Nice work! The floors look really clean and in great shape.
I just ran across this while replacing the floor pan in my 82 RS. I don't recall that on other Foxes, I have owned, but then again the memory is fading as the years go by. Now I just have to grind down the rust staples.
Trey
"I Don't build it hoping for your approval! I built it because it meets mine!"
"I've spent most of my money on Mustangs, racing, and women... the rest I just wasted."
Mustangs Past: Too many to remember!
Current Mustangs:
1969 Mach 1
1979 Pace Car now 5.0/5 speed
1982 GT Stalled RestoModification
1984 SVO Still Waiting Restoration
1986 GT Under going Wide Body Conversion Currently
Current Capris:
1981 Capri Roller
1981 Capri Black Magic Roller Basket Case
1982 Capri RS 5.0/4spd T-top Full Restoration Stalled in TX
1984 Capri RS T-top Roller
1983-84 Gloy Racing Trans Am/IMSA Body Parts
That's yet another thing I need to order from you guys - the adjustable prop valve, plus the braided lines. When I had the wheels off to get new tires mounted not too long ago, I checked the front hard lines and they've got 7/16" tube nuts, so that answers the question of which one of your "SN95 brakes on a Fox" line kits I need.
Just to clarify, you're talking about the bracing behind the rear seat back, seen here?
I was actually thinking that that stuff was superfluous, since a cage will be going in. Putting a bulkhead in will be beneficial even in that case?
Thanks. I haven't found any "gotchas" yet in my limited disassembly, so I'm quite happy with the condition of the car. I haven't spent much time underneath it yet, so maybe when I do I'll find some bad news, but from what I've seen so far it's just surface rust.
'89 GT convertible - not a four-eye
'82 Zephyr Z7 - future track car
Pat,
Thanks for the brake line information. Added to my brake database.
When you weighed the car, I assume that this was done before you started stripping it, correct? Any chance that you also weighed each end separately?
Yes, that is the bulkhead I'm referrring to. In general rollcages are very inefficient ways to add stiffness to a car. A normal main hoop which is only connected to the car at the base and doesn't have a diagonal does virtually nothing. Once you add the diagonal to it, it is massively better. Even then it is isn't great because the top corners aren't connected to the chassis. Remember how easy it is to take any square structure and "parallelogram-it" by pushing on opposite corners? The bulkhead already installed in the car has decent height, is attached to the car at top and bottom and consists of at least four triangles. A monoque is actually the most efficient way to make a stiff chassis, in terms of weight, but it takes a lot of fabrication time.
Jack Hidley
Maximum Motorsports Tech Support
Speaking of brake lines running under the car... I still think I'm going to do an IRS, just haven't actually done anything with that thinking yet.A while back I grabbed off a '94/95 GT the complete hard line that runs to the center of the trans/driveshaft tunnel above the diff. If I go IRS, is that line going to do anything for me? Or do the IRS cars run separate left and right rear hard lines down either side, or something like that?
Looks like I can use the line I got from the junkyard (extended, to account for the extra 5" of wheelbase, of course), and then use the MM IRS swap brake line kit (which I was unaware existed until just now).
I suppose it should note that my determination is just based on eyeballing it, while holding a stub of brake line with a 3/8" nut next to the installed lines on the car. The nuts on the car certainly looked bigger, so I'm confident enough that I'll order the kit for the 7/16" nuts (MMBK8F). But, based on how my projects normally go, it wouldn't surprise me if I broke the first connection and found that I should've ordered the other kit.
Yes, the weight listed earlier in the thread is before I started removing parts. I've been weighing everything as it comes off the car, so I've got a tally in a notebook; it would be interesting to go back to the scrap yard's scale now to see how that compares to my tally.
I did not try weighing each end of the car, as I'm not sure the numbers would've been very good. The scale at the scrap yard has a bit of a ramp up/down at each end of the scale, so I don't think the car would've been level enough to get useful numbers. Next time I drive by there I'll take a look, though, just to see if maybe it's not as bad as I thought.
Understand all. I anticipate that the cage will have diagonals, and probably also be tied from the main hoop to the B-pillars, so that should all help. Replacing the existing bracing with a flat bulkhead wouldn't be that hard.
Double
Last edited by Patrick Olsen; 03-14-2019 at 10:30 AM.
Pat,
The IRS cars all do have dual brake lines running to the back as they had TC. When installing an IRS in a Fox, that doesn't matter.
The MM IRS brake line kit that you linked is designed to allow the installation of an IRS into a Fox chassis car which had an 8.8" in it. This means that the car previously did have the rear brake line terminating just in front of and to the left of the nose of the differential. Once you install this kit, then you can use any caliper hose kit designed for a 1999-2004 IRS Mustang.
The 1994-95 Mustang GT hardline that you got isn't really going to work. It is going to be too short. It also won't connect at the front of the car in any way which is useful. The front of it will be metric ISO bubble flare. I would keep the very rear portion of this line, then cut and flare it for a 3/8"-24 SAE inverted flare. Then you can use a coupler nut and make a new line that runs from this up to the front of the car, where the union is on passenger side of the firewall.
The diameter of the hex on the front brake line nuts doesn't necessarily have anything to do with the size of the fitting going into the brake hose. You need to use some calipers and measure the major diameter of the threaded portion of the nut. That determines which hoses to use.
Jack Hidley
Maximum Motorsports Tech Support

One way to tie-in everything is to make or take whole pressings and have them chemsetted or plug welded to the existing monocoque, a trim fitting Integrated Roll Cage (IRC) . In essance, its like forming multiple March 1 spolier truss junctions against the A, B and C pillar junctions and lintels. c.f Ruf 911. The TUV in what was West Germany at that time realised that struts and trusses are potentially mobile "poleaxe" structures in collision accidents. If you move to a TUV compliant Ruf 911 style integrated roll cage, you can play with safety with all the ridgidity retained.
See http://forums.pelicanparts.com/porsc...-cage-irc.html
The IRC tubes go down to the door sills and each of the A pillar tubes connects to the other tube through a tube behind the lower part of the dash board (above your knees). This connecting tube is not included in the standard IRC and was covered in carpet. We had to remove the glove compartment to accomodate the connecting tube.
The tubes in the back stay inside the cabin.
I also added removable tubes for the doors and removable cross tubes in the back of the car. The car is very solid

Last edited by xctasy; 03-15-2019 at 05:33 PM.
About Respect https://www.youtube.com/watch?v=2bk9WG8KWW0
X's Album http://vb.foureyedpride.com/album.php?albumid=2922
Oz JPS Stang http://www.nzmustang.com/Images/Hist...cecars/jps.htm
4V (A)US Race V8's https://www.youtube.com/watch?v=Tqk18A-ibjA
ITZOLD 81 Fox http://vb.foureyedpride.com/showthre...-fun-and-games
6V i6's @ http://www.xecltd.info/?rd=10 ; AWD i6's @ http://www.apetracing.co.nz/
113 mph 84 5.0 at Amaroo https://www.youtube.com/watch?v=iTezv3Pzdls&t=8s
Techno KCM Loop Out: Severed Heads 1m³ Angels 1985 https://youtu.be/Wll6G1KpLqQ
Future Shock https://youtu.be/rDKGkWU0lWQ
I realize the Mustang line is too short, but as you suggested, I wanted it so I could have the rear portion.
I could see the major diameter of the flare nuts; that's what I was eyeballing when I compared them. I suppose I should've been smart enough to grab the vernier calipers out of the garage to measure.
'89 GT convertible - not a four-eye
'82 Zephyr Z7 - future track car
OK, jacked up one side again yesterday and checked with the calipers this time - yes, the front brake lines use 7/16" flare nuts.
Is it safe to say my car would have SAE flare nuts at the union on the firewall where the adjustable prop valve will go? I measured those last night, too, and they were 3/8". But 10mm metric nuts would measure about the same, so I don't know that I can trust that caliper measurement.
The coupler nut at the firewall is 3/8". With the exception of the 1987-93 m/c outlets, 1993 Cobra R and possibly ABS units from a MarK VII, there are no fox vehicles with metric brake line fittings.
Jack Hidley
Maximum Motorsports Tech Support
 Posting Permissions

 Reply With Quote
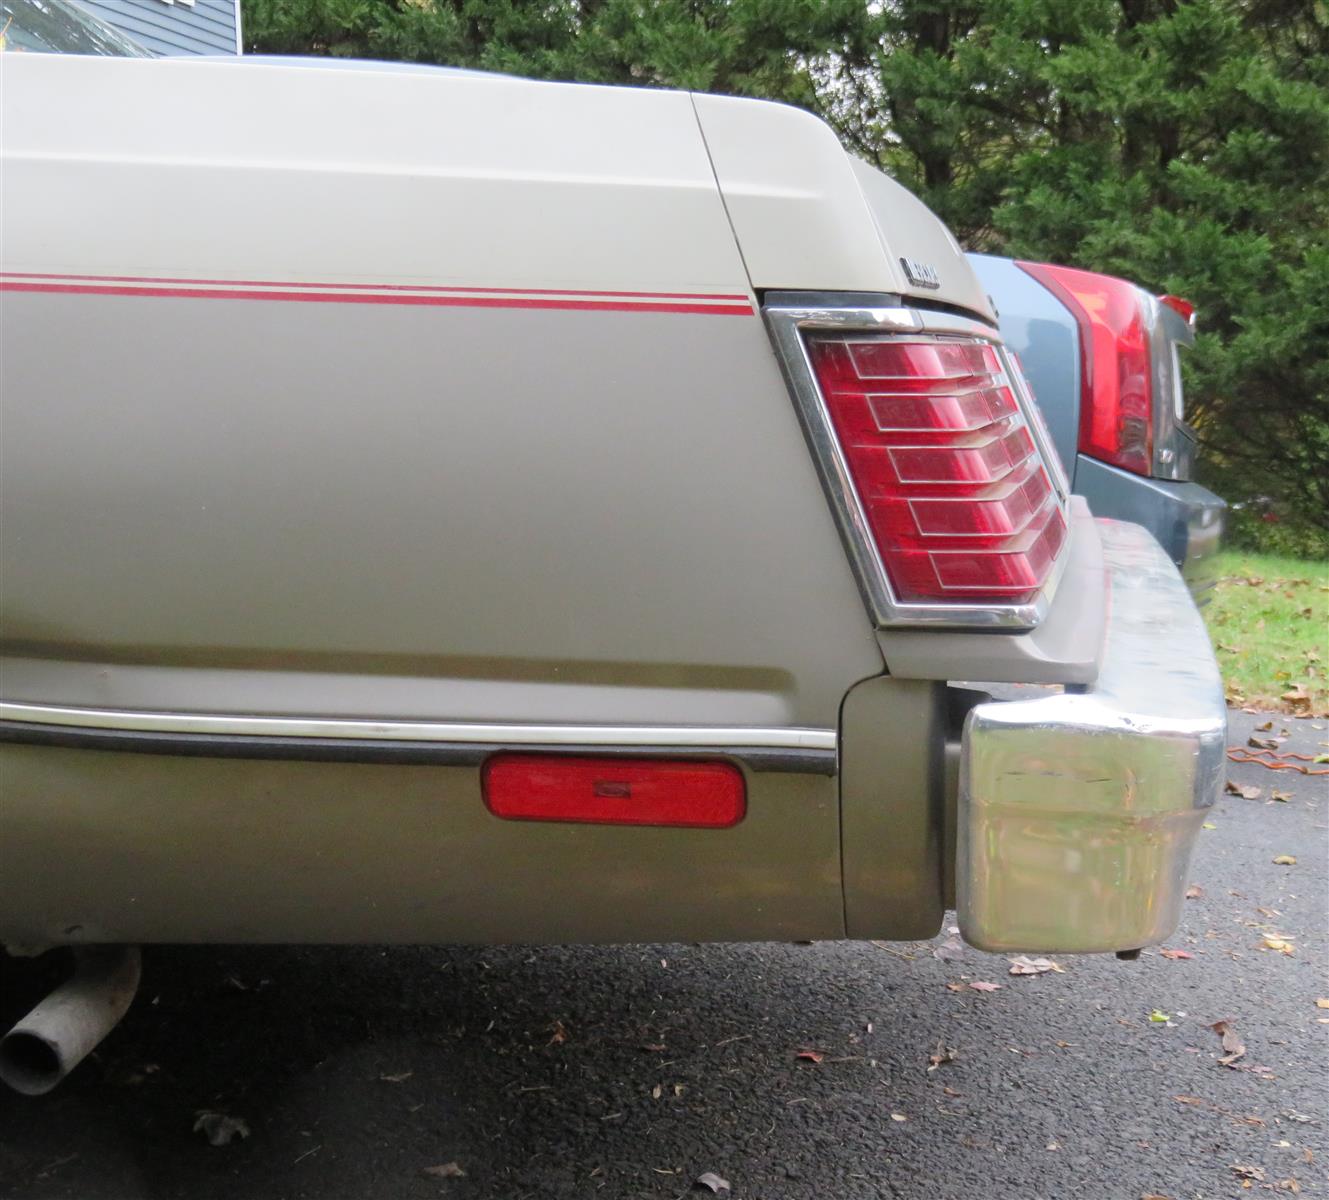


.jpg)
.jpg)
.jpg)

Connect With Us