Close


Page 1 of 2 12 LastLast
Results 1 to 25 of 40
  1. #1

    Default timing cover install

    Hello, all:

    Let's see if I have this correct. Finally fixed the broken water pump bolt problem and now ready for the rest of the install- 86GT.

    I only install the timing cover hand tight, then install the harmonic balancer so as to correctly line up the cover and gasket ensuring no leaks. Then torque the timing cover bolts. The torque on the balancer bolt is steep according to Ford. I think around 80 to 90 foot pounds. Impact or no?

    Thanks.

  2. #2
    FEP Power Member Mikestang's Avatar
    Join Date
    Aug 2013
    Location
    Firestone, CO
    Posts
    1,172

    Default

    If there are dowel pins on the lower bolts in the timing cover, (should be on an 86) then I wouldn't worry about using the balancer to line it up.

    Pretty sure tq is 90. Not a fan of the impact method, but I'm sure its been done and been ok for many.

    Be ready to install the water pump at the same time for a better chance of it all sealing. I don't use a gasket between the timing cover and block anymore and have had good luck with it. Just a small amount of silicone.
    1986 Ford Mustang GT-

    Not much stock stuff left
    347 NA power, CNC ported heads, Extrude honed Trick Flow Intake, Custom Cam
    Suspension, custom k- member, TQ arm/pan hard rod... Much more
    Restored and ready to race, made to go fast while cornering

    1981 Mustang GT-

    Old SCCA A-Sedan National Champ car
    In the middle of rebuild

    1986 LX Sedan-

    Plans to be determined...

    "Every day I learn how much I don't know"

  3. #3

    Default

    Instead of the impact I'll just use large vise grips to hold the balancer and the torque wrench to snug it up to 90. But I'll use the gasket. Just in case.
    Should go alright. Thanks.

  4. #4
    FEP Power Member Mikestang's Avatar
    Join Date
    Aug 2013
    Location
    Firestone, CO
    Posts
    1,172

    Default

    1986 Ford Mustang GT-

    Not much stock stuff left
    347 NA power, CNC ported heads, Extrude honed Trick Flow Intake, Custom Cam
    Suspension, custom k- member, TQ arm/pan hard rod... Much more
    Restored and ready to race, made to go fast while cornering

    1981 Mustang GT-

    Old SCCA A-Sedan National Champ car
    In the middle of rebuild

    1986 LX Sedan-

    Plans to be determined...

    "Every day I learn how much I don't know"

  5. #5

    Default

    Never use an impact wrench to install a balencer. It's a great way to screw up the threads on the crank and make for a whole lot of pain.

    For a 5.0, it's simple. Put an 3/8ths or 1/2" drive extension between the balencer and the timing pan. Be careful to try not to stress the pan's mount flange. Snug the bolt to set the extension against the pan, then torque the bolt to the final value.

    I never thought much about it. I never even took a picture of doing the above for an install or removal.


    Good Luck!
    .

  6. #6
    FEP Super Member
    Join Date
    May 2003
    Location
    Roseburg Oregon
    Posts
    3,308

    Default

    With a manual trans car , i put the car in 4th gear , set the park brake , and torque the balancer.
    This keeps the engine from turning and allows for a simple job.
    clowns to the left of me , Jokers to the right

  7. #7
    FEP Super Member cb84capri's Avatar
    Join Date
    Jan 2003
    Location
    lansing, mi
    Posts
    4,667

    Default

    Go to Autozone and rent a harmonic balancer installation and removal tool for free when you return it. Use it. That's the proper way to do it. If you have the dowels you don't have to worry about centering the seal on the balancer.

    Cale

  8. #8
    FEP Power Member 81coupe's Avatar
    Join Date
    Aug 2008
    Location
    Mount Washington, ky
    Posts
    1,064

    Default

    I agree with the above except the part about the Install process when using a Impact gun. I've rented the tool and it sucks, IMO. I have mostly installed the them with a good Impact Gun and some good Lube, and clean treads. Just make sure the treads are not crossed before running the Impact gun. If running into binding then stop, back out, check, clean and re-install. Works 99% of time with no problems.
    1981 Mustang Coupe: Rebuilt 91/306, Ported E7's, TF Spring kit, E-303 Cam, RPM Intake, Eddy 1406 Carb, FMS Dual Roller Timing set, March UD pulleys, Summit LT Headers, Summit 2-1/2" Chambered Mufflers w/ 2-1/2" FlowTech H-Pipe/ Flowtubes & 2-1/2" LMR SS Tailpipes. C4 trans with 8.8/ 2.73 Rear.

  9. #9

    Default

    Go to Autozone and rent a harmonic balancer installation and removal tool for free when you return it. Use it. That's the proper way to do it. If you have the dowels you don't have to worry about centering the seal on the balancer.
    Yes, use a harmonic balencer install tool to put the harmonic balencer on the crank - ABSOLUTELY!!

    But, that doesn't do anything with regards to putting the bolt on the to hold the balencer to the crank. And, to make sure that the center bolt is torqued to the correct value.
    To do that, requires that the crank shaft doesn't move.


    For harmonic balencers that don't have an opening in them to put an extension, screwdriver, through them, then using a flywheel holding tool is often the proper method to prevent the crank from moving.

    Other people have put rope inside a cylinder through the spark plug hole. I do NOT suggest that method.
    What even much worse is using a TDC tool to stop the piston before TDC. That puts a lot of concentrated force on the piston dome. Imho, that's a great way to get a piston dome failure in the future.


    Other harmonic balencers, like on many German cars, require a special tool that mounts/sits-in the harmonic balencer. Then, a pipe is used to prevent the harmonic balencer from turning.


  10. #10

    Default

    A 1" wide strap wrench around the O.D. of the damper also works well.
    Cheers,
    Jeff Cook

    '85 GT Hatch, 5-speed T-Top, Eibachs, Konis, & ARE 5-Spokes ... '85 GT Vert, CFI/AOD, all factory...
    '79 Fairmont StaWag, 5.0, 62K original miles ... '04 Azure Blue 40th Anny Mach 1, 37K original miles...
    2012 F150 S-Crew 4x4 5.0 "Blue Coyote"... 65 coupe, 289 auto, Pony interior ... '67 coupe 6-cyl 4-speed ...
    '68 Vert, Mexican block 307 4-speed... '71 Datsun 510 ...
    And a 1-of-328 Deep Blue Pearl 2003 Marauder 4.6 DOHC, J-Mod, 4.10s and Lidio tune

  11. #11
    FEP Super Member
    Join Date
    May 2003
    Location
    Roseburg Oregon
    Posts
    3,308

    Default

    Car in 4th gear works best , and you still bave 2 hands to work with ....
    clowns to the left of me , Jokers to the right

  12. #12

    Default

    Balancer went on reasonably easy. The dowel helped with the timing cover but I still had to watch it. Once the cover was on, the balancer went on good. No impact to install. Tightening the bolt runs the balancer on. I didn't have to do anything to keep the engine from moving like removal. Hand tightened with a torque wrench to the proper amount, maybe 85 foot pounds. Its right where it needs to be. My only concern is oil leaking out the corner of the timing cover where the cork pieces of the new gasket went. But they stayed put and I used plenty of RTV in the nooks. We'll see when I finish the rest of the reassembly and try it out.

  13. #13
    FEP Power Member Mikestang's Avatar
    Join Date
    Aug 2013
    Location
    Firestone, CO
    Posts
    1,172

    Default

    Good to hear. Hope it seals up for ya
    1986 Ford Mustang GT-

    Not much stock stuff left
    347 NA power, CNC ported heads, Extrude honed Trick Flow Intake, Custom Cam
    Suspension, custom k- member, TQ arm/pan hard rod... Much more
    Restored and ready to race, made to go fast while cornering

    1981 Mustang GT-

    Old SCCA A-Sedan National Champ car
    In the middle of rebuild

    1986 LX Sedan-

    Plans to be determined...

    "Every day I learn how much I don't know"

  14. #14

    Default

    Quote Originally Posted by Magnetic82 View Post
    Balancer went on reasonably easy.
    My only concern is oil leaking out the corner of the timing cover where the cork pieces of the new gasket went. But they stayed put and I used plenty of RTV in the nooks.
    That's good to hear.
    I used ?Permatex Ultra Copper? and waited 48 hours, to make sure it was completely dried. It never leaked on me.

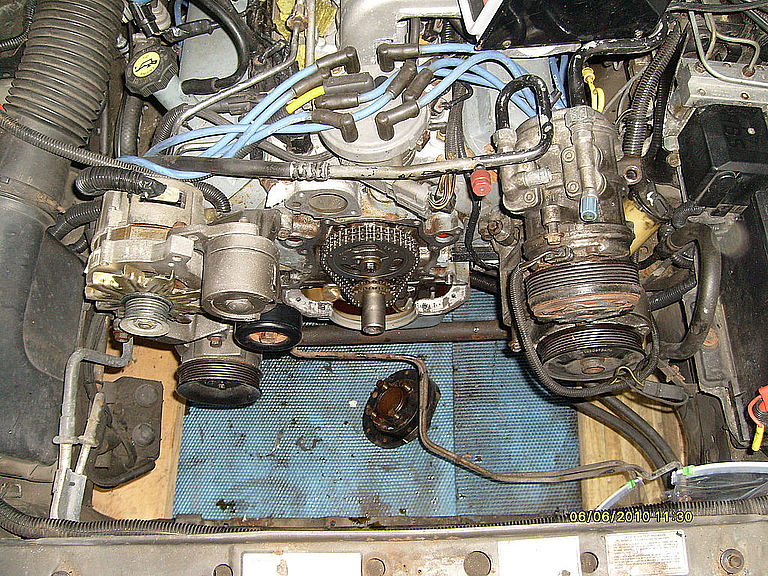
    The obligatory picture that doesn't really help at all, but I wanted to post anyway...


    .

  15. #15
    FEP Power Member 81coupe's Avatar
    Join Date
    Aug 2008
    Location
    Mount Washington, ky
    Posts
    1,064

    Default

    Good to hear. Either way of Install. Long as it works out well in the end. Also, yes using RTV on the Ends with sealing the corners works well. Never had a problem as long as I don't use to much or to little Sealer/RTV.
    1981 Mustang Coupe: Rebuilt 91/306, Ported E7's, TF Spring kit, E-303 Cam, RPM Intake, Eddy 1406 Carb, FMS Dual Roller Timing set, March UD pulleys, Summit LT Headers, Summit 2-1/2" Chambered Mufflers w/ 2-1/2" FlowTech H-Pipe/ Flowtubes & 2-1/2" LMR SS Tailpipes. C4 trans with 8.8/ 2.73 Rear.

  16. #16

    Default

    Thanks for the help and support. Nice photo. Congrats on the original AC compressor. May be a few more days before its running. I'll address a power steering reservoir leak issue first since its accessible. Might have to post some pix eventually.

  17. #17

    Default

    Well the thread repair I did on the broken water pump bolt hole leaked like a sieve. I lost a gallon of fresh coolant. As it leaked behind the timing cover as well as in front, I drained the oil pan again and lost five fresh quarts of oil. Now I have to start all over. Apparently the time cert doesn't seal. Manages to work well for bolts but now I need to somehow seal the hole I put in the block drilling out the broken bolt. So coolant doesn't leak anymore. Any ideas? Pump it full of RTV and wait a few days before reassembly? Haven't used the car in over four months. Soon snow falls and the car will wait until Spring. I may have to try to take a few pictures. Hard to get at. Thanks for the advice.

  18. #18
    FEP Power Member Ourobos's Avatar
    Join Date
    Apr 2008
    Location
    Waikoloa , Hawaii
    Posts
    1,879

    Default

    Confused as to why the bolt hole would matter for a water leak around the jackets? It's the gasket that seals it. As long as the bolt was able to be torqued into the hole, and you didn't make it 1" wide, then it should seal, if the gasket was installed properly?
    1986 CHP SSP Coupe

  19. #19
    FEP Power Member Mikestang's Avatar
    Join Date
    Aug 2013
    Location
    Firestone, CO
    Posts
    1,172

    Default

    What bolt hole? Did the bolt tighten up. Hummm, snap some pics so we can respond with better assistance
    1986 Ford Mustang GT-

    Not much stock stuff left
    347 NA power, CNC ported heads, Extrude honed Trick Flow Intake, Custom Cam
    Suspension, custom k- member, TQ arm/pan hard rod... Much more
    Restored and ready to race, made to go fast while cornering

    1981 Mustang GT-

    Old SCCA A-Sedan National Champ car
    In the middle of rebuild

    1986 LX Sedan-

    Plans to be determined...

    "Every day I learn how much I don't know"

  20. #20

    Default

    This week is rather busy at work with out of town items so I'll try to get the timing cover off and take some pictures. I can get to the back of the bolt hole that I drilled through with the cover off. Maybe I can pack it full of sealant. I felt the gasket should hold also but that's where it was rolling out. Bolt went in perfectly. Hold on a few days and I'll post some photos. Thanks again.

  21. #21
    FEP Super Member erratic50's Avatar
    Join Date
    Dec 2016
    Location
    Nebraska
    Posts
    4,575

    Default

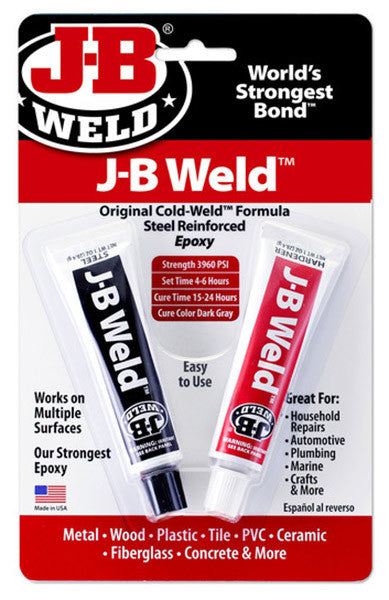
    I've used JB Weld in tough spots where the metal is tore up a few times. A little sanding and it gets you back to a good surface for a gasket. Give it plenty of time to cure and make sure the surface is clean to start with using brake clean and it works just fine.

    Heck - I even fixed the threads on my 360 degree offy for a bolt at the base of the carb using JB. Cleaned things up good, buttered the hole full, let it cure 3 days, drilled it, and tapped it. Tightened up the bolt. It held just fine. Impressive stuff.
    Last edited by erratic50; 09-24-2017 at 11:22 AM.

  22. #22

    Default

    Quote Originally Posted by erratic50 View Post
    I've used JB Weld in tough spots where the metal is tore up a few times.
    I agree with using the real 2-part JB-Weld.
    Don't use the putty sticks, or some other brand.

    https://www.jbweld.com/collections/e...fessional-size
    https://www.jbweld.com/collections/e...weld-twin-tube


    Note, to use it properly, the surface must be 100% dry and clean.
    I use Acetone as a final cleaner. I love Acetone!

    If you have to, you can build up the area with JB-Weld over a few days.
    In other words, you do not want to just keep throwing JB-Weld into the water jacket behind the hole.
    You can very likely build up it up in 3-days with little effort. Then, fill in the back of the hole some more, to make sure that you have some depth to that repair.

    Fwiw, just using sealant will may work for a while. Eventually, coolant will start to seep through. The coolant may then "rust" the block and the bolt to each other - like it seems to have happened before.

    Fwiw, I like to use Stainless bolts and studs for the timing cover. And, I use plenty of anti-seize on the bolts. That helps to prevent electrolysis, rusting, etc.


    Good luck!

  23. #23

    Default

    Man, I've been there before... 4 times recently to be exact. Trying it gasket only, silicone only, gasket and a little bit of silicone... only to put it all together, and watch it leak before your eyes. There goes more quarts of oil, new gaskets, and more time. NOT saying my way is the only way of doing it, just want to share what finally made mine work

    - Inserted shop rags half way in the water passage holes on the block to pick up any coolant, and let them sit for a day.
    - Once dry, remove the wet rags obviously, and cleaned my block with a clean rag and brake cleaner.
    - Placed a moderate bead of permatex black on the block and lightly pressed the timing cover gasket onto the block.
    - While the silicone dried a bit, I cleaned the timing cover with brake clean as well (also removing the old gasket from previous install)
    - Placed a moderate bead of permatex black on the timing cover (side that faces the block), and lightly installed, bolts hand tight.
    - While that silicone dried a bit, I cleaned the water pump with brake clean (and removed old gasket from previous install.
    - Placed a moderate bead of permatex black on water pump, and lightly matched the water pump gasket to the water pump.
    - Set it aside, and placed a moderate bead of permatex black on the timing cover (side that faces the water pump).
    - Lightly place water pump to timing cover, hand tightening the bolts.
    - An hour or so later, install your bolts. Call me paranoid, but I installed thread sealant tape on the bolts closest to water passageways.
    - Tighten in a cross pattern. I did 5 ft lbs on all first, then 10 ft lbs, and I finished off with 20 ft lbs. I know my Chilton book says 15-18 ft lbs, but 15 was not working for me the previous times. By the time disassembly came around, they had loosened a little bit with the engine warming up so 20 worked perfectly for me.

    I understand some people have had great luck with gasket only, or silicone only, but I tried both and I didn't fare out so well. Not discrediting them, just sharing what did work for me and my process as detailed as possible. Best of luck to you, as getting it wrong 4 times can be expensive lol

  24. #24
    FEP Super Member erratic50's Avatar
    Join Date
    Dec 2016
    Location
    Nebraska
    Posts
    4,575

    Default

    One thing to mention - when cleaning up housing damage using JB- wrap silicon carbide sand paper around a piece of double thick hardened glass or MDF. It has to be flat and rigid or you will make it bathtub shaped really fast. I've also just used a really nice and straight brand new file. I buy a new one every time I need to do this stuff or polish small amounts off the main or rod bearing caps to get my tolerances where I want them. Reminder -- Work slowly!

    i always chase my threads with a tap before I start assembling. If I don't have a tap I cut a notch in the very end of the bolt and chase with that. I prefer to use new water pump housing bolts if I can.

    Other than that, the same general process is what consistentky works for me.

    NAPA makes a thread sealer with Teflon and other things added. It works great as an anti-seize and a sealer and lube. The Teflon ensures adequate lubrication so you get accurate torque readings on your bolts. I always coat the entire bolt. It seals the threads and since it expands just slightly when it dries it also seals the bolt stem to the housing. It's the best stuff I am aware of for doing engine assembly. It ends the age old debate of or sealer or lube on bolts that go into water passages, etc.

    I also have used Permatex copper antiseize with Teflon and sealant quite successfully. Also very good stuff. I like the Napa stuff because it is white and wipes off easily. The copper stuff smears everywhere and is a mess to work with.
    Last edited by erratic50; 09-25-2017 at 03:55 PM.

  25. #25
    FEP Power Member Ourobos's Avatar
    Join Date
    Apr 2008
    Location
    Waikoloa , Hawaii
    Posts
    1,879

    Default

    My technique on timing covers is always
    clean block surface
    wipe RTV on the block surface and then stick the gasket on it.
    Let it dry
    wipe RTV on the outer gasket surface and let it dry
    install timing cover and tighten

    Never had a leak in over 150 of them.
    1986 CHP SSP Coupe

Page 1 of 2 12 LastLast

Posting Permissions

  • You may not post new threads
  • You may not post replies
  • You may not post attachments
  • You may not edit your posts
  •