Close


Results 1 to 14 of 14
  1. #1
    FEP Senior Member 86GTdriver's Avatar
    Join Date
    May 2007
    Location
    Norfolk, VA (again)
    Posts
    535

    Default Another Front LCA Bushing Question

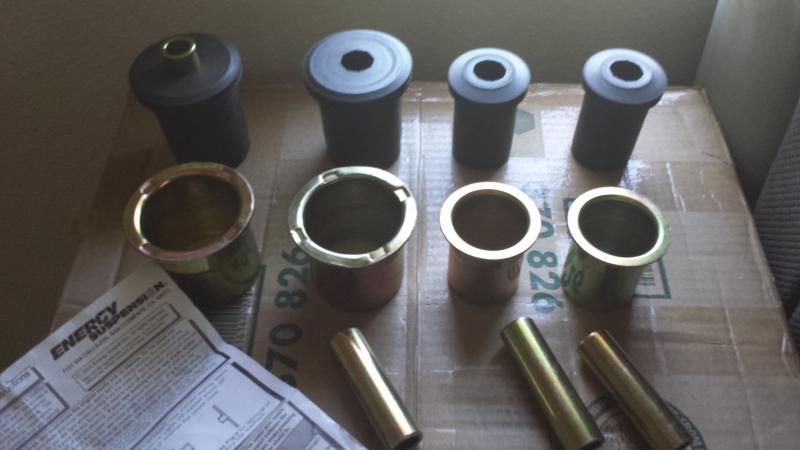
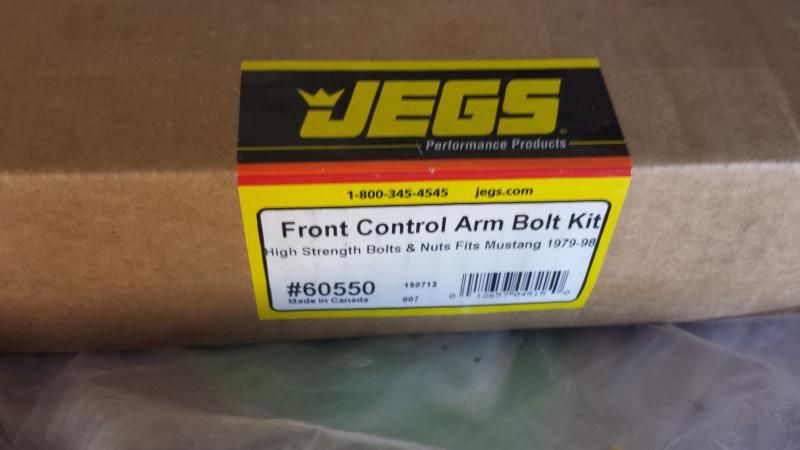
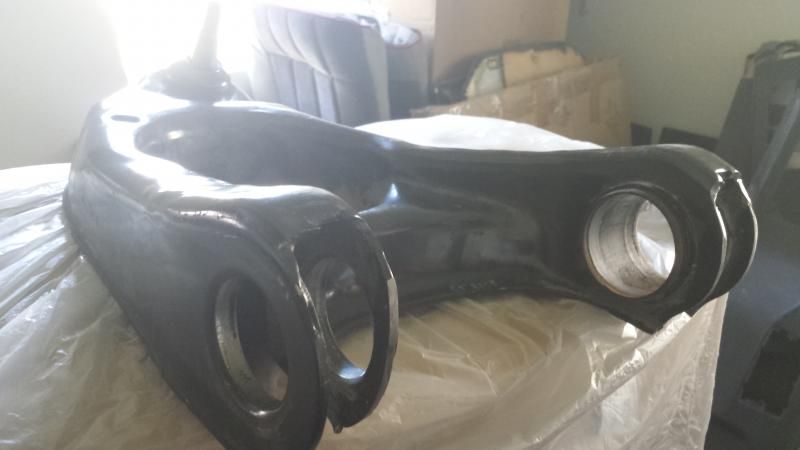
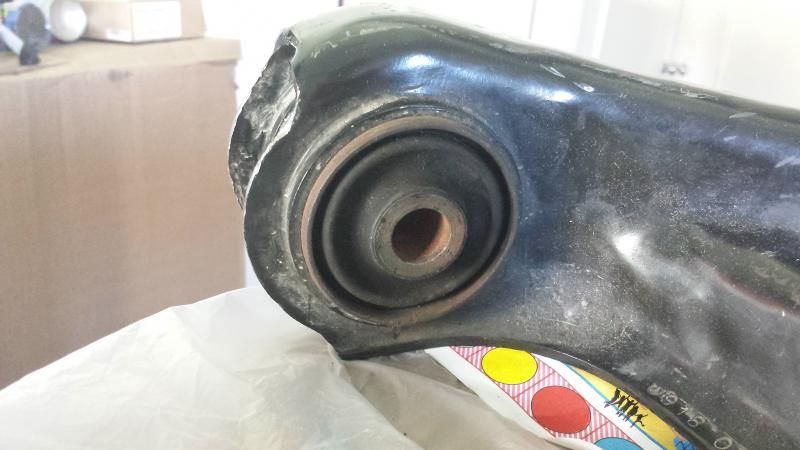
    I didn't want to hijack the previous OPs thread about Front LCAs so I thought I'd start a new one. I have these Cobra/Mach front LCAs I was wanting to use and I need to remove one shell from each, and one still has a bushing left in it. I understand I need to get a hold of a propane torch and heat the shell with the bushing left in it and I guess use a hammer to get the smoking bushing out of the sleeve. I intend on using new LCA bolts when I install these LCAs, new Moog SN95 balljoints are already pressed in and I also am using Energy Suspension Polys as replacement bushings. When the LCA w/o the bushing was pushed out, it was a hydro-bushing so I am sure the other with be the same.

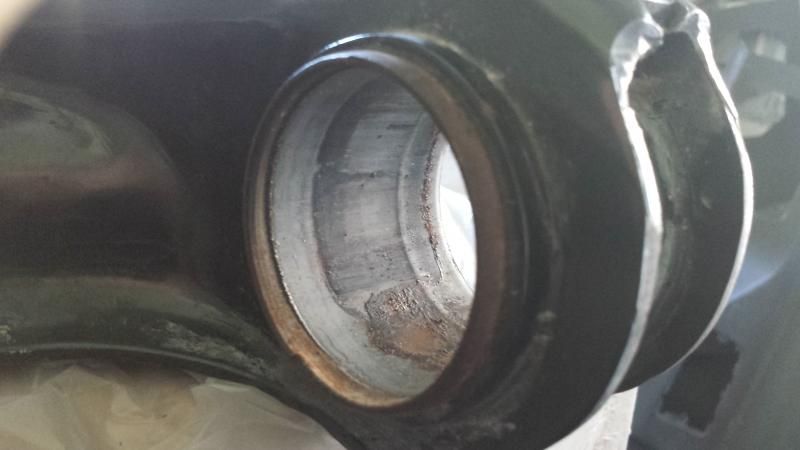
    How do I get the old sleeves out though???

    I also want to make sure these don't squeek. I heard drilling and installing a zerk helps, but I have no clue if that's a really good idea and don't know exactly how to go about that, but the instructions do say to be liberal with the grease. Despite all that, I've had trouble getting the sleeves to press into the bushings, as one can see in the first picture upper left.

    Here's illustrations as to what I'm talking about:


    Date Stamp I guess.

    Part of the P/N I guess.
    Last edited by 86GTdriver; 05-27-2014 at 02:44 PM.
    '86 Mustang GT T-Top, 5-lug Cobra brake swap done
    '96 Mustang Cobra 302rwhp 296rwtq, Sold and missed
    '11 Mustang GT/CS, Traded and will be missed
    '13 Taurus SHO, Performance Pack, hit and run, totalled
    '17 Fusion Sport, Livernois tune, Steeda CAI, Steeda Rear Swaybar, Big Mouth Ram Air, GFB+ valve, Steeda Catch can, TTR FMIC (Garrett Core)

  2. #2
    FEP Super Member Travis T's Avatar
    Join Date
    Jan 2011
    Location
    China Grove, North Carolina
    Posts
    5,267

    Default

    Last time I did it, I very carefully cut the shells with a hacksaw running from one end of the bushing to the other, along the length of it. When I was close to through, but before I hit the control arm itself, I used a hammer and collapsed it in on itself by hitting along the outside of the cut if that makes any sense. You really need a press to install them, it's a real pain.
    Last edited by Travis T; 05-27-2014 at 02:52 PM.
    1984 Mustang GT owned since 1991 (first car). Mercury Mountaineer GT-40P engine, some suspension mods, currently undergoing a five lug SN95 brake upgrade and more suspension mods. Some minor body and interior mods have been done as well.

    2004 GT convertible, 2001 Taurus LX, 1994 F150, 1950 F-1 Ford Pickup

  3. #3
    FEP Power Member wman24's Avatar
    Join Date
    Mar 2009
    Location
    Medford, NJ
    Posts
    1,100

    Default

    Take a hacksaw apart and reassemble it with the blade in the shell. Saw it till about to break thru the shell, it is easier then it sounds. Take the saw back apart and collapse the shell in with a punch or chisel, it will fall out. Pressing the new in is a little harder, I use a piece of 5/8 nc all thread some nuts, washers and old bearing races too pull them in. You also need some shorter nut and bolt for spacer so the open ends of the arms don't collapse.


    Treed me^^^

  4. #4
    FEP Super Member Travis T's Avatar
    Join Date
    Jan 2011
    Location
    China Grove, North Carolina
    Posts
    5,267

    Default

    That must be the preferred driveway method after all! As big of a pain as it was when I replaced the stock bushings in my LSC, I just left the shells in my 84 and used poly inserts.
    1984 Mustang GT owned since 1991 (first car). Mercury Mountaineer GT-40P engine, some suspension mods, currently undergoing a five lug SN95 brake upgrade and more suspension mods. Some minor body and interior mods have been done as well.

    2004 GT convertible, 2001 Taurus LX, 1994 F150, 1950 F-1 Ford Pickup

  5. #5
    FEP Senior Member 86GTdriver's Avatar
    Join Date
    May 2007
    Location
    Norfolk, VA (again)
    Posts
    535

    Default

    I do have access to a 2 ton shop press and all kinds of sizes of those round things, whatever they are called, to press in bushings at the Auto Hobby Shop here on base, but have no real experience on how to use such. The hacksaw idea sounds good. I can get that done easy!

    As far as pressing in the new sleeves, what wman24 was saying seems above my head and I don't understand in it's entirety what the information he was trying to disseminate.
    '86 Mustang GT T-Top, 5-lug Cobra brake swap done
    '96 Mustang Cobra 302rwhp 296rwtq, Sold and missed
    '11 Mustang GT/CS, Traded and will be missed
    '13 Taurus SHO, Performance Pack, hit and run, totalled
    '17 Fusion Sport, Livernois tune, Steeda CAI, Steeda Rear Swaybar, Big Mouth Ram Air, GFB+ valve, Steeda Catch can, TTR FMIC (Garrett Core)

  6. #6
    FEP Super Member Travis T's Avatar
    Join Date
    Jan 2011
    Location
    China Grove, North Carolina
    Posts
    5,267

    Default

    One thing you will have to do is put something between the two flanges on the arm that the shell fits between, otherwise you will just bend the arm when you press in the bushing.
    1984 Mustang GT owned since 1991 (first car). Mercury Mountaineer GT-40P engine, some suspension mods, currently undergoing a five lug SN95 brake upgrade and more suspension mods. Some minor body and interior mods have been done as well.

    2004 GT convertible, 2001 Taurus LX, 1994 F150, 1950 F-1 Ford Pickup

  7. #7
    FEP Power Member wman24's Avatar
    Join Date
    Mar 2009
    Location
    Medford, NJ
    Posts
    1,100

    Default

    As far as pressing in the new sleeves, what wman24 was saying seems above my head and I don't understand in it's entirety what the information he was trying to disseminate.[/QUOTE]


    A press is the most logical choice, a lot less effort on you're part. I only have access to a small press so I came up with the all thread method. As mentioned above the spacers are probably the most important part, the open end of the control arm will want to bend before the shell goes in.

  8. #8
    FEP Super Member mustangxtreme's Avatar
    Join Date
    Feb 2009
    Location
    Snohomish, Wa
    Posts
    4,021

    Default

    Post 29 is where I did my poly bushings.

    http://vb.foureyedpride.com/showthre...-L-build/page2
    Dave

    If common sense was common wouldn't it just be sense?

    1983 Capri L T top 5.0 efi aod
    1983 Capri RS Turbo
    1981 Black Magic 400 c6
    93 F-250 351 5sp 4x4

  9. #9
    FEP Power Member wman24's Avatar
    Join Date
    Mar 2009
    Location
    Medford, NJ
    Posts
    1,100

    Default

    Doesn't look like much but it works good.
    Attached Images Attached Images  

  10. #10
    FEP Senior Member 86GTdriver's Avatar
    Join Date
    May 2007
    Location
    Norfolk, VA (again)
    Posts
    535

    Default

    Quote Originally Posted by wman24 View Post
    Doesn't look like much but it works good.
    What is that?
    '86 Mustang GT T-Top, 5-lug Cobra brake swap done
    '96 Mustang Cobra 302rwhp 296rwtq, Sold and missed
    '11 Mustang GT/CS, Traded and will be missed
    '13 Taurus SHO, Performance Pack, hit and run, totalled
    '17 Fusion Sport, Livernois tune, Steeda CAI, Steeda Rear Swaybar, Big Mouth Ram Air, GFB+ valve, Steeda Catch can, TTR FMIC (Garrett Core)

  11. #11
    FEP Power Member wman24's Avatar
    Join Date
    Mar 2009
    Location
    Medford, NJ
    Posts
    1,100

    Default

    Name:  image.jpg
Views: 36
Size:  230.7 KB That is my bushing tool. The black parts are borrowed from a Harbor Freight ball joint press. Only thing not in the pic is that a put the closed end of a combination wrench on the nut toward the middle of the control arm, c clamp the hole thing to my work bench and put a 1/2" breaker bar with a ratchet attachment and a deep socket on the outboard side.

  12. #12
    FEP Supporter
    82GTforME's Avatar
    Join Date
    Feb 2013
    Location
    Alberta, Canada
    Posts
    4,857

    Default

    I did very similar myself. Check out post 8 and 9: http://vb.foureyedpride.com/showthre...=1#post1572519

  13. #13
    FEP Senior Member 86GTdriver's Avatar
    Join Date
    May 2007
    Location
    Norfolk, VA (again)
    Posts
    535

    Default

    Quote Originally Posted by 82GTforME View Post
    I did very similar myself. Check out post 8 and 9: http://vb.foureyedpride.com/showthre...=1#post1572519
    That's a really good method you used to get those shells in. Did you install the sleeves into the bushings before or after you installed the bushings into the shells? How large was that threaded rod and where did you get the metal, square plates? What did you use to shave the bushings with once you were ready to install the LCAs onto the car with?
    Last edited by 86GTdriver; 05-28-2014 at 02:07 PM.
    '86 Mustang GT T-Top, 5-lug Cobra brake swap done
    '96 Mustang Cobra 302rwhp 296rwtq, Sold and missed
    '11 Mustang GT/CS, Traded and will be missed
    '13 Taurus SHO, Performance Pack, hit and run, totalled
    '17 Fusion Sport, Livernois tune, Steeda CAI, Steeda Rear Swaybar, Big Mouth Ram Air, GFB+ valve, Steeda Catch can, TTR FMIC (Garrett Core)

  14. #14
    FEP Supporter
    82GTforME's Avatar
    Join Date
    Feb 2013
    Location
    Alberta, Canada
    Posts
    4,857

    Default

    Quote Originally Posted by 86GTdriver View Post
    That's a really good method you used to get those shells in. Did you install the sleeves into the bushings before or after you installed the bushings into the shells? How large was that threaded rod and where did you get the metal, square plates? What did you use to shave the bushings with once you were ready to install the LCAs onto the car with?
    Shells first, then greased the poly bushings and pressed them in (not a lot of effort required for this) and then put in the sleeves after.

    The rod I used was 1/2" UNC grade 8 and the square plates were 3/8" x 2-1/2" flat bar cut at 2-1/2" (big enough to cover the entire shell) with a 9/16" hole in it.

    I just used an OLFA knife to cut slivers off the end of the bushing to get it to slide in easier.

Posting Permissions

  • You may not post new threads
  • You may not post replies
  • You may not post attachments
  • You may not edit your posts
  •