Close


Page 1 of 10 123 ... LastLast
Results 1 to 25 of 230
  1. #1

    Default Project bad grandpa blown wagon

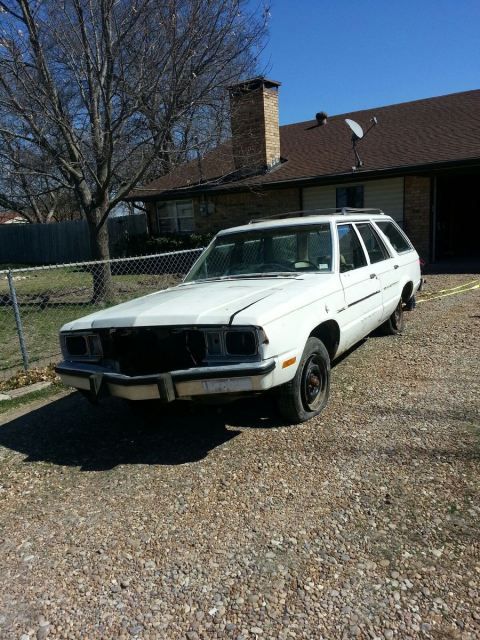
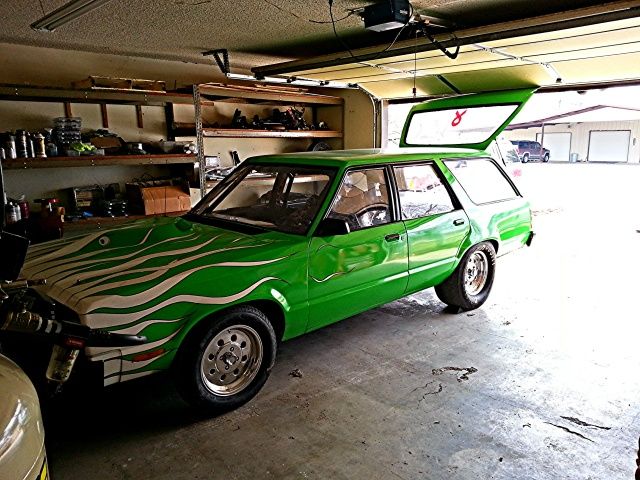
    New guy here starting my 79 wagon build. I'm doing a few things that have never been done before to my knowledge and hopefully I won't get kicked off of here. Lol. I know there are a lot of purists but I think I have a pretty good vision for a cool wagon.


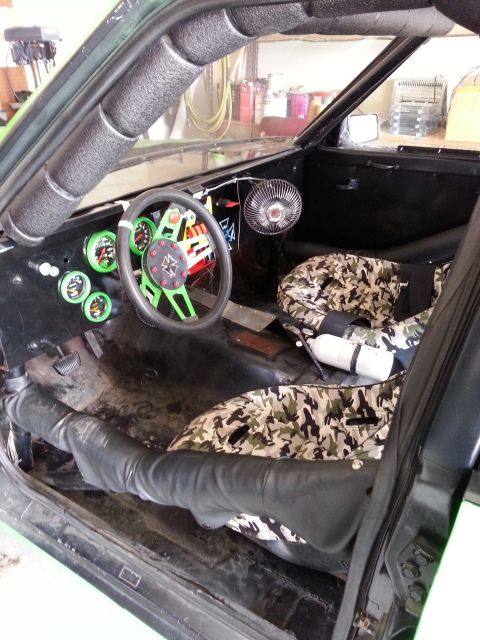
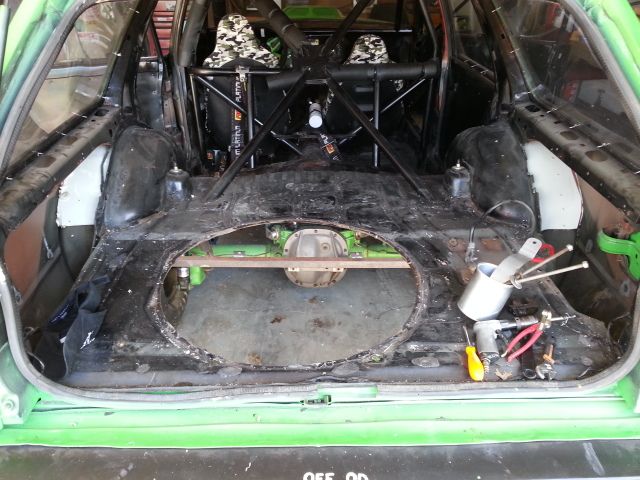
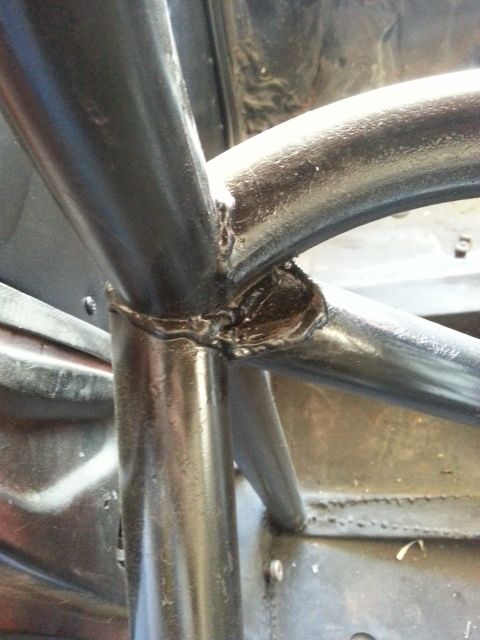
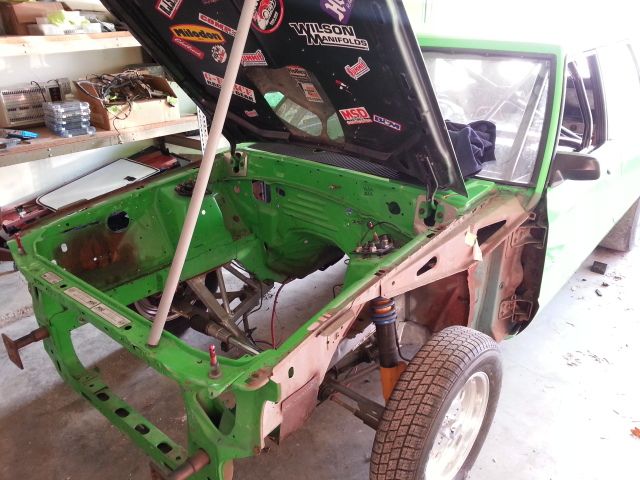
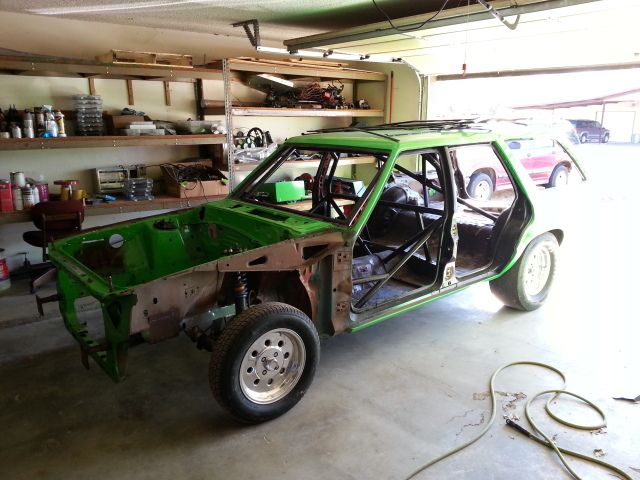
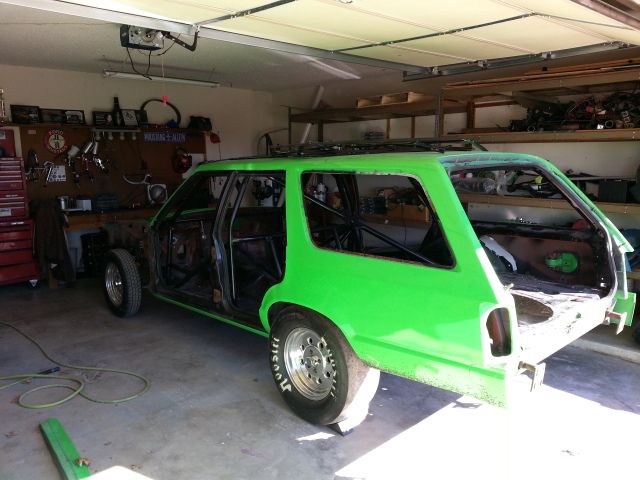
    The story: I found this wagon local that was a hacked up drag car only with some really ****ty workmanship all over it. Gutted interior, all lexan, terrible cage, patch panels laid over rust, bad body work, etc. I picked it up and I'm going to get this thing back to where it needs to be with a full rotisserie build.


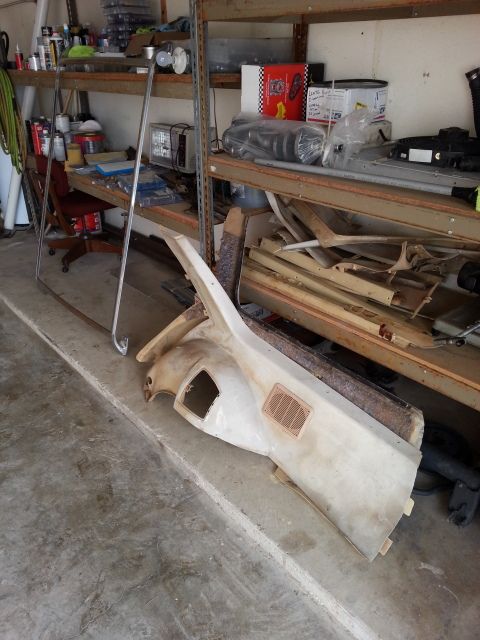
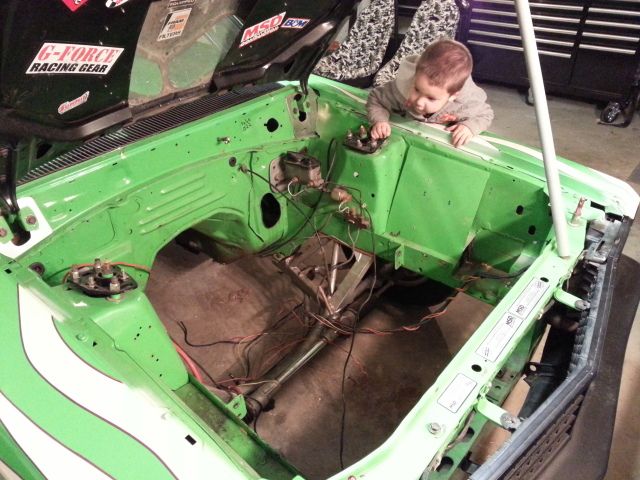
    The plan: I've got a sbf dart block 428 stroker setup that's starting to come together now. I've got a callies billet crank, Lentz billet rods, dart 9.5" iron eagle block, 7721 heads, and a blower manifold. It'll be receiving a 14-71 blower and holley hp efi and should make in the neighborhood of 1600hp while retaining streetability. I'll be reinstalling all the glass, stereo, sn95 interior, a.c./heat, and a full flour pan from a 97 mustang cobra parts car.

    Cobra parts car for the interior and floor pan. Car had no title so it was as good as trash. My friend was kind enough to sell me the parts I needed if I pull them.


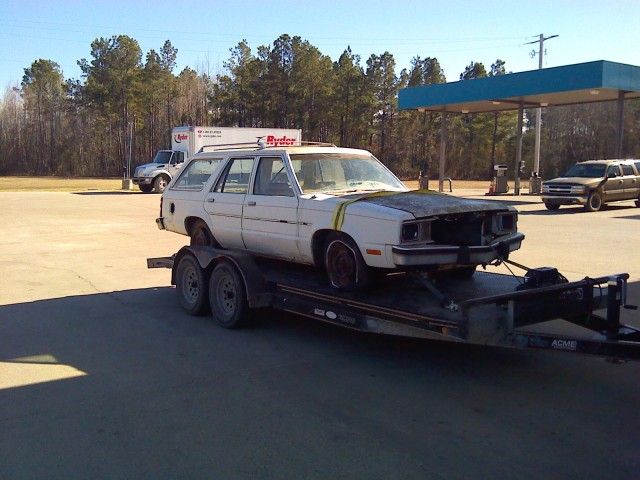
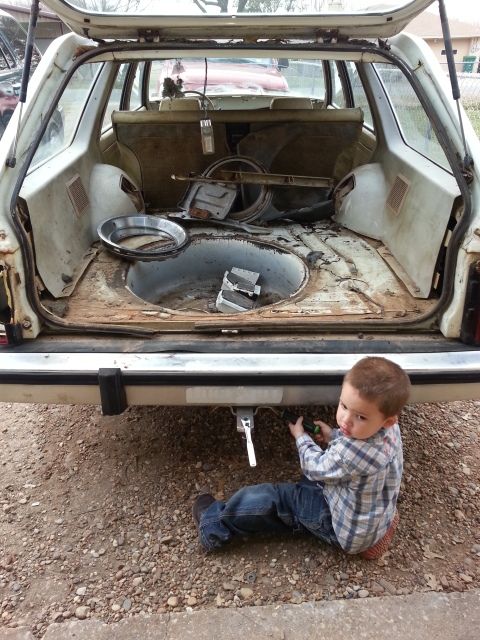
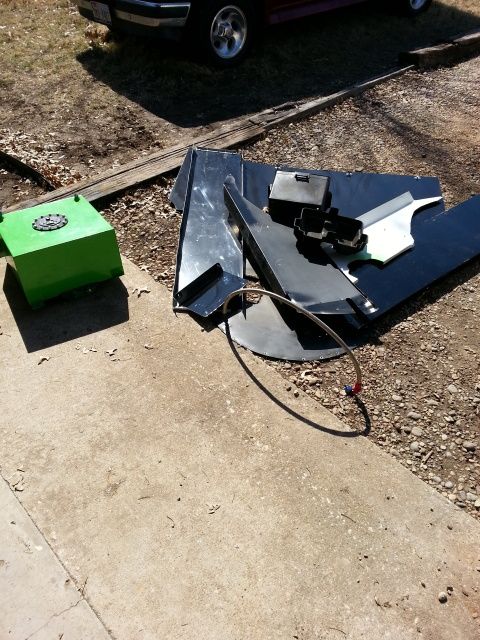
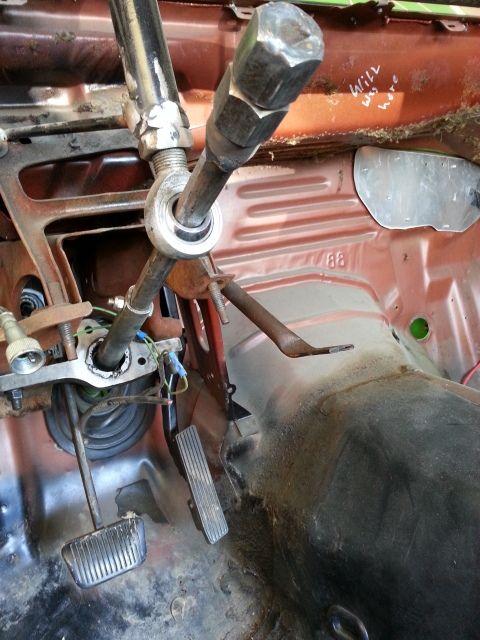
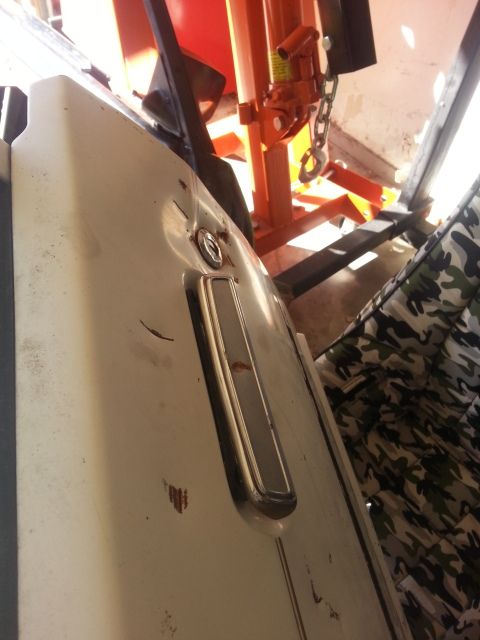
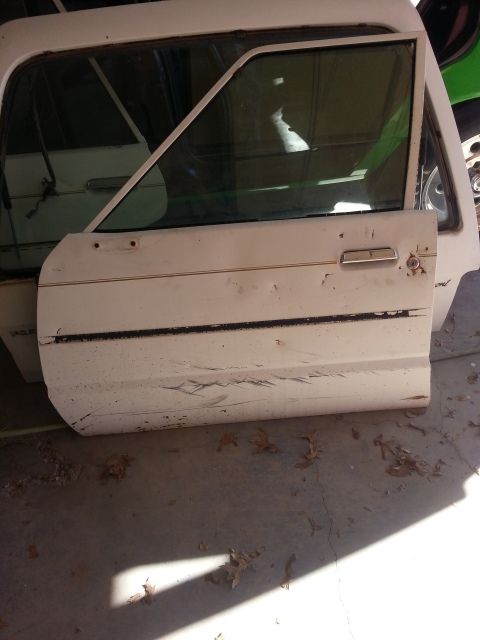
    The wagon parts car that I pulled all the interior from asking with glass and doors.
    This one had no title and no floors at all from rust. Sad to say she went to the scrap yard when I was done. It just couldn't be saved. Parts will live on in my other wagon though.
    Last edited by 1onebadfox; 03-01-2015 at 12:47 PM.

  2. #2

    Default

    These next few posts are a copy from another forum to catch up.

    Well the wagon build has officially started.

    The old blue bitch is sadly gone but the next one will be even more badass.


    Drove all the way to Arkansas to pick up a parts car for hard to find parts. Interior panels, glass, doors, chassis wiring, rear hatch, roof rack, window assemblies, etc. The wagon I'm picking up for the build is "drag car", all lexan, no inner doors, no interior, no roof rack, no functioning lights, no writers, etc. So it's cheaper and easier to buy a parts car. Did I mention I got it for $300? Would cost me $1600 to buy glass alone without a parts car so it was a smart decision. To bad there is no title and so much rust. I could have built this one...


    Got it home and went to work removing what I need. The parts car has no title and the floors are completely rotted out so she's going to the scrapper after I'm done.


    Removed the interior first with the help of my little buddy.


    It all needs restoration and will be dyed afterwards. Undecided what color yet.


    Here's a brief list of what it's got.
    Adjustable struts and coil overs on the front, tubular k member, caster/camber plates, manual rack, solid adjustable upper/lower rear control arms, rear drag springs, 33? Spline Moser axles, spool, c clip eliminators?, removable steering wheel, etc.

    Time to get to work. Gonna tear out the cage work, aluminum tin work, and strip this thing bare. I'm starting from scratch. Chopping off the front end from the strut towers forward, cutting out the floor, and parts of the

    Mean green ugly machine


    Interior shot. Going to utilize the donor wagon wiring harness integrated and cut down with my own harness to use with a sn95 dash and Fairmont steering column. Should be interesting.... cuz I'm going for a factory look.


    From the back. All this **** is coming out too. Going to put a large fuel cell under the car and utilize the factory fuel door.

    Ripped out most of the tin work


    Got the dash and wiring out.


    I'll be keeping the quick release hub but that's it from this steering column.


    And you can see why I'm going to rip out the cage and start over. I'm undecided if I wanna build a 25.5 chassis or 25.3 it'd be easier to get the kids in and out of a 25.5 and 7.50 is probably faster then I'll ever go so I'll likely do a 25.5....


    getting this bitch torn down to a shell. Going to chop the front end off, build a tubular front, and mount the shell on a rotisserie.


    Got her completely torn apart. Only item left is suspension which I will remove once the rotisserie is built.


    My project for tomorrow is to combine the driver front door from the parts car with the driver door from the green car.

    The green door is gutted. And the parts car door is to damaged to repair. I'll be cutting out the inner door skin out of the parts car door and welding it into the green door so I can have a functioning window.


    Looks like someone took a ball ping hammer to it. Can't really see it in pics. And at some point someone tried to steal it according to the previous owner.


    Got started on the inner door skin swap. I'm only taking what I need and eliminating any unnecessary sheetmetal.

    Cut out the donor to size and held in place with clamps


    Welded in place. Got half of it smoothed out already and squirted a little primer on it to prevent rust for now. Everything will be sand blasted later.

  3. #3

    Default

    Been doing a little nick nack work on the wagon. I'm currently filling all the factory tooling holes in the car and any other holes I run across so I can have a perfectly sealed cabin. I'm doing this for two reasons primarily. 1 I'm just anal like that. The factory used the holes for the machines to hold the sheetmetal while being spot welded together and it's more economical to use rubber plugs then to patch them. 2 I don't want any smoke entering the cabin during or after a burn out. It's the little details that no one will ever think about our see that matter to me.
    Most people think all these plugs in the floor pans are water drain plugs but that is false..
    I've done most on the driver side A, B, and C pillars and I'm starting the floor pans now. Picking up a tig welder/plasma cutter combo next week to do the passenger side and see how they compare.

    Making plus from 18 gauge steel and utilizing tack welds to avoid any warpage.


    What is coming next it's pretty cool. Or at least I think it is. Since I need a new floor pan and a new Fox pan(which is a direct fit) is $600+ ive decided to source a sn95 car to pull one from. I'm doing the sn interior so center console brackets will already be in place, I'm moving the dash mounted e brake to the center console so the e brake location in the floor will be correct, and the e brake mount in the trans tunnel is already in place.

    I just purchased a plasma cutter and a tig welder so this will be a fun project to break them in on. Should be here next week.
    Fortunately Clayton has a sn parts car I'm getting the floor pan from in exchange for some labor. so I'll be chopping that one up to replace the wagon pan. I'll be doing through floor subframes at this time as well.

    Here is a photo showing the differences between Fox and sn chassis. Red is sn95 only, white is exactly the same as Fox chassis, and yellow is sn vert only.


  4. #4

    Default

    Well I haven't made much progress but I do have the donor floor pan 85% out of the mustang.

    Only thing left to pull it is drilling out the spot welds that secure it to the frame rails and cutting the firewall. I'll be taking sir of the firewall with it just in case I need a little extra material.


    View looking aft at the rear seat structure.


    Driver side seem


    I finally got around to filling my mig bottle and buying an argon bottle for the tig. I'm loving my new tig welder A's plasma cutter! Went ahead and purchased some tig consumables, tungsten, 4043 filler rod, and some er70s2 filler rod. It was an expensive day.


    And I made a little tool for beating bearing races in to place. My first tig weld in many many years. I was a little kid the last time I had a tig torch in my hand and I must say this **** still isn't easy...
    Mild steel 1 5/8" .120" wall tube.

  5. #5

    Default

    Donor floor pan is out in one perfect piece. I left a little extra material on the front side so I could carefully break it apart at the seam working on the shop floor rather then in a cramped up mustang.


    My son is there every step of the way. I left the frame rails from the mustang on the floor pan for now. I'll be removing those and completely sand blasting this floor pan before reinstalling in the wagon.


    I used a 3/8" drill bit to remove the mustang pan because I didn't care about any sheetmetal behind the floor pan but I pulled out the spot weld kit to remove the wagon pan since I need to take special care not to drill through the frame rails. You can see in this pic it has subframe connectors. I'll be removing just before I go in with the new floor pan. It's helping to keep the structural integrity of the car right now. I'll be doing through flour subframes connectors after the new floor is complete


    I played with the new plasma cutter to remove a few pieces of the old wagon pan to have free access to see what I'm working with without stopping, getting out of the car, and crawling under it to see.


    A view of how clean a spot weld cutter removes material.


    And a little more plasma cutter action. Worth is weight in gold!


    After using the spot weld cutter the panels peel back pretty easily by hand. I use my rivet gun with a chisel set to release the stubborn ones.


    Next is to remove the roll bar mounts that are welded in on the front near the firewall. Gonna be a pain... then I'll be on to removing the floor section just behind the ghetto fabbed cross brace just in front of the rear seat section.

  6. #6

    Default

    As long as you're not doing Chevy power (not familiar with a 428 stroker) you've got my vote! And I'm all for a less race car interior, and a more usable car. Can't wait to follow the progress!
    Brad

    '79 Mercury Zephyr ES 5.0L GT40 EFI, T-5
    '17 Ford Focus ST
    '14 Ford Fusion SE Manual

  7. #7

    Default

    Quote Originally Posted by ZephyrEFI View Post
    As long as you're not doing Chevy power (not familiar with a 428 stroker) you've got my vote! And I'm all for a less race car interior, and a more usable car. Can't wait to follow the progress!
    Should have added that. It's a small block Ford 351w based stroker. Gonna be a street/strip/show car so full interior and creature comforts, lots of power, 4 doors for the family, and and very nice craftsmanship or I hope so anyway. I'm no pro, I just do the best I can with the skills I've got.

  8. #8

    Default

    I want a wagon. Great work.

  9. #9
    FEP Senior Member roadkill's Avatar
    Join Date
    May 2013
    Location
    Berea Ohio
    Posts
    724

    Default

    Looks like a fun build. It takes vision to see something cool out of that gawdawful green monster.
    1985 Mercury Marquis LTS... "The Unicorn"
    1978 Fairmont... 306 and a C4.

  10. #10

    Default

    Quote Originally Posted by roadkill View Post
    Looks like a fun build. It takes vision to see something cool out of that gawdawful green monster.
    That's the truth. It was ugly!

  11. #11

    Default

    Subscribing. I like wagon builds.

    Jess
    Previously owned;
    1979 Mustang, v6 swapped to EFI 393, custom installed m122 blower, 4r70w trans, Megasquirt II, T-top swaped in.
    1990 Mustang, 545 BBF, C-4 with brake, ladder bars.
    1983 Mustang, 1984 SVO Mustang
    1984 Mustang convertible, v6 swapped to 351
    1986 Mustang GT, 1989 Mustang GT convertible
    1992 Mustang coupe, 4 swapped to 302

  12. #12

    Default

    Cool build, and lots of work!

    -MJS

  13. #13

    Default

    So lately I've slowly been chipping away at prepping the floor pan. Time is hard to come by lately due to work schedule.
    I'm currently removing the frame rails and working out a few dings/dents that were in the floor pan. Started removing the factory tar mat as well. After getting all of that **** removed I'll be sand blasting both sides.


    Picked up my new 110lb sand blaster. Gonna use the hell out of this thing.

  14. #14

    Default

    So there's alot of work to be done on this floor pan before going in the car...

    Removing the frame rail from the driver side.


    And the frame support doubler.


    Frame rail removed. You can see the spot welds are not evenly spaced and are pretty random with no pattern. This leads me to believe they were done by hand and not a machine.


    Now to drill off the forward section(firewall portion) that won't be used. I checked up some wood to prevent bending the metal while drilling. At this point my drill bit was getting a bit dull.


    Peels right off after filling off the door welds.


    Picked up some blasting media and time to clean up the bottom side


    Got about 1/3 of the floor done before calling it quits for the day.

  15. #15

    Default

    So after pulling a few measurements and thinking everything through in my head I've got a plan for the floor structure that we'll be 25.5 legal and be a hell of a lot stronger than factory.


    The subframe connectors in there now will be coming out as well as the 1x2" cross brace that the previous owner added.


    I found more rust in the rear seat brace so I'm going to have to build a new one from 2x3" tube
    Last edited by 1onebadfox; 05-01-2014 at 02:36 PM.

  16. #16

    Default

    Awesome project! Pretty sure i saw this car on craigslist. Glad it went to a good home!
    Looking for a Fox wagon

  17. #17

    Default

    Quote Originally Posted by Mike Gager View Post
    Awesome project! Pretty sure i saw this car on craigslist. Glad it went to a good home!
    You probably did. It was for sale for 2 years. It's rough and ugly but it'll be nice in the end.

  18. #18

    Default

    Wow, that's a major project you've undertaken. I applaud your dedication, most people would pass on it.
    81 Fairmont wagon,528 on E-85,just a brutal street car

  19. #19

    Default

    Got some metal for the subframes and floor structure. Using 2x2 .083, 2x3 .083 wall, and 1x4 that I still need to locate somewhere.


    finally got all the tar mat off the floor pan. Next will be to finish working out a few dent and dings then filling all the unnecessary tooling holes.


    Will be sand blasting both sides and giving a nice coat of 2k primer before installation.

  20. #20

    Default

    Got 18 holes in the floor pan patched up.


    Down to bare metal and welds ground down.


    And 2 coats of primer. I've still got more work to do on the floor pan but I wanted to get it in primer ASAP to prevent surface rust.

  21. #21

    Default

    Quote Originally Posted by whyidontknow View Post
    I want a wagon. Great work.
    i know where one sits in wichita body kinda rough tho

  22. #22

    Default

    Slowly picking away at the wagon. I've got a 3 week vacation coming up soon so I'm hoping to get a good portion of the floor structure built and the floor pan reinstalled.

    Getting ready to cut out some cancer and install a new patch panel. It's pretty rough.


    And the patch panel. Still have a bit of body work to do on the panel before it's ready to cut to size and weld in.


    I found a substantial amount of cancer in both rear seat pans so I've cut them out completely and I'll be building one from scratch. This will also allow me to brace the lower torque boxes internally and integrate them directly into the floor structure.


    Chopped out the hunk of **** cross brace and subframe connectors.


    I'll go ahead and mention the port work on the heads is complete. I won't say what they flow but it'll more than meet my power goal. Also have a custom cam, springs, valve seals, retainers, and locks ordered up. Probably be a few weeks before I receive it. I'll post pics and details when I pick everything up in a few weeks.

  23. #23

    Default

    One patch panel down. 3 more to go on the firewall section.


  24. #24

    Default

    Finally test fittingg the sn95 floor pan after removing the remaining pieces of roll cage from the door sills.


    And now it's time to get started on the door sill structure. These will tie directly to the through floor subframe out riggers in the front and rear and I'll also tie them directly to the lower torque boxes.


    Since no one makes 1.3"x4" .083" wall rectangle tube I'm making my own from 2"x4" .083" wall. This size will sit directly into the door sill structure perfectly. Everything cut out.


    Doing a little sand blasting and prepping for some primer on the door sill structure.


    Cut to length. After I cut down and weld it to the correct width it will sit flush and tie into the 1/8" plate with plug welds that the front outrigger will attach to. It slides in behind the lower torque box that I will also plug welds to. Then I'll run bracing from there.


    Burned up my second 4.5" angle grinder making these cuts. Going to pick up a DeWalt 10amp grinder tomorrow that should be better suited for the work I do.

  25. #25

    Default

    Got a new angle grinder so I can continue. This thing has some balls for a 4.5" grinder. Notching out .63" from the center to get the 1.3" width I'm shooting for. Took into account the cutting wheel thickness..


    Pretty nice fit up for 212" of cutting on both sides by hand.


    Dead nuts 1.3" I'm happy with that.


    And on to welding this thing back together. I would rather have tig welded this for more practice on tig but I'm out of argon so mig will do. Doesn't have to be pretty as it will all be ground off.


    Capped both ends so I won't have to worry about moisture on the inside of these.


    And all ground smooth. Time to mask it off and shoot it with 2k primer. The areas near welds I'll use weld through primer.

Page 1 of 10 123 ... LastLast

Posting Permissions

  • You may not post new threads
  • You may not post replies
  • You may not post attachments
  • You may not edit your posts
  •