Close


Page 1 of 2 12 LastLast
Results 1 to 25 of 49
  1. #1
    FEP Supporter
    82GTforME's Avatar
    Join Date
    Feb 2013
    Location
    Alberta, Canada
    Posts
    4,857

    Default Paint & Primer Choices: Tangerine (and other paint related questions)

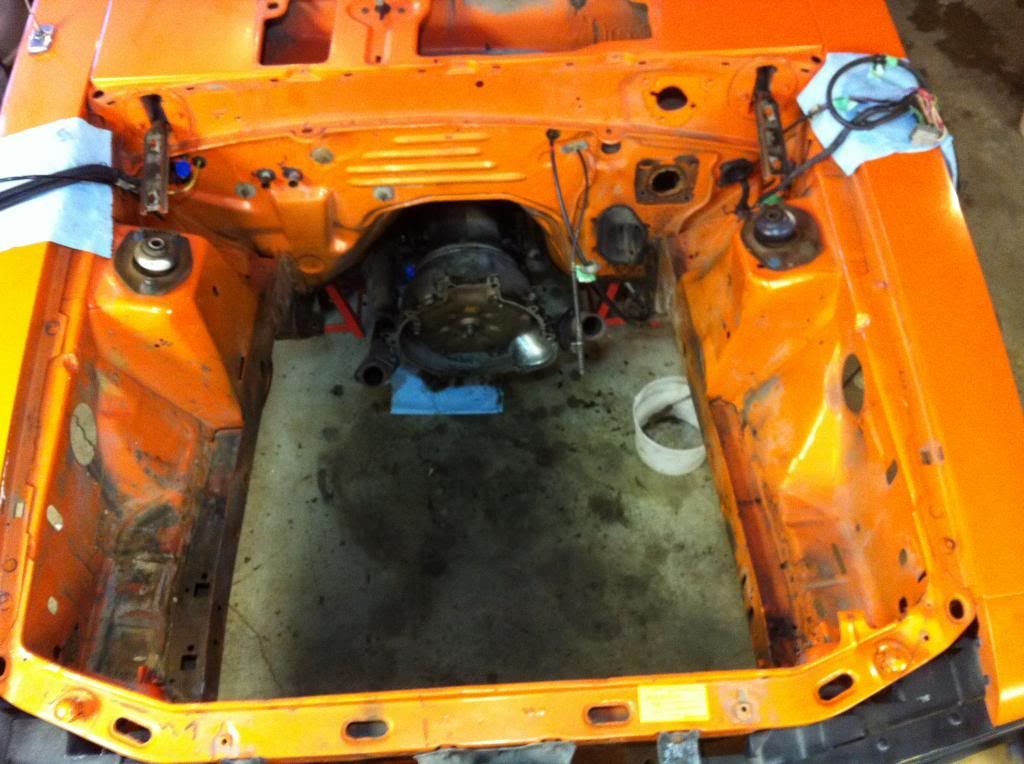
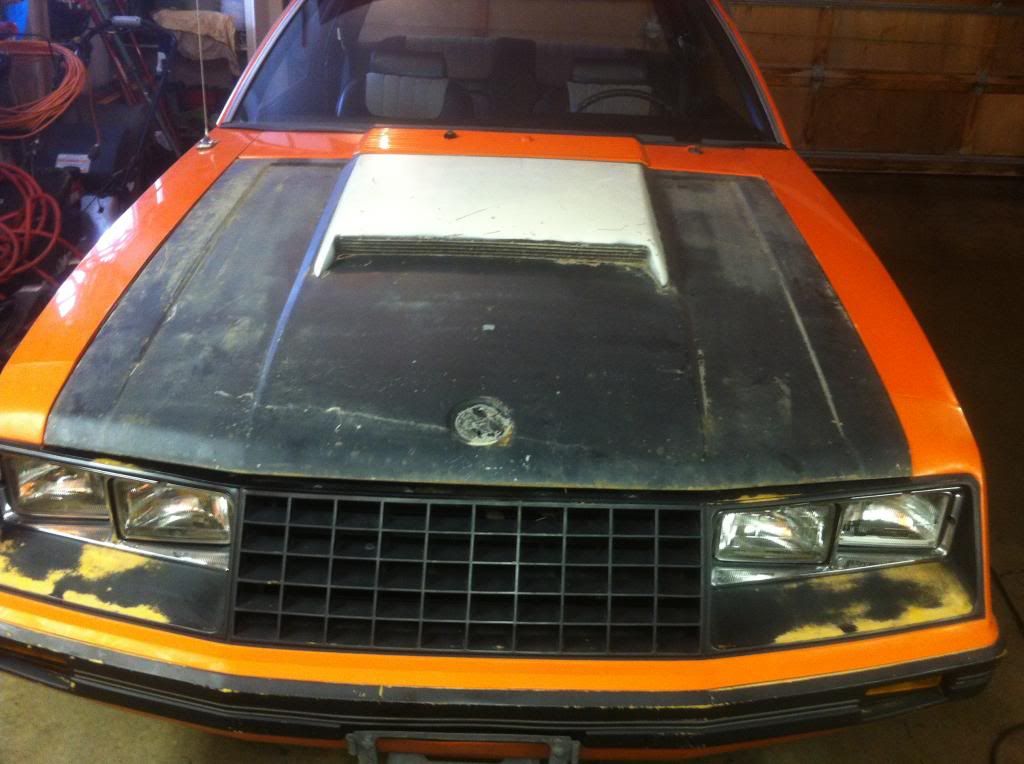
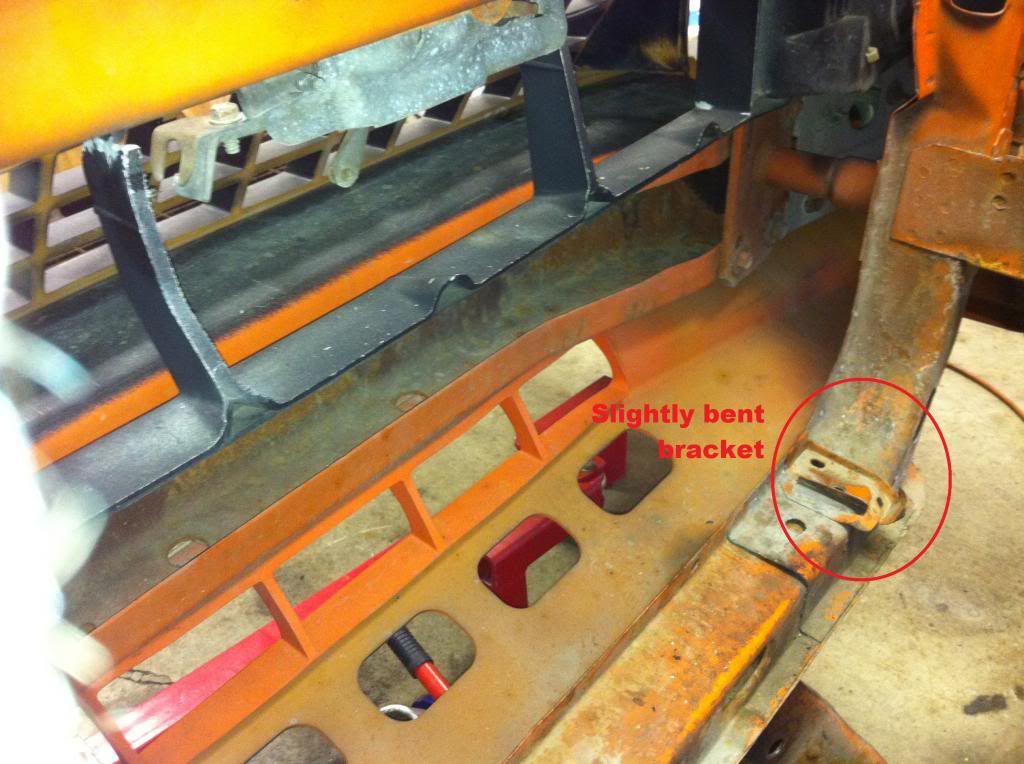
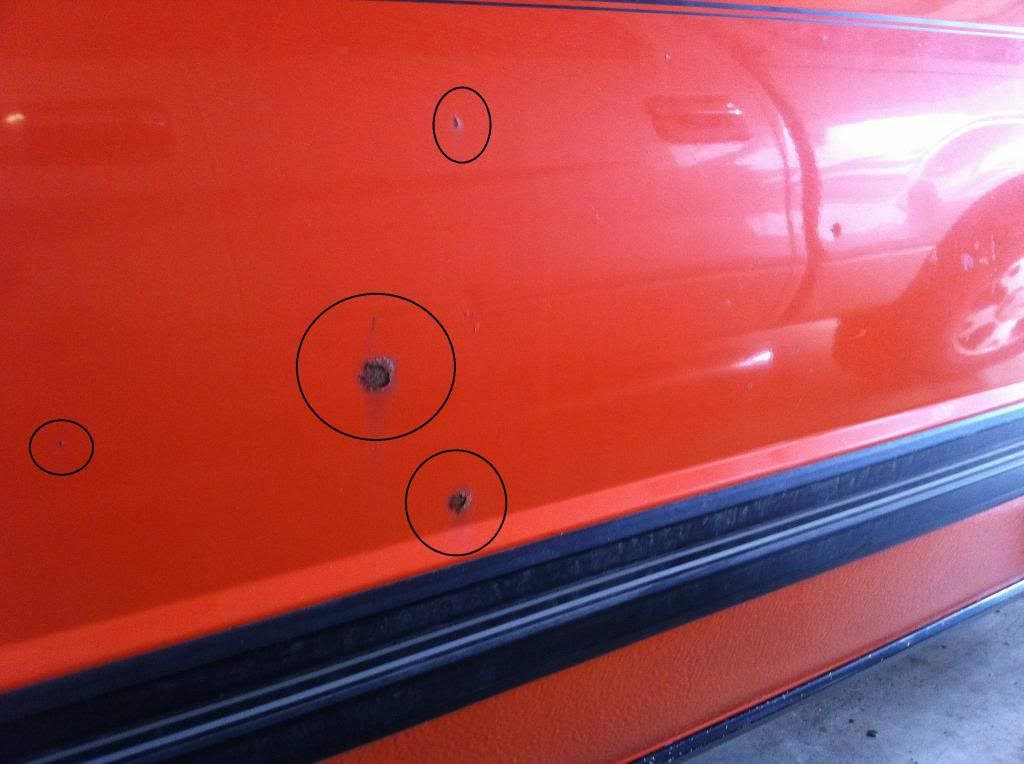
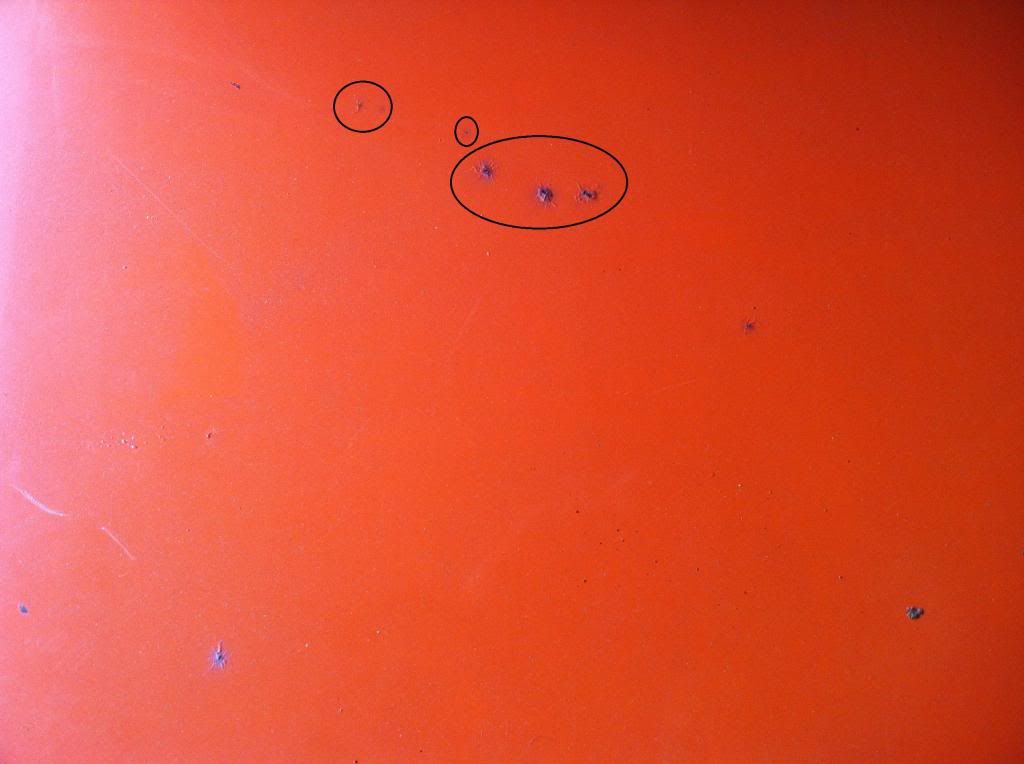
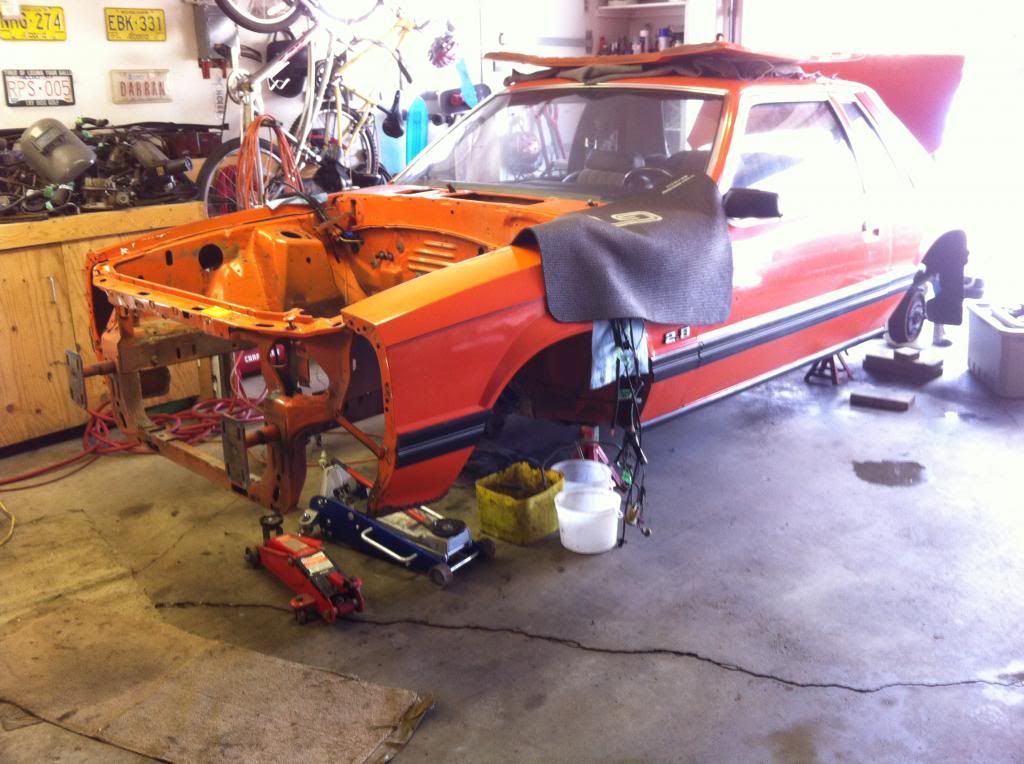
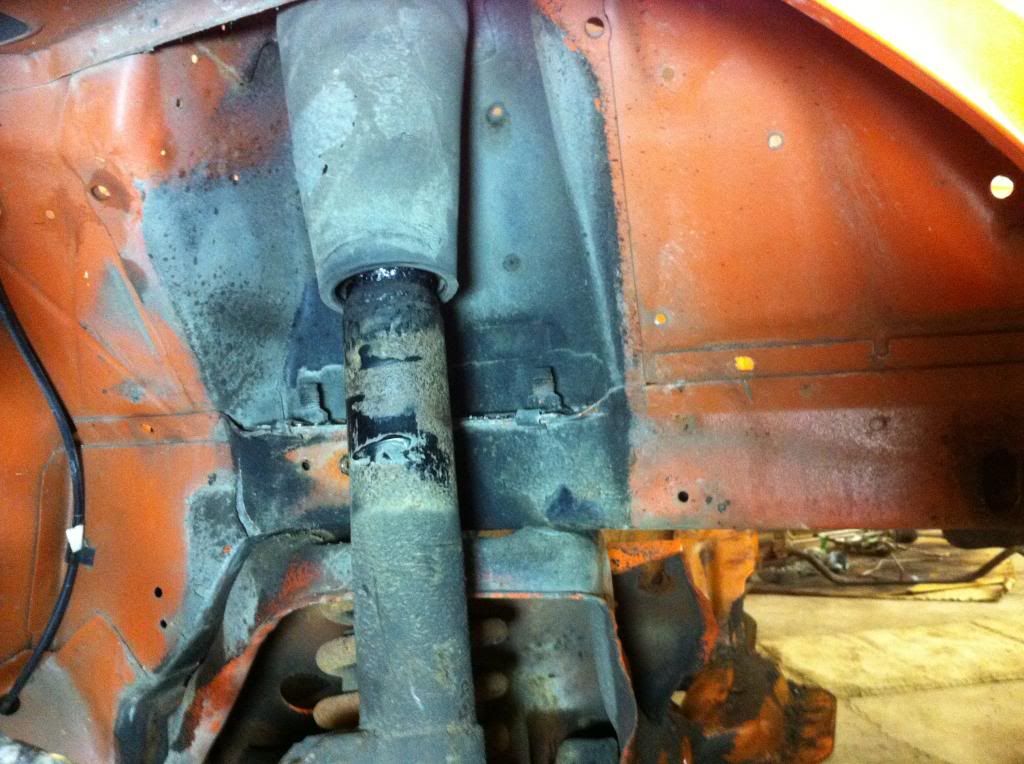
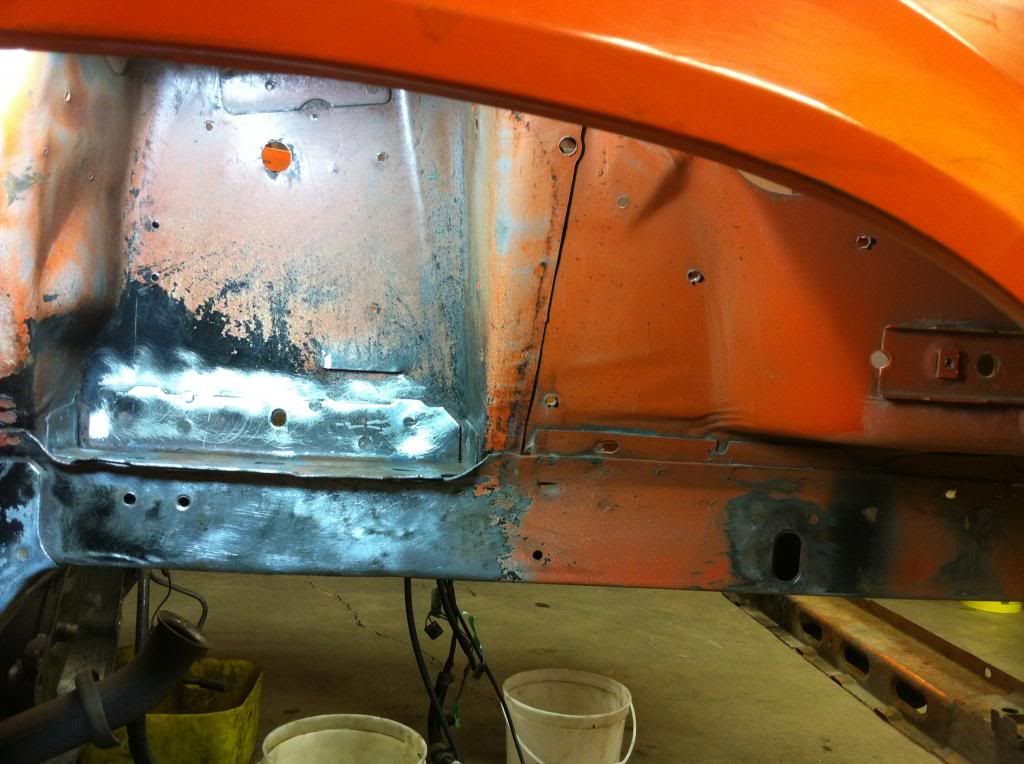
    Home painters and bodymen: I'm at a point that I need to decide what type of paint and materials I am going to need to do the engine compartment (which may turn into the front clip), new hood, front and back bumper covers. Then finally on to some touch up rust spots intermittent on other spots of the car. I am going to be painting mainly over the original finish. I think I have a game plan for the prep process so now it comes to materials.

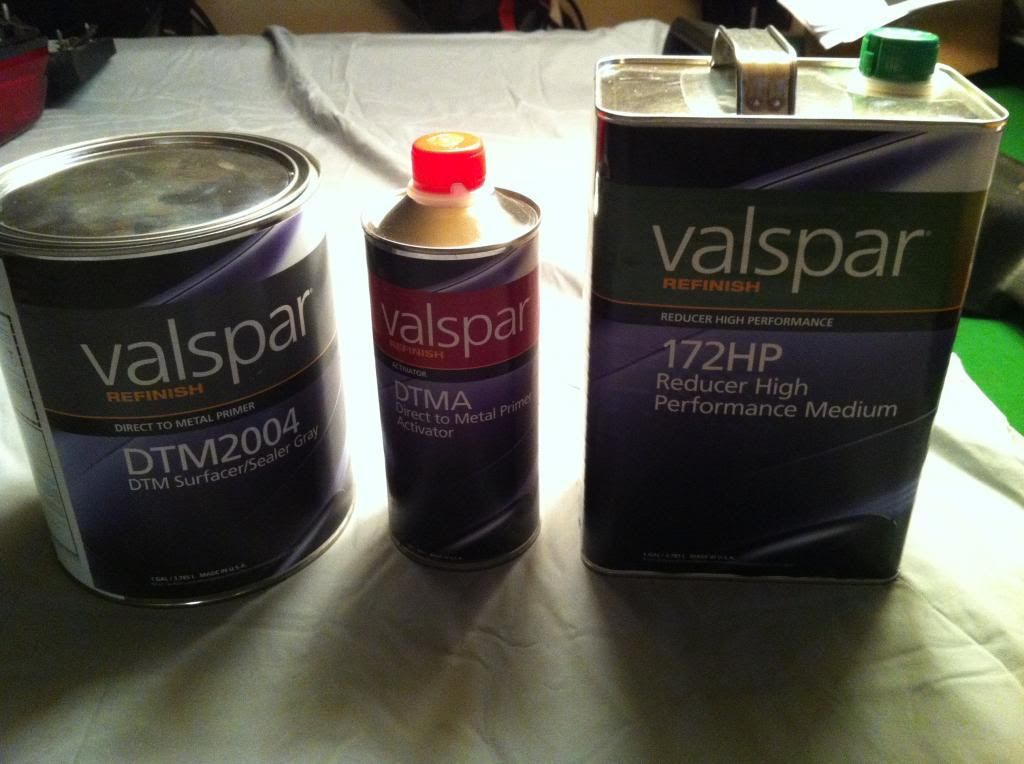
    My question is what to use. I have read that Tangerine (orange) can be tough but if you use the right primer (tinted?) that it can be done at home. So:

    Primers: acrylics or epoxys?
    Sealers: required and what type?
    Top coat: base/clear or single stage urethane?

    Bear in mind I am a beginner but have full confidence I can do a decent job. I would like to keep it simple so am leaning away from the epoxys and base/clear. Thoughts? Thanks.
    Last edited by 82GTforME; 04-04-2014 at 09:58 AM. Reason: Changed title
    Quote Originally Posted by Travis T View Post
    I think this is my favorite car on the site right now.
    Quote Originally Posted by BLUECRAPI
    This is the best thread on the internet.
    Darran
    1982-1C (Black) GT T-Top:http://vb.foureyedpride.com/showthre...he-Road-Thread
    1986-9L (Oxford White) SVO: http://vb.foureyedpride.com/showthre...d-did-1986-SVO
    1979 (85:Tangerine) Coupe (my son's): http://vb.foureyedpride.com/showthre...gerine-Machine
    1979 (3F:Light Medium Blue) Coupe (one day to be my other son's!) http://vb.foureyedpride.com/showthre...um-Blue-Bomber!

  2. #2
    Moderator wraithracing's Avatar
    Join Date
    Jun 2010
    Location
    Grand Junction, CO/RR TX
    Posts
    14,213

    Default

    I will try to give you a quick answer, but I will forewarn you that I am a bit punchy right now. I have been up since 4pm yesterday and I just spent 12 hours driving home from a rig, so I won't go into one of my standard long write ups this time.

    The type of primer depends on what you are doing with it. There are regular sanding primers, high build primers, primer/sealers, and catalyzed primers. I would like more information and/or pictures of what you need/want to prime to be able to give a more informed decision.

    Orange/Tangerine is a red based paint and reds generally take more coats/paint compared to other primary colors. Sometimes a tinted primer or tinted sealer helps, sometimes a specific gray tone base does the same thing. All of this will depend on what brand and type of paint you buy. I would recommend picking your final paint color and working back from there. For a beginner I highly recommend you pick a paint brand/system and stick with it. You will have fewer issues and headaches in the long run. When you have more experience and knowledge, then you can start mixing things up.

    Personally I like using a sealer before I start spraying my color coat as it can help in many ways, but again different systems work differently so . . . . . .

    Base Coat/Clear Coats are not difficult to spray and offer the advantage that if you have an issue in/during the base coat you can stop fix it and then continue on with the painting as long as you are within your clear coat window.

    Single Stage has the benefit of solid color for all coats so if you color sand and buff you have less chance of sanding or buffing through.

    In truth spraying the Base coat is very similar to spray old school lacquer. Spraying Clear Coat and Single Stage are both very similar and in some cases virtually identical. So again pick your color first as it may or may not be available in all paint types, so don't back yourself into a corner if you don't have to.

    Give me some more information and I am sure myself and others can help you sort all your options out. Although remember . . . ask 100 painters how to paint a car and you will get 100 different answers!

    So much for being a short!

    Trey
    Last edited by wraithracing; 04-02-2014 at 05:09 PM.
    ​Trey

    "I Don't build it hoping for your approval! I built it because it meets mine!"

    "I've spent most of my money on Mustangs, racing, and women... the rest I just wasted."

    Mustangs Past: Too many to remember!
    Current Mustangs:
    1969 Mach 1
    1979 Pace Car now 5.0/5 speed
    1982 GT Stalled RestoModification
    1984 SVO Still Waiting Restoration
    1986 GT Under going Wide Body Conversion Currently

    Current Capris:
    1981 Capri Roller
    1981 Capri Black Magic Roller Basket Case
    1982 Capri RS 5.0/4spd T-top Full Restoration Stalled in TX
    1984 Capri RS T-top Roller
    1983-84 Gloy Racing Trans Am/IMSA Body Parts

  3. #3
    FEP Supporter
    82GTforME's Avatar
    Join Date
    Feb 2013
    Location
    Alberta, Canada
    Posts
    4,857

    Default

    Trey, thanks for your reply after a long and arduous day!

    This is the engine compartment to be cleaned scuffed, primed/sanded where bare (under battery tray etc.) before we put the motor back in. I might just stop there or depending on the work do the quarters including in the wells. I am also needing to remove the bumper cover as I need to get at some minor rust where it meets the bottom fenders. Plus it needs some black so I will also do the orange. Is it better to do it separately or on the car? I am going to do the back one on the car. Of course the hood needs stripping and a little more prep. The k-member is to be blasted then finished.


    Some (this would be the extreme worst and not perforated) rust spots to fix and/or sand and spray to blend in.


    We are freshening this coupe up and salvaging as much of the original finish as we can. What is intact is really good and only in need of polishing. Hopefully just spot fixing the surface rust spots and the previously mentioned things.


    I didn't realize I needed to choose a type or brand first. Cannot the OEM colors be replicated by any paint manufacturer? If not then, I suppose I need to ask what BRANDS are recommended for my needs and the paint type to go best with the OEM paint. Then I can try to source around.

    I hope the info helps for some feedback.
    Last edited by 82GTforME; 04-02-2014 at 11:17 PM. Reason: Changed pic links.

  4. #4
    FEP Supporter
    82GTforME's Avatar
    Join Date
    Feb 2013
    Location
    Alberta, Canada
    Posts
    4,857

    Default

    A couple of quick phone calls gave me a couple of brands: De Beer/Valspar (type tbd) and PPG Delphi polyurethane single stage with a possible clear coat option. They had a small compatability concern about this one over the factory enamel. Can it be primed and/or sealed over?

    So much information and options out there to dissect through. My head is starting to spin.

  5. #5
    Moderator wraithracing's Avatar
    Join Date
    Jun 2010
    Location
    Grand Junction, CO/RR TX
    Posts
    14,213

    Default

    Ok, that helps to answer some questions and give me more information. So you want to keep as much of the original finish as possible. I understand and can appreciate that. I will say that for a beginner that will prove to add a high degree of difficulty. The difficulty will be in blending and matching the original color in it's current condition. Unfortunately as time goes by the colors tend to fade and age which generally will change the color on the car from it's original luster and color. So most likely you will have to start with the original color mixture and fine tune it from there. The other issue will be getting a good blend from the new paint into the old that is seamless and not noticeable. It can be done, but again for someone with limited experience it will be a bit more difficult. This is especially true for something like the rear bumper cover as the easiest repaint would be to remove the cover and paint it separately and then re install. The bumper covers may times didn't match too well even from the factory especially on the early models as Ford was still working out how to paint urethane properly at the time and many times this caused a difference in color.

    The first and foremost issue is to make sure that all your rust is either removed completely or properly converted and sealed. I personally like the Eastwood line of Rust Encapsulator and their other rust converting and sealing products. POR 15 works well too, but over the years I have turned to the Eastwood products again and again without any issues. I recommend checking out the different options and determine what works best for each area you have. From the pictures it appears your wheel arches may be a bit more involved then they look at first. The driver side appears to have more than just surface damage from the pictures, so be thorough with your cleaning and repair so that the rust doesn't ever come back and ruin all your hard work.

    In regards to the OEM color being able to be mixed in any paint by any manufacturer, unfortunately the answer is not always a Yes. Some manufacturers don't have the paint code from that many years ago, so they don't have a formula to mix with. Others may have a formula, but due to changes in paint manufacture and the chemicals used their formula may not be mixable in all brands or types of paint today. With that said, a quality paint mixer will be able to mix a formula for your color in one of their paint offerings, but getting them to take the extra time and get it right might prove difficult as a single customer and most likely one time buyer as the time investment is much higher than a standard off the shelf mix. So just be aware of that going in. You will also most likely need to provide a sample of the paint to help them match the color. Many times the fuel door is a good choice for this as the sun damage is often less than any other piece, it's small, easily removable, and doesn't affect the driveability of the vehicle if that's an issue.

    If the majority of the car that needs repainting is the front clip, you might seriously consider matching the paint as closely as possible. This will most likely require you to purchase a bit of extra paint so you can spray some test panels too in order to verify your color match and what primer or sealer color works best to get your color match of the top coat. Then rather than trying to blend the fenders, you might spray to any sharp break such as the fender to door and then to the body moldings rather than try to blend the color mid panel. This will make it easier for you to get a good paint job and worry less about the blending into the original paint. If the color match is close, then most likely this will be the most seamless way of painting it IMHO.

    Another observation is that your cowl vent cover is painted body color which is not Factory, so are you sure that the car hasn't been repainted before? Again due to the issue of bright colors such as reds and oranges fading over time, it would not surprise me if the car had been repainted at some point in time during it's life. Actually I just looked at the engine bay again and I can almost guarantee that the car has been repainted at some point due to the color on the hood bumpers, all the fender bolts and then the discoloration where the hood bumpers were on the fenders. So with that in mind, you will definitely want to start with a factory paint code mix, but verify that is matches the current color on the car.

    I believe that answers most of your questions, but I am sure I have created many new questions in the process. Consider the information and options I have given you and we can go from there. Good Luck!

    Trey
    ​Trey

    "I Don't build it hoping for your approval! I built it because it meets mine!"

    "I've spent most of my money on Mustangs, racing, and women... the rest I just wasted."

    Mustangs Past: Too many to remember!
    Current Mustangs:
    1969 Mach 1
    1979 Pace Car now 5.0/5 speed
    1982 GT Stalled RestoModification
    1984 SVO Still Waiting Restoration
    1986 GT Under going Wide Body Conversion Currently

    Current Capris:
    1981 Capri Roller
    1981 Capri Black Magic Roller Basket Case
    1982 Capri RS 5.0/4spd T-top Full Restoration Stalled in TX
    1984 Capri RS T-top Roller
    1983-84 Gloy Racing Trans Am/IMSA Body Parts

  6. #6
    FEP Supporter
    82GTforME's Avatar
    Join Date
    Feb 2013
    Location
    Alberta, Canada
    Posts
    4,857

    Default Original paint to work with.

    Thinking about your comments Trey. I have to disagree on the car being painted previously. Being an early car the cowls were painted and maybe more


    Plus all of the cars in the 79 brochure had them painted. For a 50000 km car, I wouldnt have expected it to have anything done. There are signs of some small touch ups on the fading bumper cover but nowhere else is there repairs or spray i can see


    Signs of a more recent 
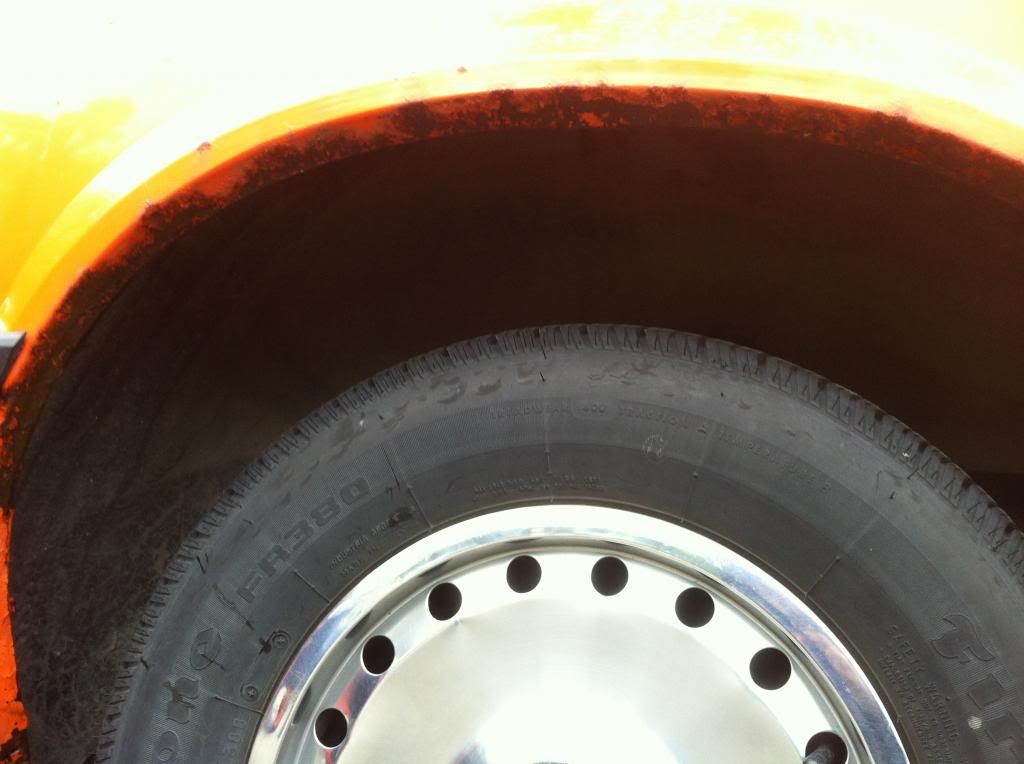
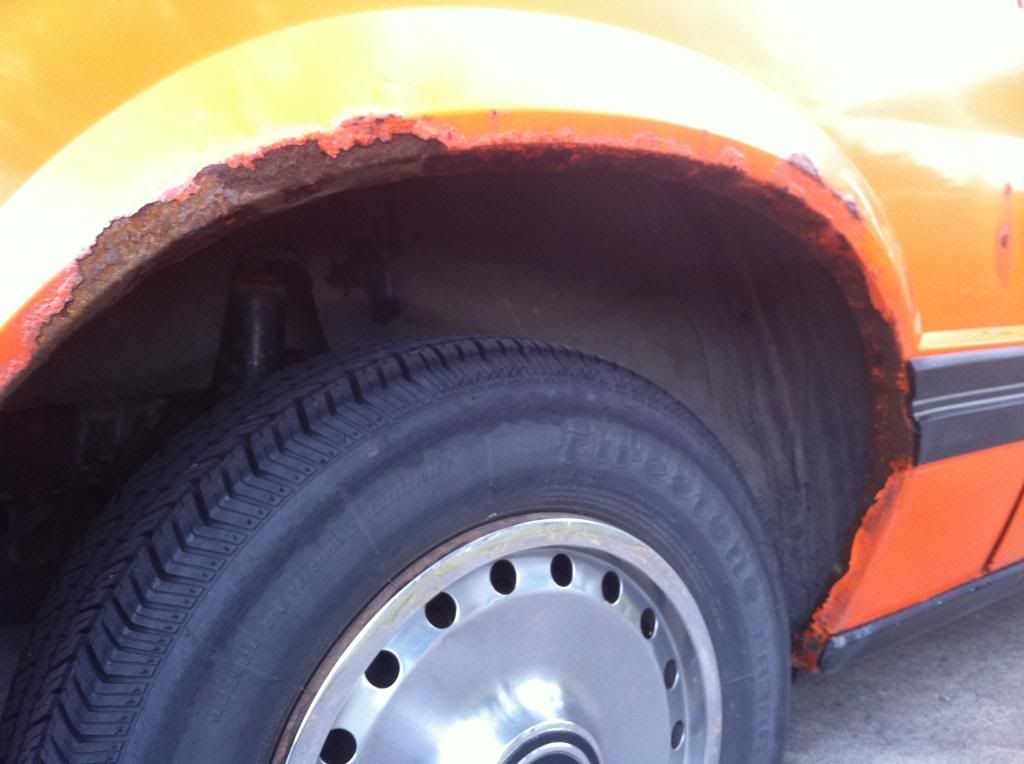
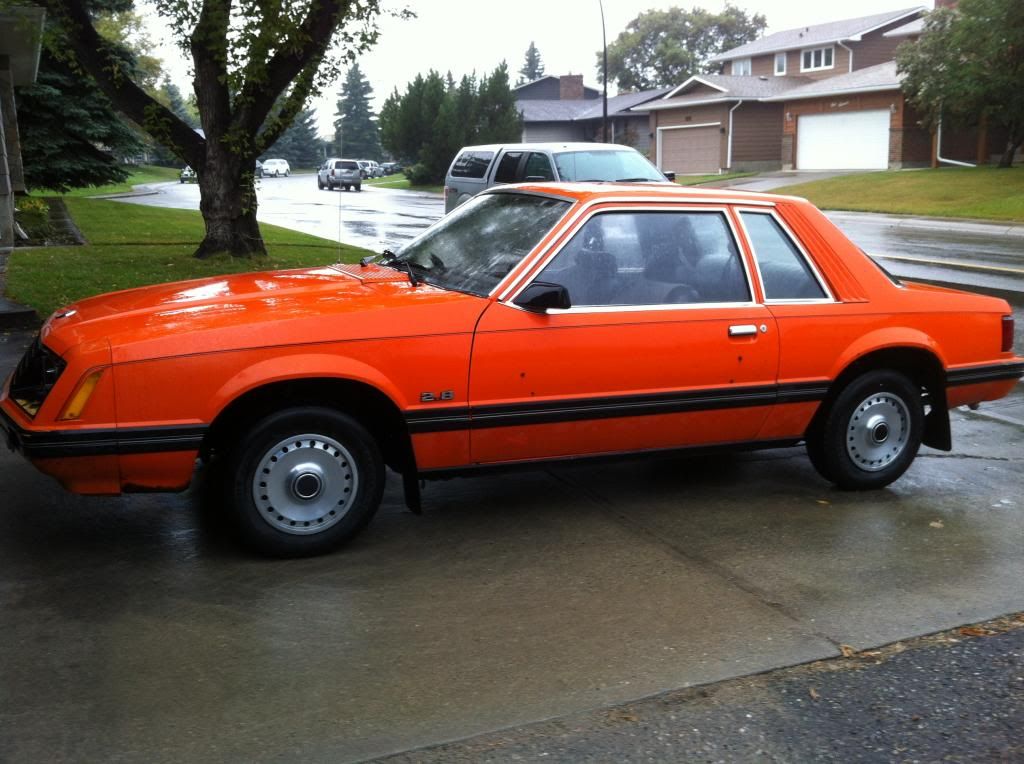
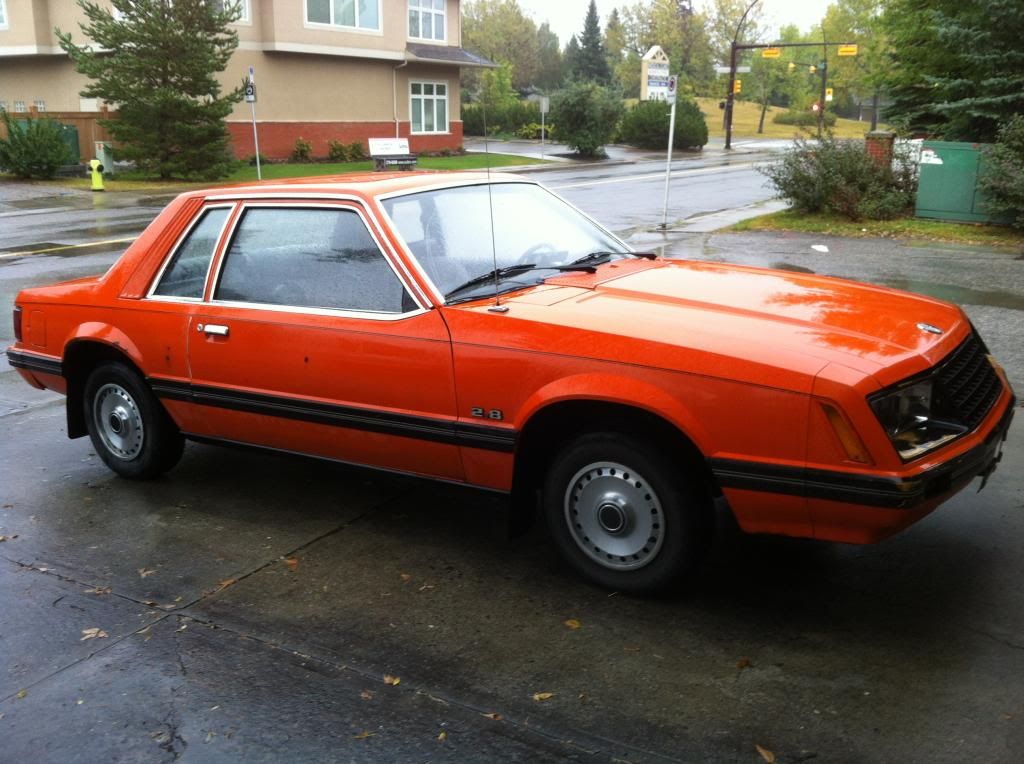
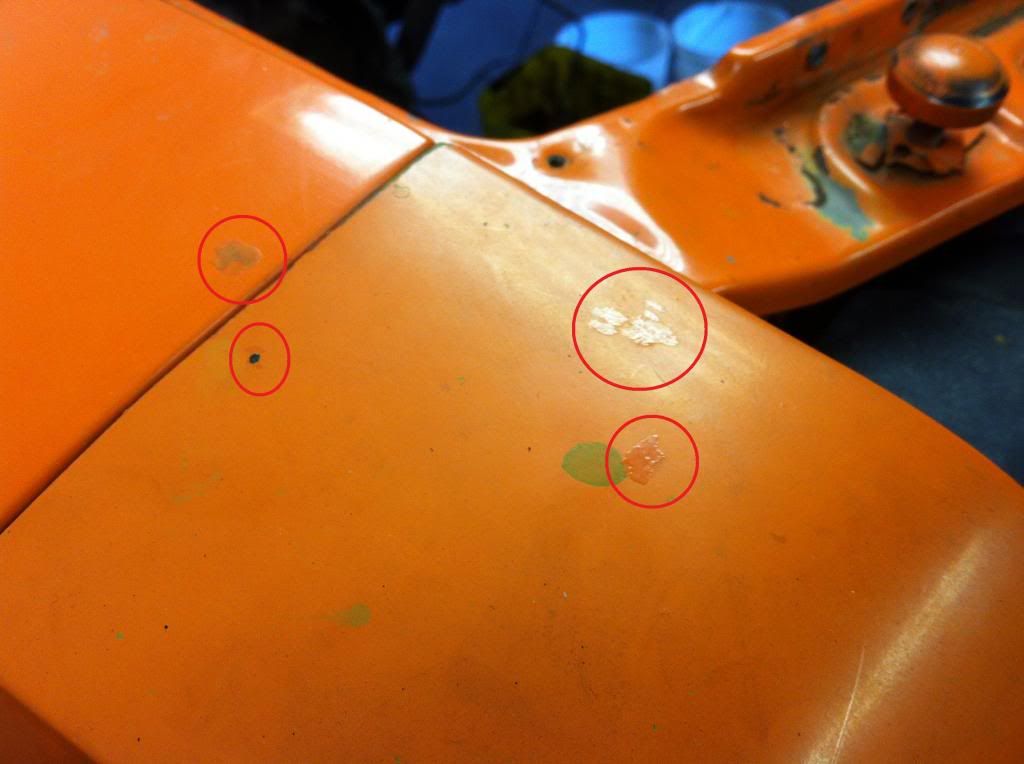
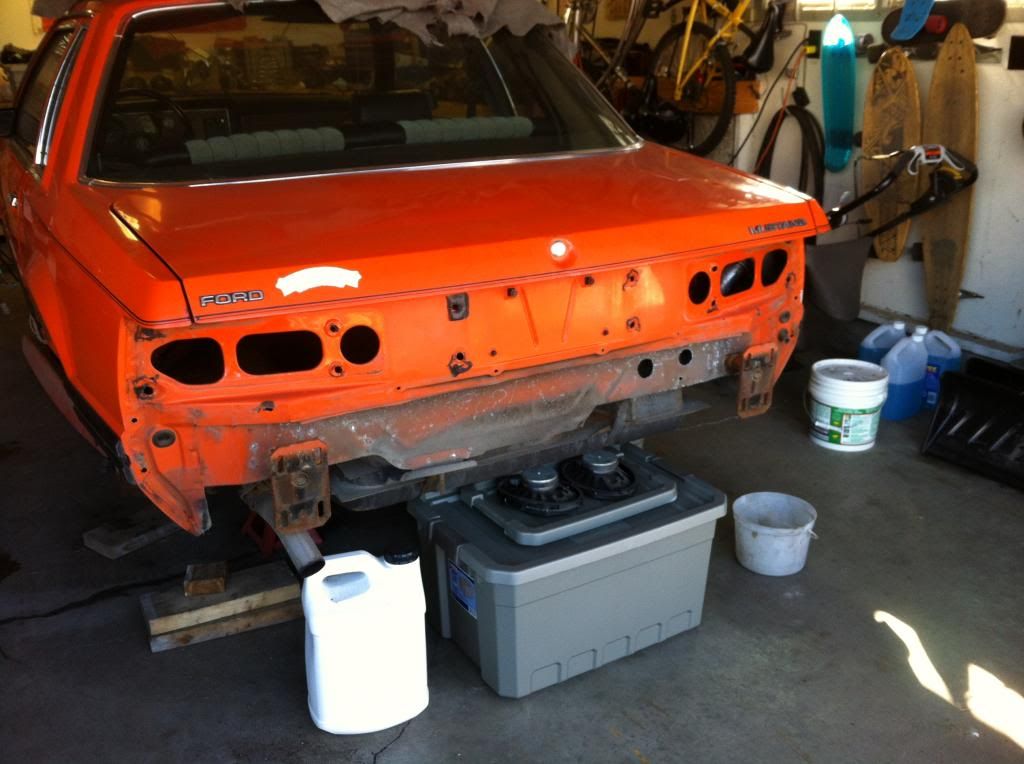
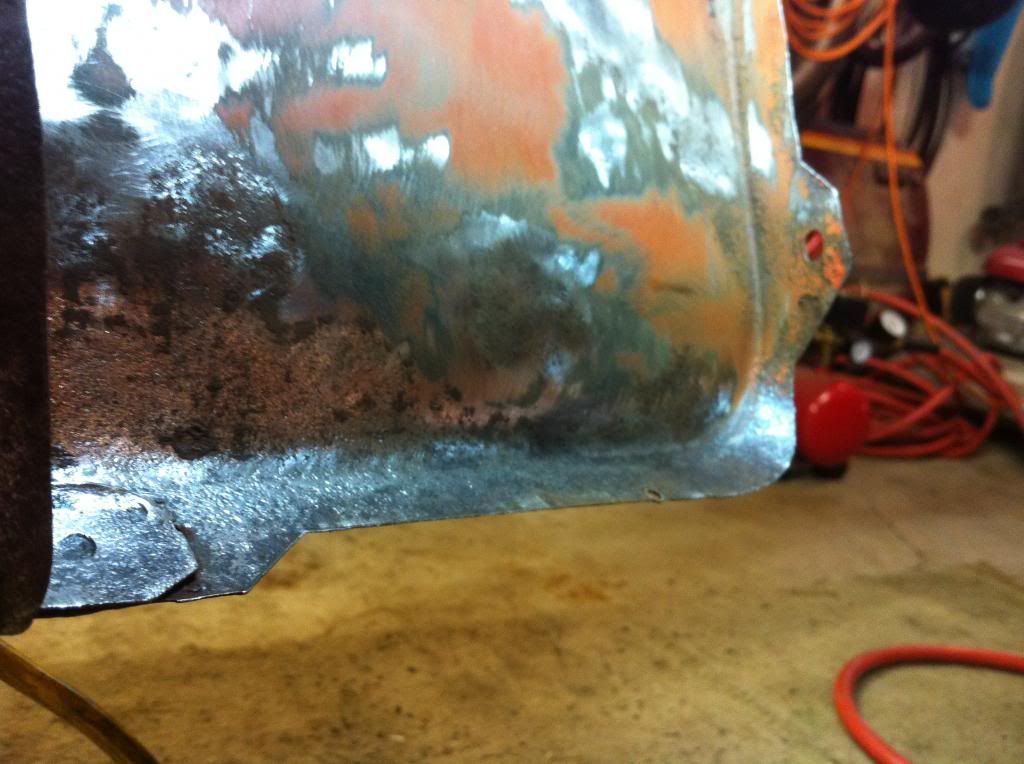
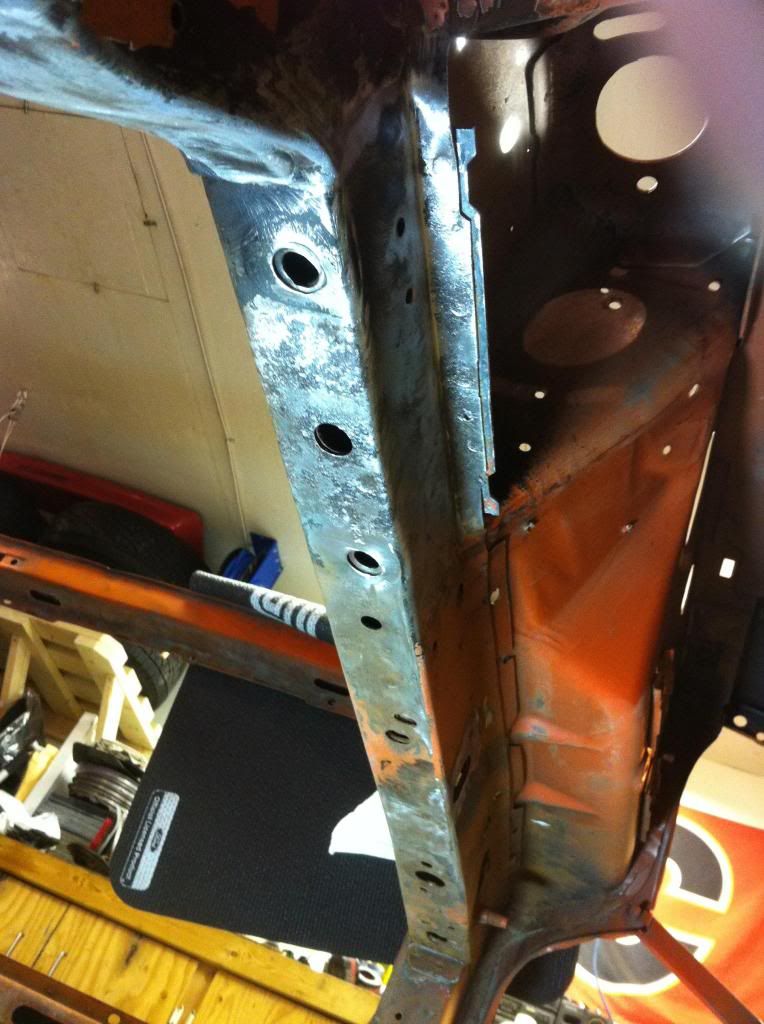
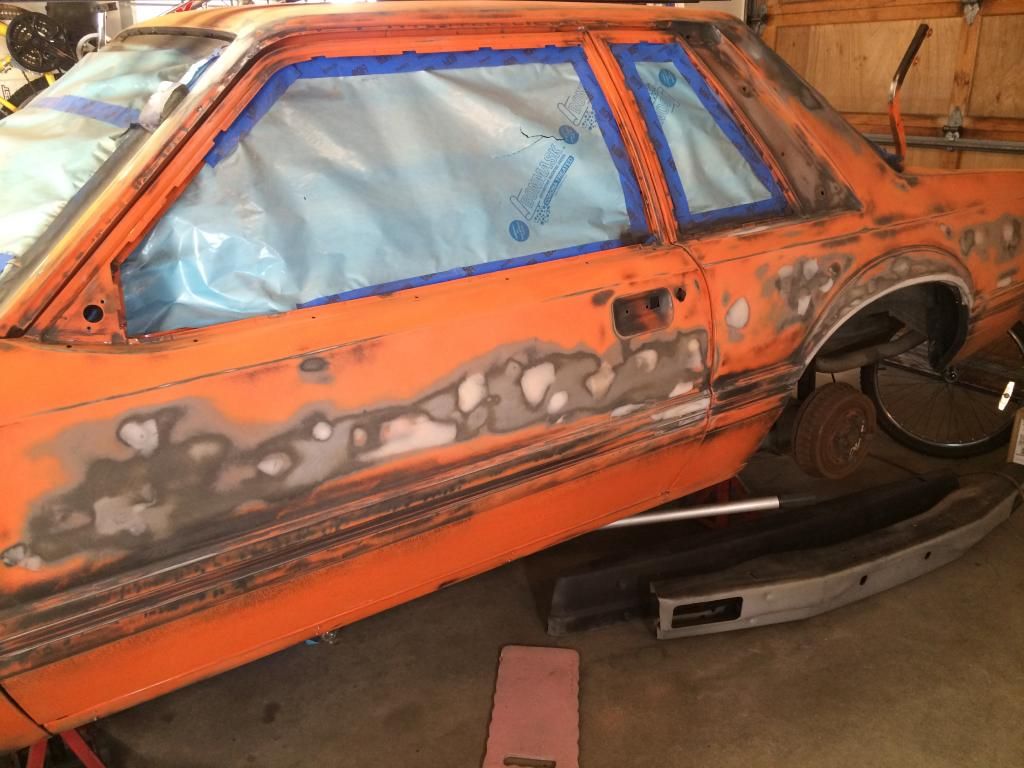
bump. It looks pretty minor though. Plus original body and molding pin-striping:


    That bump may have broken this bar in the light bar. I will reinforce it but it is not weakened as is.


    One of the rad mounts was slightly bent. I honestly think it may have been factory. Nothing looked as if ever disturbed.


  7. #7
    FEP Supporter
    82GTforME's Avatar
    Join Date
    Feb 2013
    Location
    Alberta, Canada
    Posts
    4,857

    Default A big decision.

    Quote Originally Posted by wraithracing View Post
    I will say that for a beginner that will prove to add a high degree of difficulty. The difficulty will be in blending and matching the original color in it's current condition.
    After watching some blending videos on youtube this evening I am going to have to agree with you. Even though I think this color is barely even fading but even so, it would be too much for me.

    Quote Originally Posted by wraithracing View Post
    This is especially true for something like the rear bumper cover as the easiest repaint would be to remove the cover and paint it separately and then re install. The bumper covers may times didn't match too well even from the factory especially on the early models as Ford was still working out how to paint urethane properly at the time and many times this caused a difference in color.
    Agreed, I think the back will come off too now.

    Quote Originally Posted by wraithracing View Post
    The first and foremost issue is to make sure that all your rust is either removed completely or properly converted and sealed. I personally like the Eastwood line of Rust Encapsulator and their other rust converting and sealing products. POR 15 works well too, but over the years I have turned to the Eastwood products again and again without any issues. I recommend checking out the different options and determine what works best for each area you have. From the pictures it appears your wheel arches may be a bit more involved then they look at first. The driver side appears to have more than just surface damage from the pictures, so be thorough with your cleaning and repair so that the rust doesn't ever come back and ruin all your hard work.
    Again more videos. The Eastwood products look good. I have no idea where to get them up here. I guess a good body shop supply store?

    Quote Originally Posted by wraithracing View Post
    In regards to the OEM color being able to be mixed in any paint by any manufacturer, unfortunately the answer is not always a Yes. Some manufacturers don't have the paint code from that many years ago, so they don't have a formula to mix with. Others may have a formula, but due to changes in paint manufacture and the chemicals used their formula may not be mixable in all brands or types of paint today.
    The two I called both said they can do the original color. Now to find out in which types. I think I am going to go with base/clear if I can.

    Quote Originally Posted by wraithracing View Post
    If the majority of the car that needs repainting is the front clip, you might seriously consider matching the paint as closely as possible.
    These are some of the rust spots I need to rid myself of. A couple are larger than quarter size the others are minute but will need to be dealt with.


    These on the trunk aren't worth trying to fix and blend. I would have to do the whole lid. There are other very small specks here and there to do also. I got this car in the nick of time I think.


    So, with that being said...I am going to redo the entire thing now. I probably didn't want to admit I needed to. I can't have some nice and others so-so or pretty good. I'm really not that far from it now. Enough digressing in this thread, let's move on.

    Quote Originally Posted by wraithracing View Post
    I believe that answers most of your questions, but I am sure I have created many new questions in the process. Consider the information and options I have given you and we can go from there. Good Luck!

    Trey
    Yes, it does. I'll let you know once I talk to one of the paint suppliers tomorrow.

    Thanks again Trey. Nothing like setting a guy in a different (the right and better) direction.

    My timeline is short I had promised my son we'd try to be on the road by the end of June. This scope change may delay things a tad. We'll see how his sanding technique is

  8. #8
    Moderator wraithracing's Avatar
    Join Date
    Jun 2010
    Location
    Grand Junction, CO/RR TX
    Posts
    14,213

    Default

    Well, it looks as I was wrong on the cowl. I have only owned two 79 models in my life, my Pace Car and a silver Ghia and I honestly don't remember the cowl as I didn't have the car that long, but as you stated it does appear that Ford painted them body color in 79. So once again we learn something everyday!

    The Eastwood products are available directly from them through their website, but I am not sure how that works for you being in Canada.

    Good to hear your local supply can do the original color for you. I am not sure on your color, but some colors have multiple variations due to being sprayed on different model. lines, and different plants. So it's still best to make sure the color matches yours as much as possible before making your final choice.

    Although a complete repaint may not have been your first choice, you will probably be happier with the finished product in the long term. Feel free to PM me if you have any questions or need any additional help.

    Good Luck and definitely post up progress pictures and the final work so the rest of us can enjoy all your hard work!

    Trey
    ​Trey

    "I Don't build it hoping for your approval! I built it because it meets mine!"

    "I've spent most of my money on Mustangs, racing, and women... the rest I just wasted."

    Mustangs Past: Too many to remember!
    Current Mustangs:
    1969 Mach 1
    1979 Pace Car now 5.0/5 speed
    1982 GT Stalled RestoModification
    1984 SVO Still Waiting Restoration
    1986 GT Under going Wide Body Conversion Currently

    Current Capris:
    1981 Capri Roller
    1981 Capri Black Magic Roller Basket Case
    1982 Capri RS 5.0/4spd T-top Full Restoration Stalled in TX
    1984 Capri RS T-top Roller
    1983-84 Gloy Racing Trans Am/IMSA Body Parts

  9. #9
    FEP Supporter
    82GTforME's Avatar
    Join Date
    Feb 2013
    Location
    Alberta, Canada
    Posts
    4,857

    Default

    Quote Originally Posted by wraithracing View Post
    The Eastwood products are available directly from them through their website, but I am not sure how that works for you being in Canada.

    Good to hear your local supply can do the original color for you. I am not sure on your color, but some colors have multiple variations due to being sprayed on different model. lines, and different plants. So it's still best to make sure the color matches yours as much as possible before making your final choice.

    Although a complete repaint may not have been your first choice, you will probably be happier with the finished product in the long term. Feel free to PM me if you have any questions or need any additional help.
    Thanks, Trey. Maybe I will take said painted cowl with me to the paint shop today. I am planning on doing the hood and K-member first as my guinea pigs for spraying before I would do the car.

    Other than the visible rust spots, I see no need to remove all of the existing paint. I would think scuffing it would be sufficient? That would save priming etc. no?

  10. #10
    FEP Super Member Travis T's Avatar
    Join Date
    Jan 2011
    Location
    China Grove, North Carolina
    Posts
    5,267

    Default

    Most 79s did have black cowls. I think it was some of the very early cars that got body colored ones, or it was part of a trim package or something. I've seen them a time or two, but all the 79s I have ever owned had black ones. I think Ford was still trying to finalize what the cars were going to look like. Hate to hear you have to repaint the entire car, but I think once done you'll be happy that you did because it will look great in fresh tangerine.
    1984 Mustang GT owned since 1991 (first car). Mercury Mountaineer GT-40P engine, some suspension mods, currently undergoing a five lug SN95 brake upgrade and more suspension mods. Some minor body and interior mods have been done as well.

    2004 GT convertible, 2001 Taurus LX, 1994 F150, 1950 F-1 Ford Pickup

  11. #11
    Moderator wraithracing's Avatar
    Join Date
    Jun 2010
    Location
    Grand Junction, CO/RR TX
    Posts
    14,213

    Default

    Quote Originally Posted by 82GTforME View Post
    Thanks, Trey. Maybe I will take said painted cowl with me to the paint shop today. I am planning on doing the hood and K-member first as my guinea pigs for spraying before I would do the car.

    Other than the visible rust spots, I see no need to remove all of the existing paint. I would think scuffing it would be sufficient? That would save priming etc. no?
    There's no need to take the car to bare metal or prime over all the "good" paint. You will want to make sure you use a grease & wax remover first on the vehicle to remove all waxes, polishes, etc. before starting any body work. I would tackle all your body work and rust repair first. Make sure to sand well past all of your repair areas for good primer adhesion and blend your primer out past the repairs so that when you sand it back down you will get a good feather edge so none of the repairs are visible once finished. Once all your body work and primer work are done, I would wet sand the entire car including the repair areas with 320 grit and then 400 grit to prepare for paint. I like to use a final primer/sealer coat over the 400 grit right before final paint. If you choose to go without the sealer then you can sand with up to 600 grit before starting your top coats. Again as 100 painters and . . . well you know the rest.

    Good Luck with the project and keep us up to date as things move along!

    Trey
    ​Trey

    "I Don't build it hoping for your approval! I built it because it meets mine!"

    "I've spent most of my money on Mustangs, racing, and women... the rest I just wasted."

    Mustangs Past: Too many to remember!
    Current Mustangs:
    1969 Mach 1
    1979 Pace Car now 5.0/5 speed
    1982 GT Stalled RestoModification
    1984 SVO Still Waiting Restoration
    1986 GT Under going Wide Body Conversion Currently

    Current Capris:
    1981 Capri Roller
    1981 Capri Black Magic Roller Basket Case
    1982 Capri RS 5.0/4spd T-top Full Restoration Stalled in TX
    1984 Capri RS T-top Roller
    1983-84 Gloy Racing Trans Am/IMSA Body Parts

  12. #12
    FEP Supporter
    82GTforME's Avatar
    Join Date
    Feb 2013
    Location
    Alberta, Canada
    Posts
    4,857

    Default

    It looks like Eastwood themselves will not ship direct to me (environmental thing) with an Internet order. I will call on Monday seeing as they even gave me a 10% off coupon. Trying to source it locally, but that may be difficult. I'm going to get some convertor and encapsulator if I can.

    I did get this though. High build primer/sealer. I will pick up the Valspar base and clear at a later time.


    I little more chrome and the sails to remove and then let the prep begin :


  13. #13
    FEP Power Member 87gtVIC's Avatar
    Join Date
    May 2009
    Location
    Whitestone, NY
    Posts
    1,065

    Default

    I think you have made the correct choice as a do it yourselfer. I believe you would have been unsatisfied with the color difference between the panels. This way you will now have a complete one color paint job. Wishing you luck and looking forward to your progress.

  14. #14
    FEP Supporter
    82GTforME's Avatar
    Join Date
    Feb 2013
    Location
    Alberta, Canada
    Posts
    4,857

    Default

    Quote Originally Posted by wraithracing View Post
    The first and foremost issue is to make sure that all your rust is either removed completely or properly converted and sealed. I personally like the Eastwood line of Rust Encapsulator and their other rust converting and sealing products. POR 15 works well too, but over the years I have turned to the Eastwood products again and again without any issues. I recommend checking out the different options and determine what works best for each area you have. From the pictures it appears your wheel arches may be a bit more involved then they look at first. The driver side appears to have more than just surface damage from the pictures, so be thorough with your cleaning and repair so that the rust doesn't ever come back and ruin all your hard work.

    Trey
    I started on the underside of the front passenger quarter yesterday. Time consuming. It seems foe every little bit you address you reconsider and do more.

    I had a couple of questions for prep and the application of the convertor and encapsulator.

    I plan on some primer and/or paint under the wheel arches. I started by removing the undercoating where I was working:


    This is why I had to remove the front bumper cover:


    Under the frame rail:


    The questions are:

    How good is good enough to put the convertor or encapsulator on spots like this and under the wheel well lips? There are a couple of spots in corners that are next to impossible to get anything in there to scuff the small amounts of rust. What about the inside of the frame rail?

    What would you do for primer and/or finish coats under there?

    This type of spray on undercoating is petroleum based? Of course this spot and all of what is being painted will be degreased and washed again.

  15. #15
    Moderator wraithracing's Avatar
    Join Date
    Jun 2010
    Location
    Grand Junction, CO/RR TX
    Posts
    14,213

    Default

    The Eastwood Rust Encapsulator and other rust converting products actually work to convert the rust into an "inert" product that doesn't corrode any further. So you don't need or want to remove all of the rust. Most recommend removing the large chunks and loose debris and then coat over what is left. You do want to remove all the undercoating or paint that you can in areas you need to use the rust converter on to make sure that you get good adhesion and get all of the rust coated properly.

    In the tough to get to areas, I have found that often a wire brush wheel on a grinder/drill will help to get into those areas to remove the big stuff and that will generally be enough for what you what/need to do.

    The primer/finish coats are up to you and your budget in those areas. The Eastwood Rust Encapsulator and POR-15 can be left as is and will do just fine. Otherwise you can look at Eastwood's Chassis Black and POR-15 has similar products. The POR-15 products generally require topcoats anywhere there will be sun exposure unless they have changed since I used them last. The Eastwood products do not require top coats as they have UV stabilizers, but the Rust Encapsulator will fade over time due to sun exposure, so be aware of that.

    Hopefully that answers yours questions. If I missed something just let me know, I am still trying to wake up from a short night's (day) sleep.

    Trey
    ​Trey

    "I Don't build it hoping for your approval! I built it because it meets mine!"

    "I've spent most of my money on Mustangs, racing, and women... the rest I just wasted."

    Mustangs Past: Too many to remember!
    Current Mustangs:
    1969 Mach 1
    1979 Pace Car now 5.0/5 speed
    1982 GT Stalled RestoModification
    1984 SVO Still Waiting Restoration
    1986 GT Under going Wide Body Conversion Currently

    Current Capris:
    1981 Capri Roller
    1981 Capri Black Magic Roller Basket Case
    1982 Capri RS 5.0/4spd T-top Full Restoration Stalled in TX
    1984 Capri RS T-top Roller
    1983-84 Gloy Racing Trans Am/IMSA Body Parts

  16. #16
    FEP Power Member
    Join Date
    Jan 2014
    Location
    Arlington, Texas.
    Posts
    1,016

    Default

    The only thing I noticed from your pictures that I would be concerned with is the rust around your wheel well arches in you rear quarter panels. It appears you have rust holes there. Or if you don't see it a tapping with a body hammer will reveal a hole. Don't just put body fill over it. If you do it will bubble your paint. It looks to me you may have to weld some replacement metal over the rust holes, then do the necessary body work to complete this area. Also keep in mind there are different spraying techniques when using a HVLP (High Volume Low Pressure) gun as opposed to a traditional spray gun. Also beware that some of those random rust spots you have may need to be repaired in a similar manner. If after you clean the area and it appears like the metal is a little thin or looks like an oatmeal type of texture I would again weld a patch on that area. If you don't it will bubble your paint later. Test your painting skills on a scrap piece of metal first. As you already know the materials required for paint are not cheap. Just letting you know so that your paint job will last a lot longer if you pay attention to these details. And of course for a good job most of the work is in the preparation. I admire your ambition.

  17. #17
    FEP Power Member Ourobos's Avatar
    Join Date
    Apr 2008
    Location
    Waikoloa , Hawaii
    Posts
    1,879

    Default

    I soda blasted, washed thoroughly, primed with epoxy primer, and used a urethane enamel.. Then clear coated.

    1986 CHP SSP Coupe

  18. #18
    FEP Supporter
    82GTforME's Avatar
    Join Date
    Feb 2013
    Location
    Alberta, Canada
    Posts
    4,857

    Default

    That looks really nice. I have a lot of work to do to get to that point. Unfortunately I cannot blast, and I have already decided on the Valspar base and clear.

  19. #19
    FEP Supporter
    82GTforME's Avatar
    Join Date
    Feb 2013
    Location
    Alberta, Canada
    Posts
    4,857

    Default

    Quote Originally Posted by 84GT350CONV View Post
    The only thing I noticed from your pictures that I would be concerned with is the rust around your wheel well arches in you rear quarter panels. It appears you have rust holes there. Or if you don't see it a tapping with a body hammer will reveal a hole. Don't just put body fill over it.
    You were correct. Not bad for sure. Only the passenger side was like this. I totally understand the best method is to replace the material, but I need a weld free method.


    Quote Originally Posted by 84GT350CONV View Post
    I admire your ambition.
    Thanks, the ambition starts to fail when it is starting to turn into a full time job to itself. Also with spring slow getting here, it isn't putting a spring in my step lately.

  20. #20
    FEP Supporter
    82GTforME's Avatar
    Join Date
    Feb 2013
    Location
    Alberta, Canada
    Posts
    4,857

    Default

    Quote Originally Posted by wraithracing View Post
    The Eastwood Rust Encapsulator and other rust converting products actually work to convert the rust into an "inert" product that doesn't corrode any further. So you don't need or want to remove all of the rust. Most recommend removing the large chunks and loose debris and then coat over what is left. You do want to remove all the undercoating or paint that you can in areas you need to use the rust converter on to make sure that you get good adhesion and get all of the rust coated properly.
    I have sanded, cleaned, converted and encapsulated all that I need to. I am ready to do some block sanding in order to do primer and filler.

    My question is; do I need to remove (sand) where I want to fill back down to metal? I had read or seen that body fillers should be put on bare metal

    I would prefer to block sand, prime, sand and then fill (and repeat as necessary). Is this order an incorrect way of thinking?

  21. #21
    Moderator wraithracing's Avatar
    Join Date
    Jun 2010
    Location
    Grand Junction, CO/RR TX
    Posts
    14,213

    Default

    If you have used the rust encapsulator to treat the rust, you don't want to remove it. I don't have a can in front of me right now, but IIRC the R.E. has a 12 or 24 hour recoat window. If the R.E. has dried longer than that such as in your case, you need to scuff up the areas with R.E. to promote adhesion of your body filler, primer, or sealers. If you sand through the R.E. you can recoat with the R.E. allow it to dry for the 2 or 4 hours it recommends and then you can apply your body filler, primer, sealers, etc. over it.

    Once you primer, seal, etc. you can sand as needed or continue to apply additional coats of materials as needed without sanding if you are within the recoat time.

    The easy way to remember is that if you are within the "Recoat" time you have your chemical adhesion between the products, this help fuse or bond the products together. If you exceed the "Recoat" time, then you must scuff/sand to ensure mechanical adhesion as your chemical adhesion is less due to the base product curing. You still get some chemical adhesion as the new top coat will chemically "bite" into the scuffed base coat thanks to the scuffing opening up the pores of the surface.

    Trey
    ​Trey

    "I Don't build it hoping for your approval! I built it because it meets mine!"

    "I've spent most of my money on Mustangs, racing, and women... the rest I just wasted."

    Mustangs Past: Too many to remember!
    Current Mustangs:
    1969 Mach 1
    1979 Pace Car now 5.0/5 speed
    1982 GT Stalled RestoModification
    1984 SVO Still Waiting Restoration
    1986 GT Under going Wide Body Conversion Currently

    Current Capris:
    1981 Capri Roller
    1981 Capri Black Magic Roller Basket Case
    1982 Capri RS 5.0/4spd T-top Full Restoration Stalled in TX
    1984 Capri RS T-top Roller
    1983-84 Gloy Racing Trans Am/IMSA Body Parts

  22. #22
    FEP Supporter
    82GTforME's Avatar
    Join Date
    Feb 2013
    Location
    Alberta, Canada
    Posts
    4,857

    Default

    Getting closer to spray some primer finally.

    Thoughts are to give it a full prime, glaze and fill all of the remaining little spots (which looks to be minimal at this point), give it another block sand and then prime/seal it before painting later.

    My timelines and (current) lack of skill/knowledge doing this don't allow me the luxury to do everything back to back right after the previous step.

    What are your thoughts? Is that too much work? Maybe I am taking too long of a way to get where I am going?

    Thanks


  23. #23
    Moderator wraithracing's Avatar
    Join Date
    Jun 2010
    Location
    Grand Junction, CO/RR TX
    Posts
    14,213

    Default

    Looks like you are making good progress. Trust me this is not the stage you want to rush as it will affect the quality of the final paint job. So take your time and make sure the body work is right and your final paint will look so much better!

    You can primer the entire car if you want, but by the same token it's not an absolute necessity due to the original paint still being in decent shape. If you do prime everything you need to make sure that you sand and prep everything before spraying your sealer and final color coats.

    If you choose to primer all of your body work and any bare metal (DTM primer! ) that can work fine too. I would recommend the first coat focused on the body work areas, then the second coat covers the same areas, but you fan out from there, and the third coat does the same, but fans out even further. This helps to feather edge the primer into the surrounding paint so that when you do your final sand you won't be left with any thick edges.

    Just make sure that you prime/seal the entire car according to directions and then top coat as the directions say within the recoat times otherwise you have to sand the primer/sealer and start over again.

    Good Luck!

    Trey
    ​Trey

    "I Don't build it hoping for your approval! I built it because it meets mine!"

    "I've spent most of my money on Mustangs, racing, and women... the rest I just wasted."

    Mustangs Past: Too many to remember!
    Current Mustangs:
    1969 Mach 1
    1979 Pace Car now 5.0/5 speed
    1982 GT Stalled RestoModification
    1984 SVO Still Waiting Restoration
    1986 GT Under going Wide Body Conversion Currently

    Current Capris:
    1981 Capri Roller
    1981 Capri Black Magic Roller Basket Case
    1982 Capri RS 5.0/4spd T-top Full Restoration Stalled in TX
    1984 Capri RS T-top Roller
    1983-84 Gloy Racing Trans Am/IMSA Body Parts

  24. #24
    FEP Supporter
    82GTforME's Avatar
    Join Date
    Feb 2013
    Location
    Alberta, Canada
    Posts
    4,857

    Default

    Quote Originally Posted by wraithracing View Post
    Looks like you are making good progress. Trust me this is not the stage you want to rush as it will affect the quality of the final paint job. So take your time and make sure the body work is right and your final paint will look so much better!

    You can primer the entire car if you want, but by the same token it's not an absolute necessity due to the original paint still being in decent shape. If you do prime everything you need to make sure that you sand and prep everything before spraying your sealer and final color coats.

    If you choose to primer all of your body work and any bare metal (DTM primer! ) that can work fine too. I would recommend the first coat focused on the body work areas, then the second coat covers the same areas, but you fan out from there, and the third coat does the same, but fans out even further. This helps to feather edge the primer into the surrounding paint so that when you do your final sand you won't be left with any thick edges.

    Just make sure that you prime/seal the entire car according to directions and then top coat as the directions say within the recoat times otherwise you have to sand the primer/sealer and start over again.

    Good Luck!

    Trey
    Thanks for the info Trey. Good, but slow progress.

    What do you recomment using to clean with before priming? A wax/grease remover and then a tack cloth?

  25. #25
    Moderator wraithracing's Avatar
    Join Date
    Jun 2010
    Location
    Grand Junction, CO/RR TX
    Posts
    14,213

    Default

    A wax/grease remover is usually used first before starting any bodywork etc. This prevent any wax/grease/silicone based products contaminating the body and possibly causing issues later. I then use a final prep / final clean product before spraying paint/primer/sealers/etc.

    I use primarily HOK products and I use their wax/grease remover as well as their final clean product. I like their final clean product because it's water based and works very well. Any final clean product from your local auto paint supplier should work just fine. Be sure to read the directions, use plenty of lint free clean towels/rags to wipe everything down. I wear nitrile gloves while doing the cleaning to make sure I don't leave any residue from my hands and fingers too. After your final wipe down, use a tack rag and lightly wipe down the entire car and you should be good. Also remember the best way to use a tack rag is to take it out of the package, unfold and open it completely, then hang on a hook or something and allow to air dry for at least 10 minutes. This allows the resins in the rag to off gas and dry a bit before using it so it doesn't transfer any resin to the car body. Then lightly wad up the rack and wipe down the car. You can unwrap the rag a few times as you wipe down the car and create a new wad to expose clean areas of the rag.

    Good Luck!

    Trey
    ​Trey

    "I Don't build it hoping for your approval! I built it because it meets mine!"

    "I've spent most of my money on Mustangs, racing, and women... the rest I just wasted."

    Mustangs Past: Too many to remember!
    Current Mustangs:
    1969 Mach 1
    1979 Pace Car now 5.0/5 speed
    1982 GT Stalled RestoModification
    1984 SVO Still Waiting Restoration
    1986 GT Under going Wide Body Conversion Currently

    Current Capris:
    1981 Capri Roller
    1981 Capri Black Magic Roller Basket Case
    1982 Capri RS 5.0/4spd T-top Full Restoration Stalled in TX
    1984 Capri RS T-top Roller
    1983-84 Gloy Racing Trans Am/IMSA Body Parts

Page 1 of 2 12 LastLast

Posting Permissions

  • You may not post new threads
  • You may not post replies
  • You may not post attachments
  • You may not edit your posts
  •