
See my edited post above.......I accidentally hit post before I was finished with my thoughts.Originally Posted by Mike1157

Is there anyway you could show a basic template of the pieces that were made before all of the welding?


See my edited post above.......I accidentally hit post before I was finished with my thoughts.
Brock
1984 Mustang LX Convertible 3.8L V-6/Auto (SOLD)
1984 Mustang GT Hatchback 5.0 V-8/5 Speed
I'm an FEP Supporter and proud of it. Are you?
A side note before I get to the meat and potatoes.
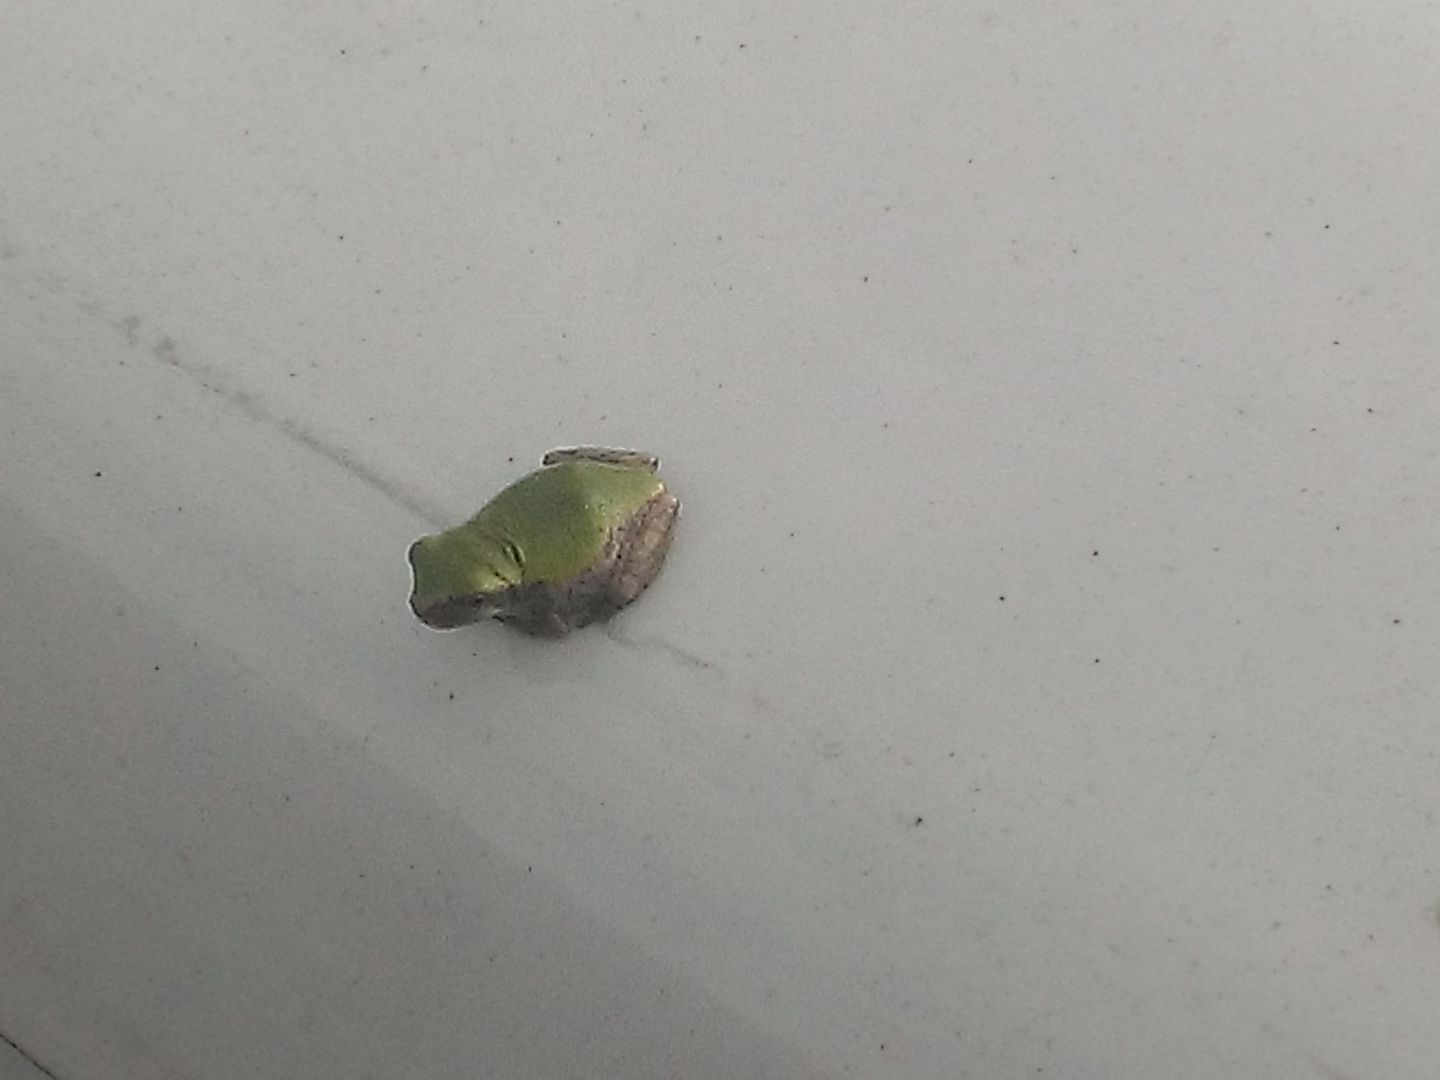
This morning I'm running errands, and when I walk around my truck to go inside I see I've had a stoweaway:
Evidently since I have no trees above me, this dude crawled up on the truck from the ground, and managed to make it all the way up onto the bed cover before he became the worlds fastest tree frog.
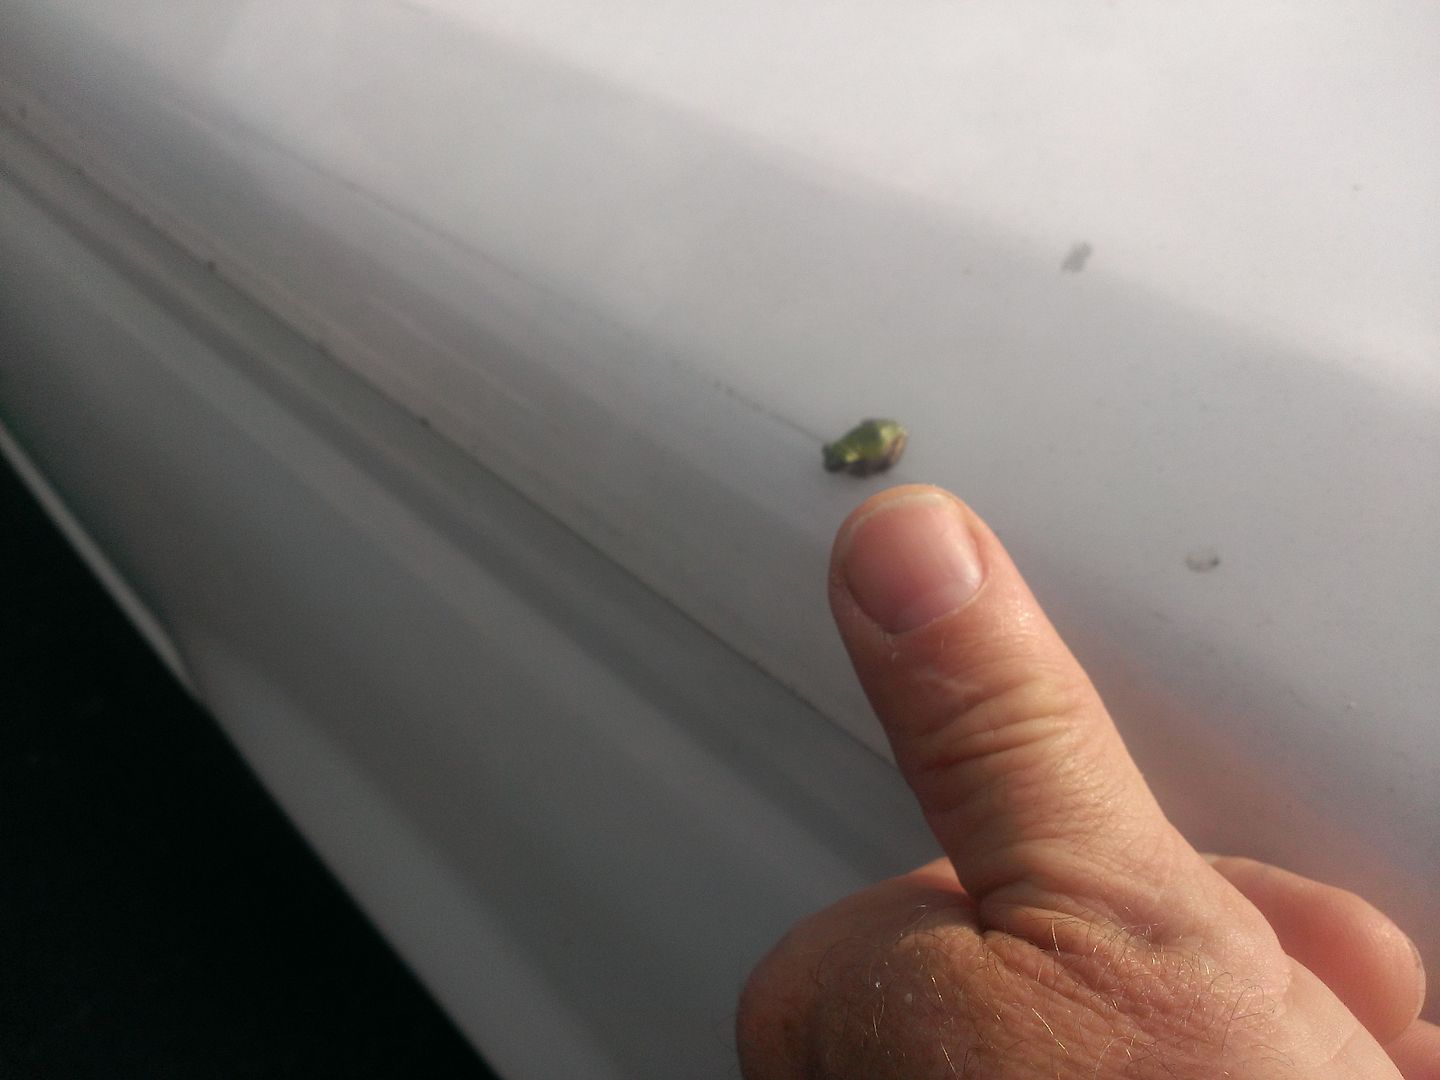
While this really isn't amazing in itself, what was kinda cool was this one little thing........
This was the tiniest little frog I've ever seen. Climbing up from the ground must've took dude all night. I went inside a store and came back out and he was gone. ( probably breakfast for some bird).
Anyway,........I digress.
If sheet metal workers that build entire cars out of aluminum, or thin gauge steel using an English wheel and a brake to form a fender on the likes of a Rolls Royce are gods, I am the lowest form of one celled pond scum ever to attempt the same.
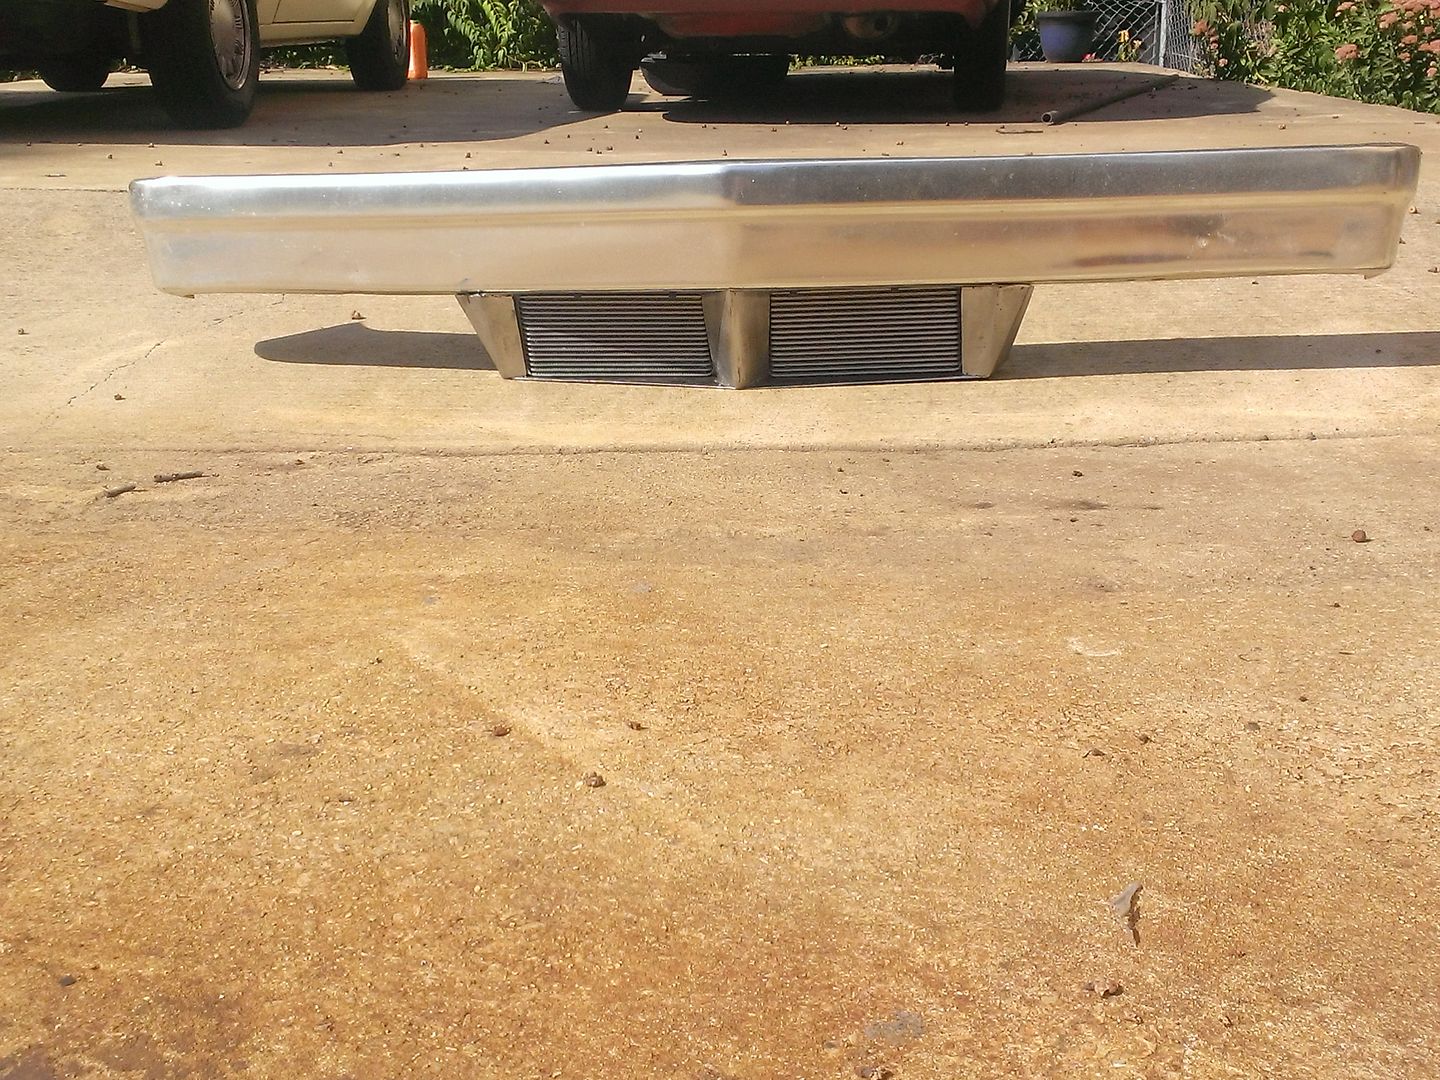
I managed to get the shroud built, but it's no where near ready for it's close up. Nonetheless, here it is.
The outside angles were formed out of two pieces, bent in a vise using little more than pair of vise grips, and a hammer. What I got out of that was something that was close enough to weld.
.
They really didn't fit together very well, and the welding you see at the top is my attempt to fuse the two angles to a top plate that bolts to the bumper. The whole thing has taken about 8 hours so far, and will probably have another 8 in it after bodywork. It will take some filler to fill in the holes, flatten out the waves, and put a sharp edge on the top where the shroud meets the bumper, but again like I said earlier, that thing will see things my way one way or the other.
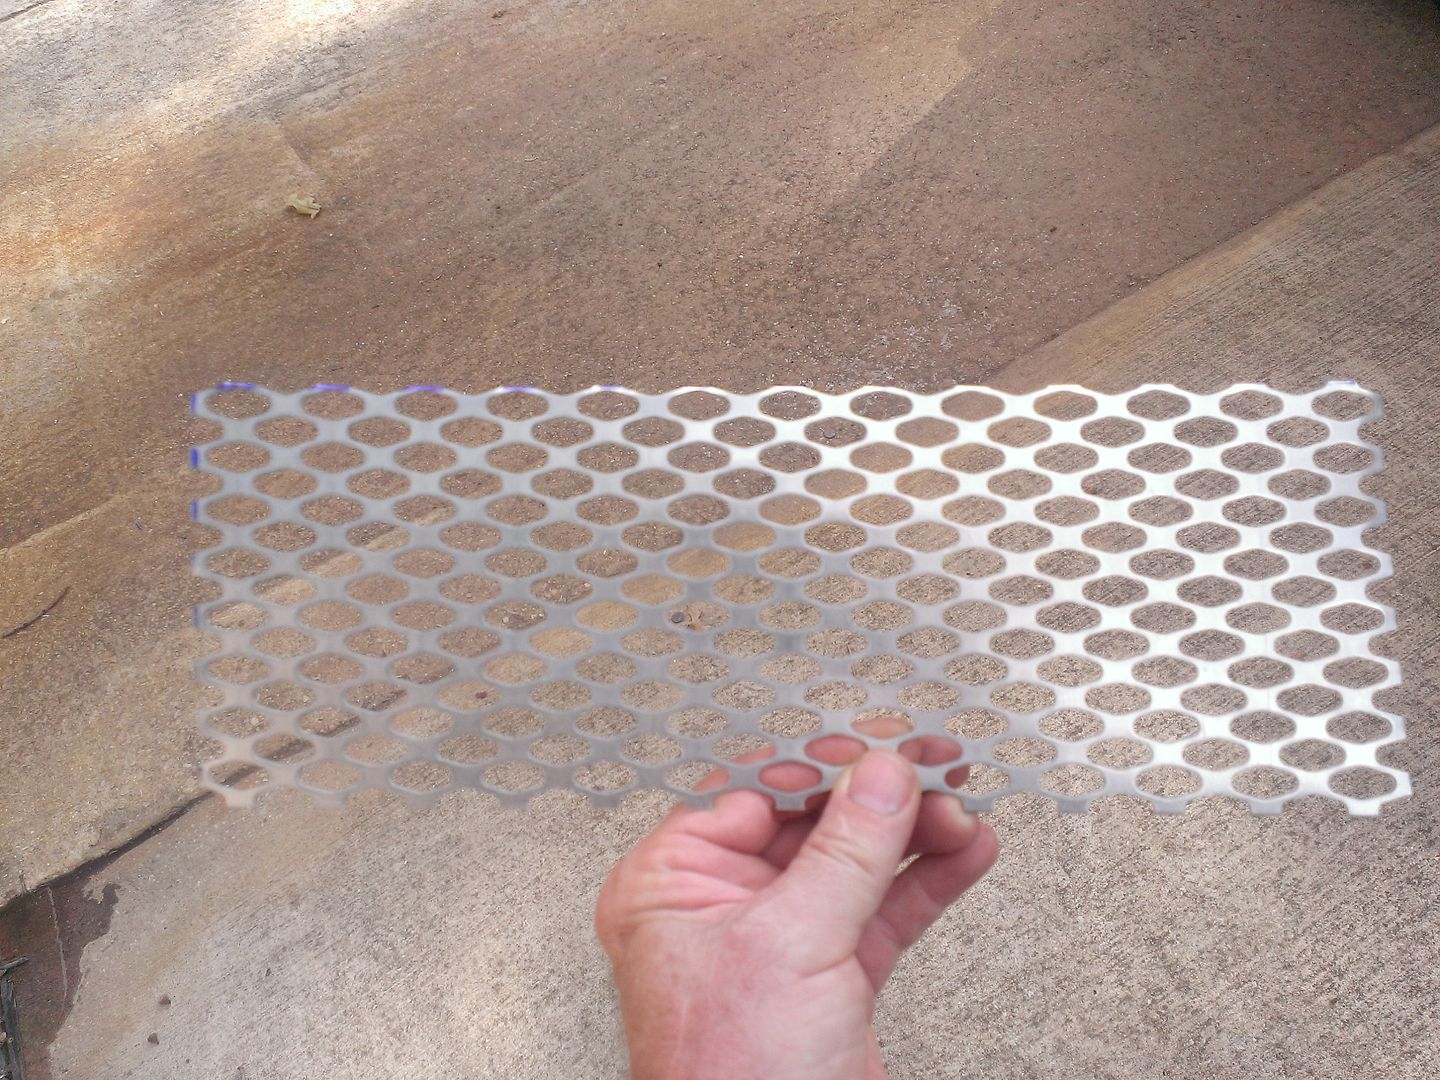
I did come up w/ a grille to kind of protect the front of the coolers.
Actually pretty simple, the piece gets sandwiched between the front of the coolers, and the back of the shroud, no place for it to go from there.
The shroud will be body color ( Competition Orange) as will the bumper, and that grille material will be satin black. Although I'm kinda sick of messing w/it, I have to finish the stupid thing, the humidity just makes the thing start rusting if I leave it for more than a day.
Last edited by Mike1157; 09-11-2014 at 04:59 PM.


No kidding. Not only the forming of the panels, but back in the day everything was welded with an oxyacetylene torch! I don't even want to think about how the front and rear shrouds on my dad's Austin Healey were done. How they didn't warp those panels from the heat, I will never know. Repairing small sections of it was hard enough with a TIG welder.
That being said, looks like your shroud is conforming to the bumper now that it's bolted in place. Looks cool in a 1950's air craft kinda way.
Brian
1982 Capri 5.0L
1965 Fastback project car - more rusty than not
And so it goes.
A "theme", or style just kinda pops into place for me sometimes. The 50's aircraft style that you see is the same art deco style I saw when the thing was only a couple of rough pieces. (now its a total of 9 rough pieces)
That lower grille will inspire the design of the upper, the front end will force something in the rear, it'll be just like the red car was in theory inasmuch as I'll have to carry the theme throughout the whole build.
It would be cool to pay homage to a 30-50's aircraft style theme ( which requires a lot of riveted, engine turned pieces, shiny aluminum panels, and spartan brown leather) and I could certainly pull that off, but...........
That would be a 180 degree departure from the interior, which will be anything but that. Digital gauges, tubular framework running throughout, black gloss lexan hiding all evidence of switches and those gauges, high back winged racing seats, and everything in various shades of tan,brown,and black. ............definitely NOT retro.
One year. I bought this thing in August of 2013.
In the past year this build has been more like a war. Each day, each mod, each improvement has been a battle. As in all wars, the battle is the smaller part of the whole mess, and as the saying goes, you win some, you lose some.
Saturday, the battle objective was to get the car on the ground, and rolling on it's tires for the first time. Before that could happen, I had to change the tail pipe that I had built just last week. The original design had the tail pipe going over the rearend between the upper control arm, and the center section of the rear. Despite the fact that I had that tail pipe against the tunnel roof, the upper control arm hit the tail pipe when the car was lowered to ride height.
Me: 0
Car: 1
So I had to completely rebuild it, and re route it over the rear on the outside of the upper control arm. But I got that done, and it cleared perfectly.
Me: 1
Car: 0
I had still some painting to do in, and around the gas tank, and I wanted to redo the fuel line in braided SS as opposed to the braided cloth wrapped hose that I had done previously. Got that done w/ no casualties.
I moved to the front end.
I've been holding on fully assembling the front suspension because I knew that I was gonna have bump steer issues as low as I intended to run this car at ride height. My thinking being that I'd just assemble the strut w/o the spring, take a stab at my anticipated ride height, and go through the pain in the ass process to correct the tie rod end geometry to match the arc of the lower control arm, and the put the whole thing together for real. .
But I didn't want to go through that procedure just yet, as I really have no clue how low the front end will actually be. I figured the only way I was gonna truly be able to make that determination was to actually assemble it, and let the car settle on it's springs.
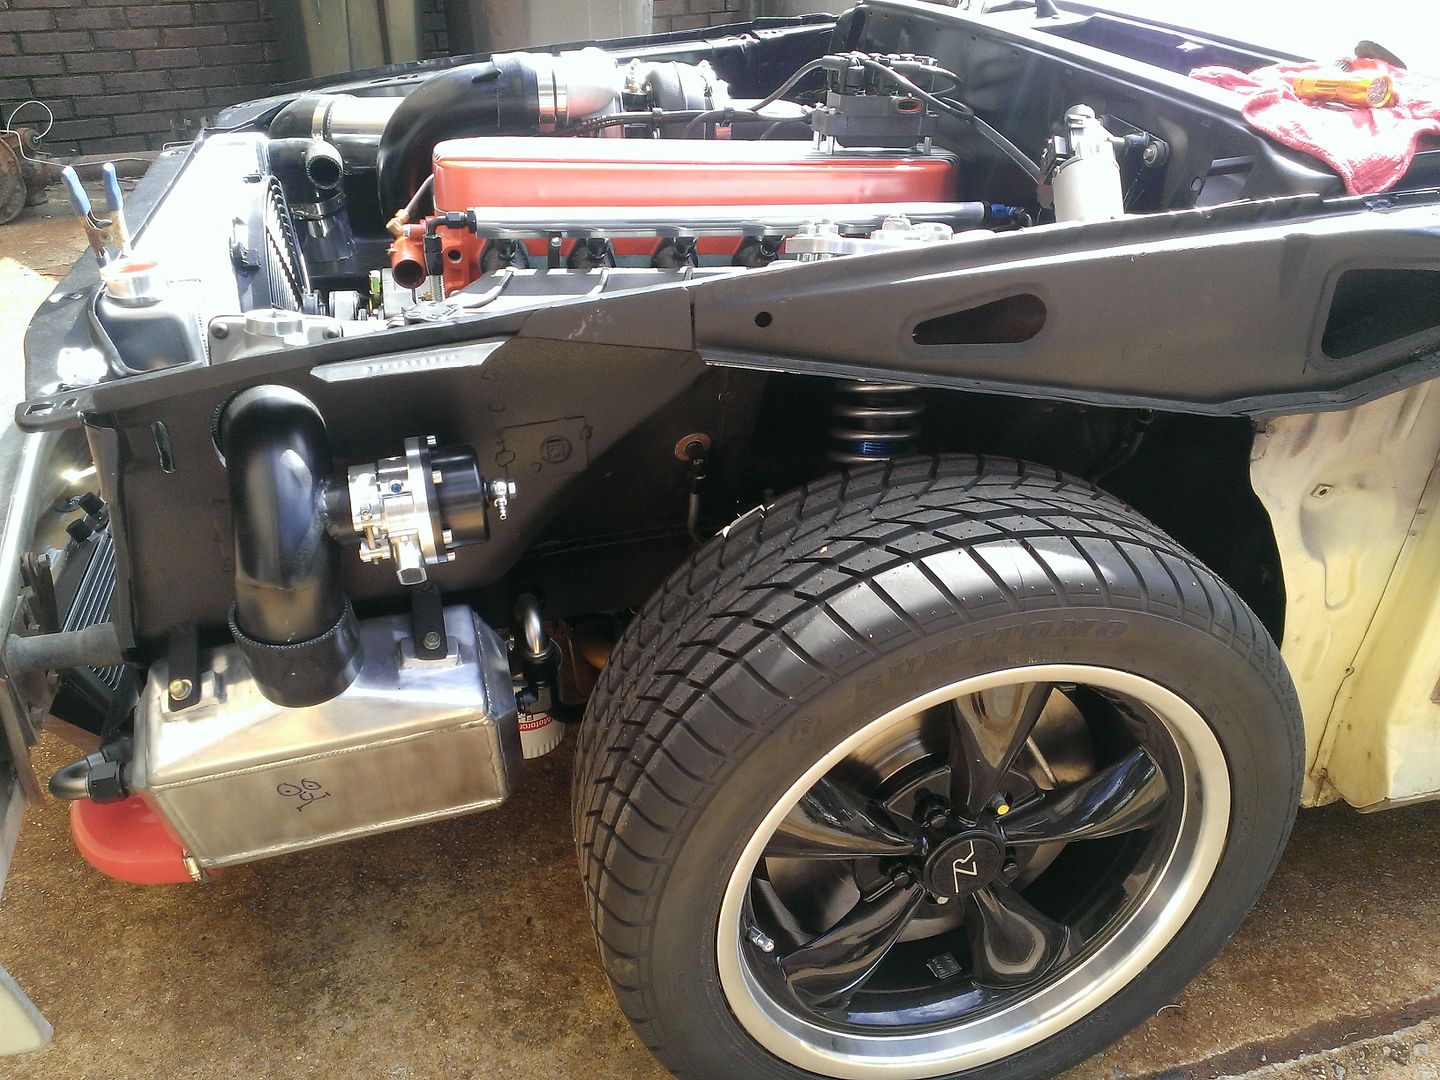
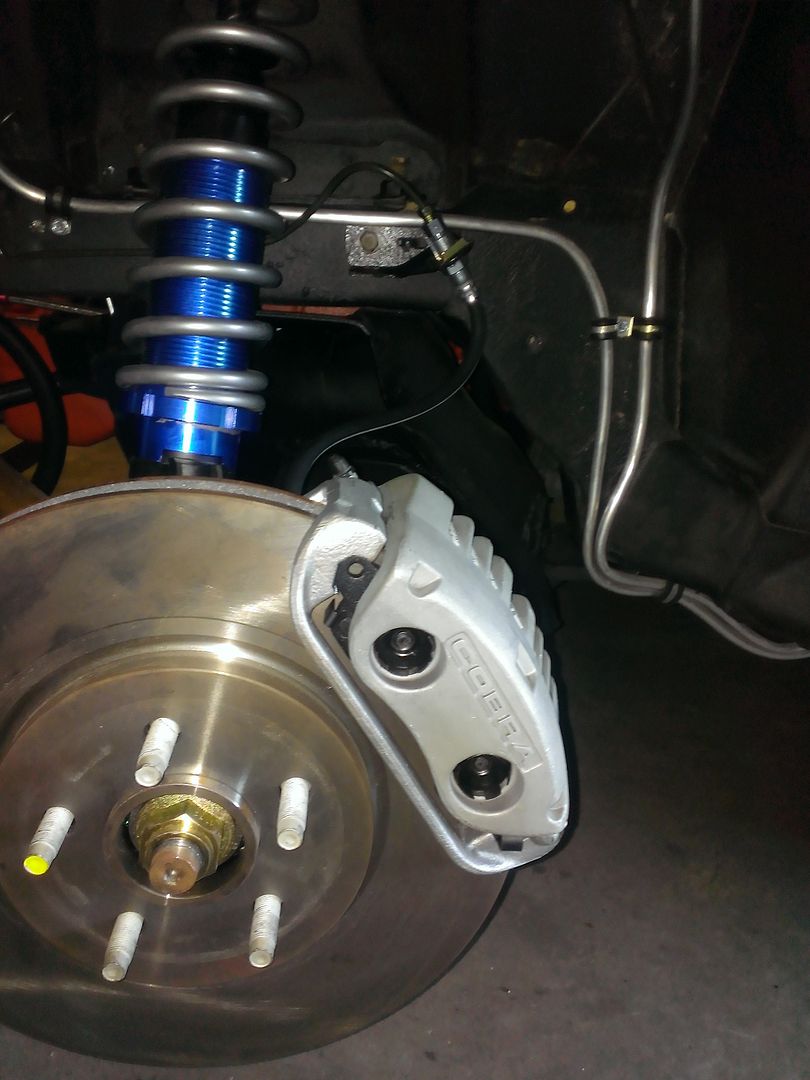
So I opened the oldest boxes I've had in the garage, and got out the rotors, calipers and pads, and put that junk together. No sooner did I get that done it was obvious that there was a major interference issue.
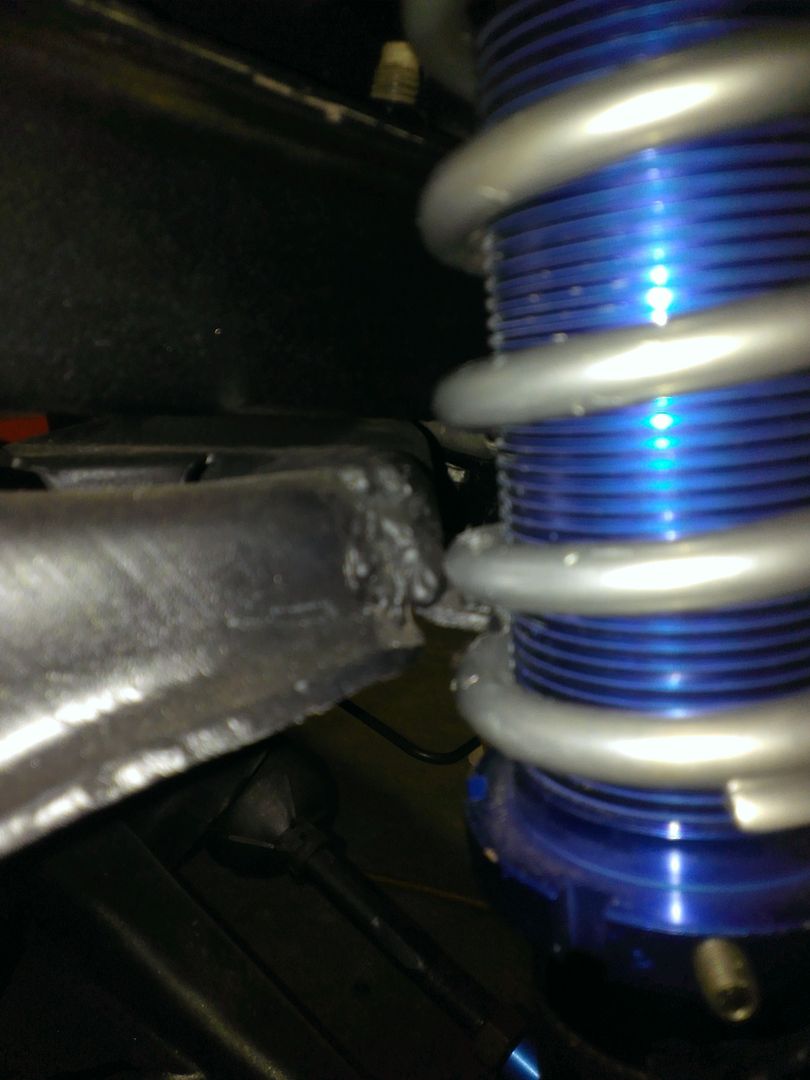
Fairmont lower control arms are too short to use a coil over conversion kit as the picture clearly shows. I believe that when compared to a Mustang, they are even shorter than that, and significantly shorter than a 93 arm.
For Saturday, that was the deal breaker. The suspension wouldn't compress as the strut was interlocked w/ part of the k member. That left me at the end of the day, w/ the car still in the air, despite the fact that the entire front suspension was now tightly bolted together, and the tires were on.
Again,
Car: 1
Me: 0
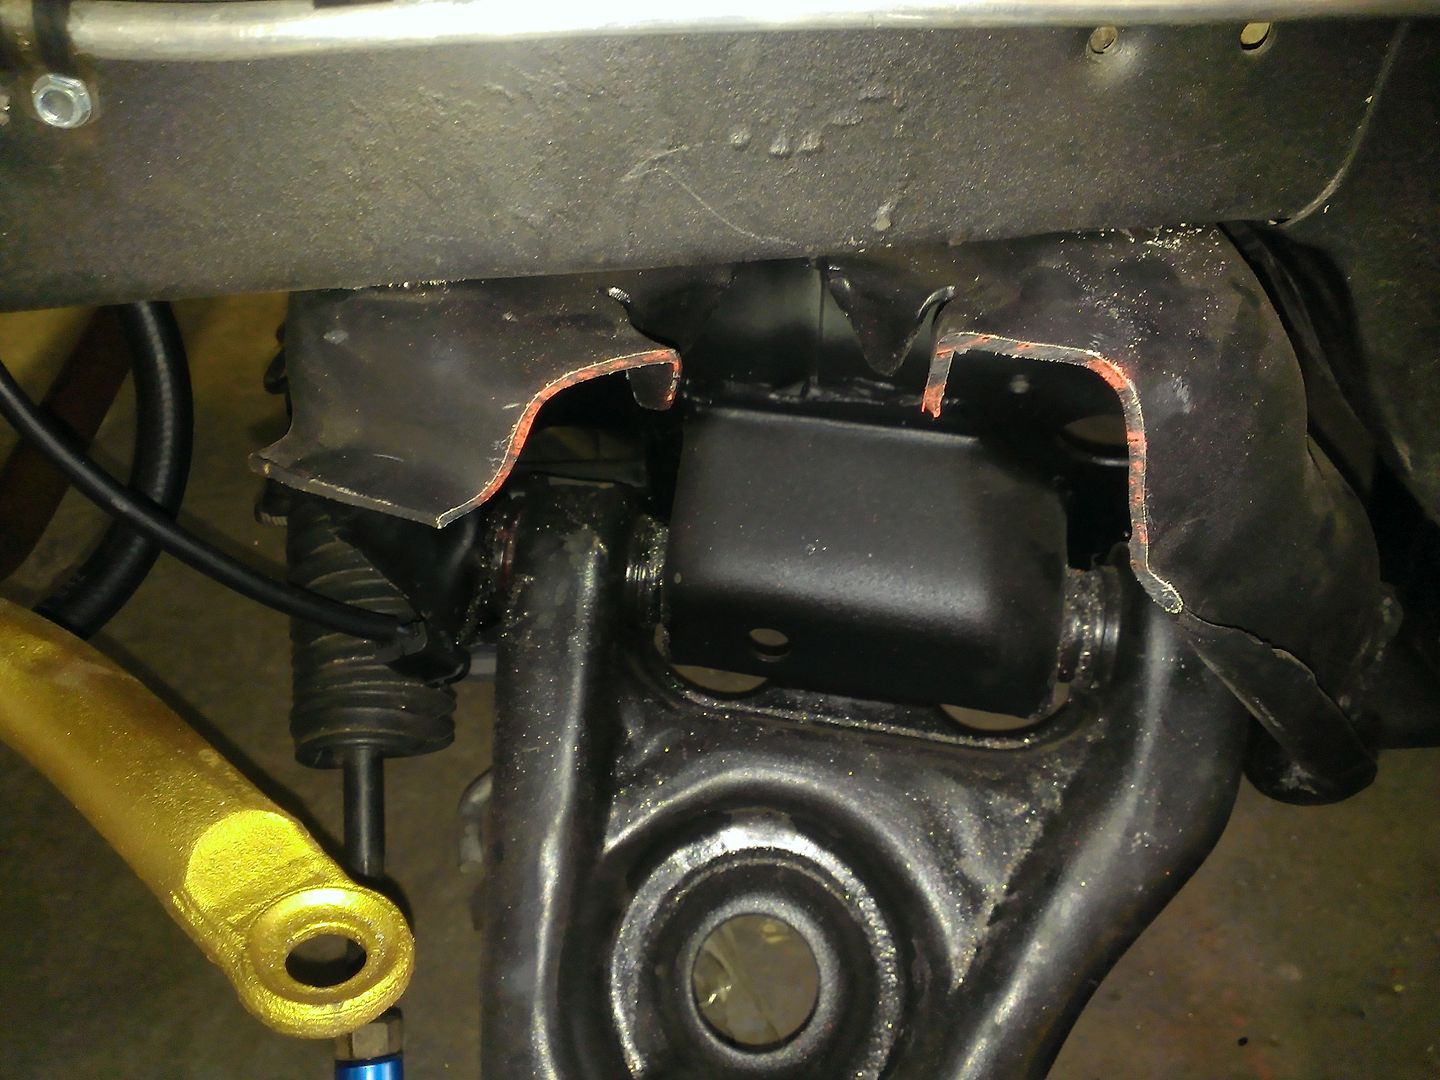
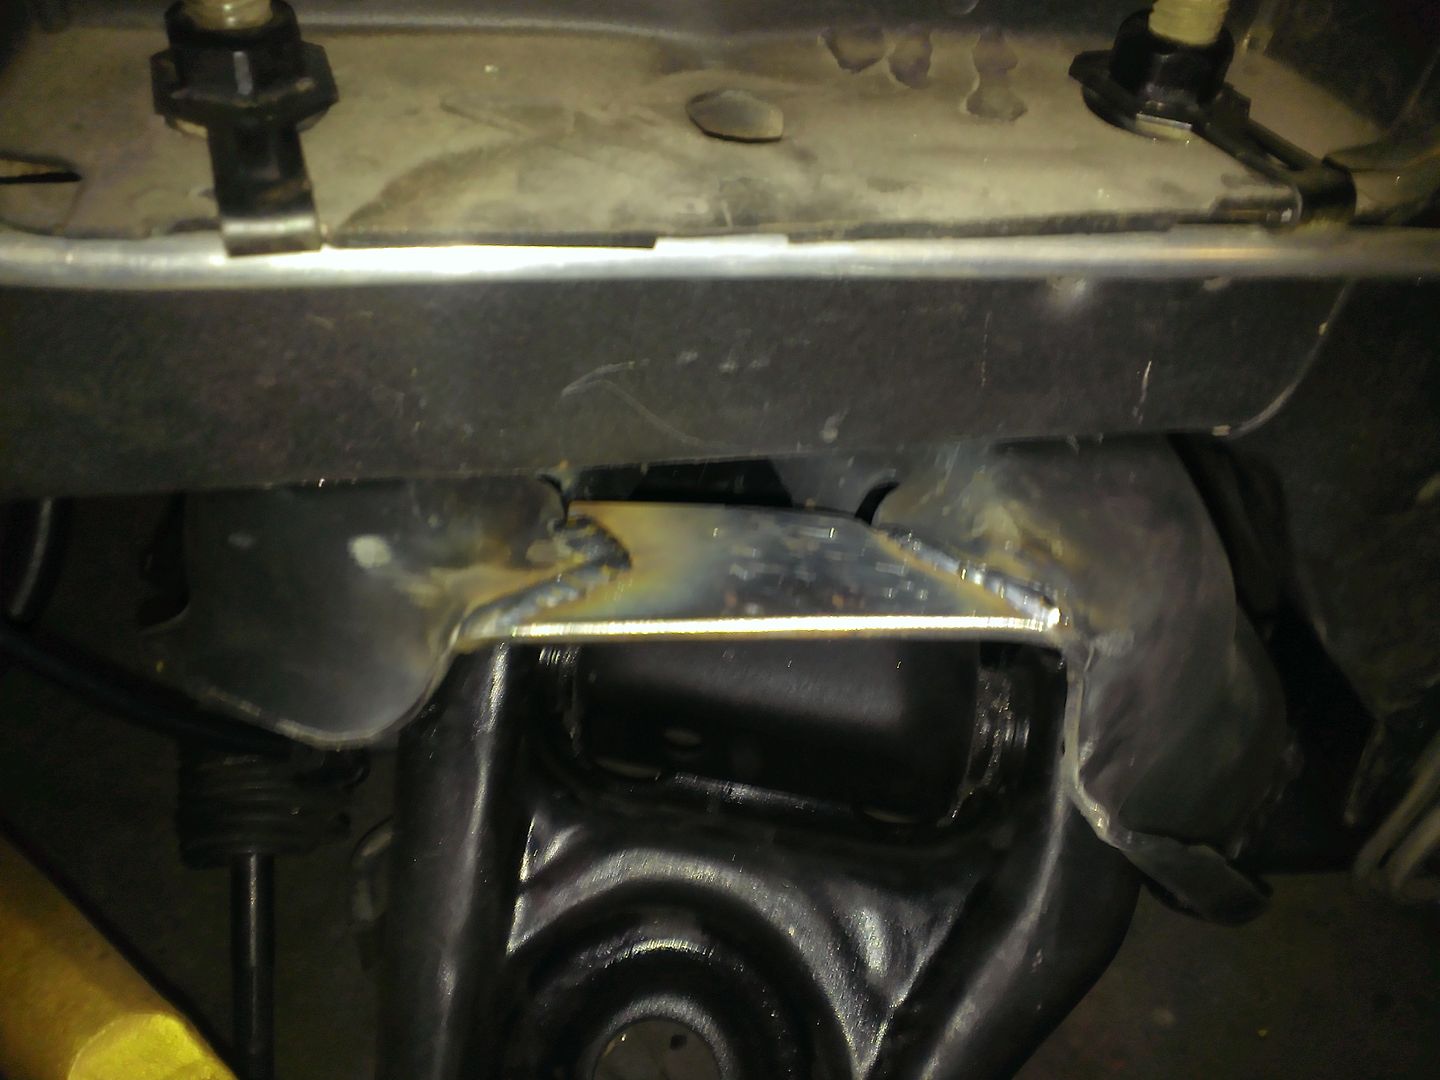
Today, after consulting some friends on how to best modify the k member to allow the necessary clearance, it was collectively determined that I would cut out a chunk of the k member w/ a sawzall, and add back a small piece of plate to restore any lost integrity, but that required I completely take the stuff back off that I just put on yesterday.
But whatya gonna do?
You put a new blade on the sawzall, and cut that bitsh.
Then cut, and fit a piece of plate, protect the surrounding area from weld splatter, and weld it back together.
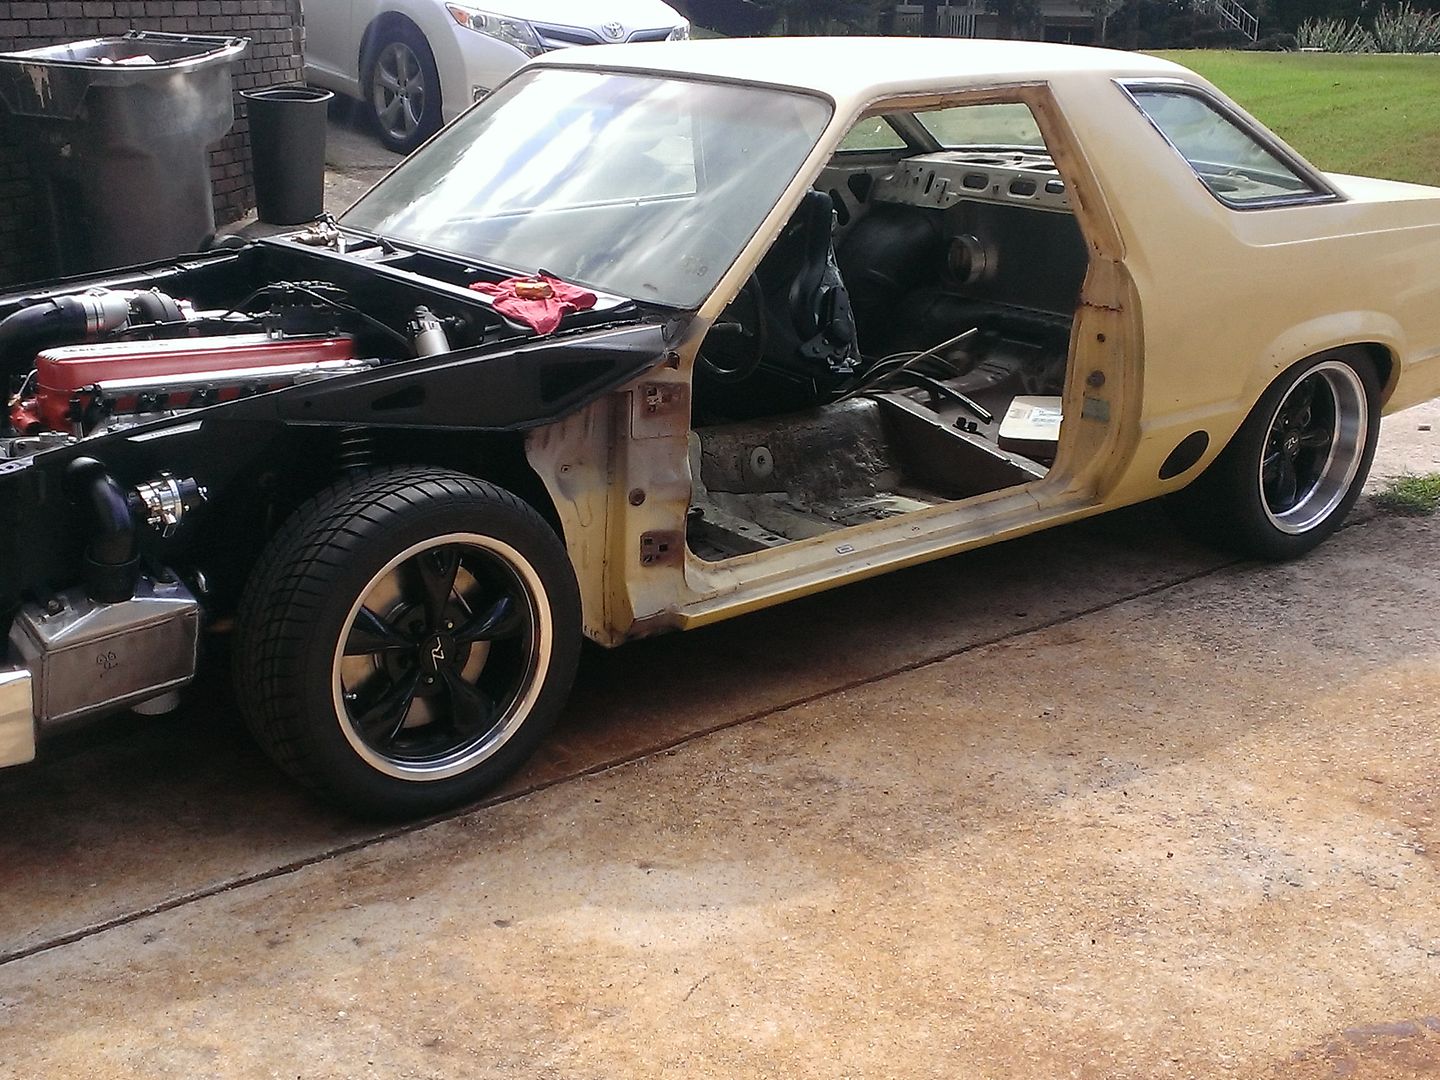
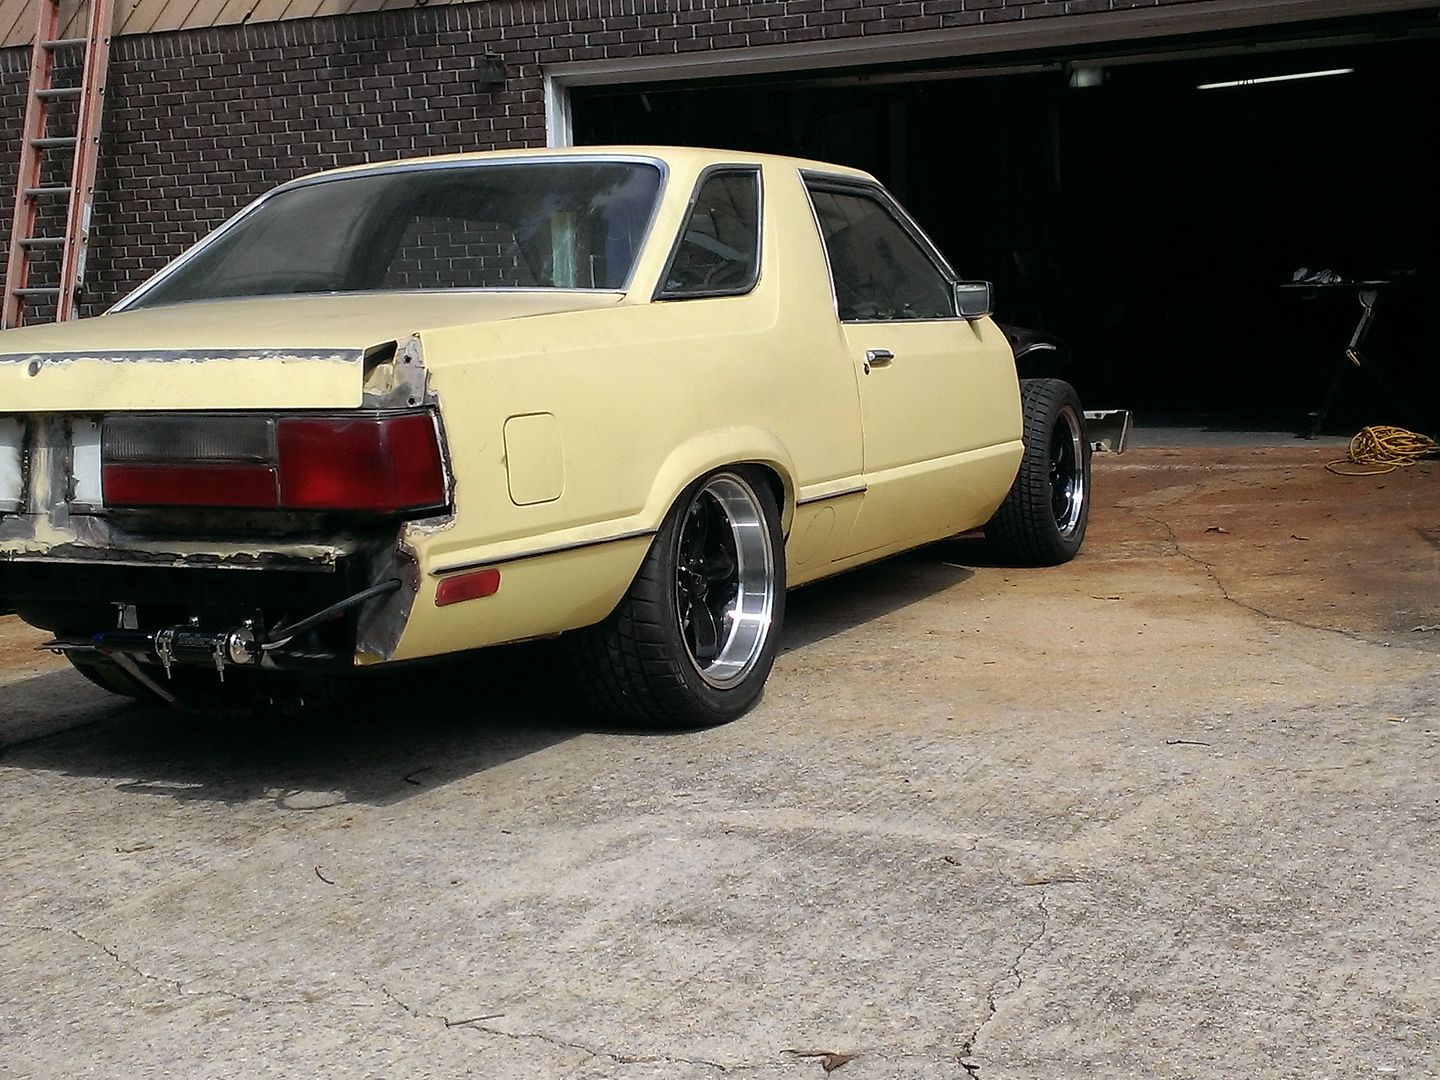
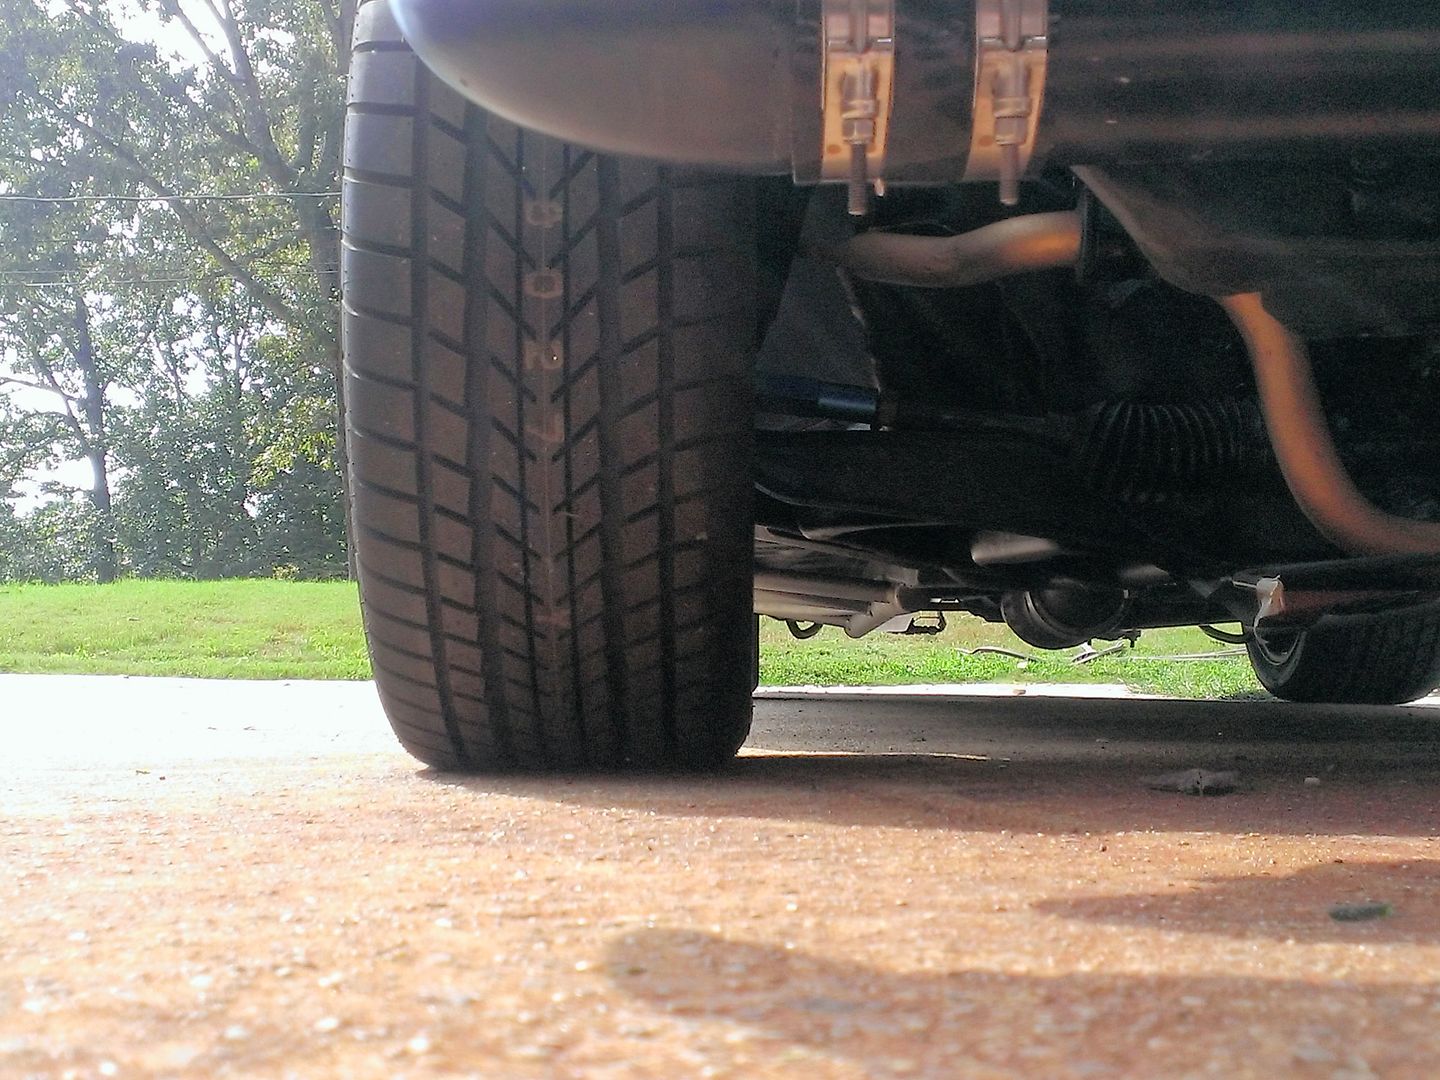
Once that was behind me, I put the tires on the car, and put it on the ground ( also the first time they've actually touched the pavement),and rolled the whole thing outside.
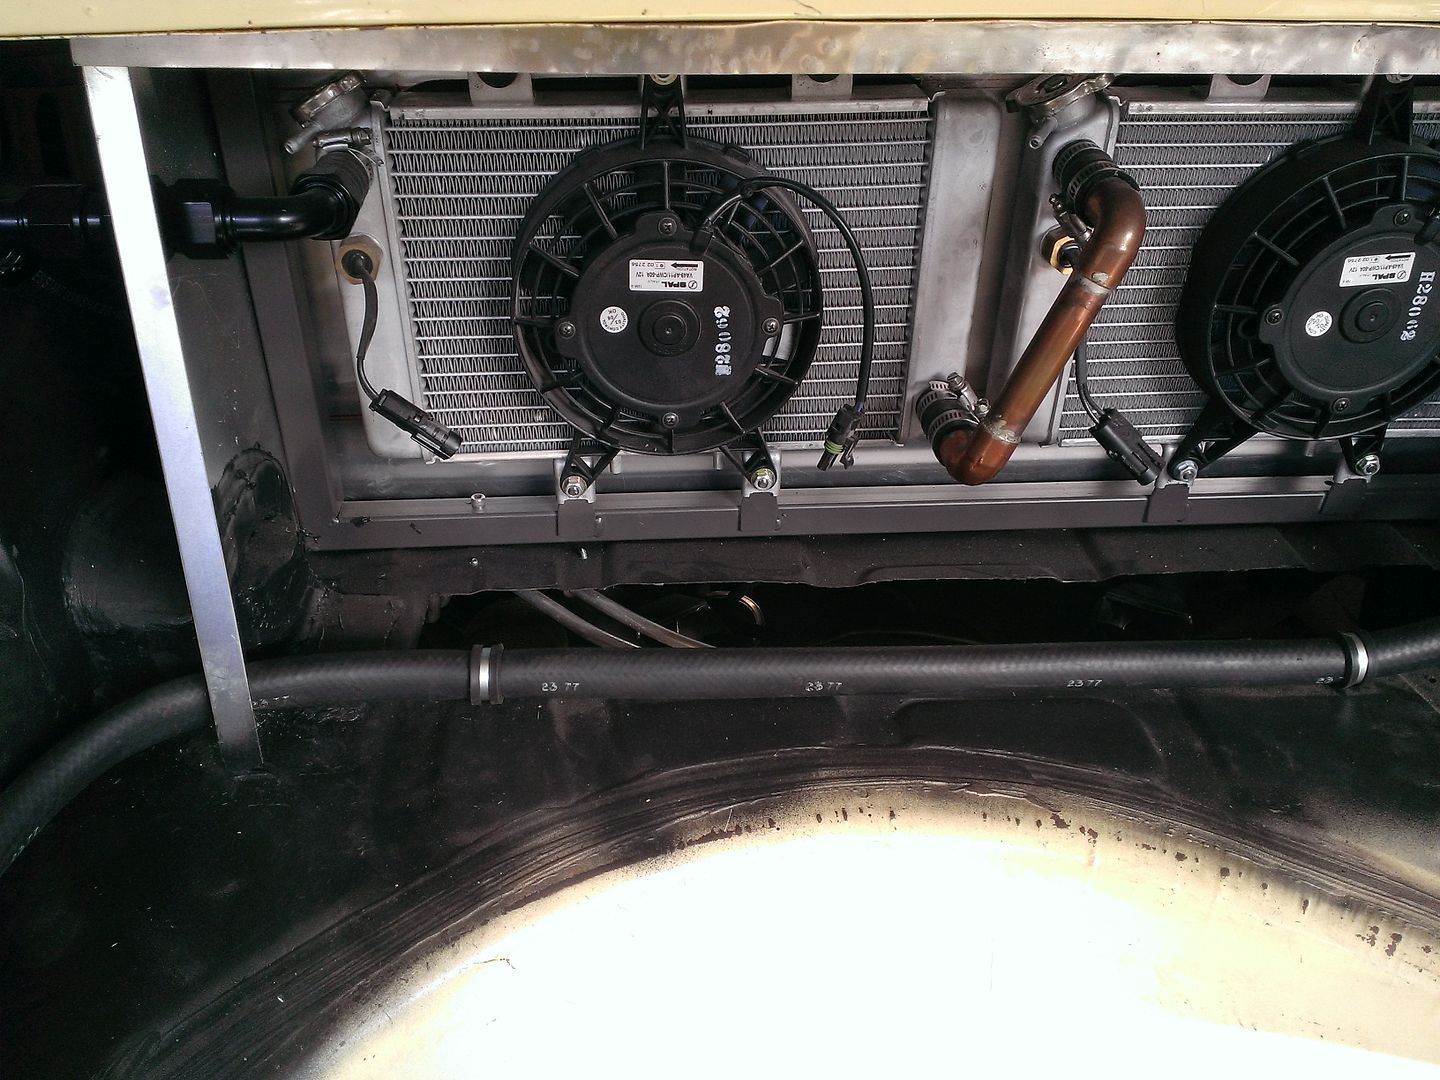
The pic is deceptive, the cooler is centered, the radiator is offset.
it's down there.
Just a little FYI, this is actually a SW desert edition Fairmont and evidently the original owner ordered the car w/ the optional "door delete" feature.
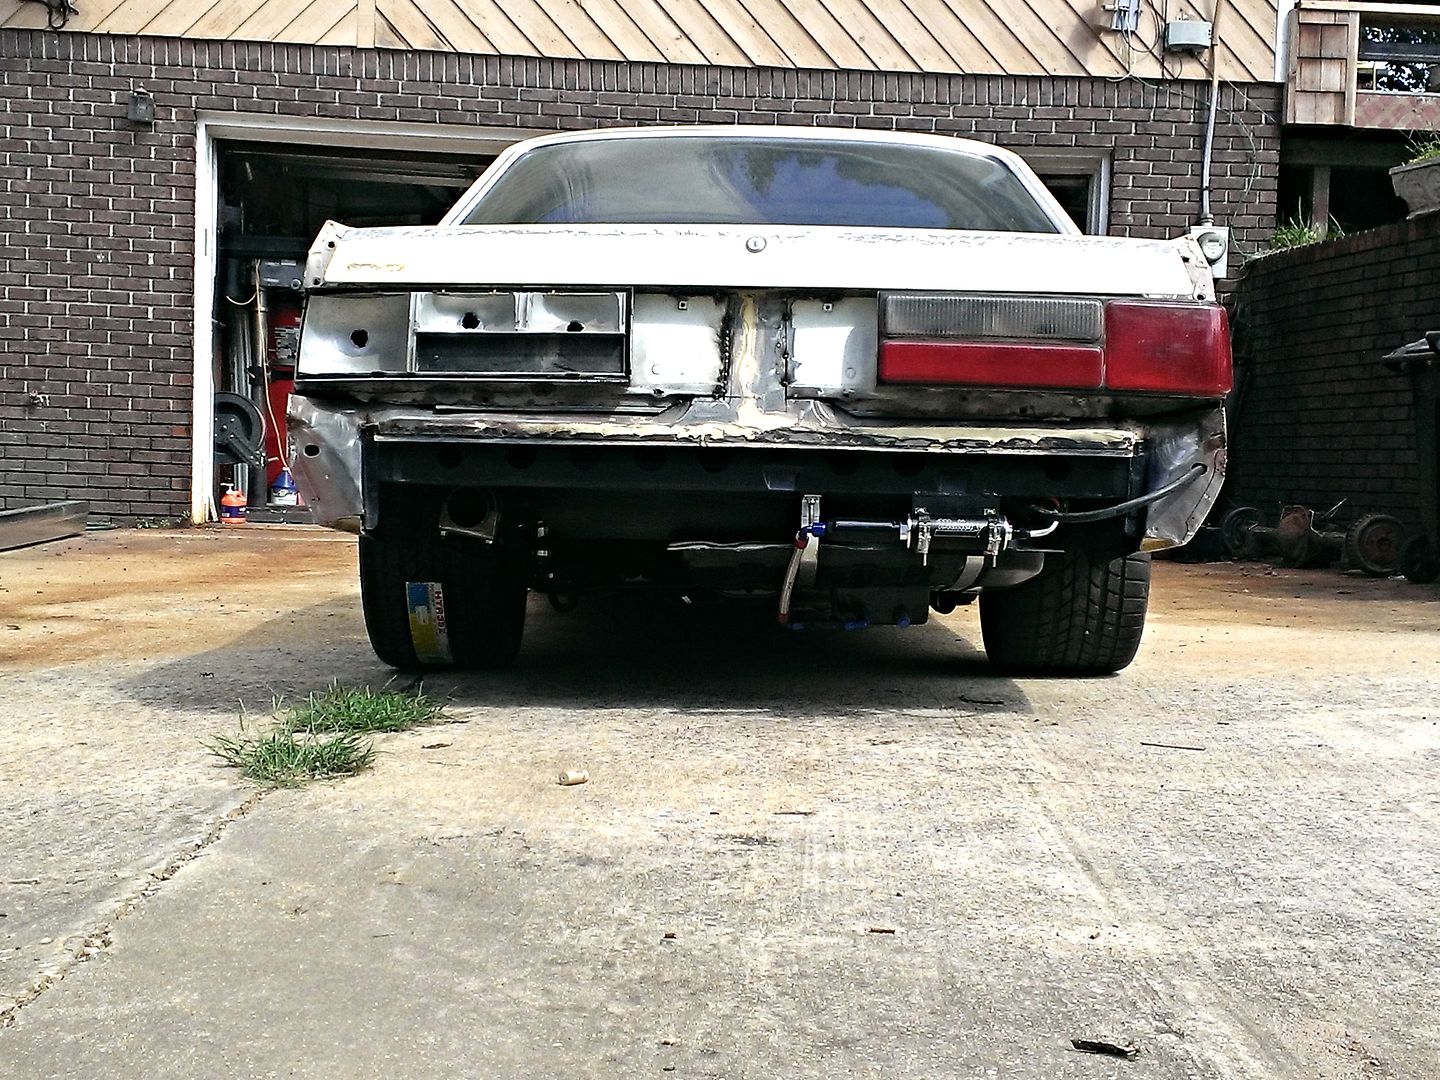
This rear carnage shot was my attempt to show off the 315's under the car. The Mustang taillights will go in the trash, as they don't really fit the car, and besides, I have a custom plan for the rear of the car to that end. On the left, you can see the single 3" muffler. What to do w/ the tail pipe is another dilemma. On one hand, I think I'll just add a 3.5-4" fart pipe looking muffler tip, and be done, on the other hand, I sketched a trapezoid looking center positioned outlet to share a similarity to the front grille for the coolers.
I'll ask for opinions on that from you guys.
The car is low ( obviously) The only thing that is at risk at this ride height is the oil filter. Ironically, one of the most fragile items on the car is hanging about 5" off the road, right up front.
Again, The plan from the sketch was to add a splitter mounted to the bottom of the cooler shroud, and bolstered by 3/8-1/2" thick pylons that would be mounted to the bumper. That splitter would serve as "cow catcher" of sorts in the event something was on the interstate that would otherwise deal a death blow to that filter. You can look at the side shots, and see just how periously low that dude is hanging. After looking at it myself, I think I'll just put a shorter oil filter on it and that'll get it up another 1" or so. That, or I'll put a 90 degree adapter on it and run the thing horizontally.
I kinda like this ride height, and it appears that I have about 1.5-2" of compression left before I'm at full bump, however, I can obviously raise the thing if need be. But I'm gonna let it sit for a few days before I attempt any bumpsteer adjustments, But believe me,.....I have it. In spades.
This is after dropping the tie rod end 1.25". From the pic, (and if I keep this ride height) it looks like I'll need another 1/2-3/4" at least to get the tie rod anywhere close to parallel w/ the lower control arm.
But all that is piddly little junk. Today the car loses. I win!
Last edited by Mike1157; 09-14-2014 at 07:54 PM.

Cool stuff! I vote no on the fart cannon.
Brad
'79 Mercury Zephyr ES 5.0L GT40 EFI, T-5
'17 Ford Focus ST
'14 Ford Fusion SE Manual


I like the trapezoid idea....with a couple dividers. How wide and high?
When's the rematch? I'm sure the car still has a few surprises up it's sleeve for you next round!
It's a 3" exhaust, so the outer trapezoid will probabably be 3.5". the 3" exhaust will float in the middle of the outer. Probably as wide as a license plate ( at the widest part).
Probably, gonna skip messing w/ the exhaust for a while,...I can make the bracketry for the water reservoir, and I/C pump for the trunk mounted radiators.
That should probably be a relatively safe battle for me to wage.
Last edited by Mike1157; 09-14-2014 at 10:47 PM.
Nevertheless, Godspeed.
Brad
'79 Mercury Zephyr ES 5.0L GT40 EFI, T-5
'17 Ford Focus ST
'14 Ford Fusion SE Manual
Finally, a full body shot! Looks sweet! Seems like every day there's an anticipated "first" when working on a car, there's always some sort of unexpected hurdle to overcome before the victory.
Are you going to further brace the K-member where you sliced it? The plate you welded on looks beefy, but still looks like there's room for some flex horizontally (more than original, anyway).
The 315's sure are nicely tucked in there, though, and I bet it feels good to see the car on the ground. I know I liked seeing it finally!
Brian
1982 Capri 5.0L
1965 Fastback project car - more rusty than not
Naaw, the k member is a done deal. As it is right now there is nothing different from most aftermarket k members, as they stop at the frame rail as far as support goes.
Yeah, it does feel good to have it sitting on the tires after all this time. I'll have a problem when it comes time to put it back up in the air. The tires fit so well back there, I regret rolling the lip on the one quarter, cause it sure didn't need it.
Ok, systems.
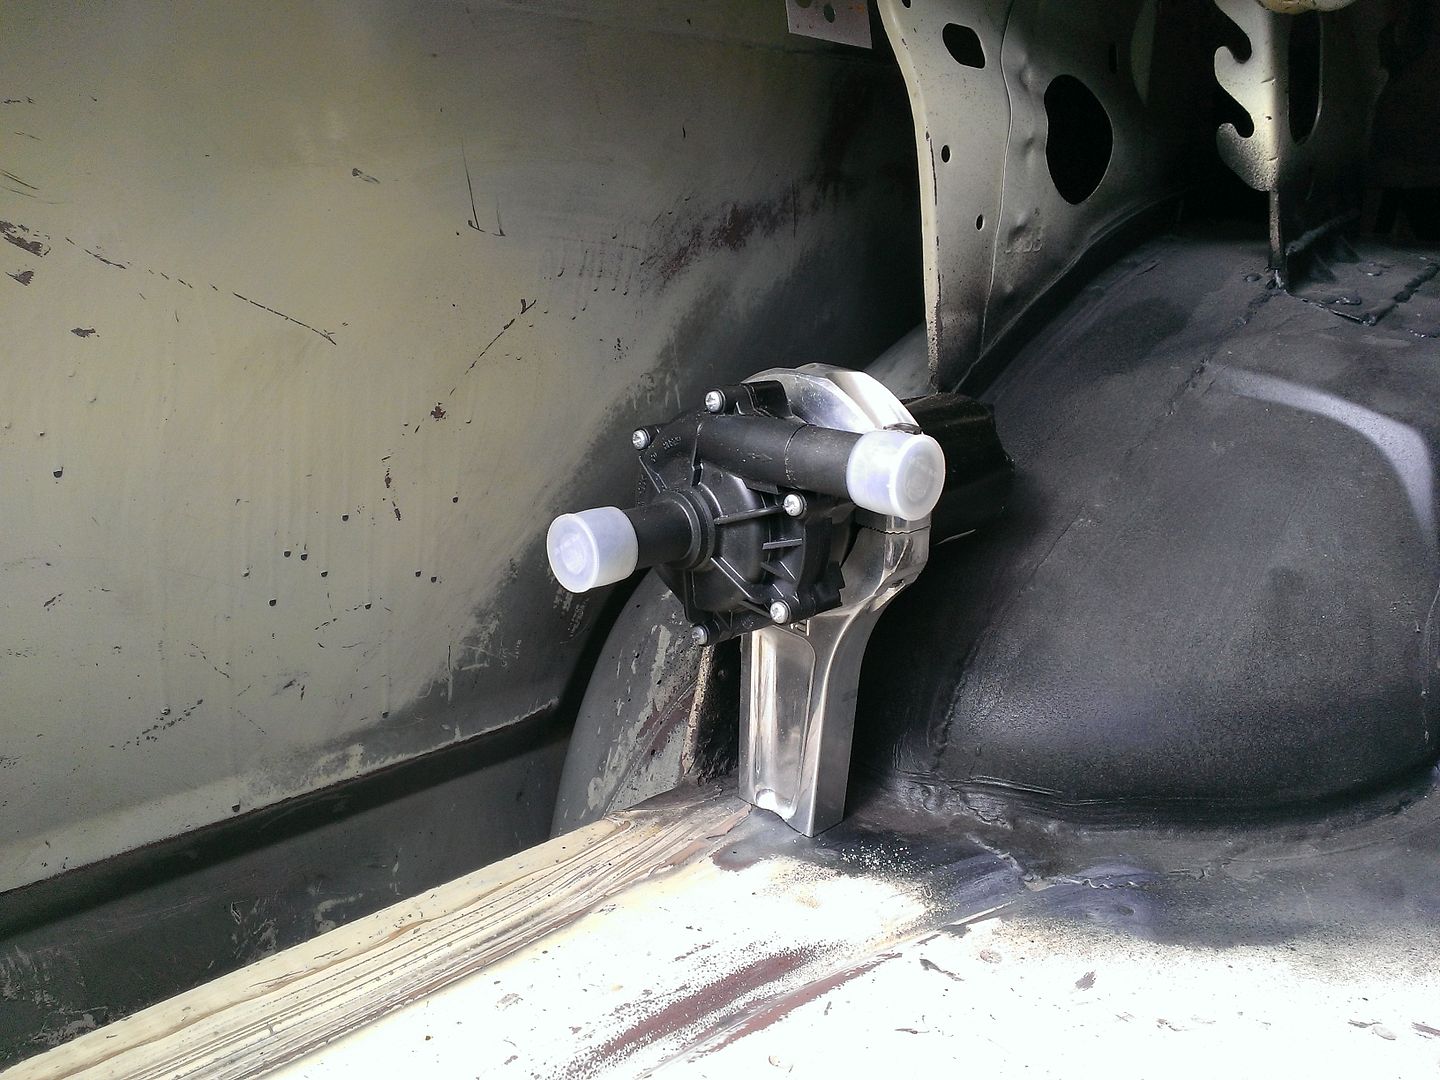
Did the IC water reservoir/pump mount today.
That entailed finding a sufficient round mount to hold the body of the Bosch 03 Cobra pump I'm using to move water between the IC, and the radiators.
Awhile back I snagged one of these BBC aluminum con rods that my friend had used up in his drag car. Once aluminum rods reach a certain number of passes in a drag car, they become "work hardened" and are subject to breakage. For my purpose the one I snagged worked perfectly.
What looks like some sort of bizzaro catyclismic engine failure, is actually the end result of me cutting the small end off of a BBC alum rod, then drilling, and tapping it to act as a mount stalk for the Bosch pump. Two 1/4" studs sticking through the floor, nutted on the bottom do nicely to hold the Cobra IC pump 3.750" in the air.
The water reservoir is a chinese 2.5 gal aluminum tank, that I made these rectangular stands to elevate it high enough to match up with the input of the Cobra pump.
That pump feeds water to these two radiators before going to the IC, then back again to the reservoir.
Pics aren't that great, it was getting late, and the sun was phucking with me. So I took these few shots for todays' update.
Last edited by Mike1157; 09-16-2014 at 08:33 PM.
That's a pretty tidy installation! How did you determine the volume of fluid circulation and and heat exchanger surface area?
Thank you.
annndd,
How did I determine what volume, for what surface area?
There was no math applied in making that determination. If anything, the only math that WAS used was done to determine how much part "a" plus part"b", plus part "c" was gonna cost me.
I basically just used an 03 Cobra heat exchanger/IC system as a bare minimum reference, and made everything bigger than that.
That math always ends with an answer you won't like Mike.
I have no knowledge of 03 Cobras of course but when I see something well planned and laid out like that I figured more went into it. Shows how much I can over think.
We work with these in the gas compression industry and our engineers of course have to do a little more calculating. I suppose on a dyno you could dial in the optimal charge temperature or is it the cooler the better?

It's gonna be one of those the cooler the better deals, but since it's a street driven car, I'll have to see where the water temp manages to stay in the system. Typically an A2A intercooler will start at ambient air temp, and can get no cooler than that, whereas an A2W system like mine will start out there, and get progressively hotter unless the radiators can wick the heat back out of the water. Most of the time people choose an A2W system for a drag car because you can fill that reservoir w/ ice water before each pass, and keep the charge temps waay below ambient. I had other reasons for using it though.
So it's a crap shoot.
I'll run the system constantly when I'm driving the car, and obviously won't be under boost the whole time I'm driving, so in theory, the heat exchangers (radiators) should be capable of keeping the temps close to ambient if the radiators are properly sized. The real reason for an A2W system over an A2A system for me was the size of the box that the charged air has to travel through. That little IC is waay smaller than a typical A2A piece, and I just didn't have room for it hanging out front w/ all the rest of the crap.

Currently sitting beside myself......WOAH!!
-Currently Searching for "The One"
I've Been held up over the fact that SN95 Cobra calipers use fine thread banjo bolts to hold the brake line onto them.
Does anybody carry those stupid bolts? Nope.
After spending last Saturday driveing to every retail parts suppliers in the nation I ended up ordering them from Summit. Before doing that, and after looking online, it appeared based on the research, that the bolts were supposed to be 10 x 1.5 pitch. So that's what got ordered from Summit. When they came in, it was apparent that they were in fact wrong.Another phone call to Summit had the correct bolts ordered again, and those bolts showed up today. Whether or not they are long enough is a point of contention, as they are only protruding out of the brake line caliper fitting about 1/4".
I screwed dem bitches in anyway.
I've only had these stupid rotors and calipers for a year now, and today they are just now becoming a brake system.
This thing was truly the biggest pain in my ass I have yet to do. (not really, but close.) It became a "challenge after the first line was finished, and tight. After that, all of the other lines that went to the thing had to be exact, and most had to be cut, bent, and flared in place.
By installing it on the inside of the engine compartment, close to the MC as specified in the instructions, I managed to F up more of the paint. There is a gi honkin chunk missing behind the two lines that go to the MC because I thought after getting them bent, and tight, I'd just give the two lines a bump w/ my hand to tighten them up against the strut tower. They tightened up alright, which was immediately followed by the chip insulting my efforts by popping up behind the lines.
Everywhere a hole was drilled, paint chips.
I don't even care anymore, I'm just gonna get one of those touch up pens, and repaint the whole stupid engine compartment w/ it.
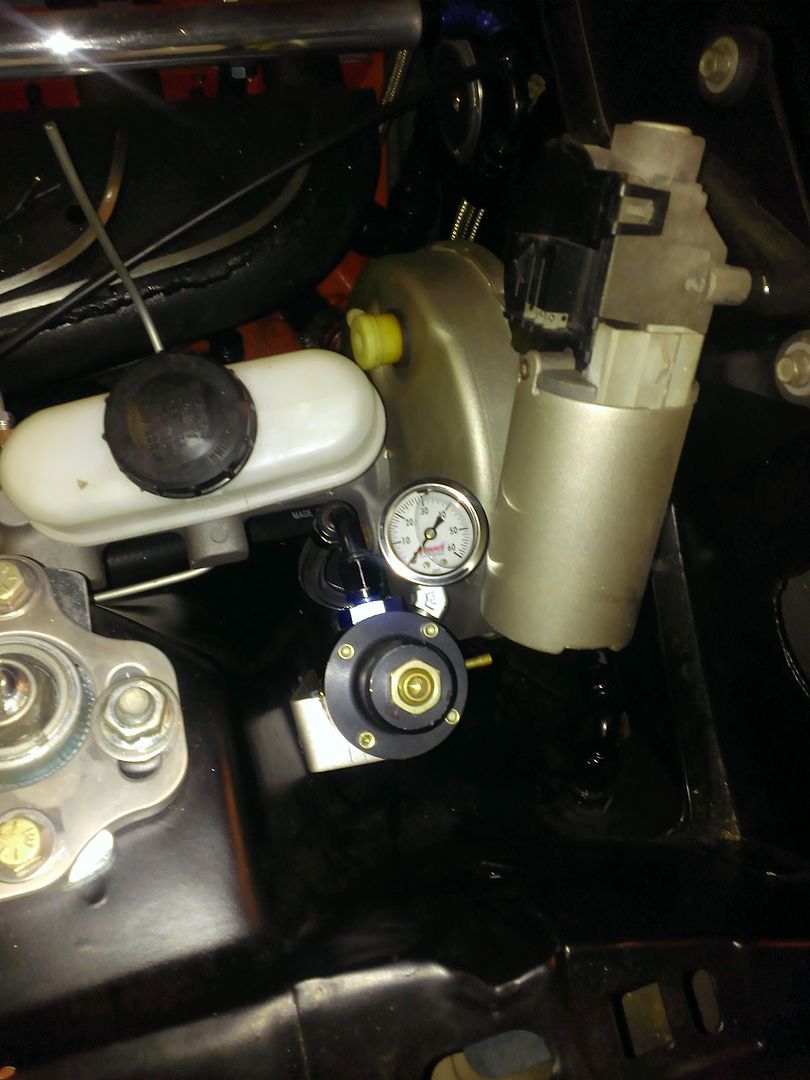
I completed the fuel system by locating a place on the exit side of the fuel rail to install the return regulator. I always amaze myself by trying to find the smallest place to jam the most s hit I can get into it, to the point of not being able to remove anything that is screwed onto it unless the whole damn thing is removed from the strut tower first.
I dare anybody to get the line at the top of the pic off w/o taking the regulator off of it's mount first:nonono:.
I'm still waiting on MM to get me the brake line fittings for the MC, and according to UPS tracking, they'll be here tomorrow, along w/ the steering rack fittings to allow me to put braided lines from the PS pump there instead.
Dare I say that with that arrival, the entire engine compartment will be done, plumbed and buttoned up, waiting on the completion of the interior so I can wire up the engine?:shrug:
I'd be lying. I still have to dick with the AC lines first.
Who needs AC? It's almost October! Is the engine bay gonna be a full wire tuck kind of job? There can't be much more to do before you turn the key for the first time (famous last words).
Brian
1982 Capri 5.0L
1965 Fastback project car - more rusty than not
The brake lines look good. I like to see them run neatly and I feel the pain of flaring them in place. The ones I had to do weren't so precise but to measure, cut, flare and then bend...not likely to get it right on. The effort pays off in the final product.
Even with all of the little things, you are fightling through it! Even if the final battle will be finished with paint pens!
Speak for yourself. I got home tonight, and the house thermostat said 81 degrees inside ( AC turned off during day, cause it gets down to upper 60's at night). AC in Alabama is a must if the car is to be driven w/ my wife sitting beside me when we go on long trips. Since I hope this car will someday make the trip between here and Las Vegas to SEMA .
I will definitely NOT be driving across the desert southwest W/O air.
I will attempt to keep the engine wire harness out of sight as much as possible, but the entire interior has to be mocked up and mostly complete before I can locate the ECU, and fuse block, which will in turn allow me to wire the engine compartment.
Last edited by Mike1157; 09-26-2014 at 10:15 PM.

Wow.. you are most definitely packin and stackin parts. It's looking good. Nice job on the brake line routing. I understand about AC. My 83L's air only works going down the road with the tops out. I have debated about converting it but, that is a back burner kind of thing.
Dave
If common sense was common wouldn't it just be sense?
1983 Capri L T top 5.0 efi aod
1983 Capri RS Turbo
1981 Black Magic 400 c6
93 F-250 351 5sp 4x4
Heh, you sure we live on the same planet? I haven't experienced anything other than hot (but still bearable without AC), short summers followed by painfully cold, very long winters. I'm sure 82gtforme can attest to the same. Your winters are probably hotter than my summers! I was just joshin' though. Cruising across the desert in that car with cold AC blowing would be awesome.
Brian
1982 Capri 5.0L
1965 Fastback project car - more rusty than not
This has been a decent summer compared to the past. We never saw a triple digit day. About a dozen or so high 90's, but mostly upper 80's for the average here. The humidity is the killer though. 70-80% humidity typical makes even a high 80 day absolutely intolerable.
The winters do get down to the teens some times but mostly average around 40 degrees for about two months. Again the humidity makes a 35 degree day bone chilling.
As for the car though, it's built for that trip. It's a personal goal to make a Rt 66 mecca through the desert to see what is left of the original route to LA. Vegas, and SEMA is my destination. I hope to make that trip in 2015.

Mike what master cyl. And booster are you using?
 Posting Permissions


Connect With Us