
Cool, great score!


Cool, great score!
1984 Mustang GT owned since 1991 (first car). Mercury Mountaineer GT-40P engine, some suspension mods, currently undergoing a five lug SN95 brake upgrade and more suspension mods. Some minor body and interior mods have been done as well.
2004 GT convertible, 2001 Taurus LX, 1994 F150, 1950 F-1 Ford Pickup


The only thing left to do is port match the intake side. Parts are not readily available and my gasket set (to match with) and the new springs are at least a couple weeks away. Go figure. I'm going to take these back to the machine shop for the valve and seat work as well as the new guides done. Hopefully shipping dates are worst case scenario.
http://s1337.photobucket.com/user/82...39f10.jpg.html
Last edited by 82GTforME; 11-04-2018 at 11:03 AM.
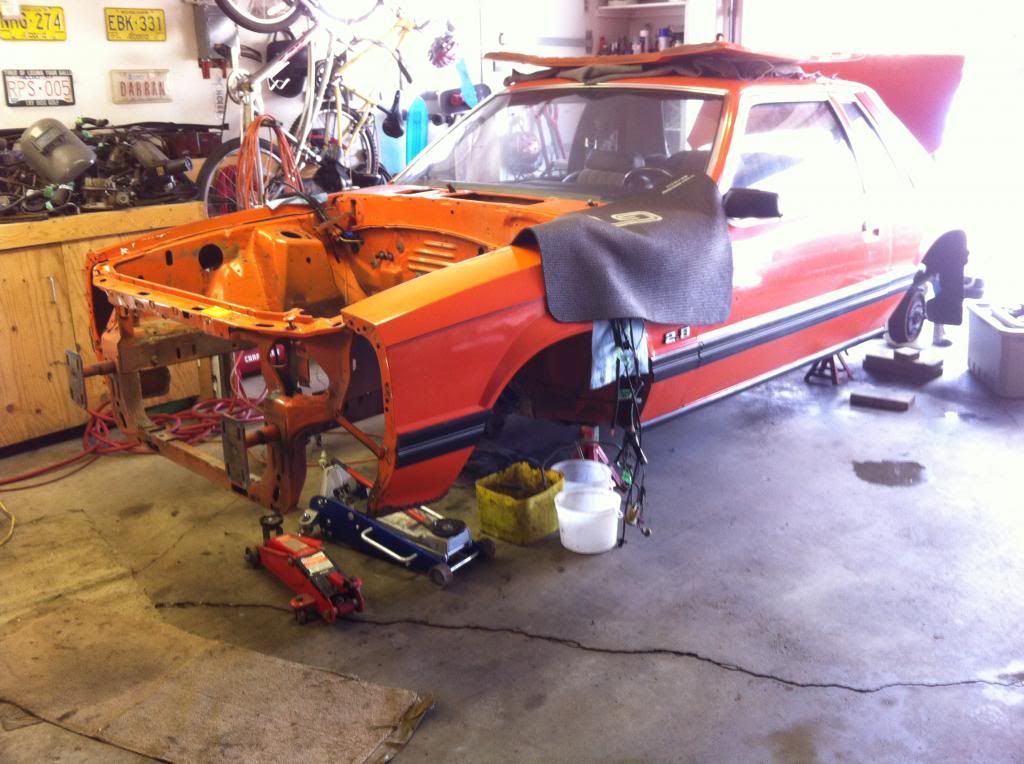
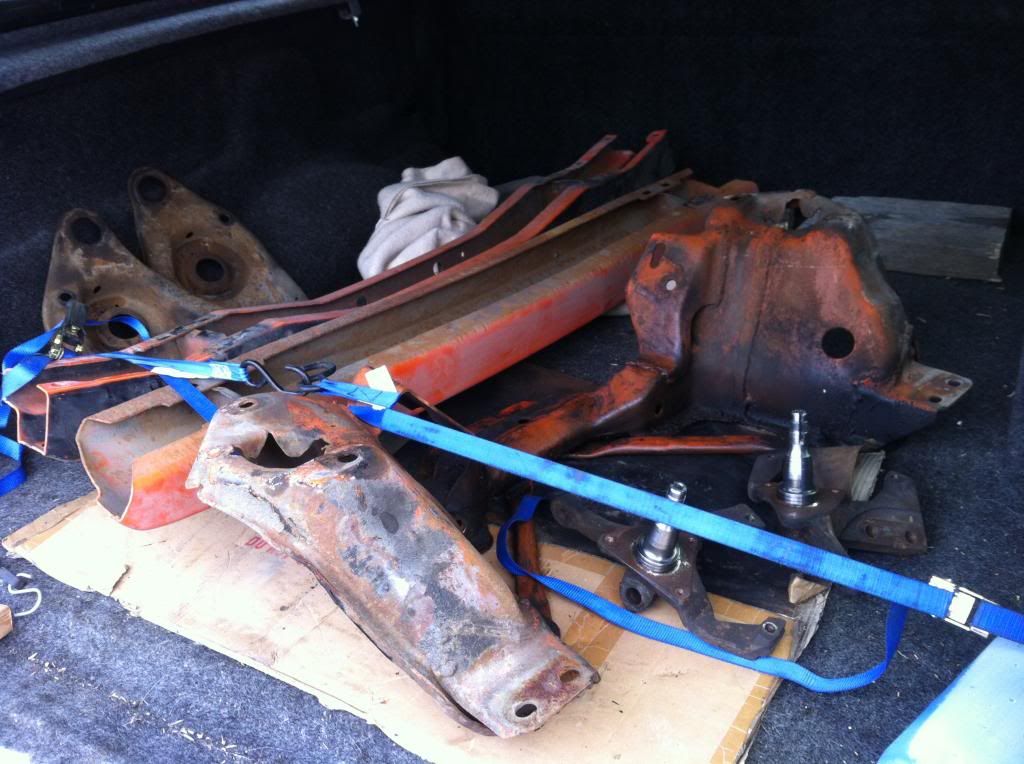
Pulling this engine, stripping it and all the rest was a whirlwind. Stuff was kind of strewn all over in order of removal. I bought some tubs to start cataloging items that were: needing blasting/cleaning for possible paint, degreasing and prepping for later reinstallation and then things that are ready to install. I'm trying to keep things together like internals/ fasteners, bolt on accessories, body, suspension etc. I like to be organized!
I got around half done. I can see more of my work bench now!
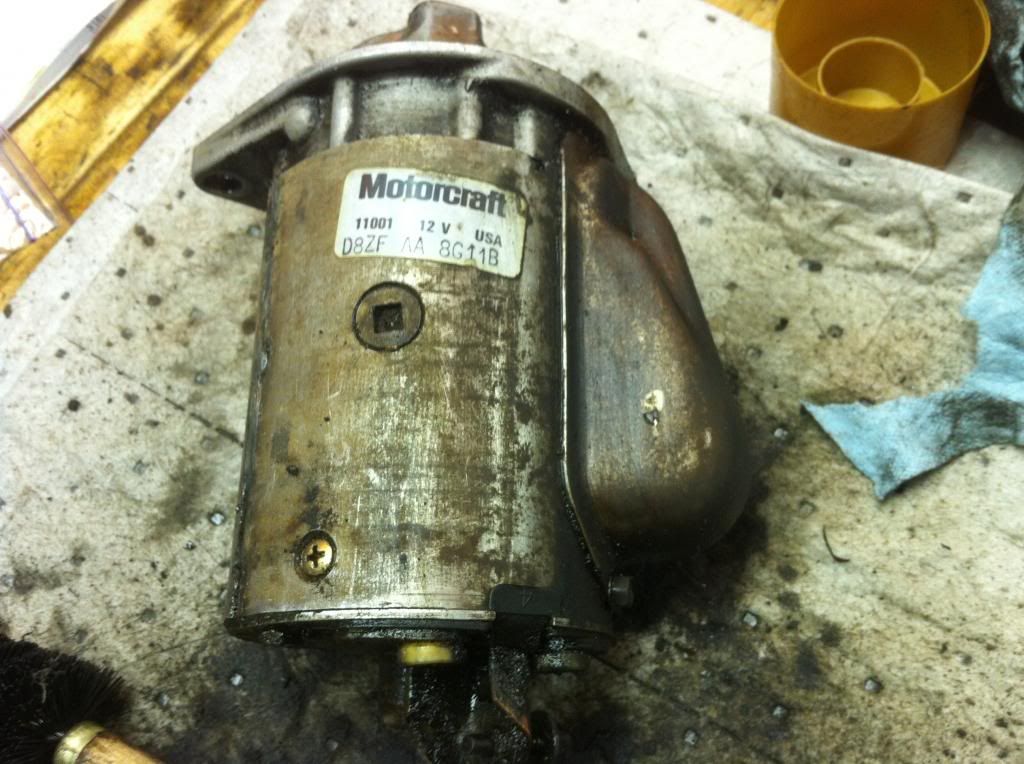
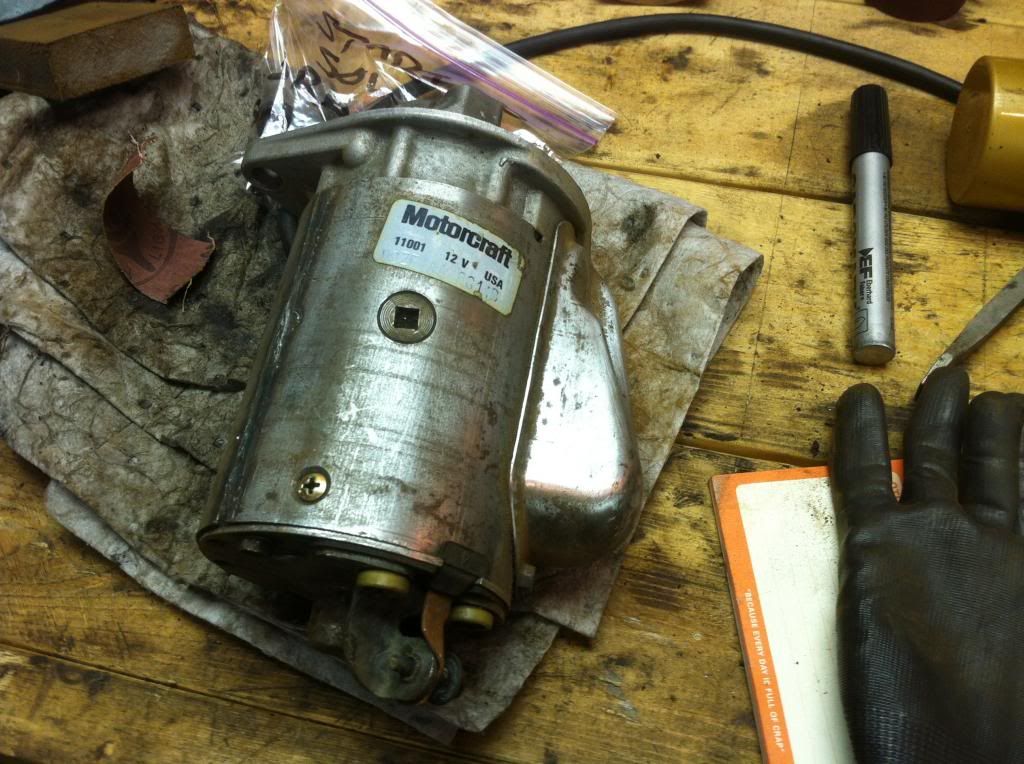
We are trying to use as much as we can that came off the car to keep costs down. The original starter was still in use. Even though it was working, it looked it's age and was all oily from the leaks the engine had. I carefully degreased it and then took some emery paper to the rust and finished off with a sanding sponge. It looks pretty good!
http://s1337.photobucket.com/user/82...861cd.jpg.html
http://s1337.photobucket.com/user/82...e8e5f.jpg.html
Last edited by 82GTforME; 11-04-2018 at 11:03 AM.
After a nice spring break away I had four days to really get thinking about this project. I needed to decide paint etc. I started another thread in the Body section and feedback got me re-thinking my plans. http://vb.foureyedpride.com/showthre...ices-Tangerine Problems with color matching and the rust spots I need to deal with have made my mind up to paint the entire car now.
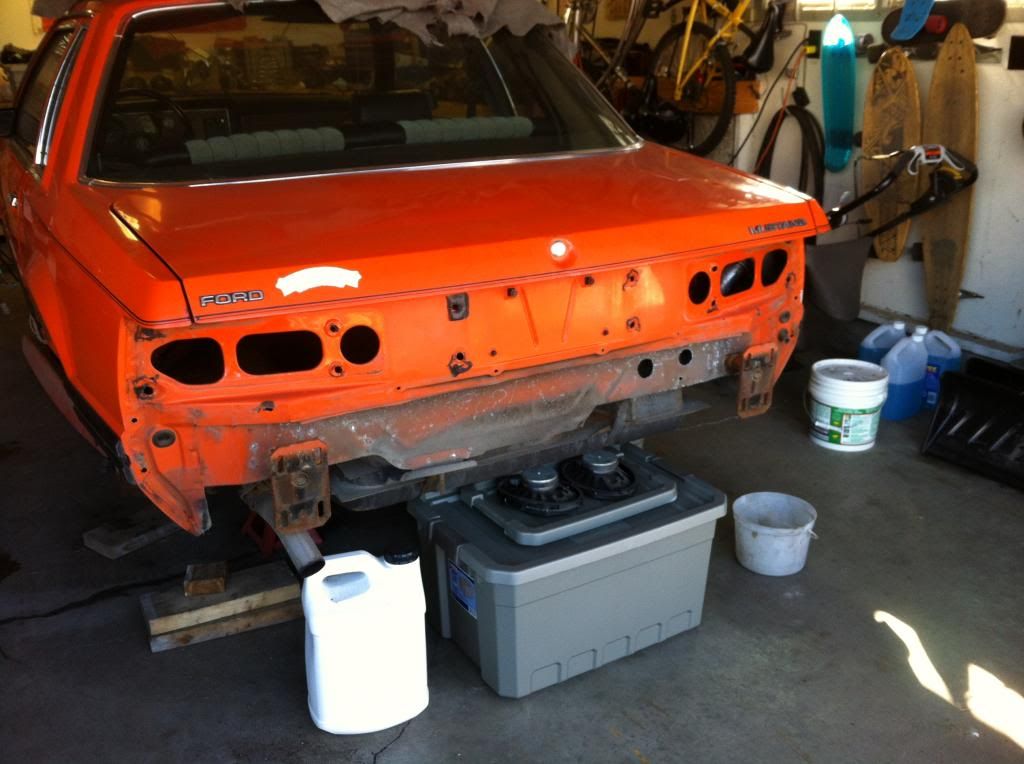
With a few days left before back to work, I was a man on a mission. The teardown was on. Front and back bumper covers off as well as a bunch of the chrome trim and rubber. Some plastic fasteners were damaged during this step
http://s1337.photobucket.com/user/82...55714.jpg.html
http://s1337.photobucket.com/user/82...09cb5.jpg.html
Last edited by 82GTforME; 11-04-2018 at 11:04 AM.

Your are a man on a mission...good work...
Current rides:
89 LX 5.0, 5 -spd..the Lemon
86 RS Capri 5.0 Auto...
86 LX Colorado SSP 5.0 5-spd (Sadly Sold)
85.5 SVO, Finally Got Boost
83 RS Capri 5.0, 5-spd (another sadly sold)
The number of small rust spots just breaking through the paint and some larger helped make up my decision to repaint the car. I'm at this point now, what the heck eh?
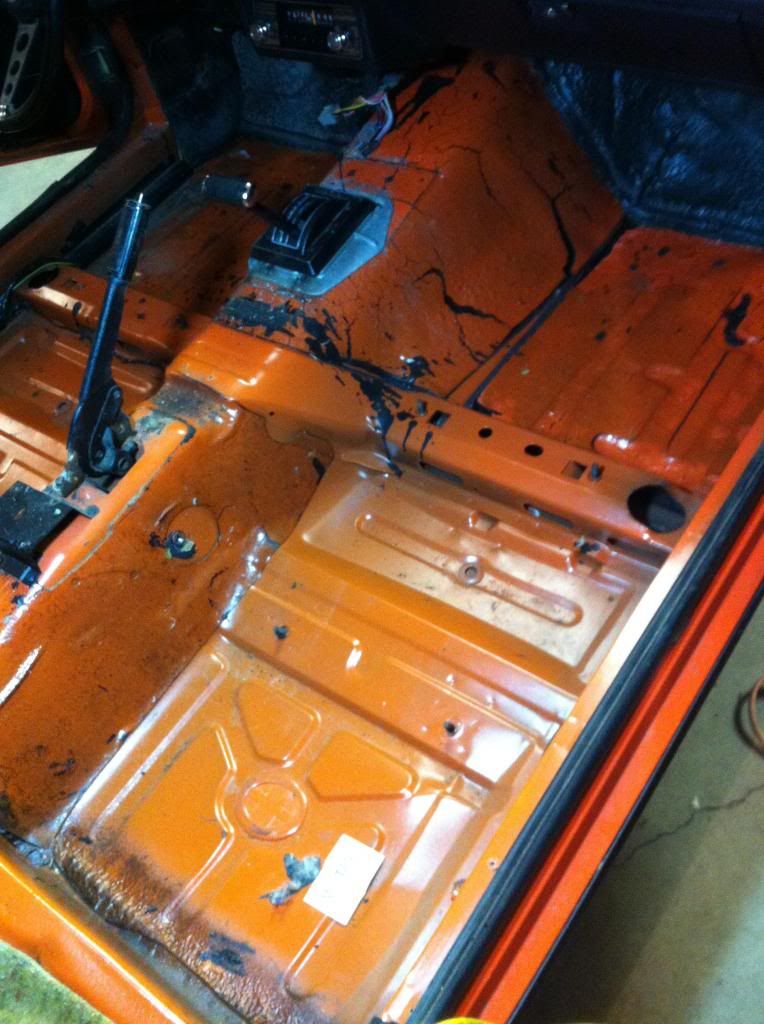
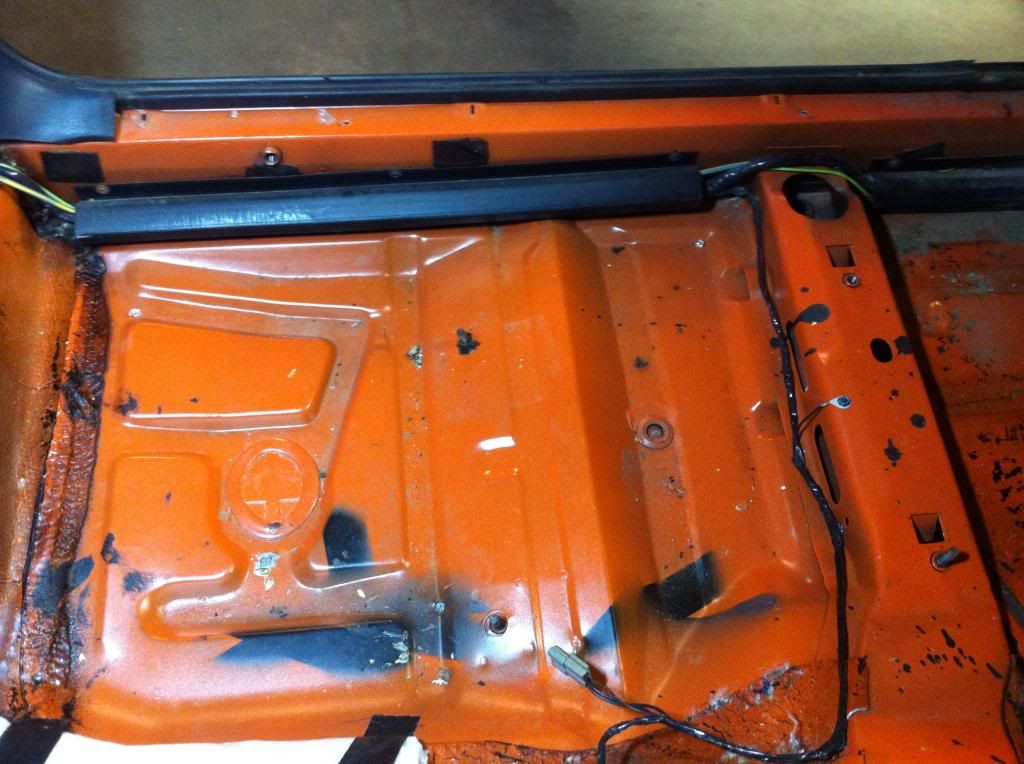
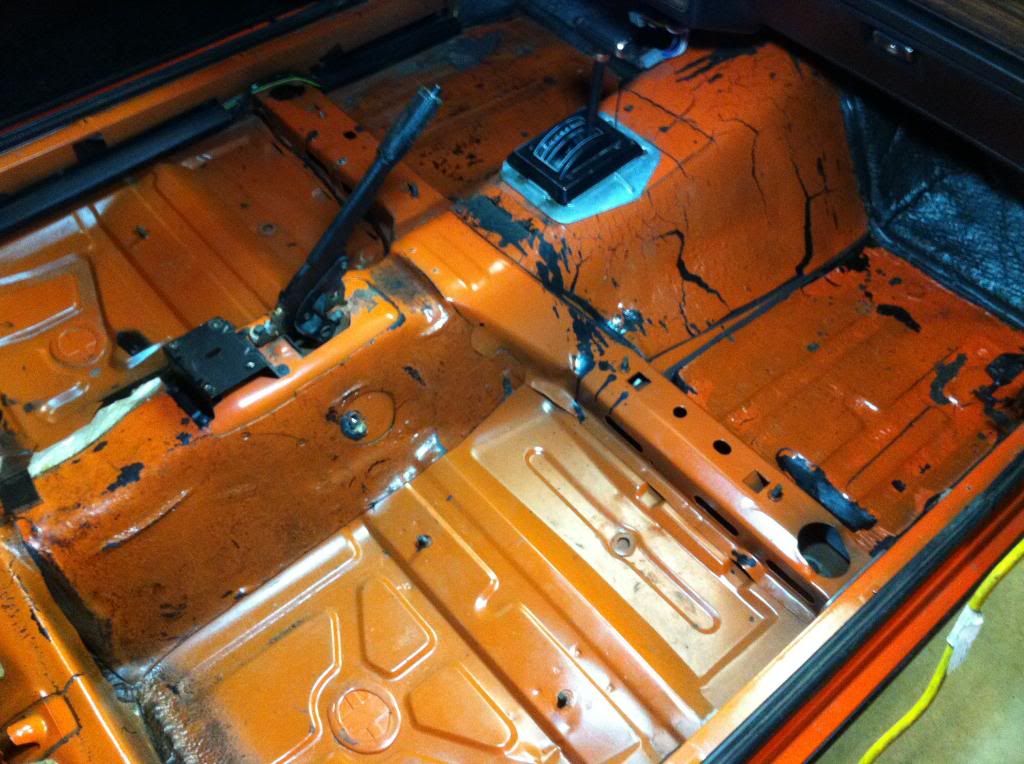
We had ordered a new carpet from ACC because there was some mouse damage in the form of holes on the drivers floor. That was one thing that my son needed to get replaced. Seeing as we were at this point and needed to remove a bunch of stuff to get the carpet out, we pretty much pulled the entire interior except the dash.
With the rusting previously mentioned and the signs thing the undercarriage had I wasn't expecting nice things but was I surprised!!
Look at these floor pans! No signs of water or water damage at all except a palm of your hand size spot up by the drivers kick panel where the thick coating deteriorated.This will save a lot of time!
http://s1337.photobucket.com/user/82...a7dbe.jpg.html
http://s1337.photobucket.com/user/82...9f6b9.jpg.html
http://s1337.photobucket.com/user/82...7947d.jpg.html
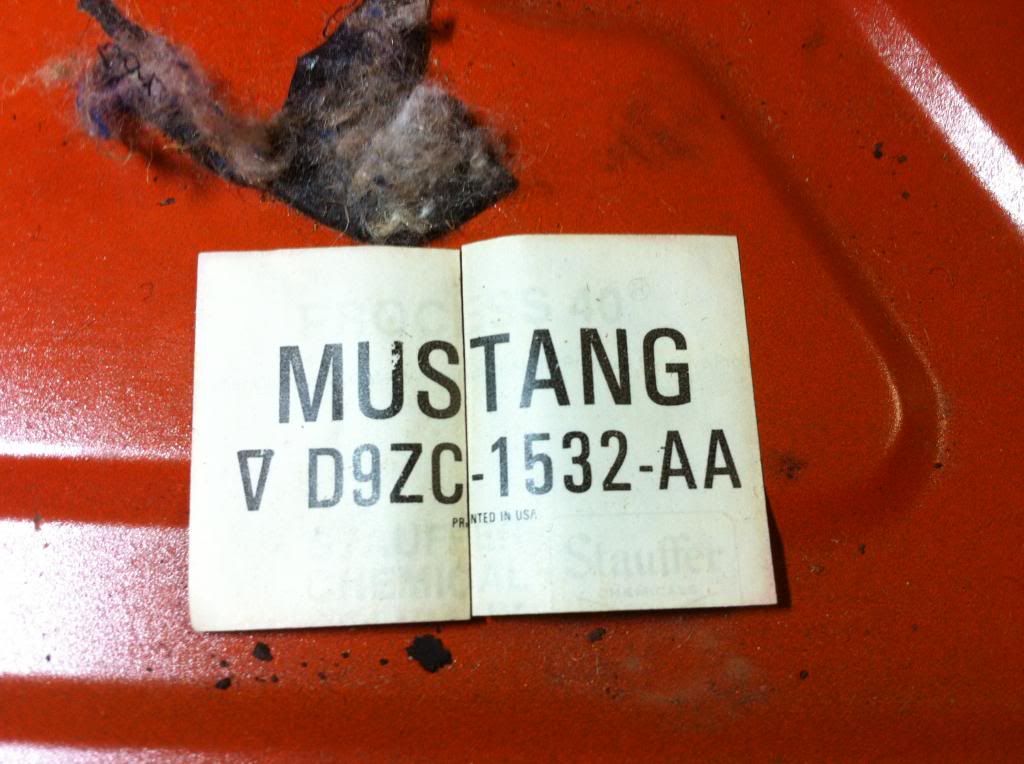
This was under the carpet. Maybe came off it? It almost feels like a decal.
http://s1337.photobucket.com/user/82...cb600.jpg.html
Last edited by 82GTforME; 11-04-2018 at 11:05 AM.
I think you made the right decision and that car is worthy of a full repaint.
1984 Mustang GT owned since 1991 (first car). Mercury Mountaineer GT-40P engine, some suspension mods, currently undergoing a five lug SN95 brake upgrade and more suspension mods. Some minor body and interior mods have been done as well.
2004 GT convertible, 2001 Taurus LX, 1994 F150, 1950 F-1 Ford Pickup
Doing the carpet was a luxury we decided on due to the holes in the front from mice. The headliner was a neccessity. The previous owner had pulled the fabric tight and folded it under the visor mount but it was not enough to prevent the inevitable. My son Jackson joined FEP (he's more of a Facebook FEP'er) and asked the question: http://vb.foureyedpride.com/showthre...liner-question
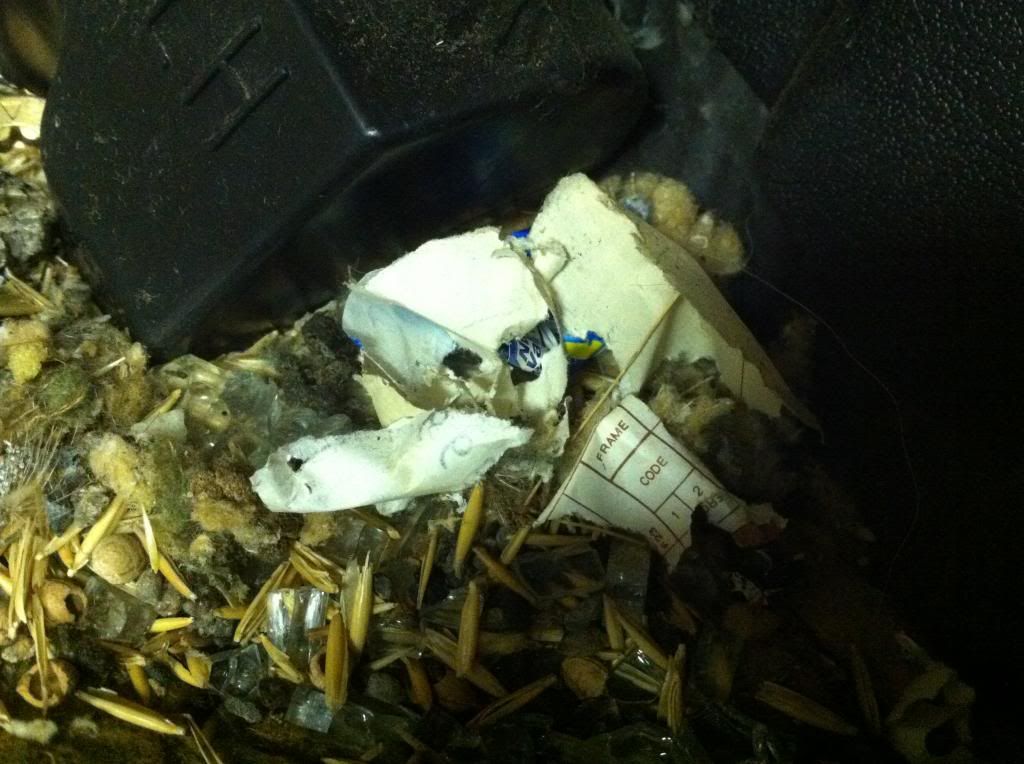
We knew the mice had been under the back seat (see part of the chewed build sheet?):
http://s1337.photobucket.com/user/82...bb50a.jpg.html
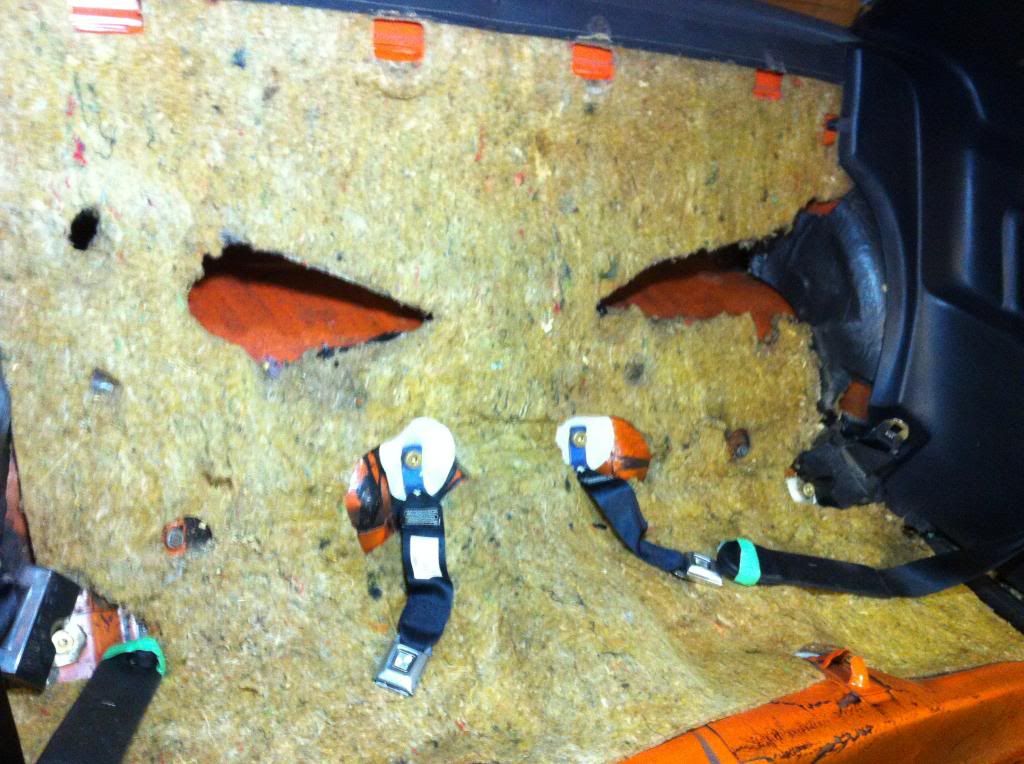
There was also grain and nest material in the wells in the trunk behind the rear wheels (no rust thank goodness). They chewed part of the insulating pad behind the back seat:
http://s1337.photobucket.com/user/82...f4911.jpg.html
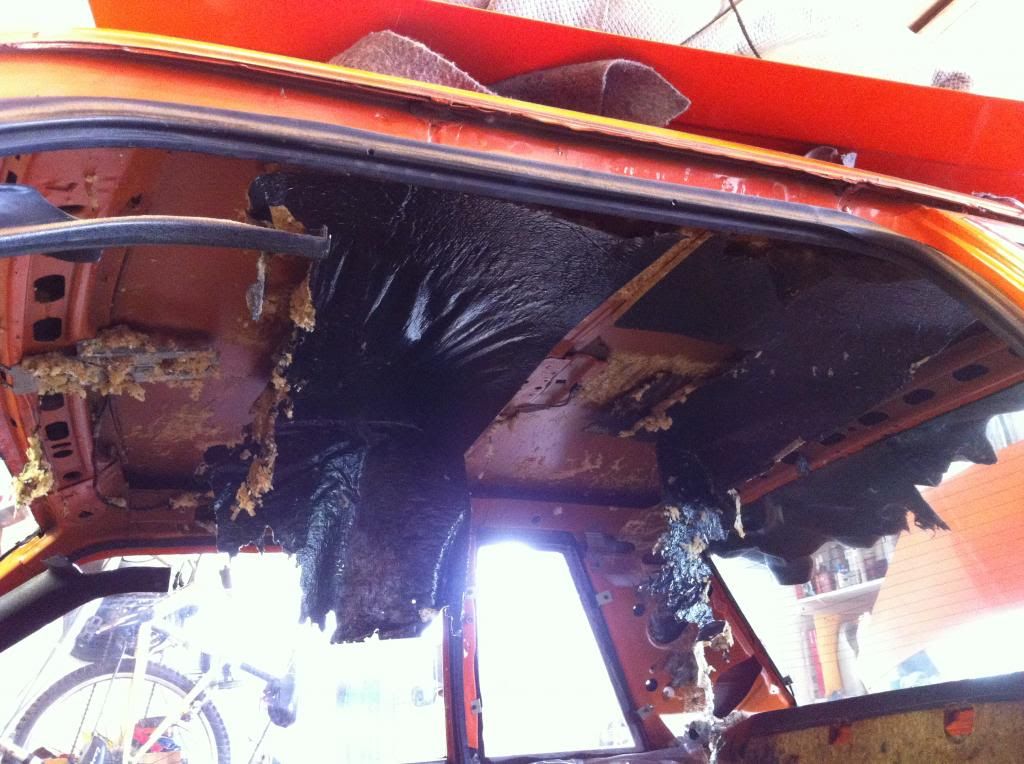
When we removed the headliner, the probable root cause of the failure. It looks like the mice partied on the top floor. This car seems like one of those gerbil or mouse cages that had all of the rooms for them to explore.
http://s1337.photobucket.com/user/82...d35de.jpg.html
There was a lot of insulation material loose up there. They must have traveled around in the folds of the sheet metal. Maybe they came up there when the sun beat down in the winter. It reeked of urine and a lot of turds. Bleh. Mandatory masks.
I had initially thought I could easily reuse the same backing board until I saw that it was chewed through. At least I have a template to use for ir and the vinyl. The fabric had a couple of small cuts it it unrelated to the mice so I am going to source out some vinyl I think. I see some people use fabric store 'by the yard' stuff successfully.
http://s1337.photobucket.com/user/82...f47f3.jpg.html
Too bad. Blainer was selling a roll of this material last year and I was too gun-shy to buy it. By the way the glue had failed as usual besides. Brittle and fuzzy and just flaked off.
Last edited by 82GTforME; 11-04-2018 at 11:08 AM.
Miscellaneous stuff:
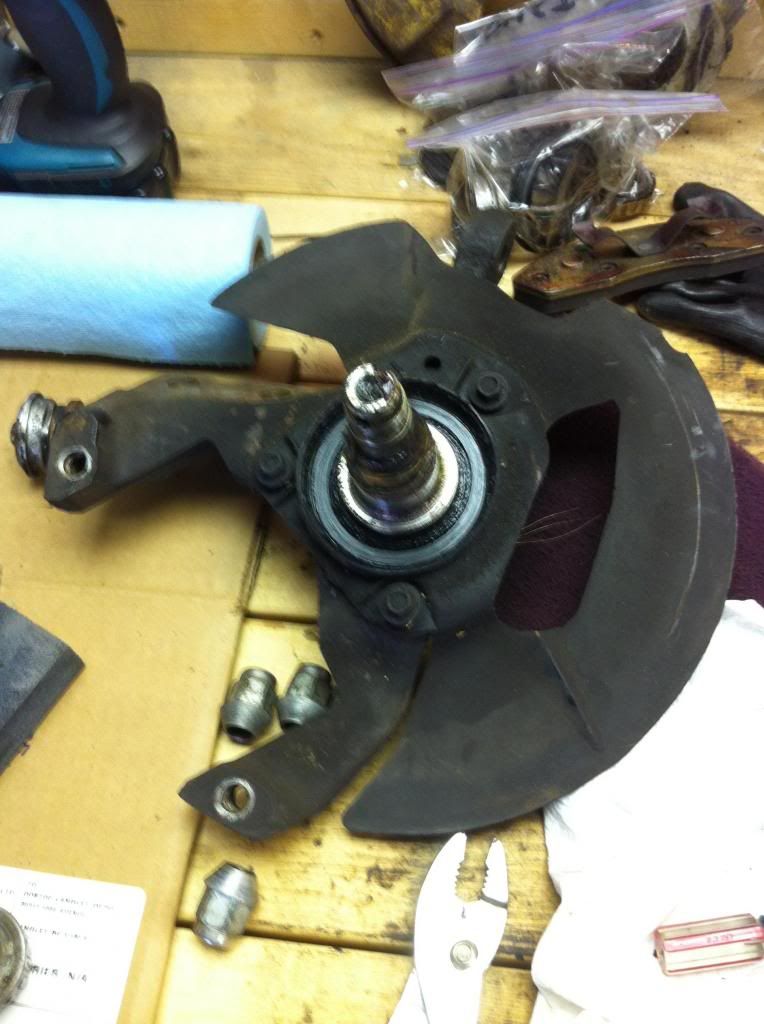
I finally got to the front control arms and removed the bushings and shells as well as the ball joints. After doing it last year, this time was only a 2-3 hour job
http://s1337.photobucket.com/user/82...72b80.jpg.html
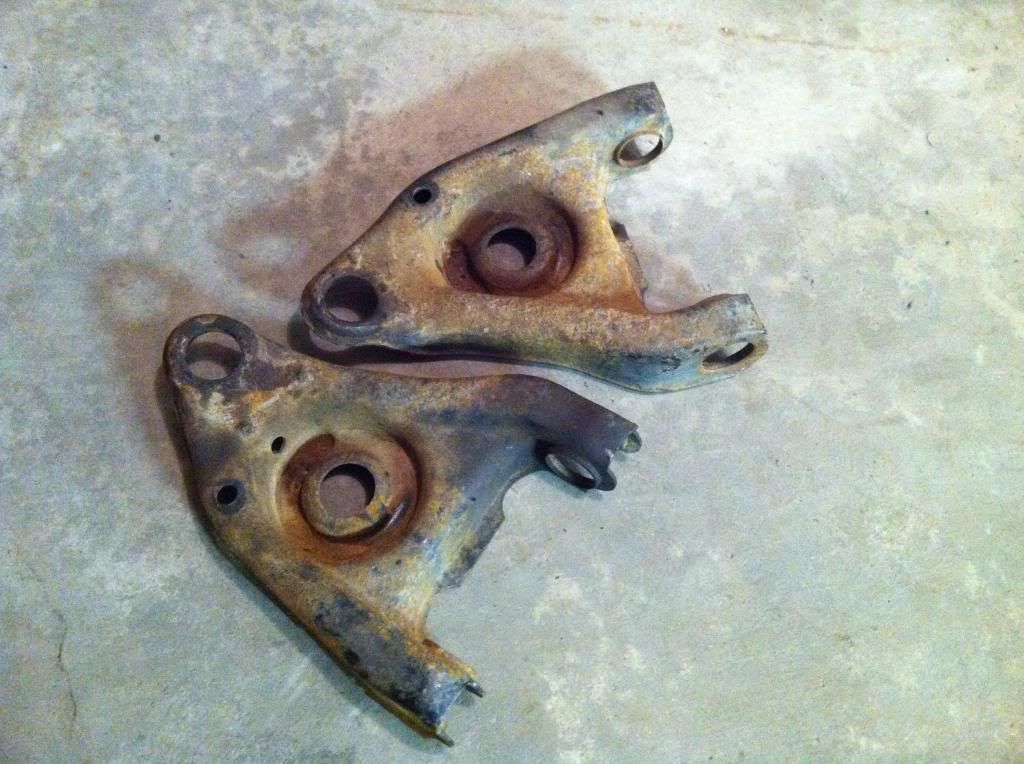
Sripped my old '82 spindles. These are good for 10" brakes versus the 9" only stock ones that came on this car (thanks for the idea Travis!). The 10" rotors only need turning. The pads are good but for $33 each, rebuilt Cardone calipers will save me a big headache. The cleaning/blasting time alone isn't worth that! Degrease and paint away.
http://s1337.photobucket.com/user/82...509b5.jpg.html
Last edited by 82GTforME; 11-04-2018 at 11:09 AM.
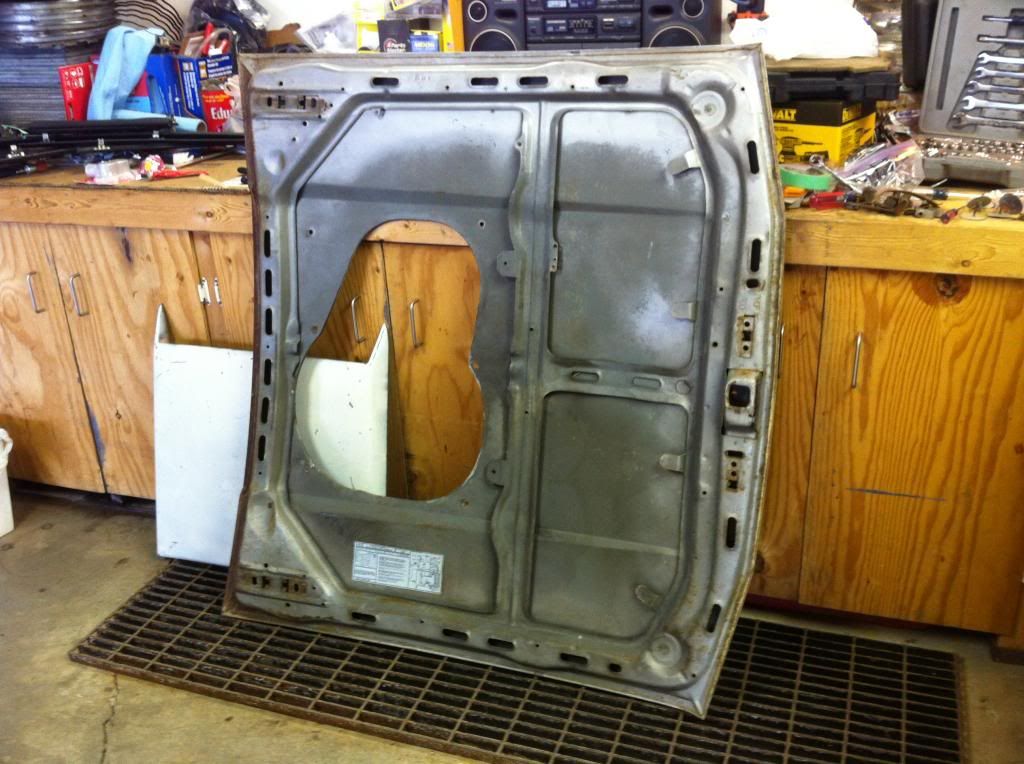
I stripped all of the hardware off of that $20 hood I got including the scoop. No broken or chipped fibreglass and had the plasic grill. I will have to bond the inner frame to the skin in a couple of places after.
http://s1337.photobucket.com/user/82...1b605.jpg.html
First load to go to the sandblaster tomorrow plus the hood. I'm going to check out a contact through work who does industrial blasting but they are "car guys" so I know it will be in good hands. The price should be alright too!
http://s1337.photobucket.com/user/82...e2d92.jpg.html
Last edited by 82GTforME; 11-04-2018 at 11:09 AM.


Those metal pieces are thick so I wouldn't be concerned with warpage. Hopefully they don't blast the spindle stems.
Black 1985 GT: 408w, in the 6's in the 1/8 mile
Bimini Blue 1988 LX 5.0 Coupe 5-speed, Hellion turbo, zero options
Grabber Yellow 1973 Mustang Mach 1: 351c, toploader
Black 2012 5.0 GT, 6-speed, Brembo brakes, 3.73's
Wimbledon White 1966 F-100 Shortbed Styleside, 390, Tremec 3550, FiTech EFI
I'm sure hoping they offer alternative blast media to heavy silica otherwise I will look elsewhere. Something less abrasive for sure especially the hood. Not too concerned with the bumpers, I am just going to rust encapsulate and prime them I think. When I bead blasted the '94 ones for my '82 last year I duct taped the the stems good and avoided the area altogether.Originally Posted by Zap's 85 GT

You never know what people are thinking these days when you get something done and assuming they know. I will mention it to them.

Damn mice. have you looked in the HVAC to see if they got in there too?
I'm an FEP Paid Supporter and proud of it. Are you?
1984 Capri Turbo RS - Alive after 7 years! Build Thread
2018 Mustang GT - daily driver
I know the manual vents are clear, I haven't checked the other ducts yet. The car was daily driven for the two years prior to last year and the long term storage was before that. Hopefully if they were in there the PO noticed and cleaned them.
The original unused spare tire actually has "SPARE" in the treads. Was this the first year for a temporary tire? The jack and the clamp are there but no tire iron.
http://s1337.photobucket.com/user/82...26d94.jpg.html
Last edited by 82GTforME; 11-04-2018 at 11:10 AM.
That's the second headliner board I have ever seen where a mouse did that. At least the car should smell much better inside when you're done.
Oh, and Mustang IIs also had temporary spares like that. Even the early 70s cars did, but they were very different. They came with a can to inflate them if you had to use them.
1984 Mustang GT owned since 1991 (first car). Mercury Mountaineer GT-40P engine, some suspension mods, currently undergoing a five lug SN95 brake upgrade and more suspension mods. Some minor body and interior mods have been done as well.
2004 GT convertible, 2001 Taurus LX, 1994 F150, 1950 F-1 Ford Pickup
This is going to take some time and elbow grease but the ball is rolling...
Some before and after pictures:
http://s1337.photobucket.com/user/82...fb3f4.jpg.html
http://s1337.photobucket.com/user/82...072af.jpg.html
http://s1337.photobucket.com/user/82...6202b.jpg.html
http://s1337.photobucket.com/user/82...5b593.jpg.html
http://s1337.photobucket.com/user/82...4dde5.jpg.html
http://s1337.photobucket.com/user/82...202a7.jpg.html
Last edited by 82GTforME; 11-04-2018 at 11:12 AM.
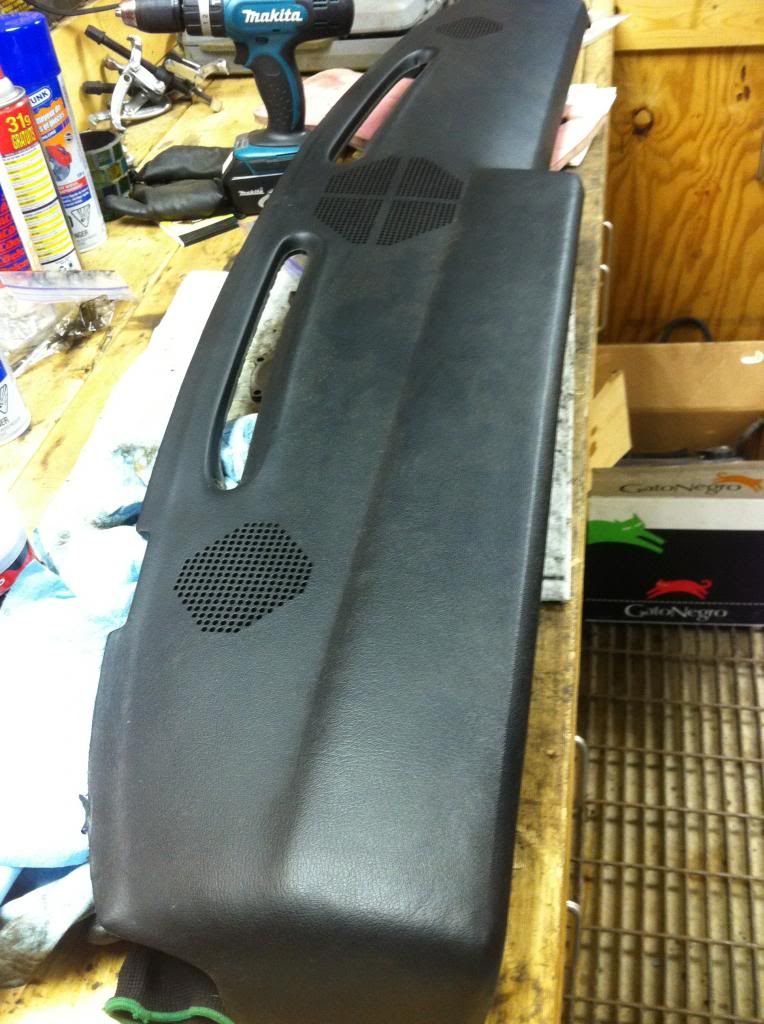
Removed the dash pad. Pretty nice
http://s1337.photobucket.com/user/82...014cd.jpg.html
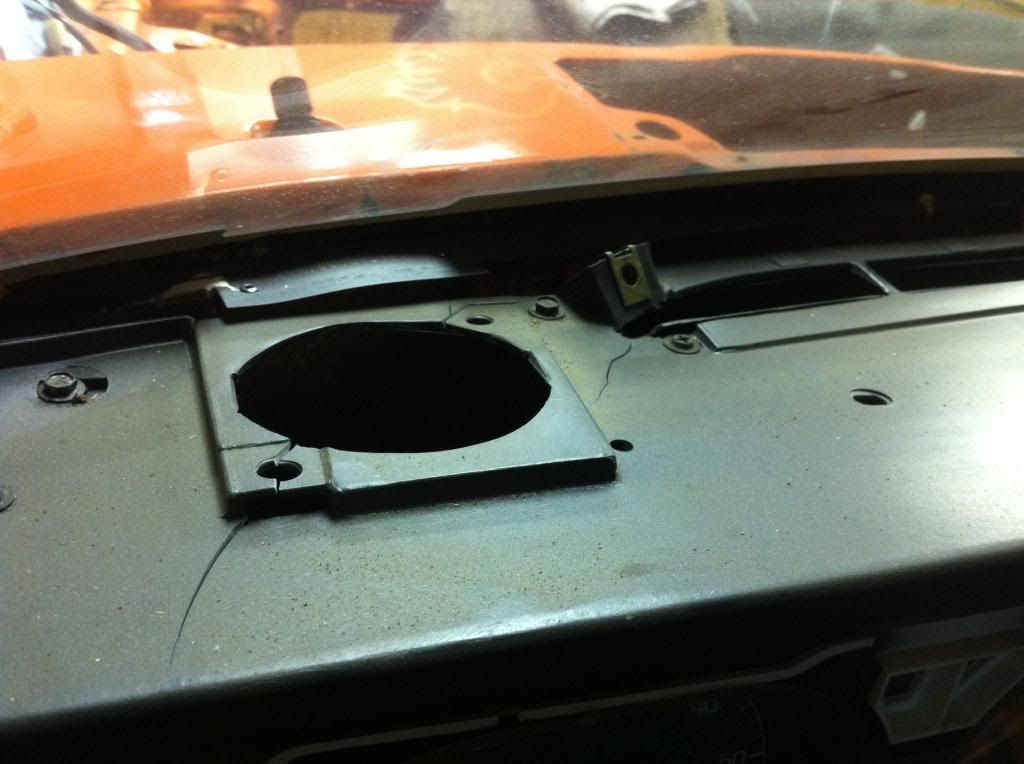
Found there were some cracks in the plastic underneath. Not a biggie I think:
http://s1337.photobucket.com/user/82...55ebc.jpg.html
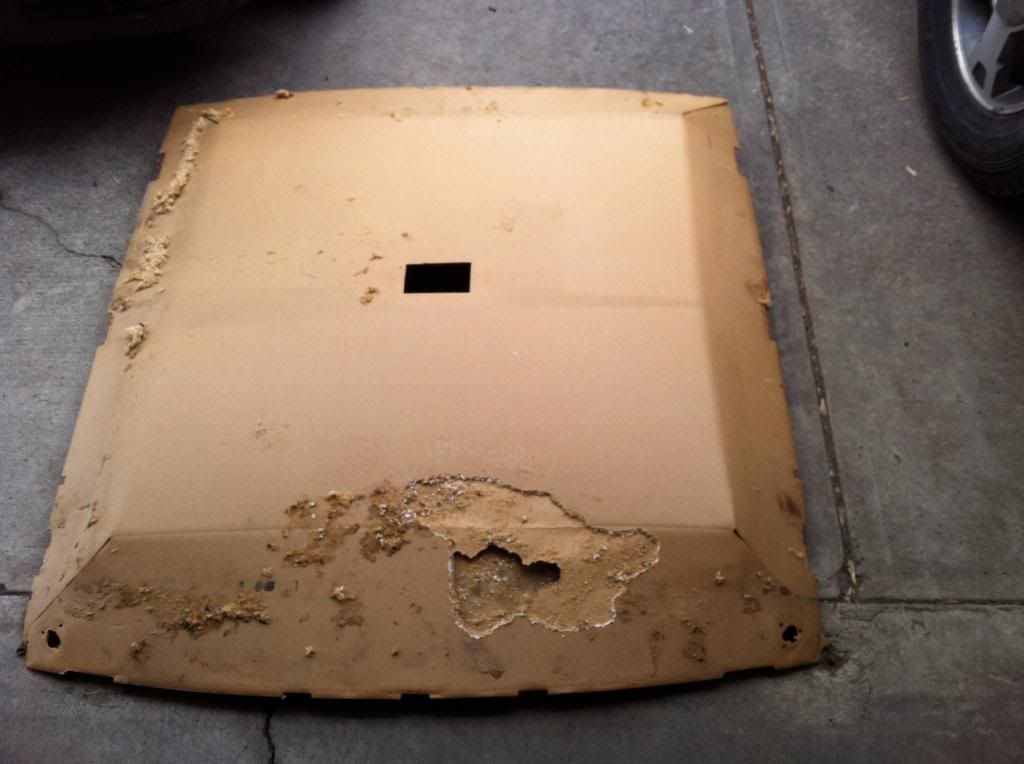
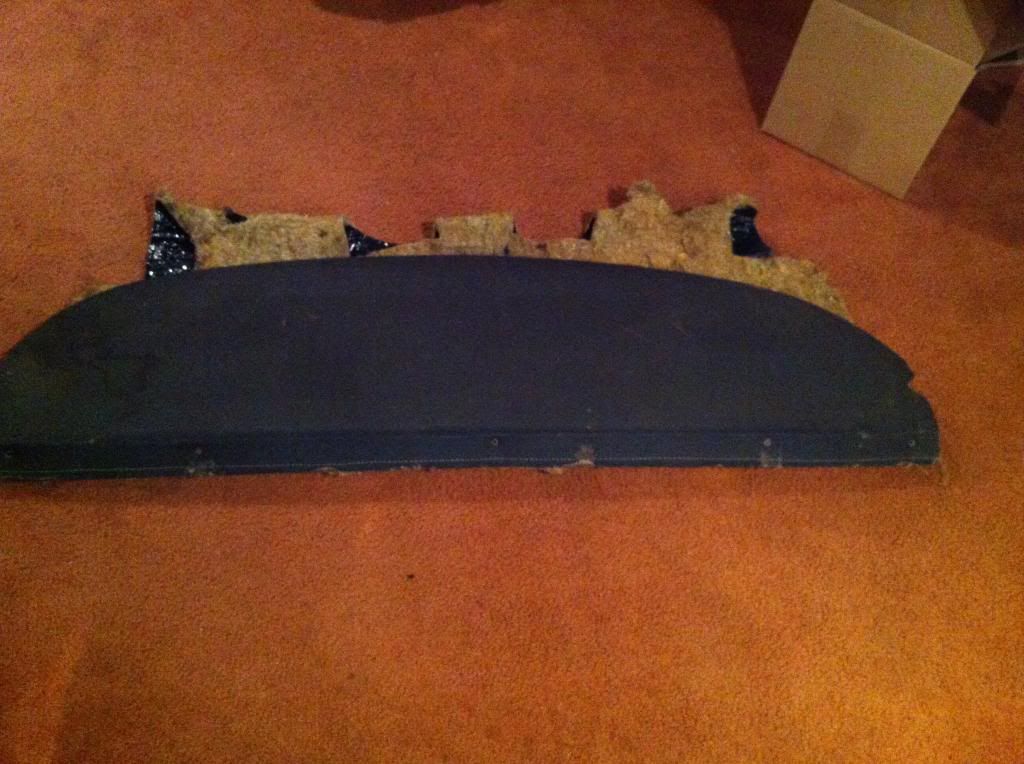
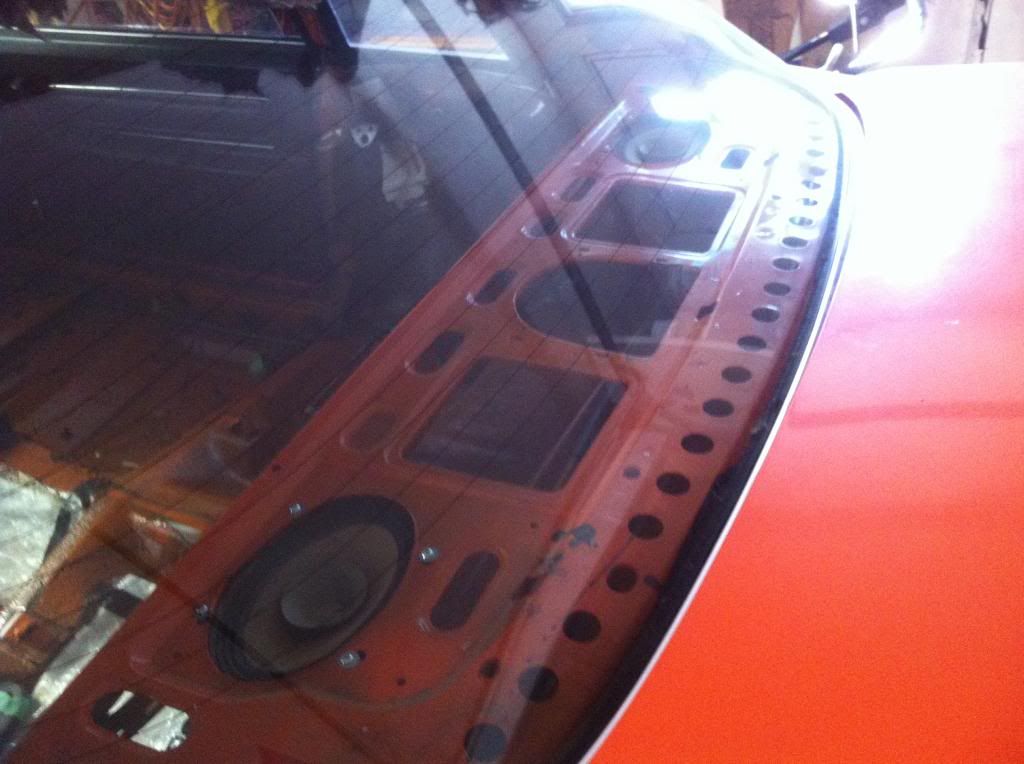
Of course the car never had back speakers installed. The rear window panel never had the cut-outs in it. I was thinking of trying to just cut the backing board but that may be very hard not to cut the mesh.
Did the coupes have the same speaker grills that the hatches did? I might just cut through and find some black grills to use. Too bad the '80 coupe is gone from the JY I had seen. I could have replaced the chewed up insulation piece behind the back seat and gotten a spare package tray. Shoulda, woulda, coulda...
http://s1337.photobucket.com/user/82...2992a.jpg.html
http://s1337.photobucket.com/user/82...77056.jpg.html
Last edited by 82GTforME; 11-04-2018 at 11:13 AM.

My dash hull was also cracked in my 83L. I used aluminum roof flashing as a backer and epoxied it to my hull. The repair starts at post 32.Found there were some cracks in the plastic underneath. Not a biggie I think:
http://vb.foureyedpride.com/showthread.php?91819-83-Capri-L-build/page2
Dave
If common sense was common wouldn't it just be sense?
1983 Capri L T top 5.0 efi aod
1983 Capri RS Turbo
1981 Black Magic 400 c6
93 F-250 351 5sp 4x4
Coupes didn't have any speaker grills, or at least my 79 didn't. You couldn't tell it had speakers in it and I'm shocked that the panels are solid. Doesn't mean you couldn't use hatch grills, that would look fine.
1984 Mustang GT owned since 1991 (first car). Mercury Mountaineer GT-40P engine, some suspension mods, currently undergoing a five lug SN95 brake upgrade and more suspension mods. Some minor body and interior mods have been done as well.
2004 GT convertible, 2001 Taurus LX, 1994 F150, 1950 F-1 Ford Pickup
Thanks Travis. After looking at that '80 coupe at the JY for a couple of months, having removed seats and gotten rear quarters for spares, I'm kicking myself for not getting the insulation and the back window panel/mesh before it got "rotated out" of the yard
I don't stand much chance to get the holes cut and keep the mesh intact. The only way will be to cut right through and like we both have thought; use the hatch speaker grilles if I can.
From what I remember about my 79, it had a pattern of holes drilled in, sort of like the dash pad, but from the top nothing was visible as they didn't go through the carpet or whatever it had on it. Guess Ford skipped drilling the holes since it was an extra step in a car that otherwise had no radio.
1984 Mustang GT owned since 1991 (first car). Mercury Mountaineer GT-40P engine, some suspension mods, currently undergoing a five lug SN95 brake upgrade and more suspension mods. Some minor body and interior mods have been done as well.
2004 GT convertible, 2001 Taurus LX, 1994 F150, 1950 F-1 Ford Pickup
Thanks. That's a great Idea! No one would ever know either! I was actually quite surprised it had the cracks there.
I think I will try that actually first. I will just follow the hash marks on the board for the template. Just need to be careful not to go through the mesh! It's not like if I don't cut the whole oval out it will affect the sound that much with these speakers!
http://s1337.photobucket.com/user/82...2992a.jpg.html
If I screw up making the holes, I will use that for Plan B I think Travis
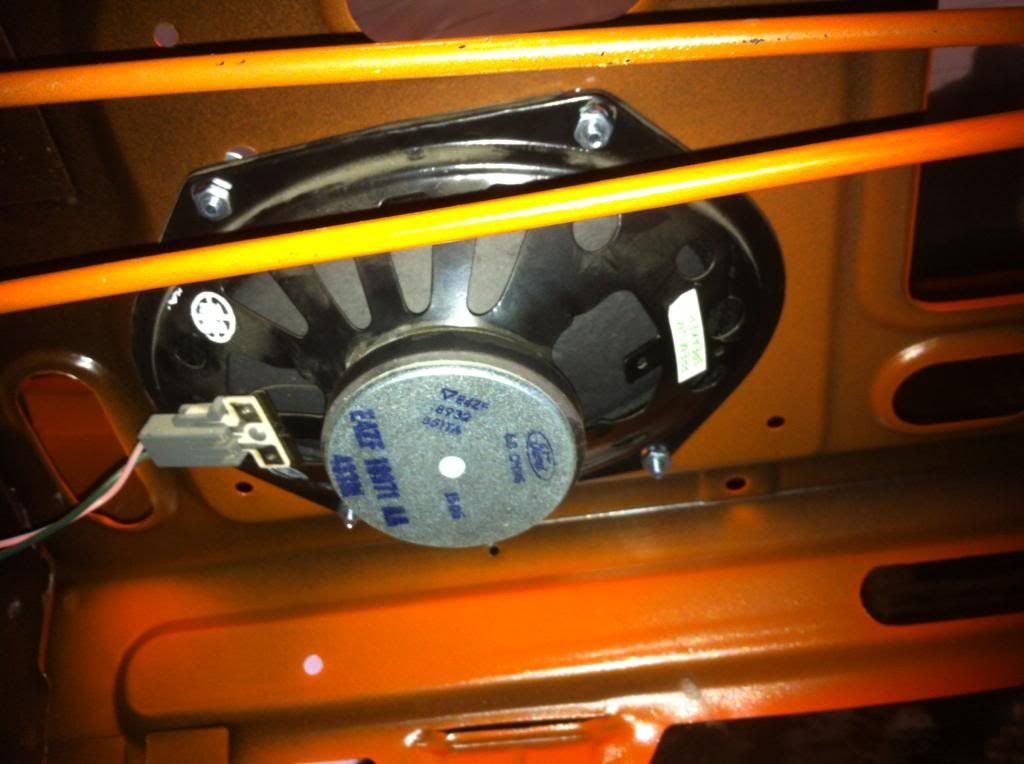
Here is how it sits. I ended up using some machine screws to hold them on. The hatch slide nuts wouldnt work on the sheet metal. Aw yeah, Premium speakers out of an '86 with matching tweeters.
http://s1337.photobucket.com/user/82...98771.jpg.html
http://s1337.photobucket.com/user/82...0768d.jpg.html
Last edited by 82GTforME; 11-04-2018 at 11:15 AM.
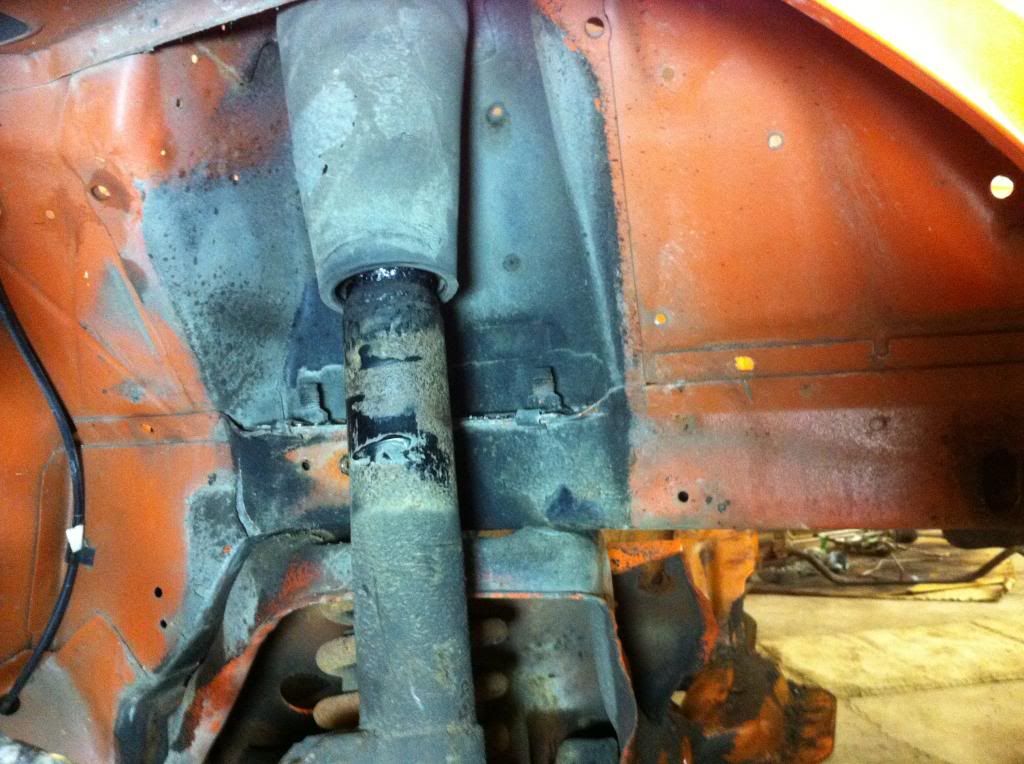
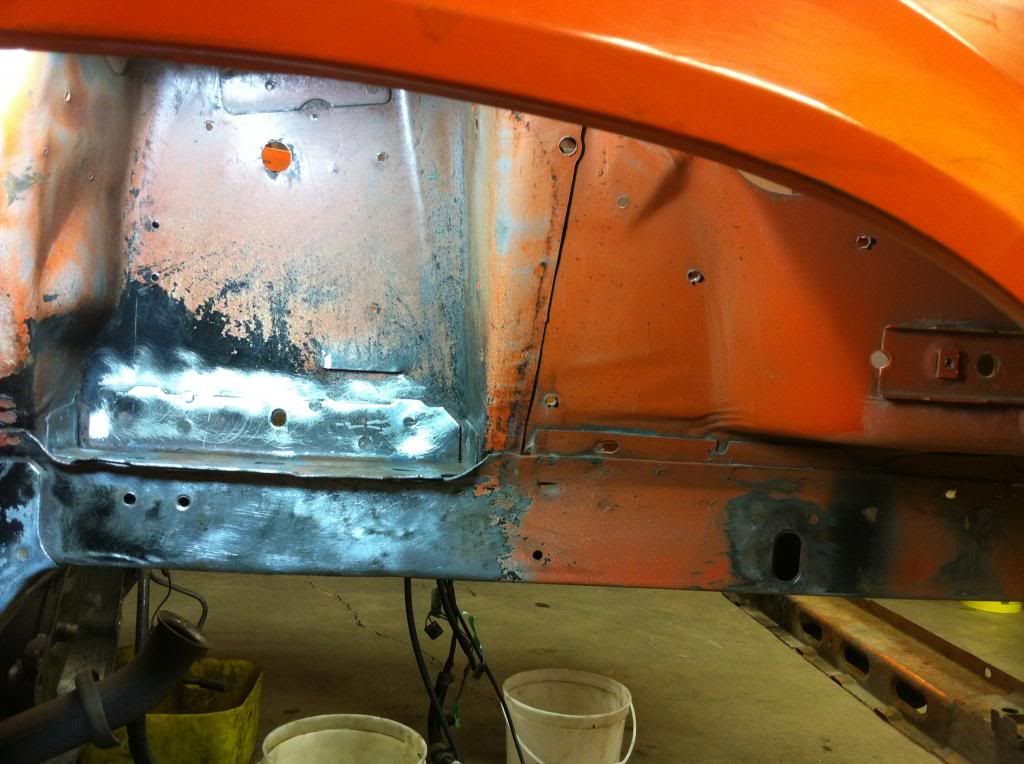
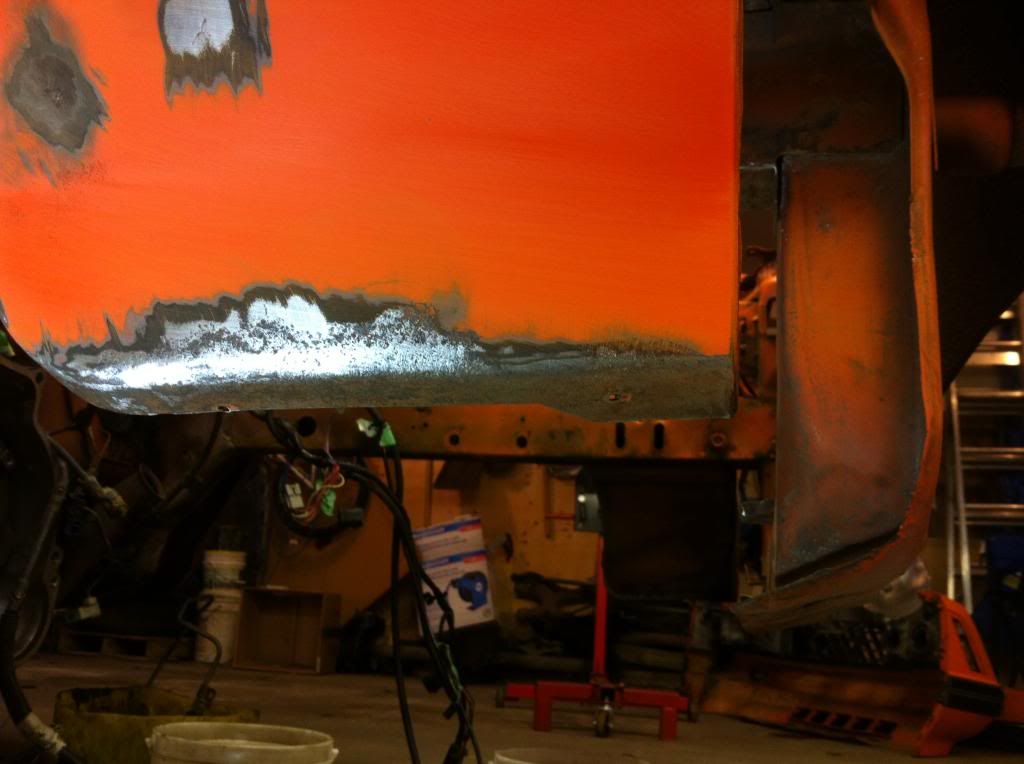
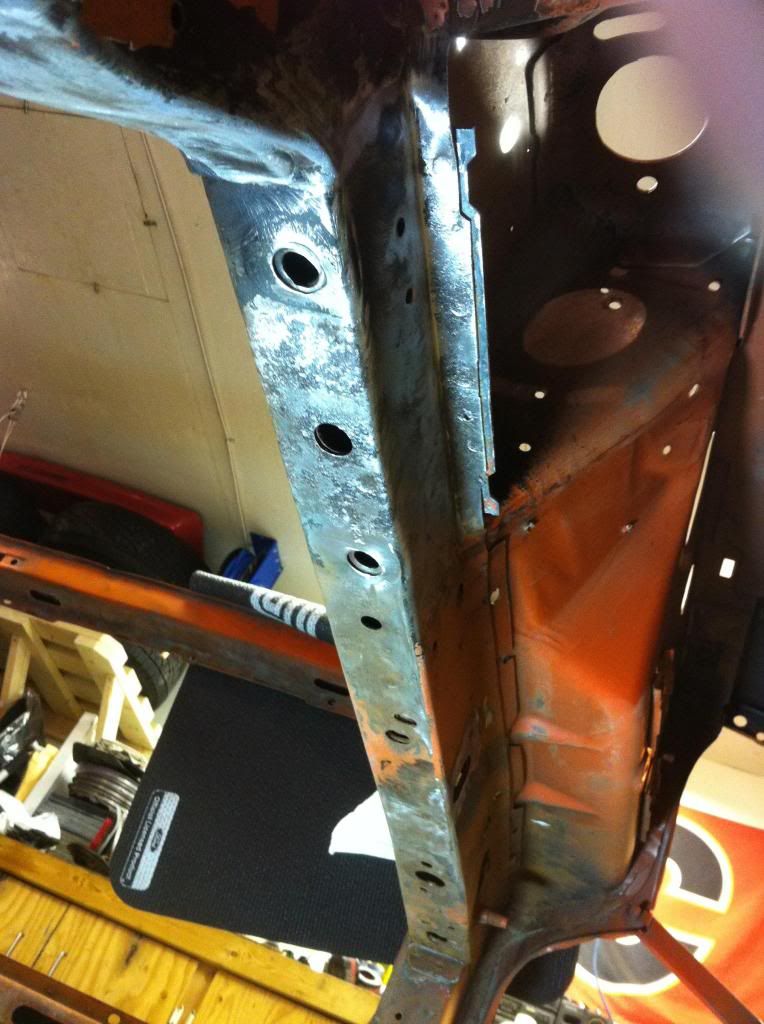
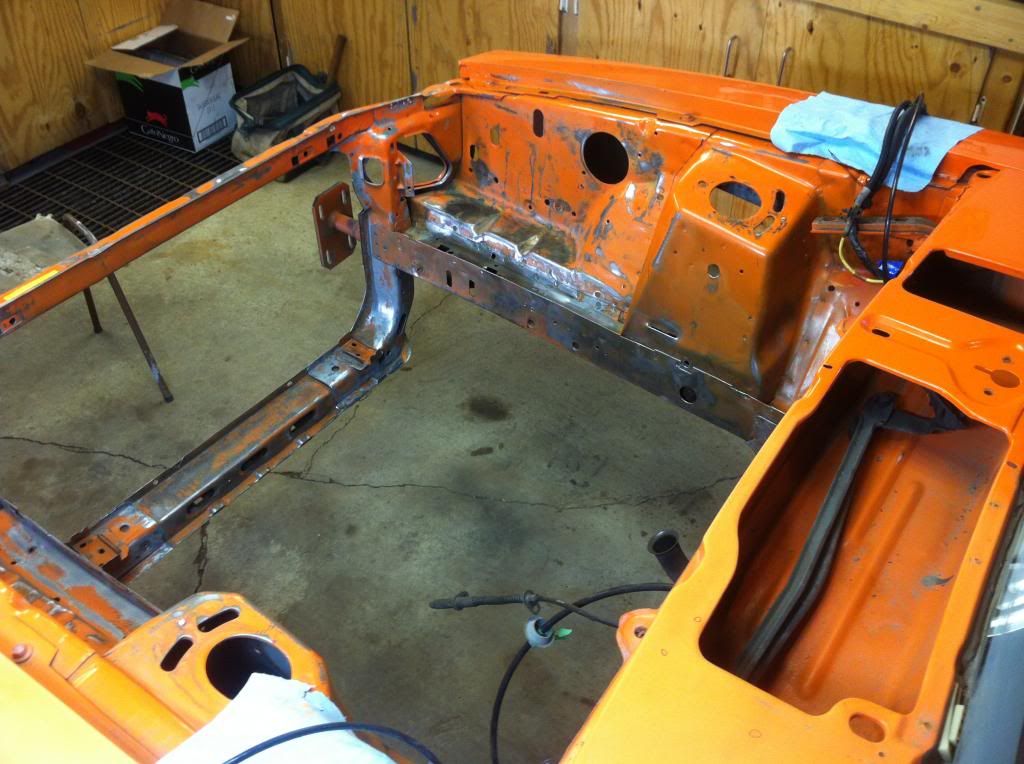
Day one last weekend was pretty slow going under the passenger wheel well. Sunday I decided to get the grinder and buffing wheel out to hit all of the larger open areas on the front end, under the hood except the firewall and most of the underside of the driver's wheel well. I made much better progress!
Now that I see it in this picture again, I really want to pull the tranny to clean it up!
http://s1337.photobucket.com/user/82...4de8b.jpg.html
http://s1337.photobucket.com/user/82...94a1e.jpg.html
Last edited by 82GTforME; 11-04-2018 at 11:16 AM.

 Reply With Quote
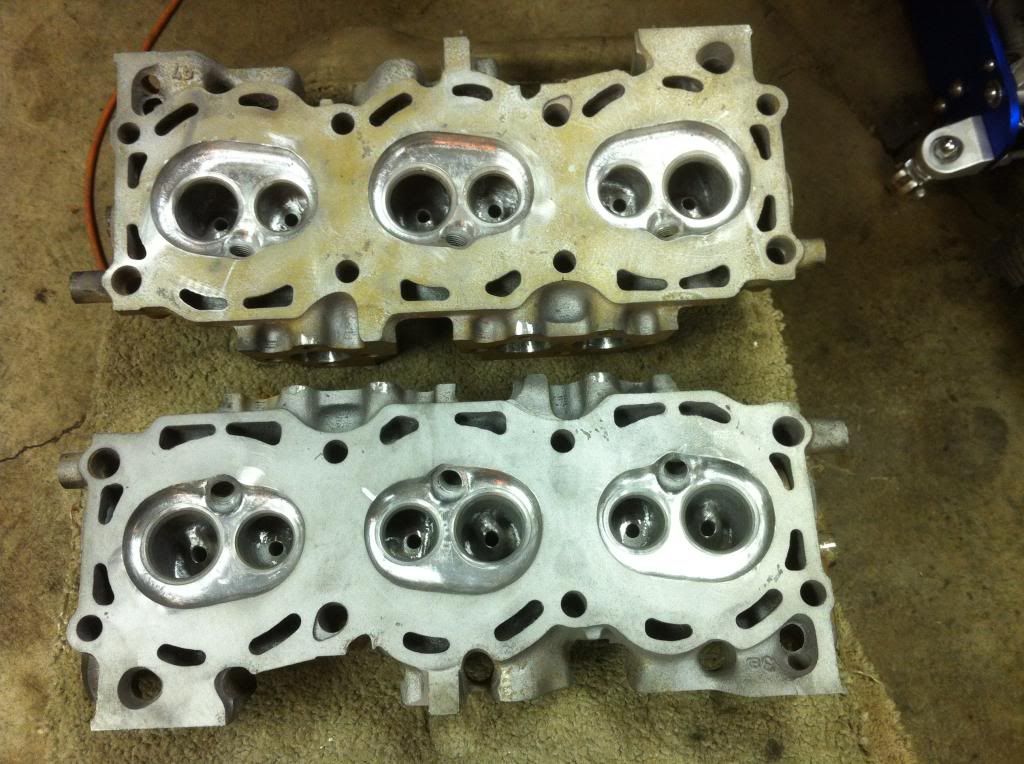


Connect With Us